Safety Information & Getting Started
Safety Precautions - continued, Features
IMPORTANT
Warnings on the appliance and restrictions are displayed
like this. Read this information strictly in order to operate
the system correctly and avoid damage.
NOTE: Information about the operation and
additional explanations are marked like this. To be
aware of such information is recommended to ensure
that the functions can be used optimally.
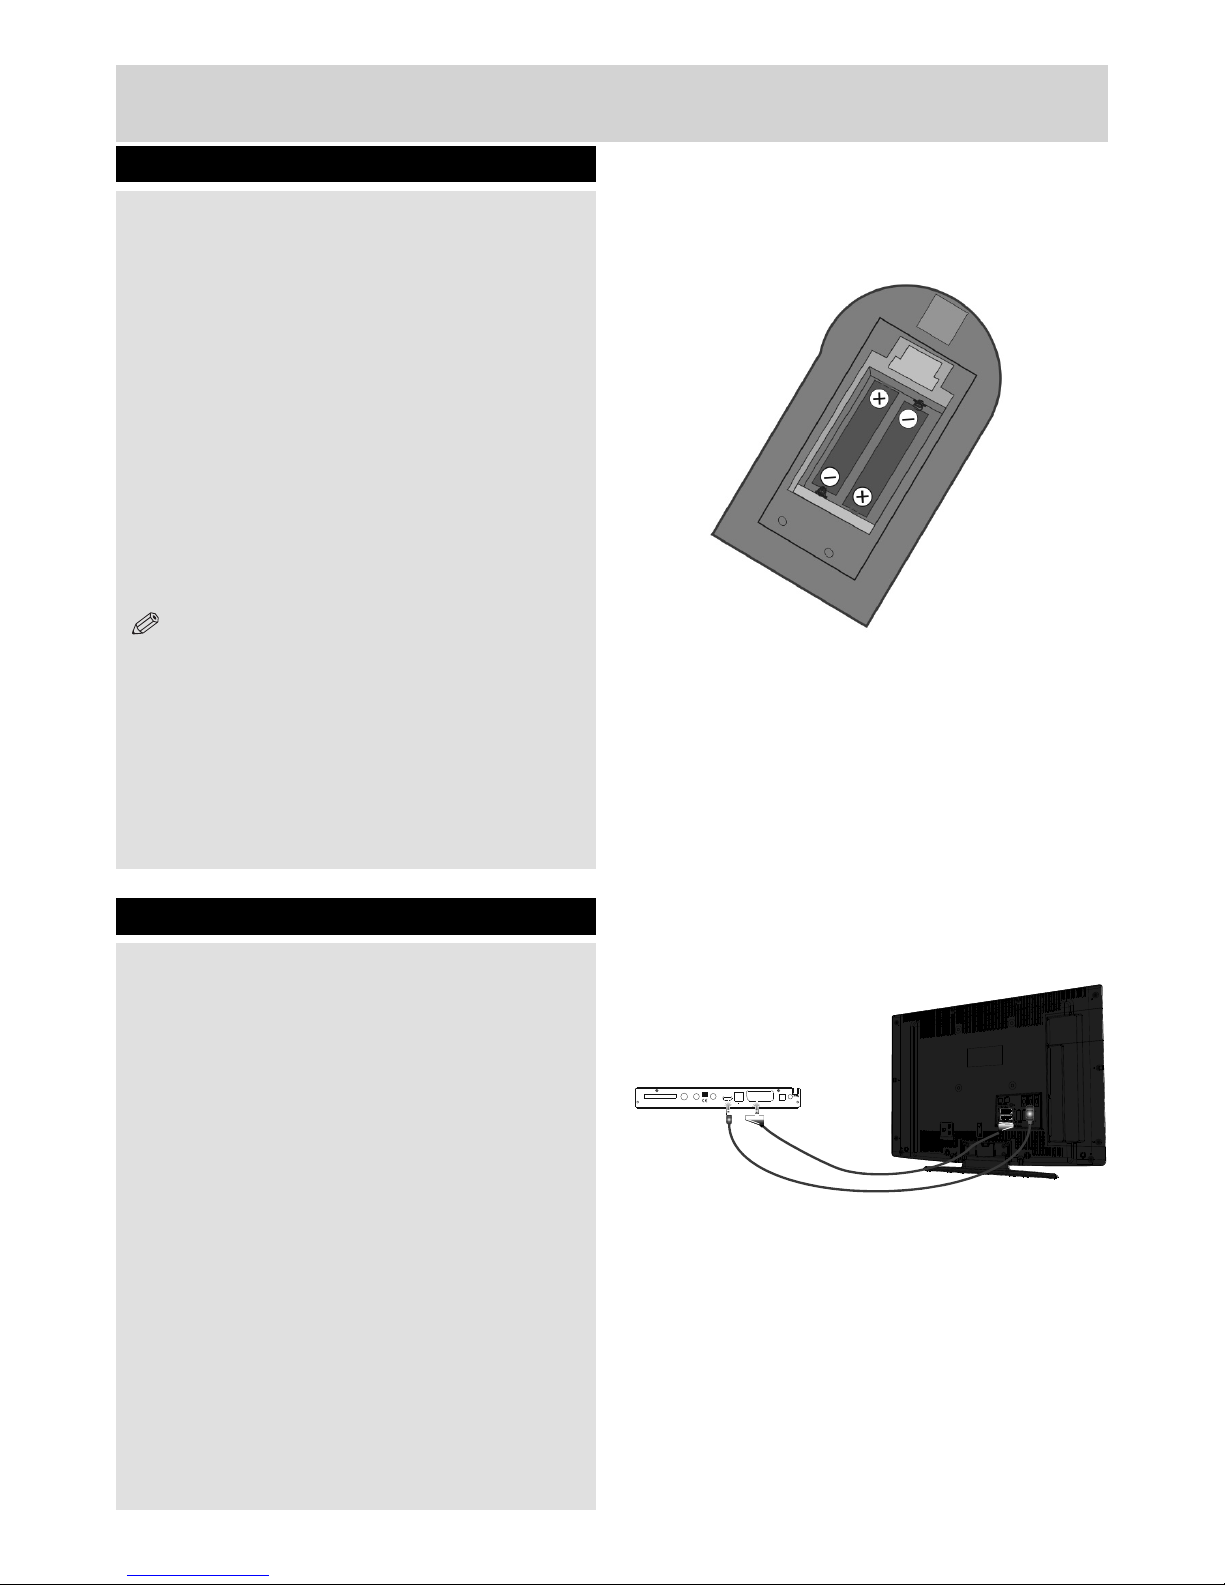
Batteries
Warning: Incorrect installation of batteries may
cause battery leakage and corrosion, resulting in
damage to the remote control.
Do not mix old and new batteries, or batteries of
different types.
Do not dispose of batteries in a fire.
Do not dispose of batteries with normal household
waste, take to a local recycling centre.
CAUTION: Insert the batteries / rechargeable
batteries in the correct polarity. Don´t try to
recharge non rechargeable batteries and under
no circumstances throw them into fire. Danger of
explosion. Do not use unequal batteries (old and
new, Alkaline and carbon, etc.) simultaneously.
If you will not use the device for a long time,
remove the batteries and store the device in
a dry and dust free place. Improper use of
batteries may cause an explosion or leakage.
If the batteries have leaked, use gloves and
clean the appliance thoroughly with a dry cloth!
Batteries should not be exposed to heat, such
as sunshine, fire or the like.
Features
• 5000 channels TV and Radio programs
• Media Browser ( USB 2.0 ) Support
• DVB-T/ DVB-S2 Compliant
• HDMI Output (576p, 720p, 1080i resoluitons
support)
• Channel lock
• Present/Next event information ( 7-DAY EPG)
• Recording timers
• Mheg support
• Parental lock at menu
• Signal strength bar for transponders
• Multi language audio support
• Digital audio output (optic)
• Teletext function support (DVB)
• Resetting to factory settings option
• TV Scart
• Ku band reception: 10.7 – 12.7 GHz
• Ka band reception: 26.5 – 40 GHz (Requires
Kaband LNB installation on dish)
• LNB Control: Horizontal / vertical polarity
switching (13V %12,825-%14,175 and 18V
%17,575-%19,425), 0-22 kHz switching, tone burst
A/B switching for dish selection,DiSEqC 1.2
• Selectable satellite configurations (Presets:
ASTRA, HOTBIRD, TURKSAT 2A/3A.etc)
• VHFIII; 174–230 MHz, 7MHz bandwith UHFIV
and UHFV; 470-862 MHz,8MHz bandwith
• Supports 16-QAM, 64-QAM (DVB-T) modulations
• Signal strength and signal quality bars for antenna
adjustment
• Various channel search options:
• Automatic Satellite search for preset
transponders
• Transponder search
• Network search
• FTA (Free- to- Air) search option for satellite and
auto search modes
• Auto FEC (Forward Error Correction) search
• Auto PID correction (except user defined PIDs)
• Digital Decoding Properties:
• Demodulation: QPSK and 8PSK
• FEC : Auto, 1/2, 2/3, 3/4, 5/6, 7/8 for DVB-S
QPSK
• Auto,1/4,1/3,2/5,1/2,3/5,2/3,3/4,4/5,5/6,8/9,9/10
for DVB-S2 QPSK
• Auto, 3/5, 2/3, 3/4, 5/6, 8/9, 9/10 for DVB-S2 8PSK
• Symbol Rate: 2 to ~ 45 Msps for DVB-S
• Symbol Rate: 5 to ~ 30 Msps for DVB-S2
• Video Decoding: MEPG2 MP@ML, PAL/NTSC
4:3 16:9, MPEG4 AVC/H.264 HP@L4 16:9
• Video Out: PAL
• Audio Decoding: MPEG-1 LAYER I/II, MPEG-2
LAYER II, MPEG-2 AAC, MPEG-4 AAC
• 32-bit OSD color, 720x576 pixels for PAL
• Last watched channel saving
• LNB short circuit and overload protection by
software
• IR remote control
4
01_TS7100_[GB]_DVB645_PVR_2712UK_10078521_50216711.indd Ksm1:4 05.04.2012 17:02:01