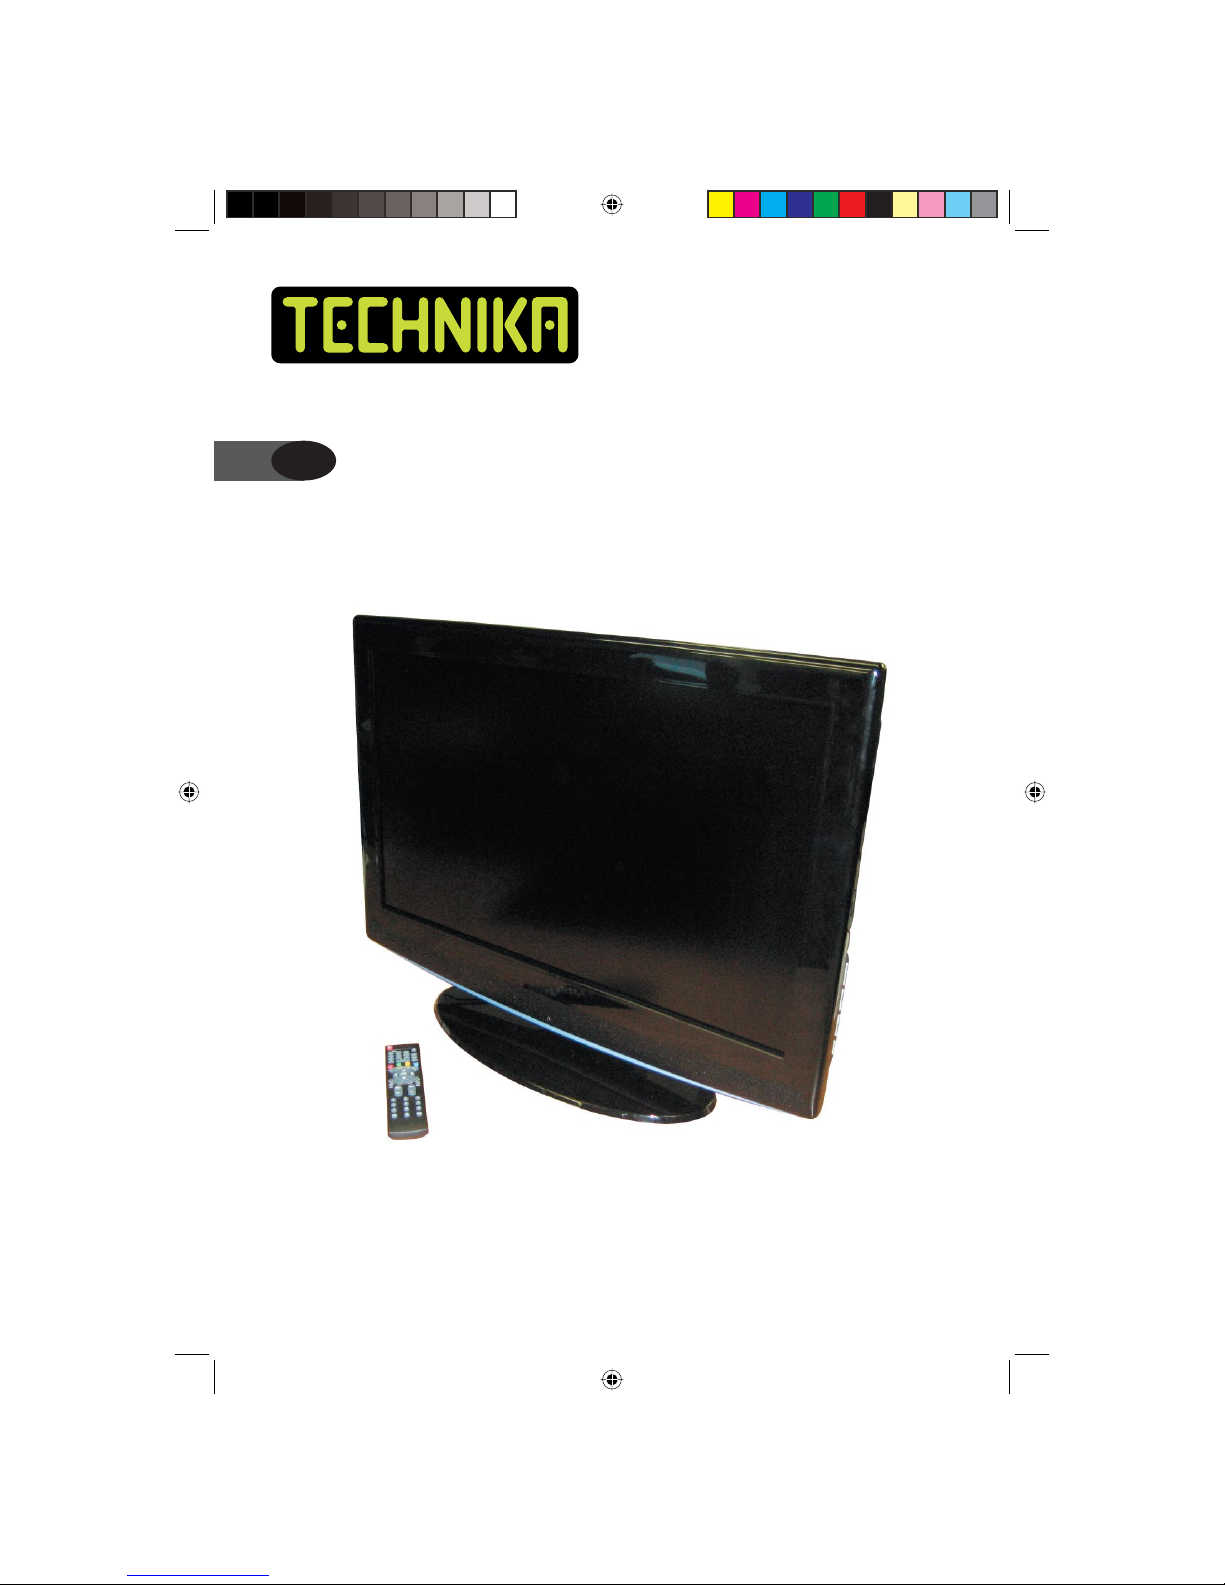
Technika LCD32-407B User manual

LCD32-407B
LCD TV Receiver
User Guide
UK
LCD32-407B.indd 1LCD32-407B.indd 1 14/11/2007 16:01:4014/11/2007 16:01:40

User Guide
1
CONTENTS
Introduction.................................... 3
HDMI............................................... 3
Safety is Important ........................ 3
In the box ....................................... 3
Safety Information......................... 4
Keep these instructions........................... 4
Electrical Information.............................. 5
PARTS IDENTIFICATION .................. 6
Front and side views ............................... 6
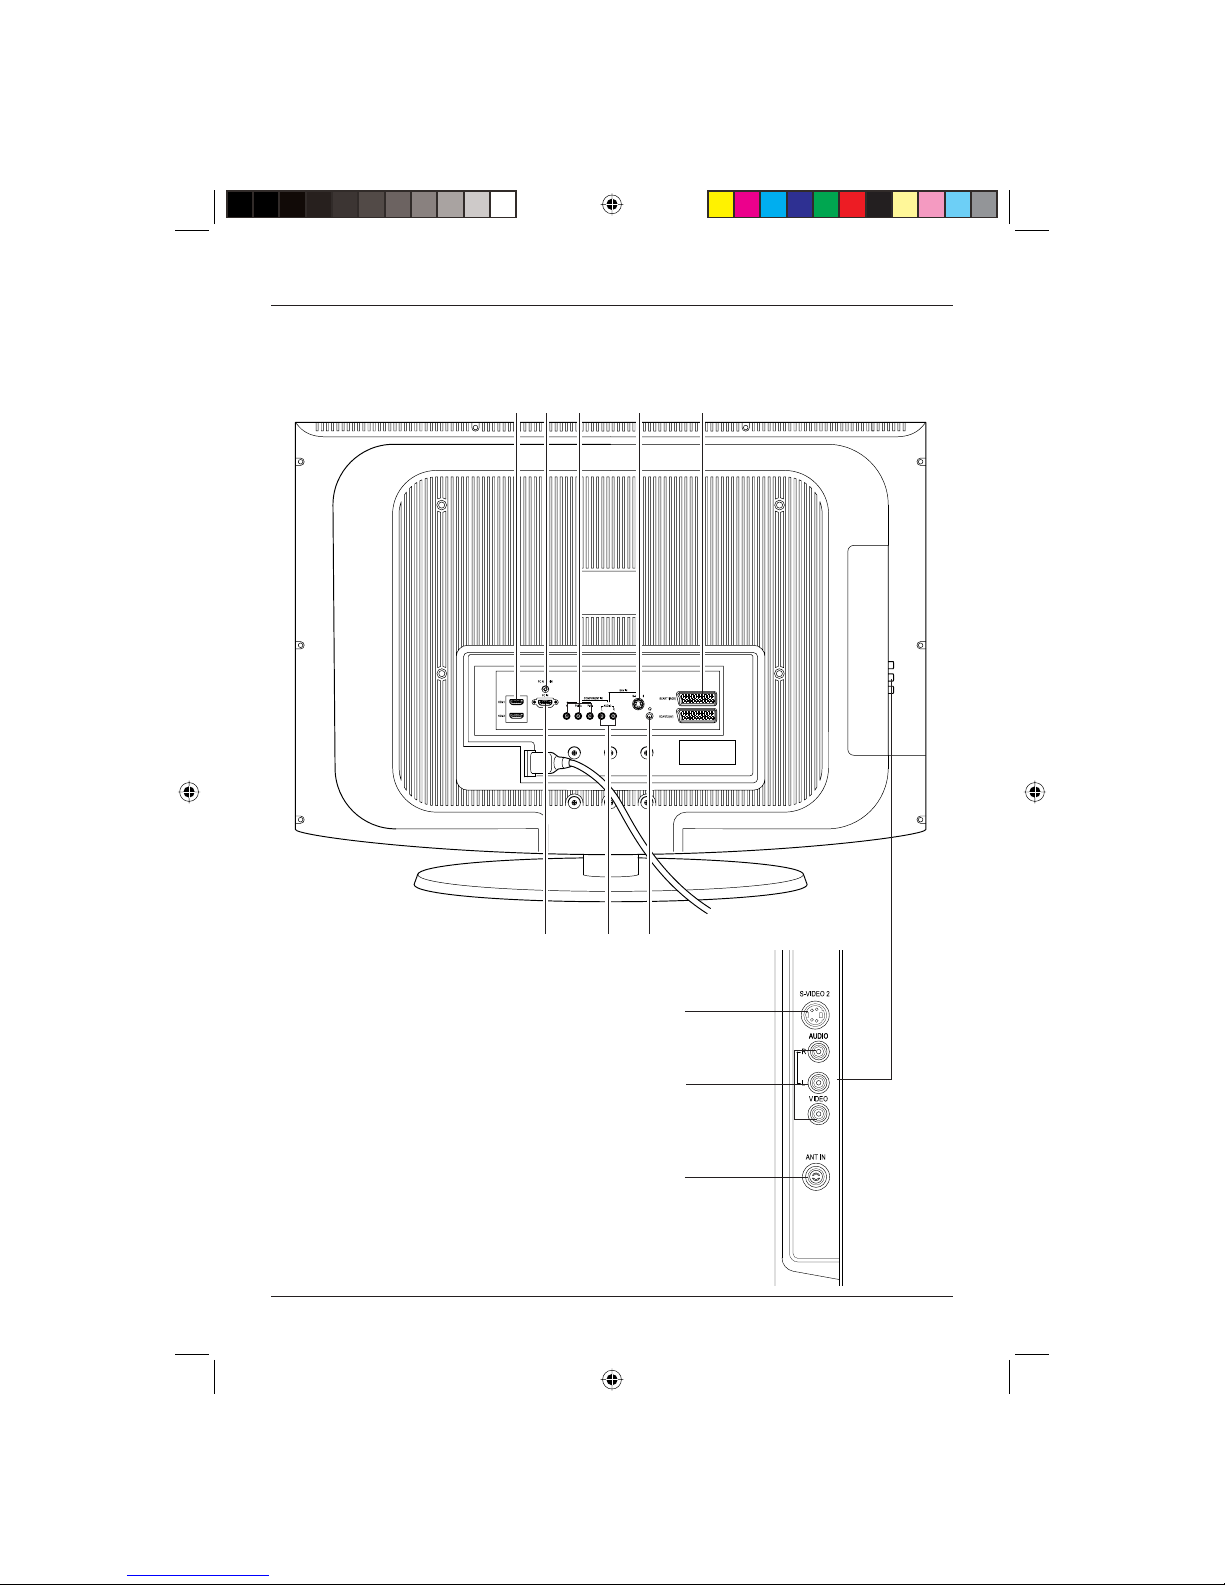
Connection Options....................... 7
Rear View............................................... 7
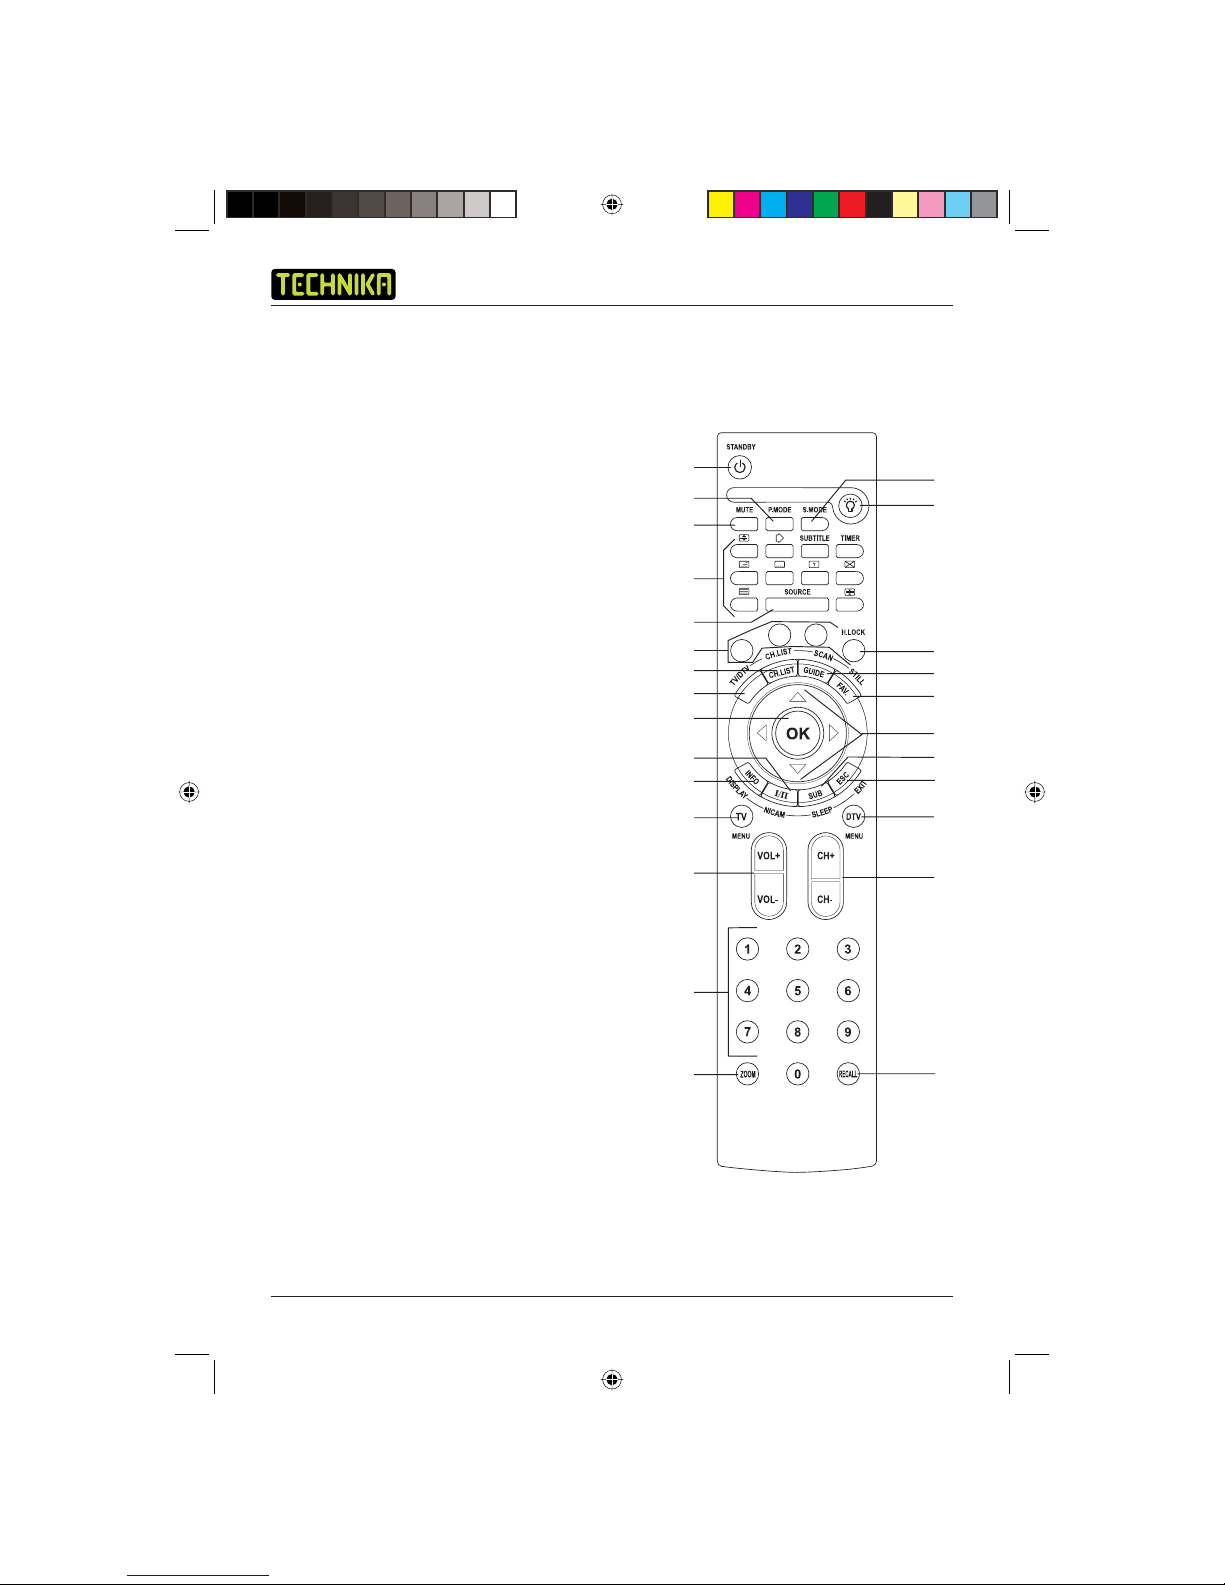
Remote Control .............................. 8
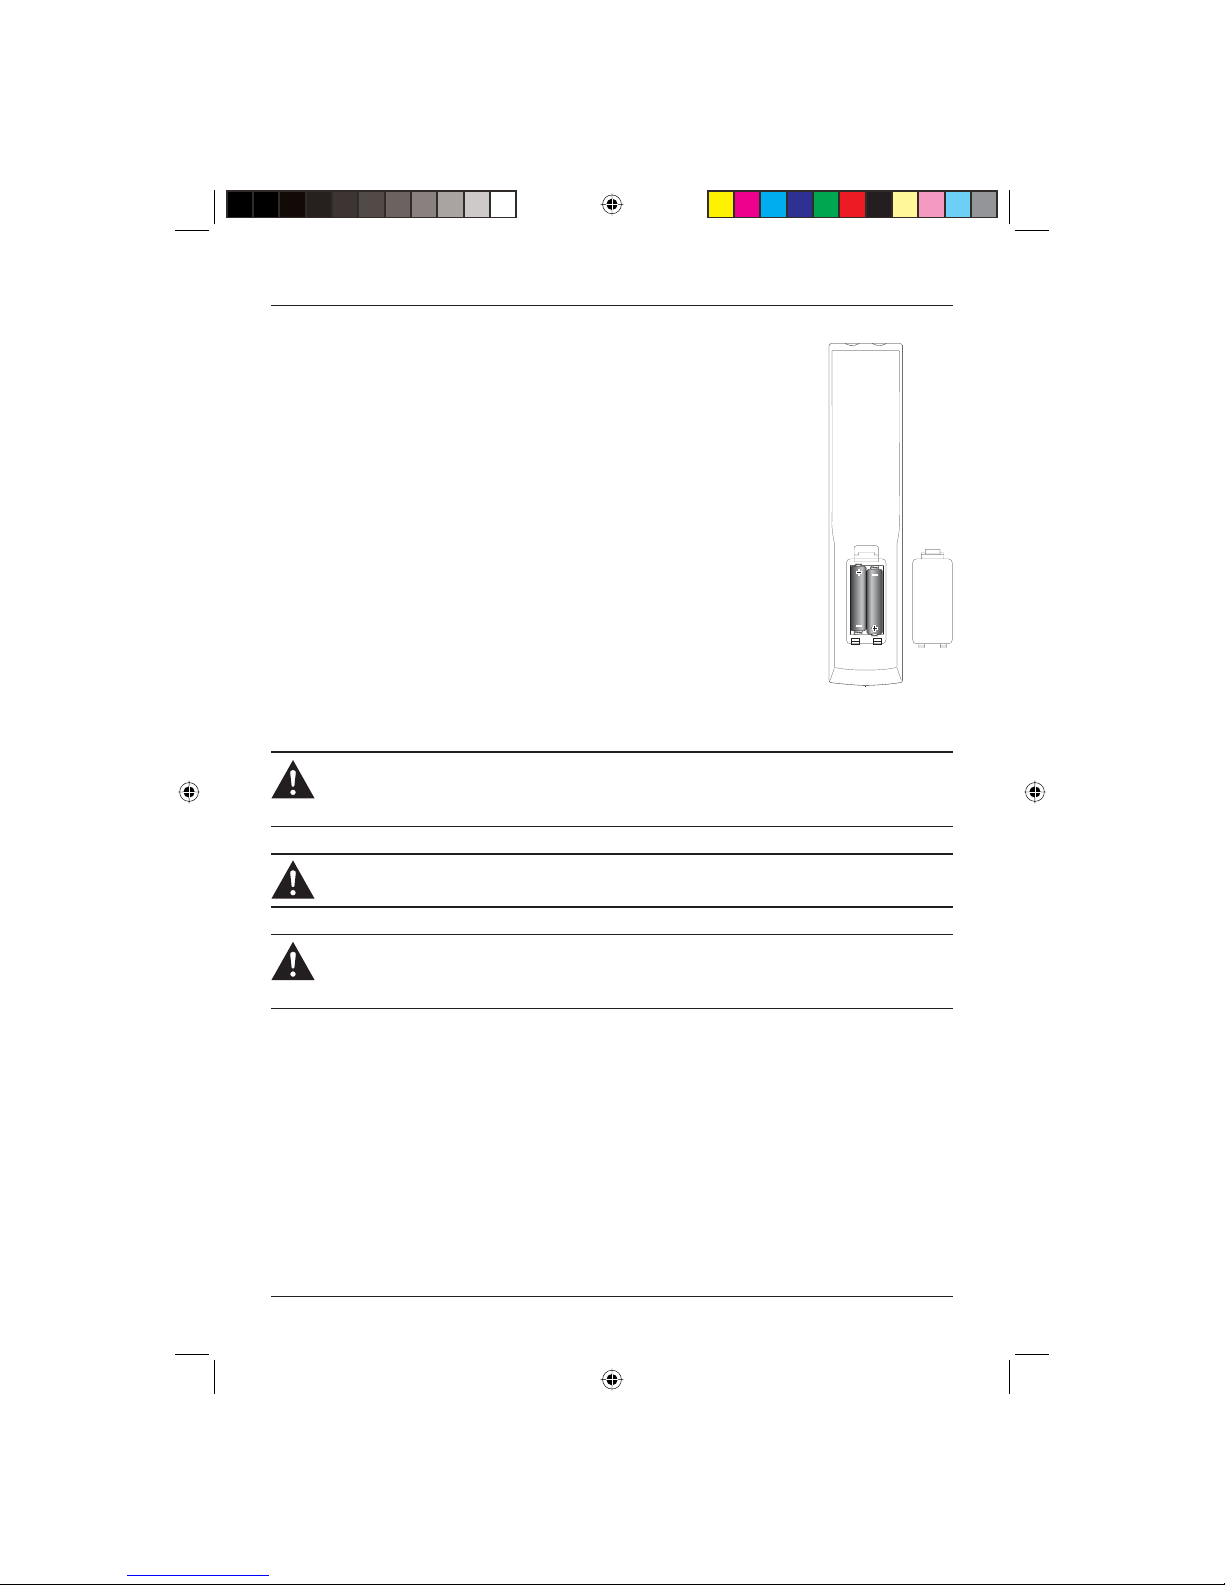
Installing batteries in the remote control . 9
Using the remote control ........................ 9
Connecting the TV ...................... 10
Connecting the TV antenna.................. 10
Connecting external devices ................. 10
Wall Mounting ..................................... 11
Basic Operating Instructions ....... 11
Switching on for the first time .............. 11
Volume................................................. 11
Mute .................................................... 11
Source Selection ................................... 12
Mono/Stereo ........................................ 12
Select the TV channel ........................... 12
Picture Mode ........................................ 12
Audio Mode ......................................... 12
Program Swap ...................................... 13
Sleep Timer .......................................... 13
Information Display .............................. 13
Child lock ............................................. 13
Menu Operations......................... 15
Picture Menu ........................................ 16
Audio Menu ......................................... 16
Function Menu ..................................... 17
Tuning .................................................. 18
Timer.................................................... 20
Using Teletext............................... 21
To Enter Text Mode............................... 21
To Select a Page of Text ........................ 21
Subtitles ............................................... 21
Fast Text ............................................... 21
East/West Text ...................................... 21
TV/TEXT Mix ......................................... 21
Page Stop............................................. 22
To Reveal Information ........................... 22
Text Enlargement .................................. 22
Hide ..................................................... 22
Display time.................................. 22
Using DTV for the First Time....... 23
Selecting and Editing Channels .. 23
Electronic Program Guide ..................... 23
The Now/Next EPG ............................... 24
The List Schedule EPG........................... 24
The Timeline Schedule EPG................... 24
Changing Channel ............................... 25
Channel List ......................................... 25
LCD32-407B.indd Sec1:1LCD32-407B.indd Sec1:1 14/11/2007 16:02:1814/11/2007 16:02:18

LCD TV Receiver LCD32-407B
2
Channel Information.................... 27
Text................................................ 27
RECALL button ............................. 27
Favourite Channel Lists ............... 27
To Add a Channel to a Favourites List ... 28
To Select a Favourites List...................... 28
Settings......................................... 28
Configuration....................................... 28
Language Settings ................................ 30
Installation............................................ 31
Troubleshooting Guide................ 32
Specifications ............................... 33
LCD32-407B.indd Sec1:2LCD32-407B.indd Sec1:2 14/11/2007 16:02:1814/11/2007 16:02:18

User Guide
3
INTRODUCTION
Thank you for purchasing this Technika LCD TV Receiver which has been designed and
manufactured to give you many years of trouble-free service.
You may already be familiar with using a similar product but please take time to read these
instructions which have been written to ensure you get the very best from your purchase.
Throughout the remainder of this user guide the Technika LCD TV Receiver will be referred to as the
‘TV’.
HDMI
HDMI (High Definition Multimedia Interface) is the next generation of digital interface. Unlike
conventional connections, it transmits uncompressed digital and audio signals using a single cable.
This TV supports high-definition video input (720p and 1080i) via the HDMI sockets on the back of
the TV.
SAFETY IS IMPORTANT
To ensure your safety and the safety of others, please read the Safety precautions BEFORE you
operate this product.
Keep this information in a safe place for future reference.
IN THE BOX
You will find the following:
• 32” LCD television
• User Guide
• Remote Control
NOTE: If any of the items listed are damaged or missing, please the TESCO electrical help line on
0845 456 6767.
LCD32-407B.indd Sec1:3LCD32-407B.indd Sec1:3 14/11/2007 16:02:1814/11/2007 16:02:18

LCD TV Receiver LCD32-407B
4
SAFETY INFORMATION
IMPORTANT SAFETY INSTRUCTIONS - READ CAREFULLY BEFORE USE
Take note of the following safety information which appears on the back of this TV.
CAUTION! RISK OF ELECTRIC SHOCK
DO NOT OPEN
TO REDUCE THE RISK OF ELECTRIC SHOCK DO NOT REMOVE COVER (OR BACK)
NO USER-REMOVABLE PARTS INSIDE
REFER SERVICING TO QUALIFIED PERSONNEL
This symbol indicates that there are important operating and maintenance instructions in
the literature accompanying this TV.
This symbol indicates that dangerous voltage constituting a risk of electric shock is present
within this TV.
Keep these instructions.
• Do not use this TV near water.
• Clean only with a slightly damp cloth.
• Do not block any ventilation openings.
• Install in accordance with the supplied Quick Start Guide and this User Guide.
• Do not install or operate near any heat sources such as radiators, stoves, or other apparatus that
produce heat.
• Protect the power cord from being walked on or pinched, particularly at plugs, and the point
where it exits from the TV.
• Do not allow the power cord to overhang the edge of a table.
• Unplug this TV during lightning storms or when unused for long periods of time.
• To avoid interference, switch this TV off while operating other radio devices in the immediate
vicinity.
• Refer all servicing to qualified service personnel. Servicing is required when the TV has been
damaged in any way, such as the power cord or plug being damaged, liquid being spilled on or
objects have fallen onto the TV, the TV has been exposed to rain or moisture, does not operate
normally, or has been dropped.
WARNING! TO REDUCE THE RISK OF FIRE OR ELECTRICAL SHOCK, DO NOT EXPOSE
THIS TV TO RAIN OR MOISTURE. THE TV MUST NOT BE EXPOSED TO DRIPPING
AND SPLASHING AND NO OBJECTS FILLED WITH LIQUIDS SUCH AS A VASE OF
FLOWERS SHOULD BE PLACED ON THE TV.
• No naked flame sources such as candles should be placed on the TV.
LCD32-407B.indd Sec1:4LCD32-407B.indd Sec1:4 14/11/2007 16:02:1814/11/2007 16:02:18

User Guide
5
Caution! Changes or modifications not expressly approved by the manufacturer could
void the user’s authority to operate this device.
Caution! Usage of controls or adjustments or performance of procedures other than those
specified herein may result in hazardous exposure.
Important
This TV generates, uses and can radiate radio frequency energy and, if not installed and used
in accordance with these instructions, may cause harmful interference to radio communication.
However, this is no guarantee that interference will not occur in a particular installation. If the TV
does cause harmful interference to electrical devices, which can be determined by turning the
TV off and on, the user is encouraged to try to correct the interference by one of the following
measures:
• Re-orient or relocate the receiving antenna.
• Increase the separation between the external device and the TV.
• Connect the external device into an outlet on a circuit different from that to which the TV is
connected.
• Consult the dealer or an experienced radio/TV technician for help.
Electrical Information
Mains Supply
The mains operating voltage is detailed on the rating plate on the rear of the TV.
The mains lead on this equipment may be supplied with a moulded plug incorporating a fuse.
Should the fuse need to be replaced, an ASTA or BSI approved BS1362 fuse must be used of
the same rating. If the fuse cover is detachable never use the plug with the cover removed. If a
replacement fuse cover is required, ensure it is of the same colour as that visible on the pin face of
the plug. If there is no alternative to cutting off the mains plug, dispose of it immediately, having
first removed the fuse, to avoid a possible shock hazard by inadvertent connection to the mains
supply.
LCD32-407B.indd Sec1:5LCD32-407B.indd Sec1:5 14/11/2007 16:02:1814/11/2007 16:02:18

LCD TV Receiver LCD32-407B
6
PARTS IDENTIFICATION
1. SOURCE
2. MENU
3. VOL+
4. VOL-
5. CH+
6. CH-
7. STANDBY
8. Remote Control Sensor
9. Standby LED
Selects the input source
Accesses the TV menus
Increases the volume
Decreases the volume
Selects the next channel up
Selects the next channel down
Turns the TV on and off
q
w
e
r
t
y
u
Front and side views
io
LCD32-407B.indd Sec1:6LCD32-407B.indd Sec1:6 14/11/2007 16:02:1814/11/2007 16:02:18

User Guide
7
1. HDMI Sockets
2. PC Audio In Socket
3. Component Video Input Connections
4. S-Video 1 Input Connection
5. SCART Sockets
6. VGA Socket
7. Component Audio Input Connections
8. Headphone Connection
9. S-Video 2 Input Connection
10. RCA Input Connections
11. Antenna Socket
qw e r t
yui
Rear View
CONNECTION OPTIONS
o
a
s
LCD32-407B.indd Sec1:7LCD32-407B.indd Sec1:7 14/11/2007 16:02:1914/11/2007 16:02:19

LCD TV Receiver LCD32-407B
8
1. STANDBY Switches the TV to standby or on
2. P.MODE Accesses preset picture settings
3. MUTE Mutes the sound output
4. S.MODE Accesses preset sound settings
5. Light button
6. TELETEXT buttons
7. SOURCE Changes source
8. H.LOCK Accesses the child lock menu
9. Fast Text buttons
10. CH.LIST Accesses the channel list
11. TV/DTV Switches between TV and DTV
12. SCAN/GUIDE Previews TV channels/ Accesses
electronic program guide
13. STILL/FAV. Freezes picture/ Selects favourite
program lists
14. OK Selects an option in the menu
15. Arrow buttons
16. NICAM Switches between mono and
stereo sound
17. INFO/DISPLAY Displays information on using the
menus/ Displays channel information
18. TV MENU Displays the TV menu
19. SLEEP/SUB Accesses the sleep timer/ Turns
subtitles on or off
20. ESC/EXIT Exits menu options
21. DTV MENU Accesses the DTV menu
22. VOL+/- Increases and decreases volume
23. CH+/- Changes channel
24. Numerical buttons
25. ZOOM Changes the aspect ratio
26. RECALL Returns to previous channel
q
2^
REMOTE CONTROL
When using the remote control, aim it towards the remote control sensor on the TV. The function
of some buttons will vary depending on the source being used (e.g. TV, DTV).
w
e
y
u
o
1)
g
j
k
l
2@
2$
2%
1!
2#
2!
2)
t
r
i
d
f
h
;
LCD32-407B.indd Sec1:8LCD32-407B.indd Sec1:8 14/11/2007 16:02:1914/11/2007 16:02:19

User Guide
9
Installing batteries in the remote control
1. Remove the battery compartment cover at the rear of the remote
control by depressing the retaining clip.
2. Install the supplied AAA batteries as shown, ensuring the polarity
matches that shown in the battery compartment.
3. Replace the battery compartment cover.
Using the remote control
To use the remote control point it at the TV and press the required buttons.
You must be within 6 metres and at an angle of less than 30 degrees from
the centre of the TV.
Note: Sunshine or other strong light sources may interfere with the signal
from the remote control. In this situation turn the TV set away from
the light source.
The remote control has a small torch at the front. To operate this, press and
hold the LIGHT button.
WARNING! DO NOT LEAVE BATTERIES IN THE REMOTE CONTROL FOR EXTENDED
PERIODS AS THEY CAN LEAK OR CORRODE CAUSING DAMAGE TO THE REMOTE
CONTROL. CHECK THEM PERIODICALLY AND REPLACE THEM AS REQUIRED.
WARNING! DO NOT MIX BATTERY TYPES. WHEN INSERTING BATTERIES, REPLACE
ALL BATTERIES AT THE SAME TIME. DO NOT MIX OLD AND NEW BATTERIES.
WARNING! EXHAUSTED BATTERIES MUST BE TREATED WITH CARE AND DISPOSED
OF ACCORDING TO ANY SAFETY OR RECYCLING REGULATIONS IN FORCE IN YOUR
LOCAL AREA. NEVER DISPOSE OF BATTERIES INTO GENERAL WASTE, OR FIRE.
LCD32-407B.indd Sec1:9LCD32-407B.indd Sec1:9 14/11/2007 16:02:1914/11/2007 16:02:19

LCD TV Receiver LCD32-407B
10
CONNECTING THE TV
WARNING! ENSURE THE TV AND ALL ANCILLARY EQUIPMENT IS UNPLUGGED
FROM THE MAINS BEFORE MAKING ANY CONNECTIONS!
Connecting the TV antenna
Connect the TV antenna to the aerial socket with a
75 ohm co-axial plug. For best results use a high gain TV
aerial, preferably roof or loft mounted.
Connecting external devices
The Quick Start Guide shows the simplest and most effective
way of connecting your TV to ancillary equipment. Alternate
methods are listed below.
Note: The TV will connect through the HDMI cable by
default. Only use the HDMI cable and one other
option. Connecting more than one option may
cause interference.
HDMI lead
You can connect this TV to a compatible device using a
HDMI lead. This method will give the best picture.
SCART lead
You can connect this TV to a compatible device using a SCART lead. The connection uses
component video signals, i.e. the red, green and blue (RGB) content of the video are sent on
separate signals.
VGA cable
You can use your TV as a monitor for your personal computer by using a VGA cable. Sound from
your personal computer may also be played through the TV. This requires the audio output of the
personal computer to be connected to the AUDIO IN connection of the TV.
S-VIDEO lead
You can connect this TV to a compatible device using an S-VIDEO lead.
Component Input (YPbPr cables)
You can connect this TV to a compatible device using YPbPr cables. Connect the red, green and
blue outputs to the matching coloured inputs on the compatible device. An additional audio input
is required.
LCD32-407B.indd Sec1:10LCD32-407B.indd Sec1:10 14/11/2007 16:02:1914/11/2007 16:02:19

User Guide
11
Wall Mounting
1. The base must first be removed. Place the TV face
down.
2. Remove the six screws holding the base in
position.
3. Remove and store the base and screws.
4. Use four machine screws (M4 x 8 mm - not
supplied) to mount the TV on the bracket.
Mounting the wall bracket - please refer to the user
instructions supplied with the wall bracket (not
supplied).
BASIC OPERATING INSTRUCTIONS
Switching on for the first time
1. Plug the mains power cable into the rear of the TV.
2. Turn on at the mains socket. The STANDBY light at the bottom of the TV
will flash for several seconds before the screen comes on.
Screen 1 will appear when the TV is turned on for the first time.
3. Press the button to select English. Screen 2 will appear.
4. Press the button to select UK. Screen 3 will appear.
5. Press the button to select YES. The Auto search screen will appear and
the TV will begin to scan for channels.
Channels will be stored automatically as they are found. When the search is
complete the first channel found will be shown.
Volume
The volume of the TV can be adjusted by pressing the VOL+ and VOL-
buttons.
Mute
1. Press the MUTE button to mute the sound temporarily. A MUTE icon
appears on the screen.
2. Press the MUTE button again or the VOL+/- buttons to restore the
sound. The MUTE icon disappears.
q
screen
w
screen
e
screen
LCD32-407B.indd Sec1:11LCD32-407B.indd Sec1:11 14/11/2007 16:02:1914/11/2007 16:02:19

LCD TV Receiver LCD32-407B
12
Source Selection
To switch between the available sources, press the SOURCE button. The selected source name is
highlighted in a list on the left of the screen.
The following sources are available:
• TV • SCART 1
• AV • SCART 2
• S-VIDEO 1 • HDMI 1
• S-VIDEO 2 • HDMI 2
• YPbPr • DTV
• PC
Mono/Stereo
Press the NICAM button to switch between mono and stereo sound.
Select the TV channel
You can use the numerical buttons (0-9) on the remote control to select a specific TV channel or
the CH+/- buttons to scroll through the channels.
Picture Mode
The TV has four preset picture settings which adjust the colour, brightness and contrast:
• Personal
• Bright
• Standard
• Soft.
To switch between the preset picture settings, press the P.MODE button. You may adjust the
personal mode to your own preferences. For information on how to do this, see page 16.
Audio Mode
The TV has four preset audio settings which adjust the bass and treble:
• Personal
• Music
• Standard
• News.
To switch between the preset audio settings, press the S.MODE button. You may adjust the
personal mode to your own preferences. For information on how to do this, see page 16.
LCD32-407B.indd Sec1:12LCD32-407B.indd Sec1:12 14/11/2007 16:02:2014/11/2007 16:02:20

User Guide
13
Program Swap
To switch between the last viewed channel and the current channel you can press the RECALL
button.
Sleep Timer
The TV has a sleep timer function allowing you to turn the TV off after a predetermined time.
1. Press the SLEEP button repeatedly to set the sleep time. SLEEP will appear followed by the
preset time in minutes. Select from:
• 15 minutes • 30 minutes
• 45 minutes • 60 minutes
• 90 minutes • 120 minutes
• 180 minutes • 240 minutes.
2. Setting the TV to OFF will cancel the sleep timer. The TV will begin to count down from the
preset time. The current countdown time can be viewed by pressing the SLEEP button. When
the sleep timer reaches zero, the TV will switch to standby mode.
Information Display
1. Press the DISPLAY button to display the current channel information. The information will
show the current channel and sound mode settings.
2. Press the DISPLAY button again to remove the current channel information.
Child lock
The child lock allows you to prevent use of various aspects of the TV.
To use the child lock press the H.LOCK button. You will
be asked to enter your password. The default is ‘0000’.
The following screen will appear.
Lock external input
This option allows you to prevent the use of each of
the input sockets and the TV individually.
1. Highlight the first option on the list. By default it
will be showing TV.
2. Press the button to cycle through the available
input sockets.
3. Press the H.LOCK button to lock that source.
4. Whenever someone attempts to view that source
they will be asked to input the password. If the
password is entered correctly the CHILD LOCK
menu will be shown where they will be able to turn off the lock.
LCD32-407B.indd Sec1:13LCD32-407B.indd Sec1:13 14/11/2007 16:02:2014/11/2007 16:02:20

LCD TV Receiver LCD32-407B
14
Lock channel
This option allows you to lock TV channels.
1. Press the button to highlight each of the channel digits individually.
2. When a digit is highlighted it can be changed by pressing the and buttons. For example, to
select channel 4, change the channel number to 004.
3. Press the H.LOCK button.
4. Whenever someone attempts to view that channel they will be asked to input the password. If
the password is entered correctly the CHILD LOCK menu will be shown where they will be able
to turn off the lock.
Lock TV search
This option allows you to prevent the tuning of the TV from being changed.
1. Press the button to highlight TV SEARCH.
2. Press the H.LOCK button.
3. Whenever someone attempts to carry out a manual search, automatic search or fine tune they
will be asked to enter the password. If the password is entered correctly the SEARCH window
will be shown.
Lock monitor buttons
This option allows you to lock the control pad buttons on the monitor.
1. Press the button to highlight KEYPAD.
2. Press the H.LOCK button.
3. Whenever a button on the monitor is pressed a message will appear saying the buttons are
locked.
Remote
This option allows you to lock the buttons on the remote control.
1. Press the button to highlight REMOTE.
2. Press the H.LOCK button.
3. Whenever a button on the remote is pressed a message will appear saying the buttons are
locked.
Clear all
This option unlocks all settings.
1. Press the button to highlight CLEAR ALL.
2. Press the button. All settings will be unlocked.
LCD32-407B.indd Sec1:14LCD32-407B.indd Sec1:14 14/11/2007 16:02:2014/11/2007 16:02:20

User Guide
15
Change password
This option allows you to change the password.
1. Press the button to highlight CHANGE PASSWORD.
2. Press the button.
3. Enter the new password.
4. Enter the new password again. The new password will now be saved and you will be returned
to the CHILD LOCK menu.
Volume limit
This option allows you to set an upper limit on the volume.
1. Press the button to highlight VOLUME_LIM.
2. Press the and buttons to adjust the volume limit.
3. Press the TV MENU button to confirm the setting and exit the Child lock menu.
PW. Channel
This option allows you to set the channel that appears when the TV is turned on.
1. Press the button to highlight PW. CHANNEL.
2. Press the and buttons to select the channel that will show when the TV is turned on.
3. Press the TV MENU button to confirm the setting and exit the CHILD LOCK menu.
BUS
This option is not available.
MENU OPERATIONS
The on-screen menus allow you to adjust and control the TV.
1. To access the on-screen menus, press the TV MENU button.
2. Press the and buttons to access the different menus.
3. Press the and buttons to scroll through the available options.
4. Press the and buttons to make changes to the a selected option or to access a sub-menu.
5. Press the EXIT button to exit the menu.
Note: Some options are only available for specific sources.
LCD32-407B.indd Sec1:15LCD32-407B.indd Sec1:15 14/11/2007 16:02:2014/11/2007 16:02:20

LCD TV Receiver LCD32-407B
16
Picture Menu
This menu gives options for adjusting the appearance of the
TV picture. The following options are available with the ‘TV’
source selected.
VIDEO MODE – Allows you to select preset levels of
contrast, brightness and colour. Choose between:
• STANDARD
• SOFT
• PERSONAL
• BRIGHT
CONTRAST – Allows you to increase or decrease the contrast of the picture.
BRIGHTNESS – Allows you to increase or decrease the brightness of the picture.
COLOUR – Allows you to increase or decrease the intensity of the picture colour.
SHARPNESS – Allows you to increase or decrease the sharpness of the picture.
COLOUR TEMP. – Allows you to select a warmer or cooler picture.
ZOOM – Allows you to adjust the screen ratio Choose between:
• FULL
• 4:3
• ZOOM1
• ZOOM2
• FILM
• PANORAMA.
Audio Menu
AUDIO MODE – Allows you to select preset levels of bass
and treble. Choose between:
• PERSONAL
• MUSIC
• STANDARD
• NEWS.
BALANCE – Allows you to adjust the volume balance
between the left and right audio channels.
AUTO VOLUME – This allows you to limit the volume to a preset level.
LCD32-407B.indd Sec1:16LCD32-407B.indd Sec1:16 14/11/2007 16:02:2014/11/2007 16:02:20

User Guide
17
EQUALIZER – This allows you to adjust the volume levels at
different frequencies, from 50Hz (bass) to 15kHz (treble).
1. Highlight EQUALIZER and press the button. The
following screen will be shown.
2. Use the and buttons to select the various
frequencies and then the and buttons to adjust the
level.
3. Press the TV MENU button when you are finished and
the levels will be saved in the PERSONAL audio mode.
SURROUND – Allows you to turn surround sound on and off.
DIGITAL BASS – Allows you to turn digital bass on and off.
Function Menu
This menu allows you to change functional settings of the
TV.
LANGUAGE – Allows you to change the on-screen menu
language.
BLUE SCREEN – If set to ON the screen will turn blue if
there is no signal for 3 seconds.
OSD SETTING - Allows you to adjust the on-screen display
in the following ways:
• DURATION - the length of time the menu stays on screen.
• HALFTONE - the transparency of the menus.
IMAGE POSITION (PC and HDMI mode only) – This menu
allows you to adjust the picture received from a PC/HDMI
source.
• H-POSITION – Allows you to adjust the horizontal picture
position.
• V-POSITION – Allows you to adjust the vertical picture
position.
• PHASE – Allows you to remove any horizontal distortion and sharpen the image by adjusting the
phase.
• CLOCK – Allows you to adjust the clock speed to match the PC input source.
• AUTO – Automatically adjusts the picture positioning frequency and phase parameters.
50 50
15K 50
75
100
300
1K
3K
5K
10K 50
50
50
50
50
50
50
LANGUAGE
BLUE SCREEN
OSD SETTING
IMAGE POSITION
ADVANCE
ENGLISH
OFF
FUNCTION
TXT LANGUAGE WEST
LCD32-407B.indd Sec1:17LCD32-407B.indd Sec1:17 14/11/2007 16:02:2014/11/2007 16:02:20

LCD TV Receiver LCD32-407B
18
ADVANCE
• AAA - This function can improve the brightness and contrast of the image. The options are:
- ON
- SPLIT
- MOVE
- ZOOM.
• CTI – This function reduces cross over and interference between different colours.
• LTI – This function optimises the brightness of the image.
• DLC – This option optimises the depth of colour of the image.
• SKIN – This function optimises skin tones in the image making them appear more natural.
• DNR – This option digitally reduces image noise to give a clearer picture. The options are:
- OFF
- WEAK
- MEDIUM
- STRONG.
Tuning
PROGRAM NUMB. – Allows you to select the channel
which requires tuning.
COLOUR SYS. – Allows you to choose the colour system.
Choose between:
• AUTO
• PAL
• SECAM
• NTSC3.58
• NTSC4.43
• PAL M
• PAL N
SOUND SYS. – Allows you to select the TV sound system. Choose between:
• AUTO
• B/G
• D/K
• I
• L
• L’
• M
PROGRAM NUMB.
COLOUR SYS.
SOUND SYS.
FINE TUNE
MANUAL SEARCH
AUTO SEARCH
EDIT PROGRAM
3
PAL
I
TUNING
COUNTRY UK
LCD32-407B.indd Sec1:18LCD32-407B.indd Sec1:18 14/11/2007 16:02:2114/11/2007 16:02:21

User Guide
19
FINE TUNE – The auto search and manual search will tune
to the strongest signal. However, if the reception is poor you
can try to fine tune the channel currently being viewed by
pressing the and buttons.
MANUAL SEARCH – Allows you to search for one channel
at a time.
1. Press the button to start a manual search. The
following screen will appear.
2. Press the or button to search down or up. The TV
will scan until a channel is found.
3. To pause a search press the TV MENU button.
4. To leave the search press the TV MENU button again.
AUTO SEARCH – Allows you to carry out an automatic
search for all available channels.
1. Press the button to start an auto search. The
following screen will appear.
2. The number in the top right corner will increase as channels are found. The search may take
several minutes.
Once completed the TV will tune to the first channel found.
EDIT PROGRAM – This option allows you to edit the list of programs available.
Use the and buttons to select the program you wish to edit.
RENAME
1. Press the red FASTTEXT button.
2. Use the and buttons to change the character.
3. Use the or buttons to select the next character.
4. Repeat until you have entered the name.
5. Press the red FASTTEXT button again to confirm.
DELETE
1. Press the blue FASTTEXT button.
2. Press the red FASTTEXT button to confirm.
SKIP
When selected the channel will be skipped whenever using the CH+ or CH- buttons. The channel
can only be selected by pressing the number buttons.
1. Press the green FASTTEXT button.
2. Press the red FASTTEXT button to confirm.
FINE TUNE
551.25
MANUAL SEARCH
551.25
3
AUTO SEARCH
119.68
1
LCD32-407B.indd Sec1:19LCD32-407B.indd Sec1:19 14/11/2007 16:02:2114/11/2007 16:02:21
Other manuals for LCD32-407B
1
Table of contents
Other Technika TV Receiver manuals