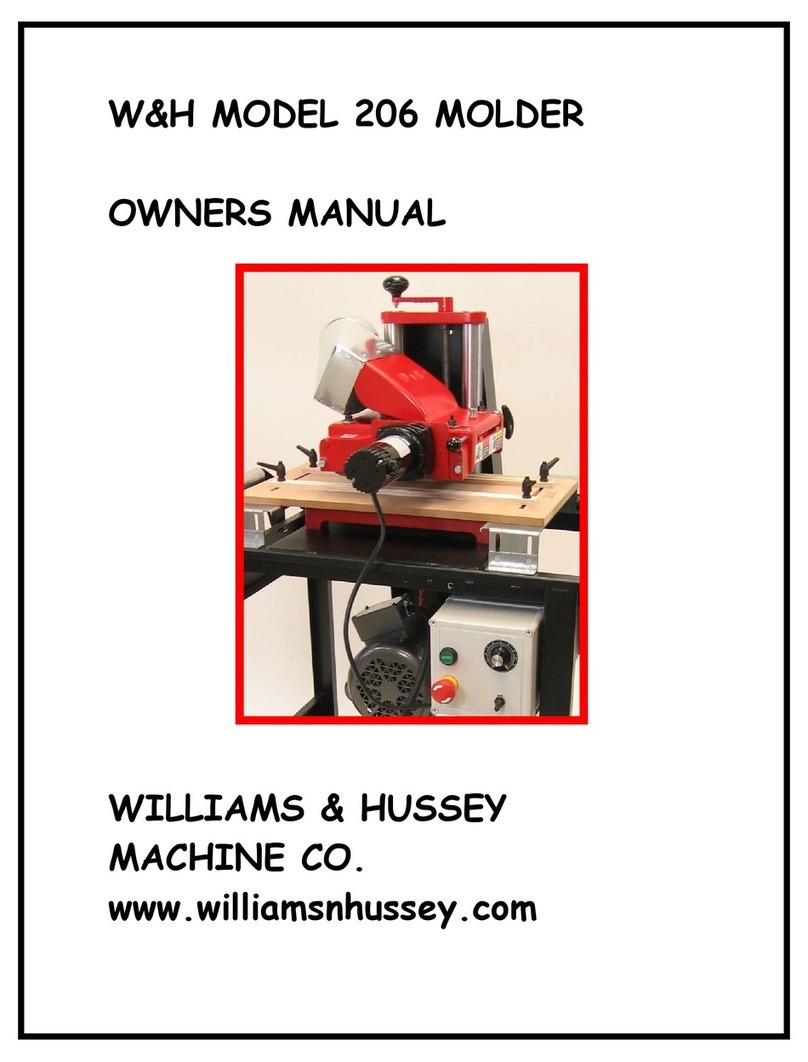
W&H 206 User manual

WILLIAMS & HUSSEY MACHINE CO INC
MODEL 206 MOLDER
OPERATOR’S MANUAL
MANUAL NUMBER OM-99
ADDRESS; 70 Powers St, Milford NH 030
info@willia snhussey.co www.willia snhussey.co
1800 2 8 1380 603 732 0219 fax 603 732 4048
Customer Service is available Monday-Friday, 8:30 AM- 4:30 PM EST
JULY 2010
1

SPECIFICATIONS ACCESSORIES
MOTOR 2HP ELLIPTICAL JIG EJ-92
RPM 6900
FEED RATE 0-19FPM CRANK EXTENSION 54-306
MAX PROFILE DEPTH ¾”
MAX PROFILE WIDTH 6 ¾”
PLANING WIDTH 7”
MIN STOCK LENGTH 9”
MIN STOCK THICKNESS ¼”
MAX STOCK THICKNESS 8”
WORKING HEIGHT 35”
OVERALL HEIGHT 50”
OVERALL WIDTH 22”
OVERALL LENGTH 28”
BOXED WEIGHT 218#
SAFETY RULES
Your W&H Molder has been designed for axi u safety, however, as with all power tools; there is a
possibility of incident or injury to the operator. Therefore, it is imperative that this manual is completely rea
an un erstoo before using.
Use your W&H Molder with respect and caution. Following stated and inherent safety precautions will
considerably lessen the possibility of personal injury. If nor al safety easures are not taken or are overlooked,
the possibility of incident rises tre endously. These safety easures are si ple to follow, and the injuries that
could happen are not worth the few inutes saved by ignoring safety.
The W&H Molder was designed for specific applications. Do not modify or use the achine for any purpose
other than what this anual describes as its capabilities. Substituting a otor with a horsepower rating over
2HP constitutes a odification. Any odifications or i proper use to the Molder-Planer ay result in personal
injury, and will void the warranty. Please contact us if you are unsure about safety protocol before using the
achine.
2

SAFETY CHECK LIST DON’T TAKE UNNECESSARY RISKS!
Failure to read and apply manual instructions will cause poor performance, unnecessary repairs and
injury.
Wear safety glasses and use respiratory protection.
Disconnect the power before servicing or changing knives.
Wear footwear that does not slip. This will help you keep proper footing and balance. Always stand beside the
achine, never in the way of the in-feed and out-feed areas.
Keep knives sharp and clean.
Make sure the achine has proper grounding.
Make sure all guards are secured and in working order.
Re ove all adjusting keys and wrenches before starting.
Check the stock for loose knots, nails, and foreign atter.
Keep the achine in a dry, clean, and well-lit area.
PREPARING TO USE THE MACHINE
1. Disconnect the power source while going through these procedures.
2. Check knives to ensure that the bolts are tight. If olding, set your guides for the stock path through the
knife area. If planing, you ay or ay not wish to set your guides. Many ti es, they are not needed in
planing.
3. When molding, the head scale setting must be set to within 3/16” of the height of your stock. The “0” on
your scale is set to the top of your GS-2 guide syste sub-plate. This eans you would set the achine
head reference to the scale at ¾” in order to take a full profile pass on a ¾” piece of stock. You could set
the achine head in reference to the scale at 15/16” for a axi u height first pass (3/4” + 3/16”). This
setting will provide the proper roller tension. Any other setting higher fro the thickness of the stock
entering the achine is unacceptable and dangerous. See the olding section for ore infor ation.
4. The chip extractor loads first under the out-feed end of the head with a lip under the cast head. You then
finish by attaching the chip extractor with its pin. Make sure the pin is inserted all the way in until you
feel it “catch” on the spring-loaded catch.
5. Check rotational clearance of the knife with the chip extractor in place. Rotate the knife by hand at the
5” pulley cut out on the inner belt guard to ensure the knife area is clear.
6. Do not stand or let others stand in the out-feed area or directly in line with the in-feed of the achine.
7. With the head set in the proper position, tighten the head locking bolt fir ly. This is essential for safety
and to ensure the achine head will stay where you have set it.
8. Test a piece of stock, with the achine off, to see if it will ake contact with the in-feed roller.
3

VARI-FEED OPERATIONAL TIPS
The ain control start button starts the knife otor and the Vari Feed otor. The speed control knob controls
the speed of the feed rollers.
The stock feed rate is approxi ately fro 0 to 19 fp (feet per inute), depending on where the knob is set.
Higher rates of feed are only reco ended for lighter depths of cuts. Turn the knob clockwise to increase the
feed rate.
When the dial is in the 9 o’clock position the feed speed is approxi ately 4 fp .
At the 12 o’clock position = approxi ately 6 fp
At the 3 o’clock position = approxi ately 14 fp
At the full to the right position = approxi ately 19 fp
Always re e ber to set your stock rate prior to entering the stock into the achine. The feed rate ay be
changed during the cut.
The vari-feed option allows for high feed rates on relief cuts on the backside of casings. The vari-feed ulti-
pass co bination provides the versatility of slow feed rates on deep hardwood profiles aking possible two or
three passes to finish.
On deep and wide profiles you can now raise the knife for a partial profile cut and enter the stock very slowly,
while engaging the butt into the knife gently, letting stock ove under the out-feed roller before engaging a
higher feed rate. This reduces the incidence of a large chip out, a chatter ark or snipe on the first few inches
of your stock. You have the sa e advantages exiting the cut.
As the grain structure changes throughout the cut you can vary the stock feed rate to reduce the possibility of
chip outs and spoilage of your piece of stock.
Before starting the achine first fa iliarize yourself with the rest of this “Owners Manual”. It is very i portant
to safely operate the achine as outlined in this “Owners Manual”. Operate the achine only within the
described design intent.
Be sure you check for rotation direction before you use the achine. See the rotation illustration in the changing
knives section.
MOTOR LOCK
Your newly designed achine base has a otor lock. This new devise allows you to lock your otor in place to
keep it fro bouncing on the belt during interrupted cuts etc. It also allows you to odify the belt tension which
can aid you in achieving the finish quality you are looking for.
To reduce tension you can crank the head down to within 1/4” of the actual setting you will use and lock your
otor. Then reset your head to the 1/4” lower running position and your tension will be reduced. You can vary
the 1/4” factor to achieve the tension you desire.
Always unlock the motor before resetting the achine head height.
4

CHANGING KNIVES DISCONNECT POWER BEFORE CHANGING KNIVES!
PLANER KNIVES
CA TION; when planing always back off all four pressure screws to a position ¼” higher than the fully seated
position.You will create too uch roller pressure and feeder proble s if you don’t.
Re ove the chip extractor by pulling out the pin and lifting the infeed end up first and pulling it back to clear
the lips hold. Clean off knives and achine arbor. Set one knife at a ti e in place against the lip of the arbor.
Place the “bevel” of the knife as shown in the illustration below. Tighten the eight bolts securely using a 7/32”
allen wrench. After tightening, double check to see that the knives are snug against the lip.
MOLDING KNIVES
Clean off knives and achine arbor. Set one knife at a ti e in place with
the bevel edge positioned as shown in the illustration below. Push the
knife fir ly down against the arbor lip and sideways against the bolts in
the direction of the tube side of the achine. Hold secure while tightening
the bolts.
KNIFE SHARPENING
For fast and professional results with ini u edge loss, return your knives to the factory for re-sharpening.
Have your knives re-sharpened when you first notice so e dullness. This gives opti al perfor ance and
axi u life span out of the knives.
Molding knives should be surface ground on the face in pairs or the profiles should be
reground. So eti es it is better to regrind the profile. If you send the to us for
regrinding we will use the best ethod that will prolong the use of your knives.
Planing knives ay be ground on the surface or on the bevel.
Both olding and planing knives have an edge angle of 57 degrees easured off the
back of the knife.
Face of knife
Hook angle is 11 degrees
The use of dull knives will put a strain on the feed echanis and will result in your need of a repair. Any
proble s created due to the use of dull knives are not covered under the warranty.
HOW TO MOLD
You will nor ally use the guide sub-plate. When using the optional jig you will take it off. Always use your
sub-plate on any job where the knife is designed to cut below the botto of the stock. This type of knife will hit
the base of the achine if a sub-plate is not used. An exa ple of this situation would be the oulding of half or
quarter rounds.
5
KNIFE
ARBOR
KNIFE BEVEL
INFEED SIDE OUT-FEED SIDE
VIEW FROM PULLEY SIDE OF MACHINE
ROTATION

The “0” on your head setting scale references the top of the ½” sub-plate supplied with your achine. For
exa ple if you were illing a ¾” piece of stock you would set the achine head at the ¾” setting. Adjusting
your achine head to this scale setting will give you a full pass cut and a co pletely finished profile. This is a
ulti-pass achine and with ulti-pass you can add 3/16”, in this exa ple, to the 3/4” di ension for a first
pass setting of 15/16”. In this exa ple you ay set the achine head to any scale setting between 3/4” and
15/16” for a first pass. These settings allow you to achieve proper roller tension for holding the stock and
providing a safe operation.
Be sure to check for sufficient feed roller contact before proceeding to use this setup and be sure to rotate
your oulding knives to check for knife rotation clearance with the chip extractor installed and the power
off before starting the achine. Turn the knife arbor by turning the otor pulley at the inner guard opening.
Other oulding tips
Stock height should be within 3/16” of finished oulding size. If aking one pass only it should be within
1/32”.
Stock width should be unifor and to finished oulding size. Saw ripping to width will not ake the stock
unifor enough for s ooth flow through the guides, and thus, will not result in a satisfactory olding. We
reco end that all stock be planed in both width and height to finished oulding size before setting up to do
the profile.
When tightening the knives, push the fir ly against the lip and sideways against the bolts in the direction of
the tube side of the achine for an exact profile atch up. Hold secure while tightening bolts.
Set the head height to within 3/16”of your stock height. This will give you proper roller tension on your
oulding stock. This is the correct way to old. It is acceptable to leave 3/16” of the cut for ultiple passes.
But for safety reasons leave no ore than 3/16”.
On so e extre ely deep or wide cuts, so e prior stock re oval will be required before olding. You ay
re ove this stock using one of the rabbet/dado knives found in our catalog. You ay also use a dado blade on a
table saw.
Failure to set your head height within 3/16” of the stock height will create an extre e safety hazard in that
possibly not enough roller pressure will be applied, or that no roller pressure at all will be applied.
Do not cut a wider stock area than the knife was designed to cut. This will cause excessive heat in the knife,
burn your stock and puts a har ful load on the feed syste .
The roll pressure screws are set at axi u olding pressure fro the factory. They are screwed into the head
as far as possible and the check nut is tightened.
When you use the achine for planing you will need to reduce the roller pressure. Loosen the pressure screw
lock nut and screw out each pressure to a setting ¼” higher than the fully seated position and retighten the lock
nut.
To change the olding knives, re ove the chip extractor. Set one knife at a ti e in place with the bevel edge
toward the in-feed end of the achine. Fir ly push the knife down against the arbor lip and sideways against
the bolts in the direction of the tube side of the achine. Hold secure while tightening bolts with a 7/32” allen
wrench or drive.
6

GUIDES
Guiding your stock
Your achine co es with the GS-2 guide syste , which includes a flex guide and a solid guide to guide, your
stock. To set these guides, first attach your knives to the knife arbor in the position you have chosen, often a
place where you can get the ost out of your roller surfaces. Panel knives would go to the far right. S aller
knives to the post side half of the ounting area and larger knives to the central positions.
Roll one knife down pointing to the achine bed and place a sa ple piece of stock you are going to old on
the bed. Align the stock to the knife profile and carefully lower the achine head until the roller puts pressure
on your stock to hold it securely.
Attach your flex guide to the side of the profile that will cut the least deep into your stock. This will give the
longest possible life to your flex guide. The beveled portion of the guide should be facing the stock. Put about a
1/32” a ount of pressure on the flex part of the guide. This will keep you stock fro wandering within the
glide path. Pull the handles up and away fro the stock path.
Attach your solid guide on the other side of the stock. Push it up fir ly against the stock and tighten the
handles angling the away fro the stock path.
Remove your set up piece of stock by raising the achine head, and pulling the stock out fro the bed.
Your knives will usually cut into one or both guides. This is nor al and expected. The guides are effective
and last a long ti e after being cut into any ti es.
As you beco e ore fa iliar with the achine and its use, you will want to ake
wooden guides to suit specific jobs. Always ake a co plete sa ple (top and
botto ) of crowns and keep sa ple to set up on.
Make your botto cut first when illing bed and crown moldings. You ay want
to add a key cut as a guiding echanis for your top profile.
When planing the edge of stock, a high, square, relieved guide is needed in order
to have the edge reasonably square and to provide
stability. The center reliefs are to reduce friction.
So e profiles are too deep to ake on the W&H. In so e
cases you can rotate the profile into a flatter position to
effectively reduce the depth of cut. A “V block” guide
would be ade to guide your stock. The profile knives
would have to be custo ade to use in this V block
position.
When aking tongue and groove stock, a serious and
detailed approach is needed in order to achieve a unifor fit. Carefully pre-inspect
your stock for cupping and warping. You need to plane all your stock to one unifor
size.
The guide thickness should be 3/8” thinner than your stock or your roller will scuff on the guides when the
stock has left the achine and the rollers are in their rest positions. When running thin stock you will need to
fasten a sub-plate between the guides to aintain a thick enough guide to control your stock.
7

Always check your knife clearance to the guide. Clear away any interfering portion of the guide by gently
lowering your knife down into the guides to just below your running position.
MOLDING PICTURE FRAMES
Decide whether the rabbet or profile cut should be done first. If you are going to ake the rabbet on the W&H
Molder, do the rabbet first. In order to utilize the W&H Molder for rabbets, a rabbet knife with a depth of cut
equivalent to the depth you need should be ordered. If we do not have a standard knife with the depth you seek,
we can ake a special knife to suit your needs.
ROUND TOP CASINGSCONSTANT RADIUS SIZE ARCS
We anufacture knives with the profile cutting the deepest portion of the cut on the open side of the achine.
Notify us when you order a knife if you want the deep side of the cut on the vertical tube side of the achine.
The set up and operation of the W&H achine for a round top oulding job is very si ilar to the straight
oulding set up. One ain difference is the oulding stock will ride piggybacked on a te plate to enable the
knife to clear the jig guiding hardware. Our EJ92 Elliptical Jig is not needed for a fixed, constant radius.
Stock preparation can be done in any ways. The following is one exa ple.
First deter ine the angle needed to cut the wood sections in order to stay within the selected radius. Lay out the
wood sections by arking the angles while being careful to select cuts for grain structure and color. Cut the
sections and biscuit join the together with glue.
We ade a fixture to band saw the inside and outside radii consisting of a pivot bar and bracket. We ounted
the pivot bar to the stock on the scrap portion of the inside radius. The pivot bar is drilled with nu erous holes
to acco odate any radius sizes. You ay also want to design a fine adjuster to allow you to ake any radius
in between your adjusting holes. Make sure the outside radius is cut first.
The guides should be 20” long, which is the length of the GS2 guide syste , or 14” long if you are just using
the bed of the achine. The guides ay be ade using the band saw set up. We ake one guide for the inside
radius and one for the outside radius. We use MDF board.
ROUND TOP SETUP
1. Make sure power supply is disconnected
2. Raise the achine head and set the stock on the bed.
3. Align the stock with oulding profile.
4. Lower the head to pinch the stock.
5. Set the guides and cla p the in place.
6. Raise the achine head, re ove the stock, and reset the head to within 3/16” of stock size. Check to see
that the rotating knife will not hit anything you don’t want it to on start up.
NEVER attempt closed loop molding. It is an unsafe procedure, you will not have enough roller pressure
initially.
8

RAISED PANELS
All of our panel knives are designed to produce a ¼” tongue. Be sure to select a panel knife based on the
finished panel thickness. A panel must be 9” or more in the direction you are moulding in order to not have
the panel co e off of one roller before it engages the second roller. When you use multiple passes you must
have at least 9” of panel remaining in the direction of the cut in order to have a least one roller on the panel at
all ti es.
If you desire a different tongue size or have a panel thickness other than ¾” or 5/8,” a special knife can be
ordered and shipped quickly by W&H.
THE RAISED PANEL SET UP
1. Disconnect the power supply.
2. Install your knives over toward the tube side of the achine allowing enough roo to install your guide.
3. Index the knife arbor so the profile will be seen against the bed. Raise the head to allow the panel to be
laid on the bed and to be lined up with the profile visually.
4. Once you have found the proper position for the panel, lower the head so the rollers will put pressure on
the panel while butting the guide against the panel. Tighten your guide.
5. Raise the head, pull the panel out of the achine, and lower the head to within 3/16”of the panel height.
Rotate the blade arbor by hand to insure nothing is interfering with its rotational path.
6. Mould the panel cross grain ends first. Stand so ewhere between the open side and in-feed side.
RAISED PANEL ISSUES
It takes so e practice to ake a good panel. It is helpful to keep a slight upward pressure on the panel as it is
being oulded with a steady pressure against the guide.
Because panels are nor ally larger than the 7” cutting capacity of the achine, the panel ust pass beneath the
open side of the head. There is approxi ately 1/32” clearance between the top of the panel and the head of the
achine, provided the head is at stock size setting, and not below.
Many users try to create a slightly deeper cut to odify the tongue size or change the profile appearance and
end up dragging and pivoting the panel away fro the guide path. The head ust be set at the panel thickness
and not below it in order to have clearance to pass the panel through the achine in a satisfactory way.
HOW TO PLANE
CAUTION! When you use the achine as a planer you will need to back off all four pressure screws ¼” so
that you will not have too uch roller tension, or you will risk shearing a pin in the large bronze wor gear.
Measure the thickness of your stock.
The a ount of stock that is re ovable in one pass is dependent on the density of the wood (relative hardness),
how wide the cut is, and the oisture content of the stock.
9

GENERAL GUIDELINES FOR DEPTH OF CUT
THICKNESS TYPE OF WOOD DEPTH OF
CUT
1” Poplar ¼”
1” Red Oak 3/16”
3” White Pine 3/16”
3” White Oak 1/8”
6” Poplar 1/8”
6” Red Oak 1/16”
See the table of contents section for knife changing and installation.
Loosen the planing head locking knob (54-21). To initially begin planing, set the head position to a height 1/32”
less than the di ension of the stock entering the achine. One-third of a turn on the elevating handle will equal
1/32”. Tighten the head locking knob.
Make sure the chip extractor is in place, the front lip engaged into the head and the pin is fir ly seated.
Utilize a high, square, relieved guide when planing the edge of stock to ensure the edge will be reasonably
square. A relief in the vertical wall of the guide reduces friction. See the guide section for a picture of the edge
guides.
THREAD LOCKING INFORMATION
A ediu strength thread-locking co pound used on so e parts prone to loosen with vibration.
Use two drops on the thread area of the parts listed below.
P-122 post side axle.
54-16 Rest pins.
54-15 Pivot screws.
A s all tube of thread locker is available for purchase. Part nu ber P-242
Do not use on P-124 in-feed axle, or on P-224, out-feed axle.
10

CHATTER
Definition
Chatter arks are irregularities in the finish
quality of the surface of the wood. They can be
evenly spaced or rando ly distributed. Si ply
put, they ay be described as “hills and valleys”
in the wood surface.
Cause
These arks are caused by either loosely held
stock or by an i balance in the achine’s
echanical qualities
Solutions
The ost co on cause of poor
stock finish quality is a rough running
belt. Replace the belt.
Make sure you are cutting with the
head set at the appropriate height.
Keep your knives sharp. Dull knives
cause inter ittent feeding.
Check the pulleys for da age or
i balance.
Check to see that both knives and all
attaching bolts are of the sa e
weight.
SNIPE
Definition
Snipe is generally an unwanted undercut in the stock. It occurs in the
first and last few inches of the stock length. It causes a different
height di ension than what was selected for the stock.
Causes
The stock ay be cupped, warped or twisted.
The stock experiences a change in down pressure as the out feed
roller engages the stock, and when the stock disengages with the in
feed roller.
The stock ay enter or exit the achine on an angle because it is
either being fed fro a higher or lower plane than the bed, or it is
exiting to a higher or lower plane.
Solutions
Use a jointer to flatten cupped, warped,
or twisted stock.
Butt stock pieces tight end to end.
Put a slight upward pressure on the
exposed end of the stock during both the
in feed and out feed stroke.
Use slightly longer stock length than
needed and cut the snipe off.
Make sure the head locking handle is
tight.
Your outboard support should be
slightly higher than your bed.
11

FEEDING PROBLEMS
Make sure that power is disconnected before inspecting achine.
SYMPTOM SOLUTION
The stock stops but the feed-rollers
continue to turn.
This is a traction or friction proble .
1) Make sure your stock is not binding in
the guides.
2) Make sure the stock is of consistent
width. Saw ripping is inadequate.
3) Make sure stock is the proper width for
the knife profile.
4) Make sure the head is set at the correct
height.
5) Check the rollers to see if they have a
glossier than nor al build-up. Clean the
gloss or pitch build up off the rollers.
6) Make sure adequate spring pressure is
being applied to the rollers.
7) Check the base or bed for rust or scars.
8) Replace worn rollers.
One roller stops while the other continues
to operate.
Check for a loose set screw on one of the
two chain sprockets involved with the roller
that won’t operate.
Both rollers will not turn Check for a blown fuse in the Vari-Feed
control. The ar ature fuse is a 2 a p fuse,
and the line fuse is a 5 a p fuse. Both fuses
are ¼”x1 ¼”
The otor electrical plug ay not be fully
engaged in its receptacle.
INSTRUCTIONS FOR REMOVAL OF FEED ROLLER
12

Unplug achine, Take off chip deflector, raise head, and re ove pressure screws over swing ar .
Re ove two 54-15 pivot screws and re ove swing ar , leaving chain connected to ating sprocket.
Reinstall each pivot screw with a drop of medium strength thread locker.
Take the sprocket off the swing ar axle by putting the feed roller in a vise. Use a couple of s all
adjustable wrenches attached to the flat on the long axle to loosen it.
Put a good square shank flat bladed screw driver into the slot on the short axle. Push in as hard as you can
while using a wrench on the square shank of the screw driver to loosen the short axle. So eti es this axle
will not co e out. Hack saw it off if it won’t. If you need to save the roller, pull the roller out of the swing
ar by lifting it up and pulling it out with the short axle still in the roller. Reset the roller in a vise and use a
s all pipe wrench to re ove it fro the roller.
REASSEMBLY The rollers are constructed with a shallow hole in one end and a deeper hole in the other.
The P-122 post side axle always goes in the short end. Reinstall the P-122 axles with two drops of ediu
strength thread locker on the thread portion. Do not use thread lock on P-124 or P-224.
The longer axle goes in the deeper end. See drawing for swing ar asse bly with roller.
POSITION OF SPROCKETS First position feed otor shaft sprockets with hubs facing in toward chain guard..
The first sprocket slides up to the end of the flat on the otor shaft and the second right up against the first.
Chains should (under load) run in a straight line fro these sprockets to the roller sprockets. Adjust the roller
sprockets to achieve this align ent. Feed roller sprockets should be positioned based on the feed otor
sprockets already positioned. The chains should run in a straight line fro the feed otor sprockets to the roller
sprockets when the achine is under load.
13

MACHINE EXPLODEDVIEW
When
reinstalling
the vari feed
unit after a
repair check
the chains
for proper
tension. The
short in feed
chain should
have a s all
a ount of
slack in it and
the long out
feed chain
should have
plenty of
slack. This is
the correct
setting. To
obtain the
correct
setting, in
ost cases,
you would
push the unit
toward the in-
feed end of
the achine as you tighten it using up the attaching bolt hole clearance for adjust ent. This should give
you the opti u chain tension and slack.
14

VARI-FEED VIEW
VF-100 assembly
Does not include roller sprockets and chains
VF-1 Vari-Feed motor
VF-2 REV A Aluminum motor mount
VF-3 Roller sprockets,14 tooth
VF-4 Short chain, 36 pitch
VF-5 ong chain, 54 pitch
VF-9 REV A Chain guard
VF-12 REV A Motor sprockets, 17 tooth
Vari-Feed Removal
oosen the set screw on the in-feed roller chain sprocket. oosen and remove the (2) hex head bolts,
and (1) socket head bolt holding the chain guard to the machine head. As you pull the unit free, pull
off the in-feed chain sprocket you loosened. To remove the motor from the motor mount and chain
guard, remove the two motor shaft chain sprockets and loosen and remove (4) socket head cap
screws that are in a rectangular pattern surrounding the motor gear housing. To disassemble the
motor mount from the chain guard remove the two remaining socket head cap screws with nuts.
UNDERSIDE VIEW OF SPROCKETS AND CHAINS
15
Out-feed
VF-3 14 tooth sprocket
VF-5 chain In-feed
VF-3 14 tooth sprocket
VF-4 chain
(2) 17 tooth
sprockets
VF-12 REV A

ARBOR REMOVAL VIEW
16

CONTACT INFORMATION
Willia s & Hussey Machine Co., Inc. custo erservice@willia snhussey.co (e- ail)
70 Powers Street
Milford NH 03055 willia snhussey.co (website)
603-732-0219 (local) Business Hours: Monday – Friday
800-258-1380 (toll free) 8:30 a – 4:30 p
603-732-4048 (fax)
WARRANTY INFORMATION
Molder – 7 Year Limited
Willia s & Hussey Machine Co., Inc. warrants its olders for a period of seven years fro the original date of
purchase.
WHAT IS COVERED?
The warranty covers any defects in work anship or aterials.
WHAT IS NOT COVERED?
The warranty does not cover da age due to; odifications, isuse, i proper aintenance, nor al wear, wood
ja s or using a knife otor with a horse power rating over 2HP.
WHO IS COVERED?
The warranty covers the initial purchaser only.
LIMITATIONS ON WARRANTY
Willia s & Hussey shall in no event be liable for death, injuries to persons or property, or for incidental,
contingent, special, or consequential da ages arising fro the use of our products.
Motors - 2 year Limited
Warranty covers any defects in work anship or aterials on original parts. Warranty does not cover defects
due directly or indirectly to isuse, abuse, negligence or accidents, nor al wear-and-tear, lack of aintenance,
or i proper repair or alteration.
Controls & Elliptical Jig - 1 year Limited
Sa e as otors.
VF-104 and VF-106
Refer to applicable otor and control warranties.
AUTHORIZATION FROM WILLIAMS & HUSSEY IS REQUIRED
BEFORE ITEMS ARE BETURNED FOR EVALUATION.
17
Other manuals for 206
2
Table of contents
Other W&H Planer manuals
Popular Planer manuals by other brands

Makita
Makita PC5001C technical information

Bartell Global
Bartell Global CONTEC CT320 Owner's manual and parts book

Baileigh Industrial
Baileigh Industrial IP-1306 Operator's manual

Makita
Makita PC5000C instruction manual

Triton
Triton TR208537 Operating/safety instructions

Black & Decker
Black & Decker 7698 instruction manual