Wasco OPTOIO-PCIe32 STANDARD User manual

user‘s guide
wasco®
user‘s guide
wasco®
OPTOIO-PCIe32
STANDARD
EDP No.: A-840600
OPTOIO-PCIe32
STANDARD
EDV-Nr.: A-840600
32 Eingänge über Optokoppler
32 Ausgänge über Optokoppler
32 optocoupler isolated digital inputs
32 optocoupler isolated digital outputs

2
OPTOIO-PCIe32STANDARD © 2015 by Messcomp Datentechnik GmbH DV07
2
OPTOIO-PCIe32STANDARD © 2015 by Messcomp Datentechnik GmbH EV08
22
wasco®wasco®
Copyright©2015 by Messcomp Datentechnik GmbH
Diese Dokumentation ist urheberrechtlich geschützt. Alle Rechte sind
vorbehalten.
Messcomp Datentechnik GmbH behält sich das Recht vor, die in dieser
Dokumentation beschriebenen Produkte jederzeit und ohne Vorankündi-
gung zu verändern.
Ohne schriftliche Genehmigung der Firma Messcomp Datentechnik
GmbH darf diese Dokumentation in keinerlei Form vervielfältigt werden.
Geschützte Warenzeichen
Windows®, Visual Basic®, Visual C++®, Visual C#®sind eingetragene
Warenzeichen von Microsoft.
wasco®ist ein eingetragenes Warenzeichen.
Linux®ist ein eingetragenes Warenzeichen.
Ubuntu®ist ein eingetragenes Warenzeichen.
LabVIEW®ist ein eingetragenes Warenzeichen.
Bei anderen genannten Produkt- und Firmennamen kann es sich um
Warenzeichen der jeweiligen Inhaber handeln.
Haftungsbeschränkung
Die Firma Messcomp Datentechnik GmbH haftet für keinerlei durch den
Gebrauch der Interfacekarte OPTOIO-PCIe32STANDARD und dieser Doku-
mentation direkt oder indirekt entstandene Schäden.
Copyright©2015 by Messcomp Datentechnik GmbH
This documentation is copyright by Messcomp Datentechnik GmbH. All
rights are reserved.
Messcomp Datentechnik GmbH reserves the right to modify the products
described in this manual at any time and without preannouncement.
No parts of this manual are allowed to be reproduced, copied, translated
or transmitted in any way without a prior written consent of Messcomp
Datentechnik GmbH.
Registered Trademarks
Windows®, Visual Basic®, Visual C++®, Visual C#®are registered trade-
marks of Microsoft.
wasco®is registered trademark.
Linux®is registered trademark.
Ubuntu®is registered trademark.
LabVIEW®is registered trademark
Otherproductandcompanynamesmentionedmaybetrademarksoftheir
respective owners.
Disclaimer
The company Messcomp Datentechnik GmbH assumes no liability for the
use of the interface card OPTOIO-PCIe32STANDARD and this documenta-
tion, neither for direct nor indirect damages.

3
OPTOIO-PCIe32STANDARD © 2015 by Messcomp Datentechnik GmbH DV07
3
OPTOIO-PCIe32STANDARD © 2015 by Messcomp Datentechnik GmbH EV08
33
wasco®wasco®
Table of Contents Inhaltsverzeichnis
1. Description........................................................................................5
2. Installation of the OPTOIO-PCIe32STANDARD ......................................6
2.1 How to install the card into your system.................................................................6
3. Connectors........................................................................................7
3.1 Position of the connector plugs..............................................................................7
3.2 Pin assignment of CN1...........................................................................................8
3.3 Pin assignment of CN2...........................................................................................9
4. System Components......................................................................10
4.1 Block diagram.......................................................................................................10
4.2 Access to the system components.......................................................................11
5. 32 Optocoupler Isolated Digital Inputs.........................................12
5.1 Pin assignment of the input optocouplers ............................................................12
5.2 Input voltage ranges.............................................................................................13
5.3 Input circuitry........................................................................................................15
5.4 Input current.........................................................................................................15
6. 32 Optically Isolated Outputs........................................................16
6.1 Pin assignment of the output optocouplers..........................................................16
6.2 Optocoupler specications ...................................................................................16
6.3 Output circuitry.....................................................................................................16
7. Board Conguration.......................................................................17
7.1 Board Identication...............................................................................................17
7.2 Access with 16 or 32 Bit.......................................................................................18
8. Windows® Programming ................................................................19
8.1 Installation of the Windows®driver.......................................................................19
8.2 Installation of the Windows® development les ....................................................19
8.3 Programming of the OPTOIO-PCIe32 by wasco®driver.....................................22
8.4 Access to the board OPTOIO-PCIe32Standard .........................................................23
8.5 Assignment of the Memory Mapped I/O addresses .............................................23
8.6 Compatibility to OPTOIO-PCI32STANDARD ...............................................................24

4
OPTOIO-PCIe32STANDARD © 2015 by Messcomp Datentechnik GmbH DV07
4
OPTOIO-PCIe32STANDARD © 2015 by Messcomp Datentechnik GmbH EV08
44
wasco®wasco®
9. Linux® Programming ......................................................................25
9.1 Installing the Linux®driver....................................................................................25
9.2 Supported Linux Distributions/Kernelversions......................................................25
9.3 Programming the OPTOIO-PCIe32 with wasco®driver........................................25
9.4 Access to the OPTOIO-PCIe32Standard ...................................................................26
9.5 Assignment of the Memory Mapped I/O addresses .............................................26
10. Accessories ..................................................................................27
10.1 Compatible wasco®accessories ........................................................................27
10.2 Connecting technique (application examples)....................................................27
10.3 Single components for own assembly................................................................28
11. Troubleshooting............................................................................29
12. Specications ...............................................................................30
13. Product Liability Act.....................................................................31
14. EC Declaration of Conformity .....................................................33

5
OPTOIO-PCIe32STANDARD © 2015 by Messcomp Datentechnik GmbH DV07
5
OPTOIO-PCIe32STANDARD © 2015 by Messcomp Datentechnik GmbH EV08
55
wasco®wasco®
1. Description 1. Produktbeschreibung
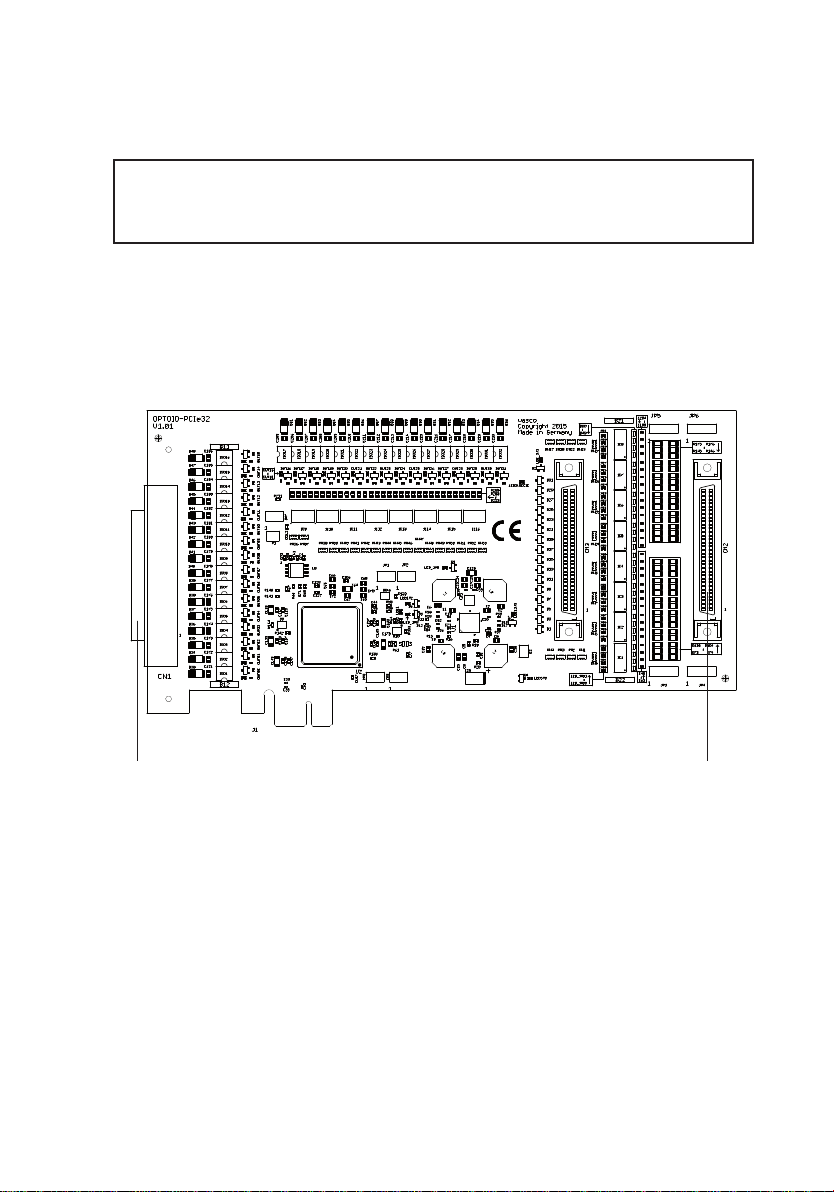
The wasco®interface card OPTOIO-PCIe32STANDARD provides 32 digital
inputs and 32 digital outputs with galvanic isolation, individually for each
channel. Optocouplers of high quality ensure the potential separation for
the inputs and outputs. All input optocouplers are bipolar. Special high
power output optocouplers can handle a maximum switching current of
up to 150 mA.
Each input or output is tted with additional protection diodes against
harmful voltage peaks. You can adjust two different voltage ranges for
each single input channel by jumpers easily to set.
Output optocouplers are led to a 68-pin SCSI jack mounted to the board’s
slot bracket. Optocoupler inputs are fed to a 68-pin SCSI jack on the
board. On demand a special cable (set of female connector, ribbon cable
and68-pinfemaleconnectorwithslotbracket)isavailable,postponingthe
connection to a slot of your PC casing.
Pin assignment and input voltage ranges are identical with PCI bus card
OPTOIO-PCI32STANDARD. Therefore a switch to PCIe is easily to realise.
Furthermore the card provides a jumper block for a card identication.
This enables you to differentiate between several identical cards in your
system.
Die OPTOIO-PCIe32STANDARD bietet 32 digitale Eingänge und 32 digitale
Ausgänge mit galvanischer Trennung, einzeln für jeden Kanal. Die Po-
tentialtrennung gewährleisten bei den Ein- wie Ausgängen hochwertige
Optokoppler. Alle Eingangsoptokoppler sind bipolar. Spezielle, leistungs-
fähige Ausgangsoptokoppler bewältigen einen Schaltstrom von bis zu
150 mA.
Jeder Ein- und Ausgang ist zusätzlich durch Schutzdioden gegen schäd-
liche Spannungsspitzen und Impulse geschützt. Über leicht steckbare
Jumper sind für jeden einzelnen Eingangskanal zwei verschiedene Ein-
gangsspannungsbereiche einstellbar.
Die Anschlüsse der Ausgangsoptokoppler sind der am Slotblech der Pla-
tine montierten 68poligen SCSI-Buchse zugeführt. Die Optokoppler-Ein-
gänge liegen an der 68poligen SCSI-Buchse auf der Platine an. Über ein
als Option erhältliches Steckerverlegungs-Set ist die Verlegung auf eine
68polige SCSI-Buchse mit Slotblech möglich.
Die Steckerbelegungen und die Eingangsspannungsbereiche sind iden-
tisch zur PCI-Bus-Karte OPTOIO-PCI32STANDARD, ein Umstieg auf PCIe ist
dadurch einfach realisierbar.
Des Weiteren besitzt die Karte einen Board-Identikations-Jumperblock,
um mehrere identische Karten im PC unterscheiden zu können.

6
OPTOIO-PCIe32STANDARD © 2015 by Messcomp Datentechnik GmbH DV07
6
OPTOIO-PCIe32STANDARD © 2015 by Messcomp Datentechnik GmbH EV08
66
wasco®wasco®
2. Installation of the OPTOIO-PCIe32STANDARD
2.1 How to install the card into your system
Before you insert the card unplug the power cord or make sure, there is
no current to/in the computer. Inserting into a running system may cause
damaging or destroying not only OPTOIO-PCIe32STANDARD, but even other
already inserted cards of your computer.
Select an empty PCIe slot of your computer for inserting the card. Please
refer to the computer‘s manual for support. Secure the OPTOIO-PCIe32
by screwing the mounting bracket to the casing of your computer to avoid
a card‘s loosening by effects of the cables.
2. Installation der OPTOIO-PCIe32STANDARD
2.1 Installation der Karte in den Rechner
Achten Sie vor dem Einbau der OPTOIO-PCIe32 darauf, dass der Rech-
ner vom Netz getrennt oder zumindest ausgeschaltet ist. Beim Einbau
der Interface-Karte in den laufenden Rechner besteht die Gefahr, dass
neben der OPTOIO-PCIe32 auch andere Karten des PCs oder Rechners
beschädigt oder zerstört werden.
Wählen Sie in Ihrem Rechner einen freien PCIe-Steckplatz in den Sie
dann die Karte einsetzen. Nehmen Sie dazu auch das Benutzerhandbuch
Ihres Computers zu Hilfe. Verschrauben Sie das Slotblech der Platine mit
dem Rechnergehäuse, damit sich die Karte nicht während des Betriebs
unter Einwirkung der Anschlusskabel aus dem Steckplatz lösen kann.

7
OPTOIO-PCIe32STANDARD © 2015 by Messcomp Datentechnik GmbH DV07
7
OPTOIO-PCIe32STANDARD © 2015 by Messcomp Datentechnik GmbH EV08
77
wasco®wasco®
3. Connectors
3.1 Position of the connector plugs
CN1: Optocoupler Outputs OUT00...OUT31
CN2: Optocoupler Inputs IN00...IN31
CN1 CN2
3. Anschlussstecker
3.1 Lage der Anschlussstecker auf der Platine
CN1: Optokoppler-Ausgänge OUT00...OUT31
CN2: Optokoppler-Eingänge IN00...IN31
CN1 CN2

8
OPTOIO-PCIe32STANDARD © 2015 by Messcomp Datentechnik GmbH DV07
8
OPTOIO-PCIe32STANDARD © 2015 by Messcomp Datentechnik GmbH EV08
88
wasco®wasco®
3.2 Pin assignment of CN1
Vcc:
Connector for internal voltage source (+ 5V) (a wiring bridge must be soldered on B11),
Never apply an external voltage across this pin.
GND:
Ground connection (only when a wiring bridge is soldered on B12).
GND
GND
OUT31-
OUT30-
OUT29-
OUT28-
OUT27-
OUT26-
OUT25-
OUT24-
OUT23-
OUT22-
OUT21-
OUT20-
OUT19-
OUT18-
OUT17-
OUT16-
OUT15-
OUT14-
OUT13-
OUT12-
OUT11-
OUT10-
OUT09-
OUT08-
OUT07-
OUT06-
OUT05-
OUT04-
OUT03-
OUT02-
OUT01-
OUT00-
Vcc
Vcc
OUT31+
OUT30+
OUT29+
OUT28+
OUT27+
OUT26+
OUT25+
OUT24+
OUT23+
OUT22+
OUT21+
OUT20+
OUT19+
OUT18+
OUT17+
OUT16+
OUT15+
OUT14+
OUT13+
OUT12+
OUT11+
OUT10+
OUT09+
OUT08+
OUT07+
OUT06+
OUT05+
OUT04+
OUT03+
OUT02+
OUT01+
OUT00+
68 34
67 33
66 32
65 31
64 30
63 29
62 28
61 27
60 26
59 25
58 24
57 23
56 22
55 21
54 20
53 19
52 18
51 17
50 16
49 15
48 14
47 13
46 12
45 11
44 10
43 9
42 8
41 7
40 6
39 5
38 4
37 3
36 2
35 1
3.2 Steckerbelegung von CN1
Vcc:
Interne Versorgungsspannung (+ 5V) der PCIe-Karte (nur durch Einlöten einer Drahtbrücke
an B11). Hier niemals eine externe Spannung anlegen.
GND:
Masse des Rechners (nur durch Einlöten einer Drahtbrücke an B12)
GND
GND
OUT31-
OUT30-
OUT29-
OUT28-
OUT27-
OUT26-
OUT25-
OUT24-
OUT23-
OUT22-
OUT21-
OUT20-
OUT19-
OUT18-
OUT17-
OUT16-
OUT15-
OUT14-
OUT13-
OUT12-
OUT11-
OUT10-
OUT09-
OUT08-
OUT07-
OUT06-
OUT05-
OUT04-
OUT03-
OUT02-
OUT01-
OUT00-
Vcc
Vcc
OUT31+
OUT30+
OUT29+
OUT28+
OUT27+
OUT26+
OUT25+
OUT24+
OUT23+
OUT22+
OUT21+
OUT20+
OUT19+
OUT18+
OUT17+
OUT16+
OUT15+
OUT14+
OUT13+
OUT12+
OUT11+
OUT10+
OUT09+
OUT08+
OUT07+
OUT06+
OUT05+
OUT04+
OUT03+
OUT02+
OUT01+
OUT00+
68 34
67 33
66 32
65 31
64 30
63 29
62 28
61 27
60 26
59 25
58 24
57 23
56 22
55 21
54 20
53 19
52 18
51 17
50 16
49 15
48 14
47 13
46 12
45 11
44 10
43 9
42 8
41 7
40 6
39 5
38 4
37 3
36 2
35 1

9
OPTOIO-PCIe32STANDARD © 2015 by Messcomp Datentechnik GmbH DV07
9
OPTOIO-PCIe32STANDARD © 2015 by Messcomp Datentechnik GmbH EV08
99
wasco®wasco®
3.3 Pin assignment of CN2
cc:
Connector for internal voltage source (+ 5V) ( a wiring bridge must be soldered on B21),
Never apply an external voltage across this pin.
GND:
Ground connection (only when a wiring bridge is soldered on B22).
GND
GND
IN31-
IN30-
IN29-
IN28-
IN27-
IN26-
IN25-
IN24-
IN23-
IN22-
IN21-
IN20-
IN19-
IN18-
IN17-
IN16-
IN15-
IN14-
IN13-
IN12-
IN11-
IN10-
IN09-
IN08-
IN07-
IN06-
IN05-
IN04-
IN03-
IN02-
IN01-
IN00-
Vcc
Vcc
IN31+
IN30+
IN29+
IN28+
IN27+
IN26+
IN25+
IN24+
IN23+
IN22+
IN21+
IN20+
IN19+
IN18+
IN17+
IN16+
IN15+
IN14+
IN13+
IN12+
IN11+
IN10+
IN09+
IN08+
IN07+
IN06+
IN05+
IN04+
IN03+
IN02+
IN01+
IN00+
68 34
67 33
66 32
65 31
64 30
63 29
62 28
61 27
60 26
59 25
58 24
57 23
56 22
55 21
54 20
53 19
52 18
51 17
50 16
49 15
48 14
47 13
46 12
45 11
44 10
43 9
42 8
41 7
40 6
39 5
38 4
37 3
36 2
35 1
3.3 Steckerbelegung von CN2
Vcc:
Interne Versorgungsspannung (+ 5V) der PCIe-Karte (nur durch Einlöten einer Drahtbrücke
an B21). Hier niemals eine externe Spannung anlegen.
GND:
Masse des Rechners (nur durch Einlöten einer Drahtbrücke an B22)
GND
GND
IN31-
IN30-
IN29-
IN28-
IN27-
IN26-
IN25-
IN24-
IN23-
IN22-
IN21-
IN20-
IN19-
IN18-
IN17-
IN16-
IN15-
IN14-
IN13-
IN12-
IN11-
IN10-
IN09-
IN08-
IN07-
IN06-
IN05-
IN04-
IN03-
IN02-
IN01-
IN00-
Vcc
Vcc
IN31+
IN30+
IN29+
IN28+
IN27+
IN26+
IN25+
IN24+
IN23+
IN22+
IN21+
IN20+
IN19+
IN18+
IN17+
IN16+
IN15+
IN14+
IN13+
IN12+
IN11+
IN10+
IN09+
IN08+
IN07+
IN06+
IN05+
IN04+
IN03+
IN02+
IN01+
IN00+
68 34
67 33
66 32
65 31
64 30
63 29
62 28
61 27
60 26
59 25
58 24
57 23
56 22
55 21
54 20
53 19
52 18
51 17
50 16
49 15
48 14
47 13
46 12
45 11
44 10
43 9
42 8
41 7
40 6
39 5
38 4
37 3
36 2
35 1

10
OPTOIO-PCIe32STANDARD © 2015 by Messcomp Datentechnik GmbH DV07
10
OPTOIO-PCIe32STANDARD © 2015 by Messcomp Datentechnik GmbH EV08
1010
wasco®wasco®
4.1 Blockschaltbild
4. Systemkomponenten
4.1 Block diagram
4. System Components
PCIe x1
PCIe Bus
Interface
Control
Logic
+12V
16bit internal Data bus
+12V 5V
GND
68pin SCSI Jack 68pin SCSI Jack
Optocxoupler Inputs
IN00...IN31 Optocoupler Outputs
OUT00...OUT31
Board Identifikation
PCIe x1
PCIe Bus
Interface
Steuer-
Logik
+12V
16 Bit interner Datenbus
+12V 5V
GND
68polige SCSI-Buchse 68polige SCSI-Buchse
Optokopplereingänge
IN00...IN31 Optokopplerausgänge
OUT00...OUT31
Board Identifikation

11
OPTOIO-PCIe32STANDARD © 2015 by Messcomp Datentechnik GmbH DV07
11
OPTOIO-PCIe32STANDARD © 2015 by Messcomp Datentechnik GmbH EV08
1111
wasco®wasco®
4.2 Access to the system components
Access to the hardware components of the OPTOIO-PCIe32 is made by
reading and writing in Memory Mapped I/O addresses by library func-
tions. The relevant addresses for OPTOIO-PCIe32 depend on the base
address given by the BIOS. You can access to the OPTOIO-PCIe32 by
double-word access only. For reasons of compatibility the wasco drivers
process or take into account the two least signicant bytes only.
(Please nd more information in the Programming chapter or in example
programs on the supplied CD)
PCIe Bus
Interface Control
Logic
32 Bit PCIe Connector
32 Bit
internal
Data Bus
4.2 Zugriff auf die Systemkomponenten
Der Zugriff auf die Hardware-Komponenten der OPTOIO-PCIe32 erfolgt
durch das Lesen von bzw. Schreiben in Memory-Mapped I/O-Adressen
mit Hilfe von Library-Funktionen. Die für die OPTOIO-PCIe32 relevanten
Adressen ergeben sich abhängig von einer vom Bios vergebenen Basi-
sadresse. Der Zugriff auf die OPTOIO-PCIe32 erfolgt ausschließlich im
Doppel-Word-Zugriff, wobei die wasco-Treiber-Funktionen aus Kompa-
tibilitätsgründen nur die beiden niederwertigsten Bytes verarbeiten bzw.
berücksichtigen. (Hinweise hierzu nden Sie im Kapitel Programmierung
sowie in den Beispielprogrammen auf der mitgelieferten CD).
PCIe Bus
Interface Control
Logic
32 Bit PCIe Connector
32 Bit
internal
Data Bus

12
OPTOIO-PCIe32STANDARD © 2015 by Messcomp Datentechnik GmbH DV07
12
OPTOIO-PCIe32STANDARD © 2015 by Messcomp Datentechnik GmbH EV08
1212
wasco®wasco®
Die OPTOIO-PCIe32 verfügt über 32 Eingangskanäle, deren galvanische
Trennung mittels Optokoppler erreicht wird.
5.1 Pinbelegung der Eingangsoptokoppler
5. 32 Optokopplereingänge
Die OPTOIO-PCIe32STANDARD provides 32 input channels which are opti-
cally isolated by optocouplers.
5.1 Pin assignment of the input optocouplers
5. 32 Optocoupler Isolated Digital Inputs
16,14,12,10 15,13,11,9
1,3,5,7 2,4,6,8
16,14,12,10 15,13,11,9
1,3,5,7 2,4,6,8

13
OPTOIO-PCIe32STANDARD © 2015 by Messcomp Datentechnik GmbH DV07
13
OPTOIO-PCIe32STANDARD © 2015 by Messcomp Datentechnik GmbH EV08
1313
wasco®wasco®
5.2 Input voltage ranges
You can select two different input voltage ranges for each optocoupler
input by setting jumpers on JP3, JP4, JP5 and JP6
JP5 JP6
JP3 JP4
5.2 Eingangsspannungsbereiche
Durch das Setzen von Jumpern auf den Blöcken JP3, JP4, JP5 und JP6
kann für jeden Optokopplereingang zwischen zwei Eingangsspannungs-
bereichen gewählt werden.
JP5 JP6
JP3 JP4

14
OPTOIO-PCIe32STANDARD © 2015 by Messcomp Datentechnik GmbH DV07
14
OPTOIO-PCIe32STANDARD © 2015 by Messcomp Datentechnik GmbH EV08
1414
wasco®wasco®
Example:
Setting the jumper over Pin1 and Pin2 of the jumper block JP3, the input
voltage range of IN00 switches from 0..2V (Low) and 14..30V (High) to
0..1V (Low) and 5..15V (High). The remaining input voltage ranges keep
unaffected.
Following table shows the data of the two input voltage ranges:
Jumper low high
on 0...1 V 5...15 V
off 0...2 V 14...30 V
Die Daten der zwei Eingangsspannungsbereiche entnehmen Sie bitte
der folgenden Tabelle:
Jumper low high
gesetzt 0...1 V 5...15 V
nicht gesetzt 0...2 V 14...30 V
1 2
3 4
5 6
7 8
IN00
IN01
IN02
IN03
9 10
IN04
IN05
IN06
IN07
11 12
13
15
14
16
1 2
3 4
5 6
7 8
IN08
IN09
IN10
IN11
JP4
9 10
IN12
IN13
IN14
IN15
11 12
13
15
14
16
1 2
3 4
5 6
7 8
IN16
IN17
IN18
IN19
9 10
IN20
IN21
IN22
IN23
11 12
13
15
14
16
1 2
3 4
5 6
7 8
IN24
IN25
IN26
IN27
JP6
9 10
IN28
IN29
IN30
IN31
11 12
13
15
14
16
JP3 JP5
Beispiel:
Durch das Setzen eines Jumpers zwischen Pin1 und Pin2 des Jumper-
blocks JP3 wechselt der Eingangsspannungsbereich des IN00 von 0..2V
(Low) und 14..30V (High) auf 0..1V (Low) und 5..15V (High). Die rest-
lichen Eingangsspannungsbereiche bleiben unverändert.
1 2
3 4
5 6
7 8
IN00
IN01
IN02
IN03
9 10
IN04
IN05
IN06
IN07
11 12
13
15
14
16
1 2
3 4
5 6
7 8
IN08
IN09
IN10
IN11
JP4
9 10
IN12
IN13
IN14
IN15
11 12
13
15
14
16
1 2
3 4
5 6
7 8
IN16
IN17
IN18
IN19
9 10
IN20
IN21
IN22
IN23
11 12
13
15
14
16
1 2
3 4
5 6
7 8
IN24
IN25
IN26
IN27
JP6
9 10
IN28
IN29
IN30
IN31
11 12
13
15
14
16
JP3 JP5

15
OPTOIO-PCIe32STANDARD © 2015 by Messcomp Datentechnik GmbH DV07
15
OPTOIO-PCIe32STANDARD © 2015 by Messcomp Datentechnik GmbH EV08
1515
wasco®wasco®
5.3 Input circuitry
5.4 Input current
UE- 1,1V
3400Ω
IE ≈ (Jumper off)
UE- 1,1V
1000Ω
IE ≈ (Jumper on)
Optocoupler
Jumper
IN.. +
IN.. -
1K 2K4
UEProtection
Diode
5.3 Eingangsbeschaltung
5.4 Eingangsstrom
UE- 1,1V
3400Ω
IE ≈ (Jumper nicht gesetzt)
UE- 1,1V
1000Ω
IE ≈ (Jumper gesetzt)
Optokoppler
Jumper
IN.. +
IN.. -
1K 2K4
UESchutzdiode

16
OPTOIO-PCIe32STANDARD © 2015 by Messcomp Datentechnik GmbH DV07
16
OPTOIO-PCIe32STANDARD © 2015 by Messcomp Datentechnik GmbH EV08
1616
wasco®wasco®
DieOPTOIO-PCIe32verfügt über32Ausgangskanäle,derengalvanische
Trennung ebenfalls mittels Optokoppler erreicht wird.
6.1 Pinbelegung der Ausgangsoptokoppler
6. 32 Optokopplerausgänge
Die OPTOIO-PCIe32 provides 32 output channels, which are optically
isolated by optocouplers.
6.2 Optocoupler specications
Voltage collector-emitter: max. 50V
Voltage emitter-collector: 0,1V
Current collector-emitter: 150 mA
6.1 Pin assignment of the output optocouplers
6. 32 Optically Isolated Outputs
1
2
4
3
6.3 Output circuitry
OUT..+
OUT..-
Schutzdiode
Optocoupler
6.2 Optokopplerdaten
Spannung-CE: max. 50V
Spannung-EC: 0,1V
Strom-CE: 150 mA
1
2
4
3
6.3 Ausgangsbeschaltung
OUT..+
OUT..-
Schutzdiode
Optokoppler

17
OPTOIO-PCIe32STANDARD © 2015 by Messcomp Datentechnik GmbH DV07
17
OPTOIO-PCIe32STANDARD © 2015 by Messcomp Datentechnik GmbH EV08
1717
wasco®wasco®
7. Board Conguration
JP1
1 2 3 4 5
0 1 2 3 4
Jumper
Bit
The board Identication enables you to dif-
ferentiate between several PC boards of the
same type in your system. This is realised by
a software readable jumper block.
The board identication to be read consists of one Byte (16 Bit) and is
structured as follows:
„x“ corresponds to „1“, if the Jumper is closed, otherwise „0“
Calling the reading command you can read out the setting of the jumper
block JP1. Not used bits are basically „0“, a set or closed jumper will be
read as „1“ .
For example:
(Jumper 1 and 3 closed)
Result of the reading command: $05
JP1
7. Board-Konguration
JP1
1 2 3 4 5
0 1 2 3 4
Jumper
Bit
Die Board-Identikation dient zur Unterschei-
dung mehrerer PC-Karten gleichen Typs im
Computer. Sie erfolgt durch einen Jumper-
block, welcher per Software gelesen werden
kann.
Die zu lesende Board-Identikation besteht aus einem Wort (16 Bit) und
ist wie folgt aufgebaut:
„x“ entspricht „1“, wenn der Jumper gesetzt ist, sonst „0“
Mittels des Lesebefehls kann die Jumperstellung des Jumperblocks JP1
ausgelesen werden. Die nicht benützten Bits sind grundsätzlich „0“, ein
gesetzter Jumper wird als „1“ gelesen.
Z.B.
(Jumper 1 und 3 gesetzt)
Ergebnis des Lesebefehls: $05
JP1
Bit 31....876543210
Jumper 54321
Board ID Register 0 0 0 0 0 0 0 x x x x x
Bit 31....876543210
Jumper 54321
Board ID Register 0 0 0 0 0 0 0 x x x x x
7.1 Board-Identikation
7.1 Board Identication

18
OPTOIO-PCIe32STANDARD © 2015 by Messcomp Datentechnik GmbH DV07
18
OPTOIO-PCIe32STANDARD © 2015 by Messcomp Datentechnik GmbH EV08
1818
wasco®wasco®
7.2 Access with 16 or 32 Bit
The jumper block JP1/1-2 enables you to set the data width of the
access.
If the jumper block JP1/1-2 is not set (Default) the card works in compati-
bility mode. In this mode the card is accessed in 16-bit mode.Additionally,
the offset addresses of the PCI card OPTOIO-PCI32STANDARD are valid with
the factor 2.
If the jumper is set, the card works in 32-Bit mode and it is compatible with
other PCIe boards in offset addressing.
The offset addresses of the two modes are covered in chapter 8.5
„Assignment of the Memory-Mapped I/O Addresses“.
JP10
2 4 6 8 10
1 3 5 7 9
Jumper
JP10
2 4 6 8 10
1 3 5 7 9
Jumper
16-Bit mode 32-Bit mode
7.2 Zugriff mit 16 oder 32 Bit
Mit Hilfe des Jumperblocks JP1/1-2 kann die Zugriffs-Datenbreite einge-
stellt werden.
Ist der Jumperblock JP1/1-2 nicht gesetzt (Default), so funktioniert die
Karte im Kompatibilitätsmodus. In diesem Modus wird im 16-Bit-Modus
aufdieKartezugegriffen.ZudemgeltendieOffset-AdressenderPCI-Karte
OPTOIO-PCI32STANDARD mit dem Faktor 2.
Ist der Jumper gesetzt, so funktioniert die Karte im 32-Bit-Modus und ist
bei der Offset-Adressierung kompatibel mit anderen PCIe-Karten.
Die Offset-Adressen der beiden Modi sind im Kapitel 8.5 „Zuordnung der
Memory-Mapped I/O-Adressen“ beschrieben.
JP2
2 4 6 8 10
1 3 5 7 9
Jumper
JP2
2 4 6 8 10
1 3 5 7 9
Jumper
16-Bit-Modus 32-Bit-Modus

19
OPTOIO-PCIe32STANDARD © 2015 by Messcomp Datentechnik GmbH DV07
19
OPTOIO-PCIe32STANDARD © 2015 by Messcomp Datentechnik GmbH EV08
1919
wasco®wasco®
8. Windows® Programming
8.1 Installation of the Windows®driver
To apply the card under Windows®, a special driver has to be installed,
which enables access to the card.
After starting-up Windows®10, 8 und 7 your operating system automati-
cally registers a new hardware device to be found. In this case insert the
data medium and advise your system to install the driver les therefrom.
If the operating system does not react it is possible to install the drivers
in the device manager.
8.2 Installation of the Windows® development les
To install Windows® development les please run setup.exe in the di-
rectory „Treiber“ on the enclosed CD and then follow installation instruc-
tions.
8. Programmierung unter Windows®
8.1 Installation des Windows®Treibers
Für die Anwendung der Karte unter Windows®ist es notwendig, einen
speziellen Treiber zu installieren, der den Zugriff auf die Karte ermöglicht.
Unter Windows®10, 8 und 7 meldet das Betriebssystem selbständig nach
dem Einschalten des PCs, dass eine neue Hardware-Komponente ge-
funden wurde. In diesem Fall legen Sie den Datenträger ein und weisen
das System an, von diesem die Treiber-Dateien zu installieren. Sollte sich
das Betriebssystem nicht melden, kann der Treiber auch im Gerätemana-
ger installiert werden.
8.2 Installation der Windows®Entwicklungsdateien
Zur Installation der Windows®Entwicklungsdateien führen Sie bitte die
Datei "Setup.exe" im Ordner Treiber auf der mitgelieferten CD aus und
folgen Sie den Installationsanweisungen.

20
OPTOIO-PCIe32STANDARD © 2015 by Messcomp Datentechnik GmbH DV07
20
OPTOIO-PCIe32STANDARD © 2015 by Messcomp Datentechnik GmbH EV08
2020
wasco®wasco®
Having installed driver software and development les completely, your
system control panel shows an icon for the localisation of all wasco®PCI
and PCIe cards existing in the system.
Wurden die Treiber- und Entwicklungsdateien vollständig installiert, n-
den Sie in der Systemsteuerung Ihres Rechners ein Icon zur Lokalisie-
rung aller im System vorhandenen wasco®PCI- und PCIe-Karten.
Table of contents
Other Wasco PCI Card manuals