Wassermann HSS-99 User manual

Trimmer HSS-99 and HSS-88
Orthodontic Accessories
For Bite Orientated Trimming of Plaster Jaw Models
USER MA UAL

Dear customer,
Thank you for choosing a product from the Wassermann range. Wassermann Dental-
Maschinen incorporates the highest standards of quality and the latest technology.
In order to enjoy maximum performance and years of trouble-free operation, please read
this user manual carefully before you connect this device and start work, and operate the
device according to the recommended guidelines. The operation safety and the
functionality of this device can only be guaranteed if you follow both the general safety
guidelines and the applying laws to prevent accidents as well as the precautions given in
this user manual. We are not liable for any damages which occur due to inappropriate
usage or faulty operation of this device.
Make sure that anyone using this device has read and understood this user
manual.
Keep this user manual in a safe place where it can be referred to as required at
any time.
The unit complies with the relevant EU guidelines.
The unit is subject to the EU guidelines 2012/19/EU (WEEE Directive).
Company address:
Wassermann Dental-Maschinen GmbH
Rudorffweg 15-17
21031 Hamburg, Germany
Phone : +49 (0)40 730 926 -20/ -24 Fax.: +49 (0)40 730 37 24
www.wassermann.hamburg
Erstellt: 20.11.18/ msc Version: 1 164130 / 168140 / 164110 / 168120
.

Contents
1 Features.......................................................................................................................................4
1.1 Orthodontic Model Table.................................................................................................................4
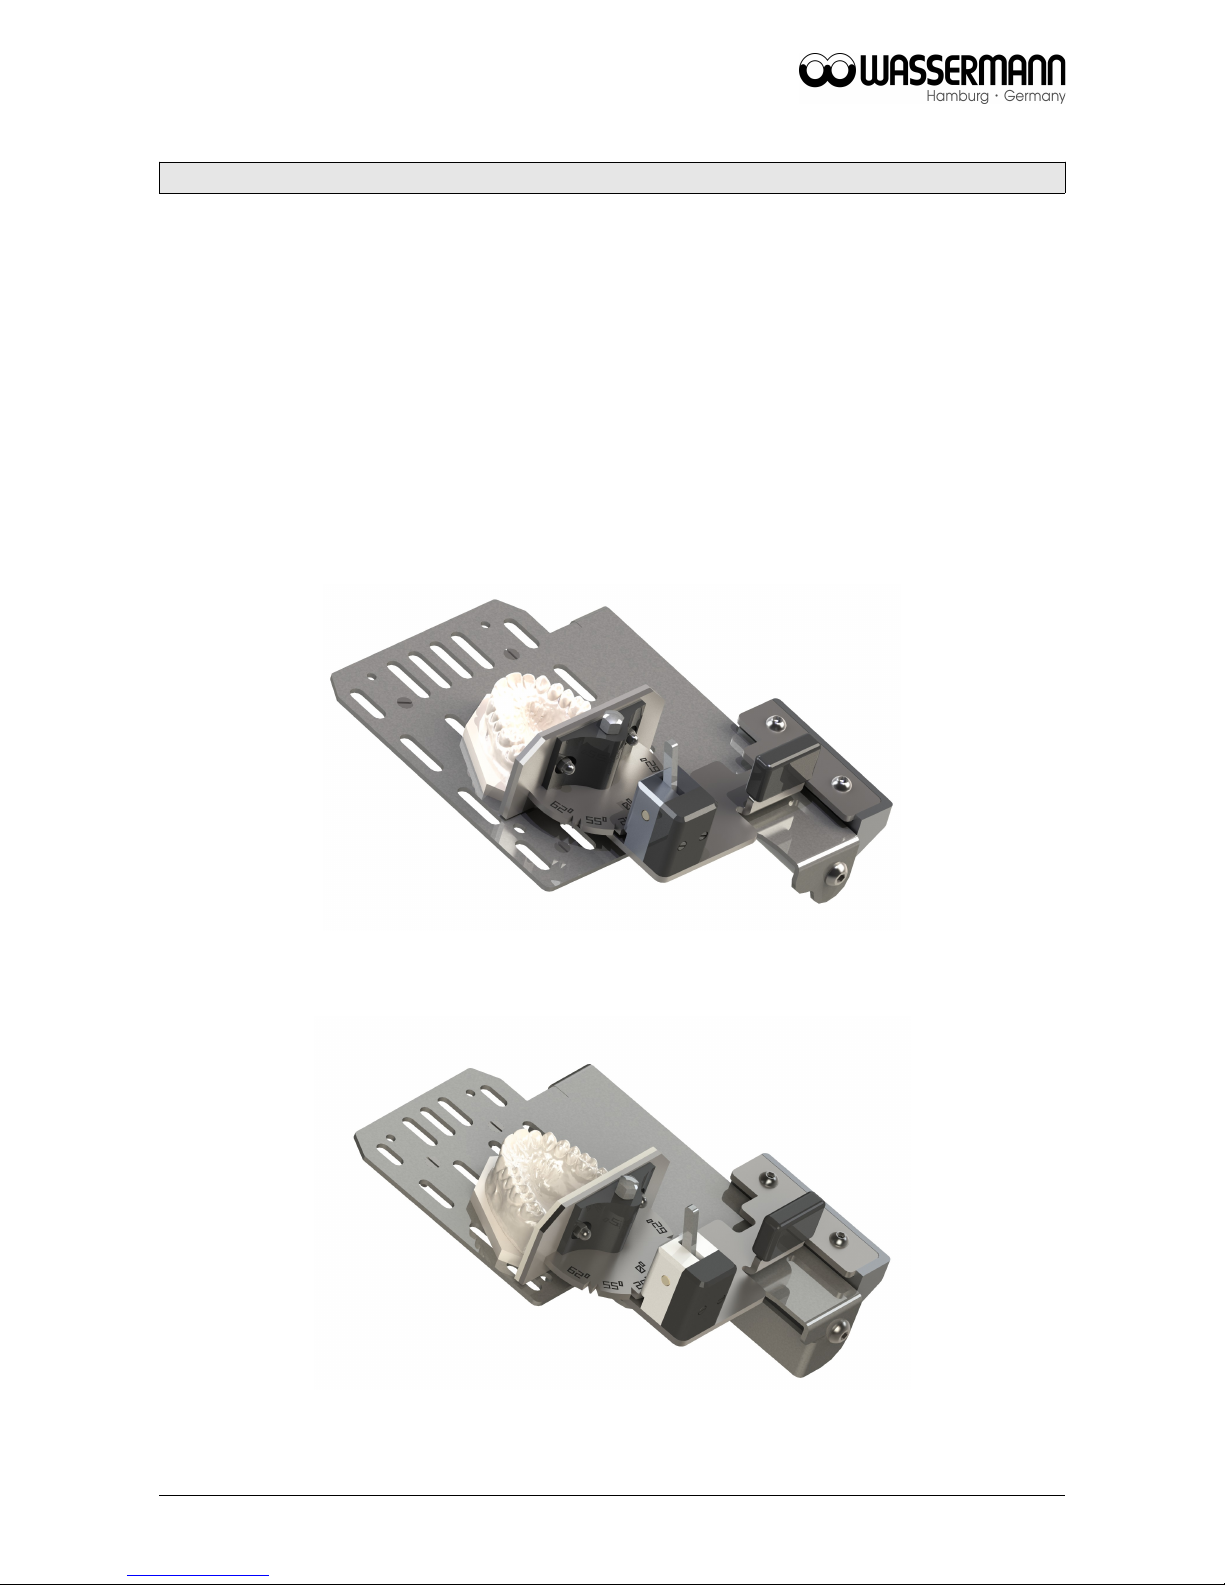
1.1.1 Figure HSS-99 Model Table KMS according to Begg (Item no. 164130).......................................4
1.1.2 Figure HSS-88 Model Table KMS according to Begg (Item no. 168140).......................................4
1.2 Laser Light Guide for Orthodontic Model Table..............................................................................5
1.2.1 Figure HSS-99 Laser Light Guide for Model Table (Item no. 164110)...........................................5
1.2.2 Figure HSS-88 Laser Light Guide for Model Table (Item no. 168120)...........................................5
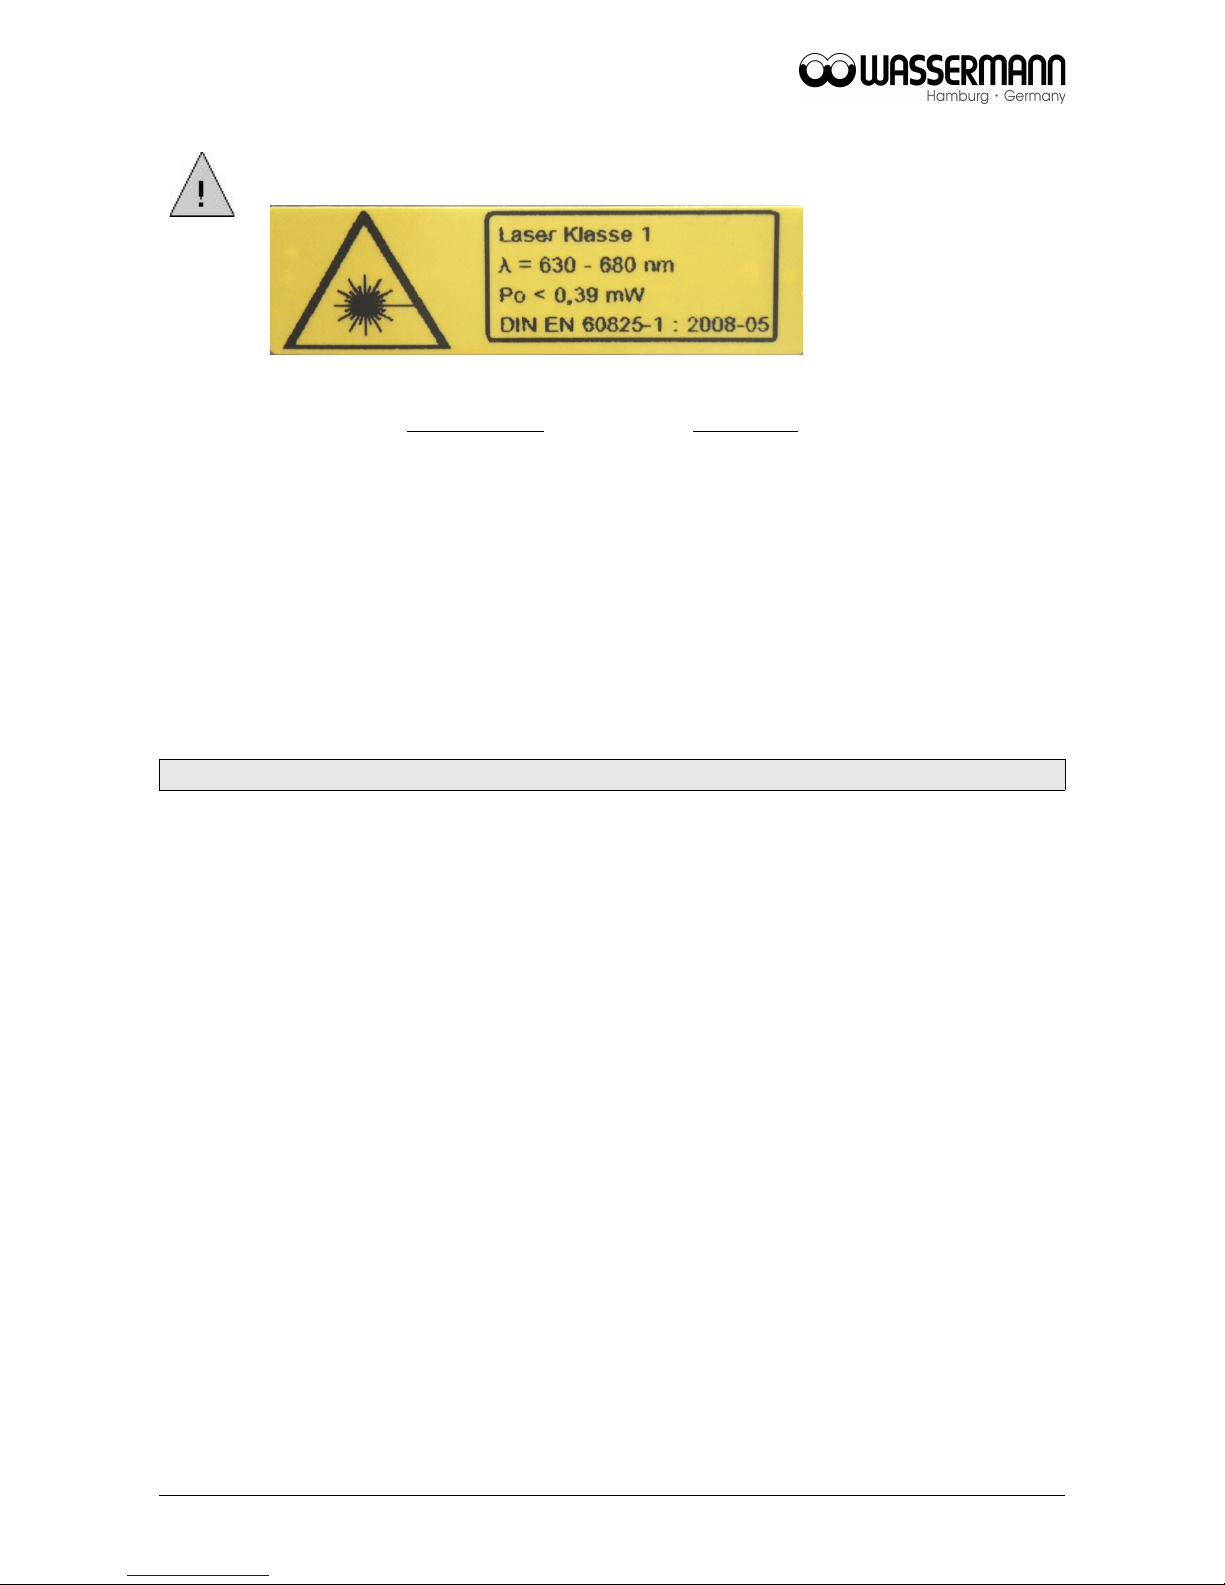
2 Safety Symbols used in this Manual.............................................................................................6
3 Safety Guidelines.........................................................................................................................6
4 Responsibility for Operation or Damage.......................................................................................7
5 Application....................................................................................................................................8
6 Before Starting............................................................................................................................. 9
6.1 Transport.........................................................................................................................................9
6.2 Storage............................................................................................................................................9
6.3 Installation of a Trimmer with Orthodontic Accessories Mounted...................................................9
7 Installation/ Start-up....................................................................................................................10
8 Operation................................................................................................................................... 10
8.1 General Operating Instructions.....................................................................................................10
8.2 Grinding Process...........................................................................................................................11
8.2.1 Important Advice Concerning the Usage of the Orthodontic Model Table....................................11
8.2.2 Usage of the Orthodontic Accessories.........................................................................................11
8.3 Adjustment of the Laser Light Guide.............................................................................................12
9 Troubleshooting.......................................................................................................................... 13
10 Care and Maintenance............................................................................................................. 13
10.1 Cleaning......................................................................................................................................13
10.1.1 Cleaning Instructions for the Orthodontic Model Table...............................................................14
10.2 Maintenance................................................................................................................................15
10.3 Repairs........................................................................................................................................15
10.4 Spare Parts.................................................................................................................................15
10.5 Service Hotline 0049 (0)40 730 926 -20/ -24..............................................................................15
10.6 Installation of Rep-Set LED (Item no. 164132)...........................................................................15
10.7 Installation of Rep-Set Laser (Item no. 164134).........................................................................15
10.8 Scope of Delivery/ Accessories...................................................................................................16
10.9 Warranty......................................................................................................................................16
11 Technical Data......................................................................................................................... 17
12 Disposing of the Unit................................................................................................................17
12.1 Information on Disposal for Countries within the EU..................................................................17
13 EU Declaration of Conformity...................................................................................................18

1 Features
1.1 Orthodontic Model Table
•All parts that come into contact with water are made of stainless steel.
•The seals are made of the latest generation of composite materials.
•The working surface with solid bearing is partially polished and has large slits to
allow the water to flow through to avoid the models sticking during grinding.
•The angle limit stop (Fig. page 8) is easily pivoted away.
1.1.1 Figure H -99 Model Table KM according to Begg (Item no. 164130)
1.1.2 Figure H -88 Model Table KM according to Begg (Item no. 168140)
4

1.2 Laser Light Guide for Orthodontic Model Table
•Laser class 1
•Combination of daylight LED and laser, precise and discreet, without glare or
reflections
•The user can adjust the guide light himself at any time.
•Due to the electrical connections, the installation of the guide light is performed by
our Wassermann Service or one of our licensed specialist companies.
1.2.1 Figure H -99 Laser Light Guide for Model Table (Item no. 164110)
1.2.2 Figure H -88 Laser Light Guide for Model Table (Item no. 168120)
5

2 afety ymbols used in this Manual
Warning!
This is a warning of risk situations and dangers.
Failure to observe this warning could be life-threatening. These warnings has to
be observed.
Information!
This symbol draws your attention to specific features that has to be observed.
3 afety Guidelines
Configuring and operating this equipment requires precise knowledge and observance
of the instructions in this user manual. The equipment is designed only for its intended
application.
WARNING:
Servicing and repairs should be carried out only by authorised specialists.
Disconnect the power plug before starting any maintenance work.
Make sure that the equipment is connected to the correct power source.
The user can adjust the laser light guide himself at any time. Due to the electrical
connections, the installation of the laser light guide is performed by our
Wassermann Service or one of our licensed specialist companies.
6

Laser class 1
•Please do not point the laser beam at people!
Even class 1 lasers should not be pointed at people, since the glare may
result in accidents.
•Do not look at the direct or reflected beam.
•Manipulations (modifications) to the laser equipment are not permitted.
•This operating manual should be kept carefully and handed over along
with the laser equipment.
4 Responsibility for Operation or Damage
The responsibility for operating the equipment lies exclusively with the owner or user if
said equipment is incorrectly serviced, maintained or altered by persons not employed by
an authorised dealer or if the equipment is used in a manner contrary to its specified
purpose.
The orthodontic accessories has to be maintained and operated in accordance with this
user manual. Wassermann Dental-Maschinen GmbH is not responsible for damage arising
from the nonobservance of these instructions.
Warranty and responsibility provisions contained in the sales and supply conditions of
Wassermann Dental-Maschinen GmbH are not extended by these instructions.
7

5 Application
Jaw models which are precisely prepared by the dental technician give the orthodontist the
basis for the necessary therapy. The requested task, a rational and accurate method of
producing plaster models is fully possible with the grinding equipment and the directional
lamp which belongs to it.
An exact line is projected on the grinding platform by the lamp. Exactly coordinated
combination of daylight-LED and laser ensure unparalleled sharp contours. The laser
beam is precise and not too hard at the same time.
Consequently, it is possible to exactly grind the tuber level of the upper jaw by aligning the
Raphe-Median-Line to the ghost line (Fig. 1).
The angle limit stop is pivoted away (Fig. 2).
Fig. 1
Fig. 2
Only use the accessories for this type of application.
The accessories for producing 3D orthodontic models are available for the trimmer
HSS-99 and HSS-88. Even subsequent upgrade is possible without any problems.
8

6 Before tarting
6.1 Transport
Before transporting the unit/laser light guide, ensure that it has been unplugged from the
power socket. Make sure that it is packed correctly in order to avoid accidental damage.
Be sure to check for any transport damage when unpacking the goods. ote down
any damage if found.
6.2 torage
The location is very important when it comes to workplace safety, even if it is only to be set
up there for a short period. The room should be dry, well ventilated and vibration-free. An
even temperature and wooden supports also help.
The unit/accessories should not be stored or set up outdoors.
If the unit/accessories is to be stored for an extended period, protect it from moisture and
dust.
6.3 Installation of a Trimmer with Orthodontic Accessories Mounted
ever use tray or illumination fitting for lifting out!
Open the box, remove the packing materials, and carefully lift out the device and
orthodontic accessories. Check the included accessories.
The device has to stand horizontally on a steady and even surface. Install
the device in a place where it will not block the working area and the functionality
(take the dimensions into account). When you set up the unit, make sure that the
grinding disc is accessible and that the unit is near a sink or close to the plaster
separator.
Do not install the unit and the accessories outdoors or in places without proper
ventilation. Before start-up, be sure the device reaches room temperature.
9

7 Installation/ tart-up
For further information please see the manual of your trimmer HSS-99 or HSS-88*.
Finally, insert the power plug into the socket, making sure that the mains and the
unit operate on the same voltage.
8 Operation
8.1 General Operating Instructions
All instructions for using the unit/ orthodontic accessories, whether in verbal or written
form, are based on our own experience and experimentation and can only be regarded as
guidelines.
A detailed description can be found in the application flyer* (included in delivery).
*If these instructions are not available, please do not hesitate to contact us.
A PDF file for download is available on our homepage:
www.wassermann.hamburg
Fig.: Flyer „HSS-99 and HSS-88 for Orthodontics .
10

8.2 Grinding Process
8.2.1 Important Advice Concerning the Usage of the Orthodontic Model Table
Use the right hand to move the model table back and forth with moderate
pressure.
8.2.2 Usage of the Orthodontic Accessories
The light shines immediatly if the trimmer is switched on by the rotary switch.
After you switch the trimmer on, wait a few seconds for the motor to come up to
speed. Only then can you use its full power. ever push on the models so hard that
the motor labours. This could overload it and cause possible damage.
•Mark the Raphe-Median-Line with a pencil and lay the model with the ground base
onto the working surface.
•Move it towards the trimmer disc so that the ghost line and the Raphe-Median-Line
mark correspond (p. 8, Fig. 1).
•When required dorsal limit is reached the grinding process is completed.
11

8.3 Adjustment of the Laser Light Guide
The user can adjust the guide light himself at any time.
Remove the 2 recessed head screws (A).
Remove the cover plate (B).
Remove the key for the adjustment (C, Item no. 164101).
This key fits the adjustment ring of the laser guide light exactly, so that the laser
diode can now be adjusted by turning the key (Fig. 5).
Then place the key (C) back in the guide light and fix the cover plate (B) with the 2
screws (A).
12
AB
C
D
E
F
Fig. 4 Fig. 5
Plug Rep-Set LED Plug Rep-Set Laser
Fig.6

9 Troubleshooting
Fault Cause olution
o free movement of
the slider or the
angular adjustment
Dirt Please see
9.1.1 Cleaning instructions for the model table
o laserlight ote for service technicians:
Please check the power supply voltage
(approx. 11.8 V at idle speed).
Power supply
defective
If the power supply voltage at idle speed deviates
clearly from 11.8 V, the power supply is probably
defective.
Please contact our Service hotline
0049 (0)40 / 730 92 6-0
Laser defective If the power supply voltage at idle speed is
approx. 11.8 V, the laser is probably defective,
please see 9.6
Installation of Rep-Set Laser (Item no. 164134)
If the above recommendations do not solve the problem, contact your dental depot
or our service department.
10 Care and Maintenance
10.1 Cleaning
Disconnect the power plug before starting any maintenance work.
The identification plate of the trimmer has always to be kept in easily legible
condition and has not to be removed.
Remove external dirt (caustic traces of plaster) from time to time with some form of
cold cleaner.
Use only cold cleaners to avoid damaging the paintwork or removing the lettering.
The equipment should be cleaned at regular intervals to ensure trouble-free
operation.
It requires only normal cleaning (sponge, damp cloth, mild detergent) and no further
chemical additives.
13

10.1.1 Cleaning Instructions for the Orthodontic Model Table
•If the free movement of the slide or the angular adjustment is not working properly,
please clean the Orthodontic Model Table.
•Use water and a clean cloth only!
•Do not use any kind of grease or oils to lubricate the moving parts!
•For cleaning the model table please unmount the screw (C) and move the washer
(D) downwards. To remove the slider (E) pull it forward and then downward.
•Please only use a suitable tool (drift pin) to remove the slider bearings (F).
•Take care that you don´t scratch the surface while drive out the bearings from the
backside.
•After unmounting the bearings (F), clean all parts and reassemble the model table.
•Test the function of the slider and check the bearings for excessive play.
•If necessary, replace the bearings (F).
•For cleaning the angular adjustment, please unscrew (B) and clean the small lever
and the spring (A).
14

10.2 Maintenance
The orthodontic accessories do not require any servicing. Just make sure that thea are
kept clean (Please see 9.1).
10.3 Repairs
Servicing or repairs to the unit/orthodontic accessories has only to be carried out
by qualified technicians. Only original spare parts are to be used. Responsibility
for the product is voided if unauthorised persons alter it or if inappropriate
components are installed.
10.4 pare Parts
If necessary please contact our service hotline phone.
10.5 ervice Hotline 0049 (0)40 730 926 -20/ -24
10.6 Installation of Rep- et LED (Item no. 164132)
Open the guide light as described under 2.6 (see P. 9 Fig. 4)
Press and remove the lamp protection (F) carefully from above, e.g. with the help of
a screw driver.
ow remove both the recessed head screws (D).
Change Rep-Set LED (Plug, see P. 9 Fig. 6).
Fix with both recessed head screws (D).
Press the lamp protection carefully from below till it snaps in again.
Finally fix the cover plate (B) with the 2 screws (A).
10.7 Installation of Rep- et Laser (Item no. 164134)
Open the guide light as described under 2.6 (see P. 9 Fig. 4)
Replace the Rep-Set Laser (Plug, see P. 9 Fig. 6).
Finally fix the cover plate (B) with the 2 screws (A).
15

10.8 cope of Delivery/ Accessories
Included parts Item no.
HSS-99 Orthodontic Model Table KMS according to Begg 164130
HSS-88 Orthodontic Model Table KMS according to Begg 168140
Laser Light Guide for Orthodontic Model Table HSS-99 164110
Laser Light Guide for Orthodontic Model Table HSS-88 168120
Accessories/ pare parts Item no.
Rep-Set Laser 164134
Rep-Set LED 164132
Key for the adjustment of the lamp 164101
10.9 Warranty
The warranty period for our equipment is 12 months. If faults occur within the
warranty period, contact your dental depot or get in touch directly with our service
department.
Your equipment should only be operated in perfect condition. If faults occur which
could harm operators or third parties, the orthodontic accessories should not be
used until it has been fixed.
This warranty does not cover damage caused by improper use, external mechanical
causes, transport damage or interference with the orthodontic accessories by
unauthorized persons.
16

11 Technical Data
Laser Light Guide for Orthodontic Model Table HSS-99 – Item no. 164110
Laser Light Guide for Orthodontic Model Table HSS-88 – Item no. 168120*
Dimensions (W x H x D)
HSS-99 without power pack
HSS-88 without power pack, without deposit table*
46 x 311 x 175 mm
Weight 1,33 kg/ 2,38 kg*
Voltage 100 – 240 VAC
Output 18 W
Power consumtion ~ 0,33 A
Safety class 1
The noise level of the lamp amounts to ≤ 70 dB (A).
Technical changes reserved.
12 Disposing of the Unit
The unit has to be disposed by an authorized recycling operation. The selected company
has to be informed of all possibly health-hazardous residues in the unit.
12.1 Information on Disposal for Countries within the EU
To conserve and protect the environment, prevent environmental pollution and
improve the recycling of raw materials, the European Commission adopted a
directive that requires the manufacturer to accept the return of electrical
and electronic units for proper disposal or recycling.
Within the European Union units with this symbol should not therefore be disposed of
in unsorted domestic waste.
For more information regarding proper disposal please apply at your local authoritie.
17

13 EU Declaration of Conformity
in accordance with 2014/35/EU (Low Voltage Directive) and 2014/30/EU (Electromagnetic
Compatibility Directive) and 2006/42/EC (Machinery Directive) and 2011/65/EU (RoHS
Directive)
Manufacturer: W A S S E R M A
Dental-Maschinen GmbH
Rudorffweg 15-17
21031 Hamburg
Germany
Product description: Directional Lamp
for dental
applications
Model: Directional lamp laser cpl. HSS-99
Directional lamp laser cpl. HSS-88
Item no. 164110
Item no. 168120
Applicable
standards:
DI E 61010-1
DI E 61000-6-3
DI E 61000-6-1
DI E 60335-1
DI E 60825-1
Hiermit wird bestätigt, dass die oben bezeichnete Maschine den genannten EU-Richtlinien
entspricht. Diese Erklärung wird ungültig, falls die Maschine ohne unsere Zustimmung
verändert wird.
This is to confirm that the above mentioned machine complies with the described EU
guidelines. This declaration becomes invalid if the machine is modified without our
approval.
Cette machine est conforme aux normes en vigueur d´Union européenne. Cet avis est
nul et non avenant si cette machine est modifiée sans notre accord.
Esta máquina, anteriormente mencionada, cumple con los limites requeridos por el
reglamento UE. Ahora bien, esta declaración quedará invalidada en caso de realizar
modificaciones al aparato sin nuestra aprobación.
Hiermee wordt bevestigd dat bovengenoemde machine voldoet aan de voorgeschreven
EU normen. Deze verklaring verliest geldigheid als er zonder onze uitdrukkelijke
toestemming wijzigen aan de machine worden aangebracht.
Place, date: Hamburg, 2018-11-20 Company stamp:
Signature : ________________________
Wilfried Wassermann
(Managing Director)
18

otes:
19

Other manuals for HSS-99
2
This manual suits for next models
1
Table of contents
Other Wassermann Trimmer manuals