5
LCD Display Panel (cont.)
Sensor Information is displayed as follows:
Wind Current speed and direction,
Maximum gust during last
interval
Rain Total since logger was launched
and cumulative since reset
RH,
Air Temperature
Current value, Maximum and
minimum since midnight (time
stamp included with max and
min values)
Solar Radiation ,
WindChill, Dew Pt.
Current value
Evapotranspiration
(available on 900ET
station only)
Total from last 24 hour
period - updated every hour
External Sensors
(see pg. 5)
Current value
Hi-Lo/Reset Key
The Hi-Lo/Reset is used for viewing time-stamped maximum and minimum
values for air temperature and relative humidity, resetting the cumulative
rainfall and calibrating the wind direction. Before
using the Hi-Lo/Reset button , be sure the parameter of interest is displayed
on the console. Maximum and minimum values are automatically reset at
midnight
To reset the cumulative rainfall reading to zero, press and hold the Hi-Lo/
Reset button until you hear a steady series of beeps.
To view maximum/minimum values for RH or air temperature, press and
release the Hi-Lo/Reset button.
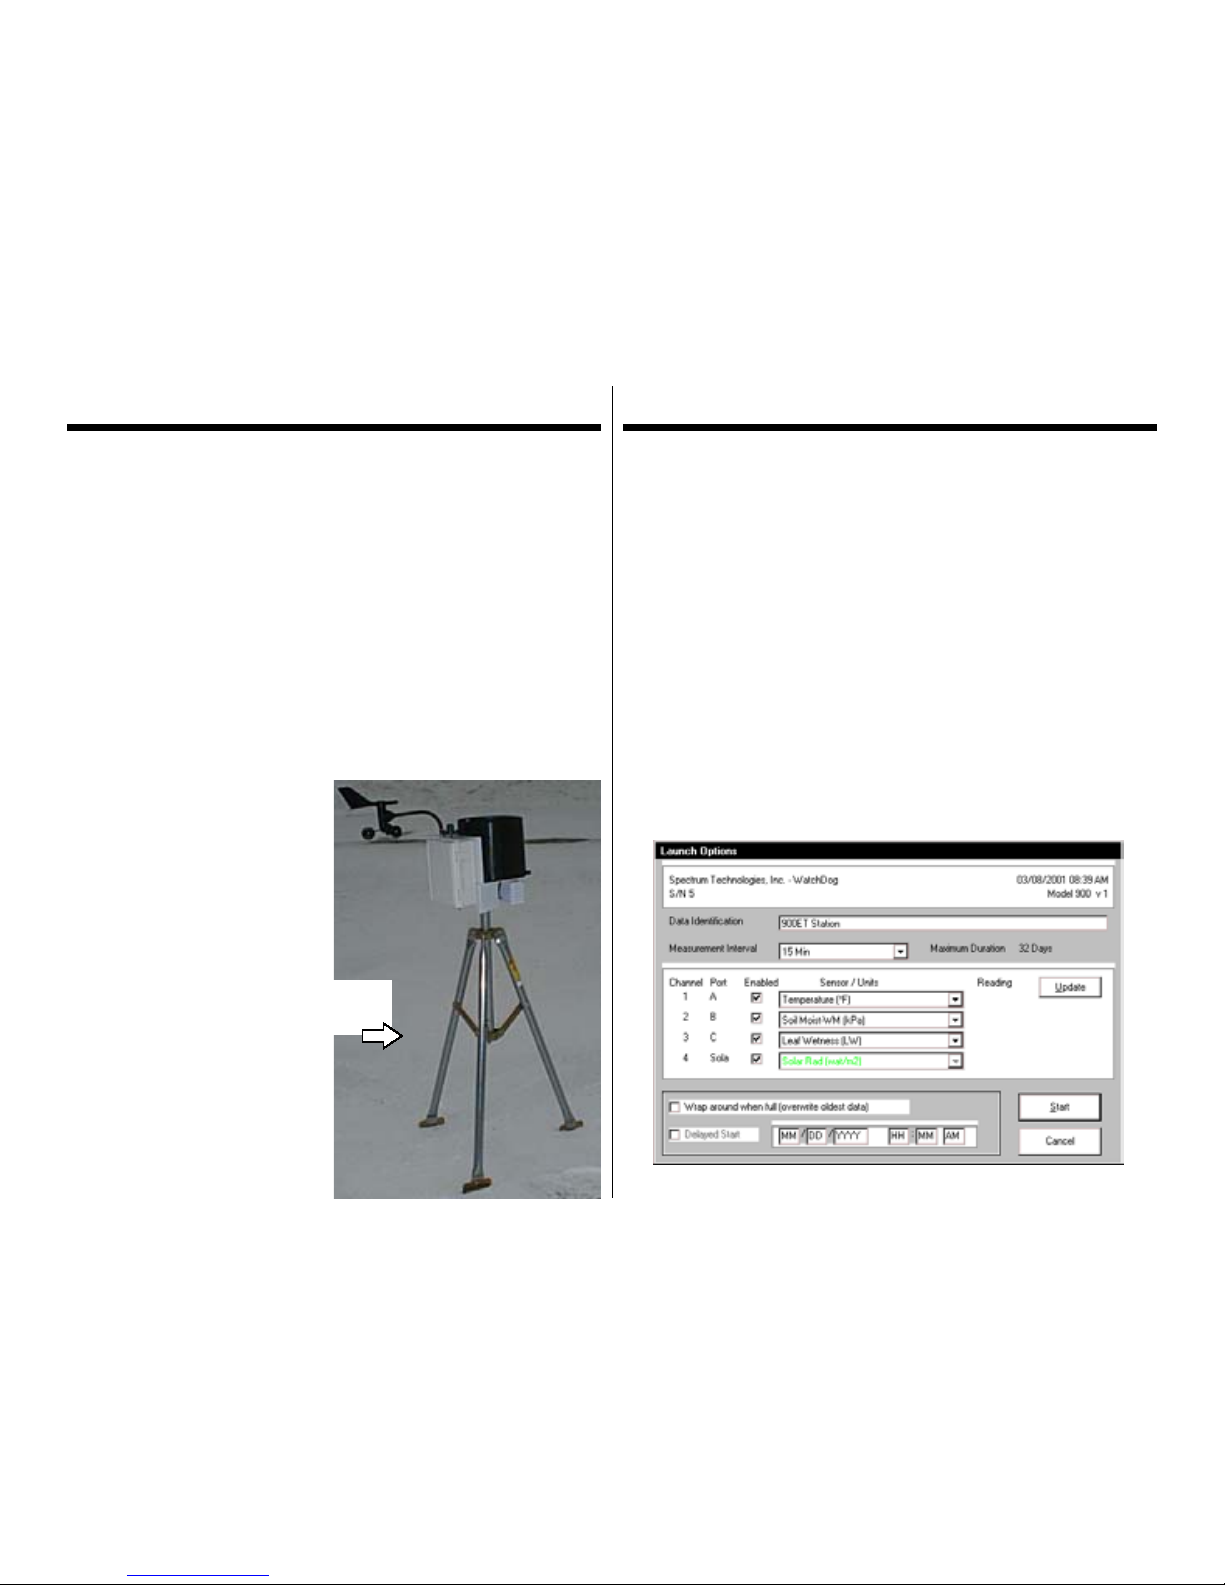
Connecting to Computer
Remotely Located Stations
If you are using the WatchDog Data Shuttle (item # 3679) to interface
with your weather station, the weather station’s datalogger must be
launched by a PC before being installed in the field or if changes
(station name, measurement interval or external sensors) need to be
made in the logger configuration. Routine download/launch
operations can be carried out with a laptop computer or the Shuttle.
Refer to the SpecWare Software User’s Guide for complete
instructions on launching and downloading the WatchDog loggers.
When launching or downloading data, connect the station to a
computer using the data transmission cable. This cable is included
with the SpecWare software package. The data cable connects to an
available serial port on your personal computer and the port labeled
“computer” on the station.
For remotely located weather stations, the only time you must have
the WatchDog connected to the computer is during the launching and
downloading of the station.
If the computer will not connect with the station, you may need to
change the batteries or change the com port settings. Refer to the
Battery Replacement section on page 15 for battery instructions.
Direct PC Connection
It is possible to connect you weather station directly to you computer.
Adirect PC connection cable allows you to monitor the weather
station’s current weather conditions and perform launch and download
operations from an office PC.
With the 6 ft. cable, connect the serial pin to the port labeled
“computer” and the 9-pin female connector to the computer data port.