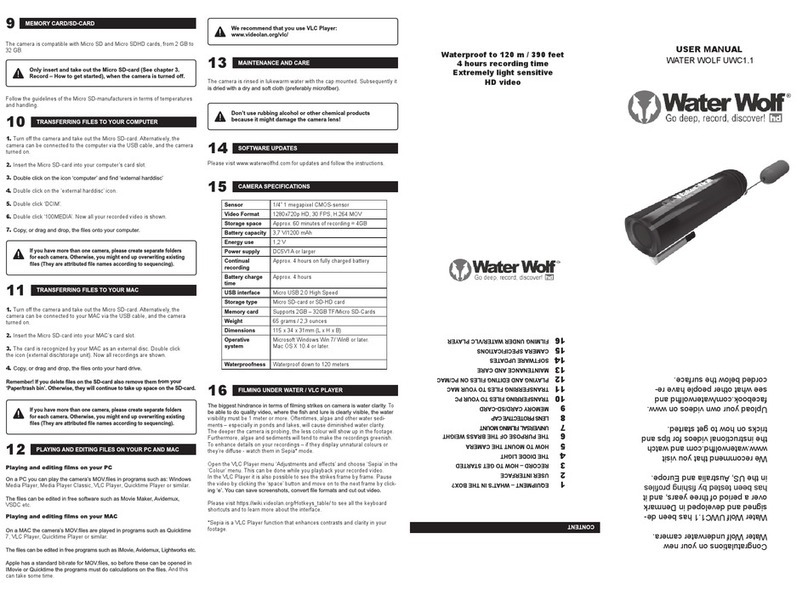
WATER WOLF UWC1.0 User manual

USER MANUAL
WATER WOLF UWC1.0
WATERPROOF TO 100 M / 330 FEET
4 HOURS RECORDING TIME
EXTREMELY LIGHT SENSITIVE
HD VIDEO
hd

2
hd
USER MANUAL
WATER WOLF UWC1.0
www.waterwolfhd.com
/waterwolfhd
Congratulations on your new Water Wolf underwater camera.
Water Wolf UWC1 has been designed and developed in Denmark
over a period of three years, and it has been tested by shing proles
in the US, Australia and Europe.
We recommend that you visit www.waterwolfhd.com and watch the
instructional videos for tips and tricks on how to get started.
Upload your own videos on www.facebook.com/waterwolfhd and see
what other people have recorded below the surface.
Congratulations!
/waterwolfhd

3
hd
USER MANUAL
WATER WOLF UWC1.0
www.waterwolfhd.com
/waterwolfhd
1EQUIPMENT – WHAT’S IN THE BOX? PAGE 4
2USER INTERFACE PAGE 4
3RECORD – HOW TO GET STARTED PAGE 4
4THE DIODE LIGHT PAGE 4
5HOW TO MOUNT THE CAMERA PAGE 5
6THE PURPOSE OF THE BRASS WEIGHT PAGE 6
7ATTACHING THE NEOPRENE SLEEVE PAGE 6
8MEMORY CARD/SD-CARD PAGE 7
9TRANSFERRING FILES TO YOUR PC PAGE 7
10 TRANSFERRING FILES TO YOUR MAC PAGE 7
11 PLAYING AND EDITING FILES ON PC/MAC PAGE 7
12 MAINTENANCE AND CARE PAGE 7
13 SOFTWARE UPDATES PAGE 7
14 CAMERA SPECIFICATIONS PAGE 8
15 FILMING UNDER WATER/VLC PLAYER PAGE 8
CONTENT

4
hd
USER MANUAL
WATER WOLF UWC1.0
www.waterwolfhd.com
/waterwolfhd
USER INTERFACE
2
The camera’s user interface is found by removing the camera house cap.
This is done by pushing a piece of string through the cap hole and pulling it.
Or wiggle the cap back and forth by hand, and pull it. With a bit of practice this
becomes easy.
EQUIPMENT – WHAT’S IN THE BOX?
1
1. Camera house
2. Line tube
3. Float
4. Cap
5. Charger cable
6. Neoprene sleeve
7. Brass weights 3 psc.
Do not try to pull off the cap by using tools such as screw
drivers or knifes.
2
3
4
5
1. On/off light
2. Micro USB-port
3. On/off button
4. Micro SD-card slot
5. Guide for line tube
1
1.
2.
3.
6.
7.
5.
4.
Before using the camera the rst time:
2. Place the Micro SD-card or Micro SDHD-card (preferably Class 10) in the
Micro SD-slot (4). The label should face down and the small end of the card
should face forward in the camera.
3. Take the cap off the camera and switch the on/off button (3) to on. After
approximately 5 seconds, the camera’s on/off light (2) will light up red while the
SD-card is being loaded. When the on/off light (1) starts ashing red the camera
is recording. The cap can now be put back on and the camera is ready to enter
the water.
RECORD – HOW TO GET STARTED
3
1. The batteries must be charged using the supplied charger cable. This
should be inserted into the USB mini port (2) on the camera house and con-
nected with a USB power source (i.e. a computer or a USB charger unit). The
camera’s on/off light (1) will light up blue when charging, and when it turns off,
the camera is fully charged.
The battery doesn’t suffer from being used when it isn’t fully charged!
The camera doesn’t record until the red on/off light (1) starts
ashing. It takes about 5 seconds before the camera is turned on.
4. When you’re done recording, turn the on/off button (3) to off.
Wait for the
on/off light
(1) to stop glowing before removing the
SD-card. Otherwise, the les on it could be damaged.
Remember! The logo must face upwards (towards the water surface), when
the camera is recording.
THE ON/OFF LIGHT
4
The camera’s on/off light has 4 different light indications:
BLUE - The camera is charging
RED - The camera is reading from or writing on the SD-card
SLOW FLASHING RED - The camera is recording
FAST FLASHING RED -
The SD-card is full and the camera will turn off after
10 seconds. Or the camera has run out of battery and will turn off after 3 seconds.

5
hd
USER MANUAL
WATER WOLF UWC1.0
www.waterwolfhd.com
/waterwolfhd
1
2A
2B
4B
3B
3A
4A
1. Steel bar
2A & 2B. Tubes
3A & 3B. Eyes
4A & 4B. Collars
5. Guide
5
HOW TO MOUNT THE CAMERA
5
The camera has several different mount options during shing.
The two most applicable ones are:
1. Articial lure mount
2. Surface oat shing mount
For more info on the mounting possibilities (i.e. as a bobber for surface
shing or marker oat mounting for vertical bottom views) please visit
www.waterwolfhd.com.
An overview of the mount ttings:
This mounting method is used for trolling or for casting articial lures.
5.1. MOUNTING FOR ARTIFICIAL LURE FISHING
1. The mainline is tied onto eye (3A) on steel bar (1).
2. Tube (2A) and (2B) are pulled towards eyes (3A) and (3B).
3. The steel bar (1) is inserted into the camera house guide (5), and tube (2A)
and (2B) are inserted from each side of the guide whereby rmly securing the
steel bar (1) into the camera house.
4. Tie your leader onto the eye (3B) and the lure (on the other end).
5. Pull the steel bar (1) so the eye (3B) is pulled through the collar (4A).
6. Add a brass weight in collar (4B) if necessary. You can now turn on the
camera, attach the cap and start shing.
Damages inicted on the camera as a result of casting and
retrieving the camera are the sole responsibility of the owner!
5.2. MOUNTING FOR SURFACE FLOAT FISHING
This mount is used for oat shing with worms, live or dead bait,
bombarda shing and surface shing with oating bait.
1. First do the same basic mounting that is used for articial lures.
2. The main line is inserted into the groove on the oat and pulled down onto
the steel bar (1) until the eye (2A) is approximately in the middle of the oat.
3. The leader is tied on to the eye (2A), and you can now turn on the camera
and start shing.
Water surface (up)
Mounted for lure shing
Mounted for surface oat shing
Water surface (up)
For the ultimate level of water pressure resistance, do not just
plug in the cap, but give it a little twist as your insert it in the
camera house!

6
hd
USER MANUAL
WATER WOLF UWC1.0
www.waterwolfhd.com
/waterwolfhd
THE PURPOSE OF THE BRASS WEIGHT
6
The neoprene sleeve is used for safely storing the camera when not in use –
and for mounting it on your hat, shing rod, oarlock, handlebars or wherever
you decide to lm from. Secure the camera by rmly tightening the Velcro end
of the sleeve around a suitable object.
ATTACHING THE NEOPRENE SLEEVE
7
The small brass weights of 6, 9 and 12 grams give the camera a stable path
through the water and makes it possible to balance the camera so that it
follows a lure that drops a little on spin stops.
Without brass
weight: Floating
With 6 grams of brass
weight: Suspending
With 9 grams of brass
weight: Slow Sinking
With 12 grams of brass
weight: Sinking
With 9 grams of brass weight
and oat: Bigger angle
With 12 grams of brass weight
and oat: Smaller angle
1. Float shing with live
bait. 12 grams of weight
inserted. A lead ball is
mounted between the
camera and the baitsh
to ensure that the sh
doesn’t swim too close to
the camera.
2. Float shing with live
bait. No brass weight
used. The camera lms
from below and is xed
to the bottom using lead
weight. The oat doesn’t
necessarily have to reach
the water surface.
1
2
ADDITIONAL MOUNTING OPTIONS I
1. Trolling shing near the surface with a Swim 4 Play 19 cm.
9 grams of weight inserted.
2. Trolling in deep water with a 3D Herring Wobbler 21 cm. 12 grams of brass
weight is inserted. The camera is mounted in eye (3A), which prevents the
most aggressive wobbler movements from causing shaky recordings.
3. Bottom exploration (on for instance carp venues) without brass weight.
Or you can use some weight and a small marker oat, which is mounted
through eye (3B).
The distance between the camera and the lure should be between 40 and
100 cm (1 1/2 feet to 4 feet) depending on the water clarity.
1
2
3
ADDITIONAL MOUNTING OPTIONS II

7
hd
USER MANUAL
WATER WOLF UWC1.0
www.waterwolfhd.com
/waterwolfhd
TRANSFERRING FILES TO YOUR COMPUTER
9
If you have more than one camera, please create separate folders
for each camera. Otherwise, you might end up overwriting existing
les (They are attributed le names according to sequencing).
1. Turn off the camera and take out the Micro SD-card. Alternatively, the
camera can be connected to the computer via the USB cable, and the camera
turned on.
2. Insert the Micro SD-card into your computer’s card slot.
3. Double click on the icon ‘computer’ and nd ‘external harddisc’
4. Double click on the ‘external harddisc’ icon.
5. Double click ‘DCIM’.
6. Double click ‘100MEDIA’. Now all your recorded video is shown.
7. Copy, or drag and drop, the les onto your computer.
MEMORY CARD/SD-CARD
8
The camera is compatible with Micro SD and Micro SDHD cards, from 2 GB
to 32 GB.
Only insert and take out the Micro SD-card (See chapter 3.
Record – How to get started), when the camera is turned off.
Follow the guidelines of the Micro SD-manufacturers in terms of temperatures
and handling.
If you have more than one camera, please create separate folders
for each camera. Otherwise, you might end up overwriting existing
les (They are attributed le names according to sequencing).
1. Turn off the camera and take out the Micro SD-card. Alternatively, the
camera can be connected to your MAC via the USB cable, and the camera
turned on.
2. Insert the Micro SD-card into your MAC’s card slot.
3. The card is recognized by your MAC as an external disc. Double click
the icon (external disc/storage unit). Now all recordings are shown.
4. Copy, or drag and drop, the les onto your hard drive.
Remember! If you delete les on the SD-card also remove them from your
‘Paper/trash bin’. Otherwise, they will continue to take up space on the SD-
card
.
TRANSFERRING FILES TO YOUR MAC
10
Playing and editing lms on your PC
PLAYING AND EDITING FILES ON YOUR PC AND MAC
11
On a PC you can play the camera’s MOV.les in programs such as: Windows
Media Player, Media Player Classic, VLC Player, Quicktime Player or similar.
The les can be edited in free software such as Movie Maker, Avidemux,
VSDC etc.
On a MAC the camera’s MOV.les are played in programs such as Quicktime
7, VLC Player, Quicktime Player or similar.
The les can be edited in free programs such as IMovie, Avidemux, Lightworks
etc.
Apple has a standard bit-rate for MOV.les, so before these can be opened in
IMovie or Quicktime the programs must do calculations on the les. And this
can take some time.
Playing and editing lms on your MAC
We recommend that you use VLC Player:
www.videolan.org/vlc/
MAINTENANCE AND CARE
12
The camera is rinsed in lukewarm water with the cap mounted. Subsequently
it is dried with a dry and soft cloth (preferably microber).
Don’t use rubbing alcohol or other chemical products
because it might damage the camera lens!
SOFTWARE UPDATES
13
Please visit www.waterwolfhd.com for updates and follow the instructions.

8
hd
USER MANUAL
WATER WOLF UWC1.0
www.waterwolfhd.com
/waterwolfhd
CAMERA SPECIFICATIONS
14
Sensor 1/4” 1 megapixel CMOS-sensor
Video Format 1280x720p HD, 30 FPS, H.264 MOV
Storage space Approx. 60 minutes of recording = 4GB
Battery capacity 3,7 V/1200 mAh
Energy use 1,2 V
Power supply DC5V1A or larger
Continual
recording
Approx. 4 hours on fully charged battery
Battery charge time Approx. 4 hours
USB interface Micro USB 2.0 High Speed
Storage type Micro SD-card or SD-HD card
Memory card Supports 2GB – 32GB TF/Micro SD-Cards
Weight 66 grams / 2 ¼ ounces
Dimensions 118 x 34 x 31 mm (LxHxB)
Operative
system
Microsoft Windows Win 7/ Win8 or later.
Mac OS X 10.4 or later.
Waterproofness Waterproof down to 100 meters
The biggest hindrance in terms of lming strikes on camera is water clarity.
To be able to do quality video, where the sh and lure is clearly visible, the
water visibility must be 1 meter or more. Oftentimes, algae and other water
sediments – especially in ponds and lakes, will cause diminished water clarity.
The deeper the camera is probing, the less colour will show up in the footage.
Furthermore, algae and sediments will tend to make the recordings greenish.
To enhance details on your recordings – if they display unnatural colours or
they’re diffuse - watch them in Sepia* mode.
Open the VLC Player menu ‘Adjustments and effects’ and choose ‘Sepia’ in
the ‘Colour’ menu. This can be done while you playback your recorded video.
In the VLC Player it is also possible to see the strikes frame by frame. Pause
the video by clicking the ‘space’ button and move on to the next frame by
clicking ‘e’. You can save screenshots, convert le formats and cut out video.
Please visit https://wiki.videolan.org/Hotkeys_table/ to see all the keyboard
shortcuts and to learn more about the interface.
*Sepia is a VLC Player function that enhances contrasts and clarity in your
footage.
FILMING UNDER WATER / VLC PLAYER
15
Table of contents
Other WATER WOLF Digital Camera manuals
Popular Digital Camera manuals by other brands

RIDGID
RIDGID Digital Inspection Camera microEXPLORER Specification sheet
Konica Minolta
Konica Minolta Digital Revio KD-300Z instruction manual
Ros
Ros C460 Operation and maintenance manual
Nikon
Nikon COOLPIX S02 user manual

Forbest
Forbest 3388Y Series user manual
Concord Camera
Concord Camera Eye-Q 4062AF user guide
