Waterford Ashling Manual

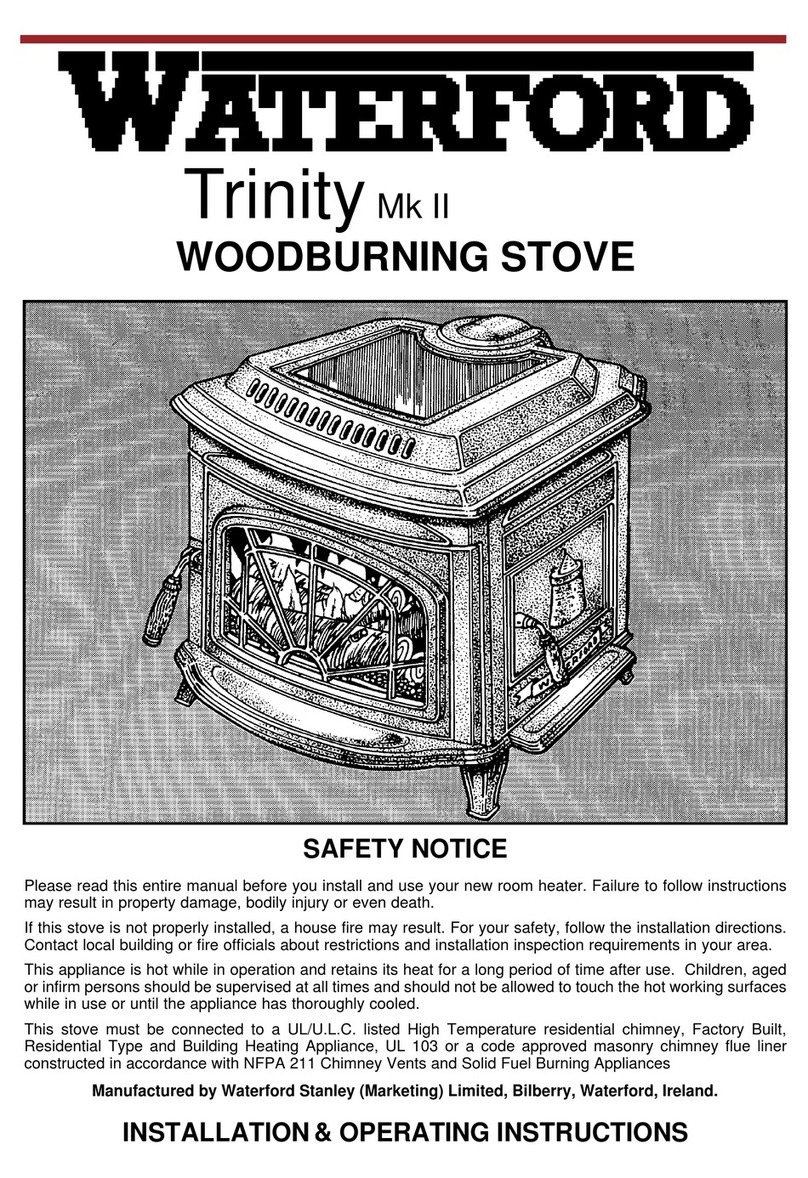
Ashling
WOODBURNING STOVE
SAFETY NOTICE
Please read this entire manual before you install and use your new room heater. Failure to follow instruc-
tions may result in property damage, bodily injury or even death.
If this stove is not properly installed, a house fire may result. For your safety, follow the installation direc-
tions. Contact local building or fire officials about restrictions and installation inspection requirements in your
area.
Manufactured by Waterford Stanley (Marketing) Limited, Bilberry, Waterford, Ireland.
INSTALLATION & OPERATING INSTRUCTIONS

1
TABLE OF CONTENTS
PAGE NO.
1. Stove Specifications 1
2. General 2
3. Pre-Installation Assembly 2
4. Blower 4
5. Floor Protection 4
6. Location 5
7. Outside Air Connection 5
8. Mobile Home Installation 6
9. Minimum Clearances to Combustibles 7
10. Additional Clearances to Combustibles 8
11. Flooring Requirements 8
12. Exploded View 9
13. Reduced Clearances 10
14. Double Wall Connections 10
15. Wall Heat Shields 10
16. Chimney 11
17. Chimney Types - USA Only 11
18. Chimney Types - Canada Only 11
19. Chimney Connector 11
20. Connecting to Masonry Chimney 11
21. Masonry Fireplace 12
22. Ventilation & Combustion Air Requirements 13
23. Spillage Test 14
24. Primary Air Settings 14
25. Low Overnight Burn 14
26. Lighting 15
27. Important Notes 16
28. Maintenance 17
29. Disposal of Ashes 17
30. Creosote 17
31. Glass Replacement 17
32. Glass Cleaning 18
33. Vitreous Enamel Cleaning 18
34. Fire Safety 18
35. In the Event of a Chimney Fire 18
CAUTION:
THIS APPLIANCE IS HOT WHILE IN OPERA-
TION AND RETAINS ITS HEAT FOR A LONG
PERIOD OF TIME AFTER USE. CHILDREN,
AGED OR INFIRM PERSONS SHOULD BE
SUPERVISED AT ALL TIMES AND SHOULD
NOT BE ALLOWED TO TOUCH THE HOT
WORKING SURFACES WHILE IN USE OR
UNTIL THE APPLIANCE HAS THOROUGHLY
COOLED.
DO NOT USE CHEMICALS OR FLUIDS TO
START OR “FRESHEN UP” THE FIRE.
DO NOT BURN GARBAGE OR FLAMMABLE
FLUIDS OR MANUFACTURED LOGS.
STOVE SPECIFICATIONS
The overall dimensions of the stove are as fol-
lows:
LENGTH: 614mm (24.17”)
WIDTH: 650mm (25.58”)
HEIGHT: 669mm (261/3”)
FLUE SPIGOT DIAMETER: 152mm (6”)
O.S.A. HOOK UP DIAMETER: 102mm (4”)
HOT PLATE DIMENSIONS: 444mm x 217mm
(17.48” x 8.94”)
HEIGHT TO CENTRE OF FLUE ON REAR
OUTLET CONFIGURATION: 565mm (22.24”)
HEIGHT TO CENTRE OF OSA HOOK UP
CONNECTOR: 109mm (4.25”)
WEIGHT: 432 lbs (196 kgs)
(See Fig.’s 1 through to 4)

Fig.1
Fig.2
Fig.3
Fig.4
ASHLING WOODBURNING STOVE
INSTALLATION AND OPERATING
INSTRUCTIONS
GENERAL
The Ashling Wood Stove has been independently
tested by Warnock Hersey in accordance with UL
1482 and ULC S627.
When installing, operating and maintaining your
Ashling Stove respect basic standards of fire safe-
ty. Read these instructions carefully before com-
mencing the installation. Failure to do so may
result in damage to persons and property. Consult
your local Municipal office and your insurance rep-
resentative to determine what regulations are in
force. Save these instructions for further refer-
ence.
PRE-INSTALLATIONASSEMBLY
(a) After removing the stove from its packing,
open the ash door (item 18 in exploded
view) and remove the contents.
(b) Open the front door (item 5) and remove
the contents of the firebox, leaving the
bricks in place.
(c) Remove the front ashtray (item 23) from
the rear of the stove if you have not already
done so. Remove the loose fitting hob and
place on a non-abrasive surface.
2
The complete installation must be done in accor-
dance with current Standards and Local Codes. It
should be noted that the requirements and these
publications may be superseded during the life of
this manual.

3
Fig.5
(d) Place the plastic packing on the ground at
the left hand side of the stove.
NOTE: As the stove is very heavy take care when
laying the stove on its side on top of the packing.
Fig.6
(e) Remove the two 1/4” (6mm) x 1/2” (12mm)
hex head bolts from the base (item 3) and
fit the front ashtray (item 23) using the two
hex head bolts. Stand the stove upright
taking care not to strain the leg bolts.
Fig.7
(f) Fit the front door handle (item 54) using
the front door handle screw (item 67) to
the front door (item 5).
Fig.8
Fig.9
This stove can be connected to either a top or rear
exit by simply reversing the orientation of the flue
spigot (item 17) on the flue spigot flange.
For either the top or the rear exit option place the
ceramic gasket onto the flue spigot flange - locat-
ed at the top of the back plate.
(g) If the side load door (item 7) is to be used,
fit the side ashtray (item 24) using the side
ashtray fixing plate (item 56) and screw
together using four 1/4” (6mm) x 1/2”
(12mm) hex head bolts provided. Take out
the chrome locking bolt and fit door latch
(item 52), the side door handle axle (item
51) and the side door handle (item 50).
Fig.10

4
Fig.11
BLOWER
An Optional Blower is available for the Waterford
Ashling. The blower is factory assembled, wired
and ready for attachment to the stove.
This unit must be connected to a grounded, stan-
dard 110 volts, 60 Hz electrical outlet. Never route
the power cord under or in front of the unit.
Do not under any circumstances, cut or remove
the grounding prong from the power cord. Do not
use an adaptor plug.
NOTE: For more detailed information see instruc-
tions included with the Optional Blower.
Fig.12
Fig.13
FLOOR PROTECTION
When installing this heater on a combustible floor,
a floor protector, is required. The floor protector is
to consist of a layer of non-combustible material
and cover the area under the heater and extend to
the sides and rear. It must also extend beneath a
horizontal chimney connector and 2” (50mm)
beyond each side. The area 16” (410mm) in front
of the fuel door(s) must have a thermal resistance
R value of 1.2.
Note: For use in Canada, the floor protector must
extend to at least 18” (460mm) in front of the fuel
door(s) and to at least 8” (200mm) from the sides
and rear of the stove.
If alternative materials are used the following
equations and information shall be used to calcu-
late the alternative material thickness required:
Example:
The specified floor protector should be 3/4” (18mm)
thick material with a K - factor of 0.84.
The proposed alternative is 4” (100mm) brick with
a C-factor of 1.25 over 1/8” (3mm) mineral board
with a K-factor of 0.29.
Step (a): Use formula above to convert
specification to R-value.
R = 1/k x T = 1/0.84 x .75 = 0.893.
Step (b): Calculate R of proposed system.
4” brick of C = 1.25, therefore
Rbrick = 1/C = 1/1.25 = 0.80
1/8” mineral board of k = 0.29,
therefore Rmin.bd. = 1/0.29 x 0.125
= 0.431.
Total R = Rbrick + Rmineral board =
0.8 ÷ 0.431 = 1.231.
Step (c): Compare proposed system R of
1.231 to specified R of 0.893.
Since proposed system R is
greater than required, the system is
acceptable.
CAUTION: Moving parts may cause injury. Do not
operate unit with blower housing removed.
DANGER: Risk of electric shock. Disconnect
power before servicing unit.
HOT PARTS: Do not operate unit with blower
housing removed.

Definitions:
Thermal Conductance =
C = Btu = W
(hr)(ft2)(oF) (m2)(K)
Thermal Conductivity =
k = (Btu)(inch) = W = Btu
(hr)(ft3)(oF) (m)(K) (hr)(ft)(oF)
Thermal Resistance =
R = (ft2)(hr)(oF) = (m2)(K)
Btu W
** If the side door is to be used the floor protector
must extend at least 16” from this side.
Fig.15
Fig.16
LOCATION
There are several conditions to be considered
when selecting a location for your Ashling Wood
Stove.
(a) Distance from a safe chimney.
(b) Position within the area to be heated - cen-
tral locations are usually best.
(c) Allowances for proper clearances to
combustibles.
(d) Obstruction in the ceiling, upper floor or
roof, for example, ducting, plumbing, elec-
trical fittings and wiring, overhead fixed fur-
nishings etc.
WARNING:
DO NOT OBSTRUCT FREE AIR SUPPLY TO
THE AIR INLET DUCT LOCATEDAT THE BACK
OF THE STOVE.
5
Fig.14
IMPORTANT: DO NOT CONNECT TO OR USE
IN CONJUNCTION WITH ANY AIR DISTRIBU-
TION DUCT WORK UNLESS SPECIFICALLY
APPROVED FOR SUCH INSTALLATIONS.
Fig.17
OUTSIDE AIR CONNECTION
Air Inlet Duct

6
If desired, the air for combustion may be drawn
directly from the outside of the house, as detailed
below. It is not obligatory to do this, but it may help
combustion in small or poorly ventilated house.
Connect a 4” (100mm) diameter stainless steel, or
other non-combustible corrosion resistant materi-
al, to the O.S.A hook-up box (item 76). In order to
do this the O.S.A. hook-up box (item 76) must be
connected to the base (item 2) using 1/4” x 2 1/4”
hex head bolts.
Run the pipe (up to 54” (1370mm) long) to the out-
side avoiding sharp bends and joints within cavity
walls. Turn the end down and fit corrosion resist-
ant mesh to prevent the entry of leaves and
rodents. (See Fig.18). Seal the penetration of the
outside wall with silicon.
Fig.18
Seal Air Duct
Wire Mesh
6. The chimney shall be attached directly to
the room heater and shall extend at least
3ft. (914mm) above the part of the roof
through which it passes. The top of the
chimney should project at least 2ft.
(610mm) above the highest elevation of
any part of the Mobile Home within 10ft.
(3048mm) of the chimney.
7. The chimney system shall comply with
Local Requirements (see page 7).
8. Any openings in a chimney guard where
required must not permit the entrance of
3/4” (19mm) diameter rod.
9. CAUTION: THE STRUCTURAL INTE-
GRITY OF THE MOBILE HOME ROOF,
FLOOR WALLS AND CEILING MUST BE
MAINTAINED.
10. Check any other local building code as
other local codes may apply.
11. WARNING: DO NOT INSTALL IN A
SLEEPING ROOM OF A MOBILE HOME.
CAUTION: Do not obstruct combustion air
opening.
Note: Listed factory built chimney connectors
including elbows are acceptable for use in Mobile
Home Installations.
MOBILE HOME INSTALLATION
In addition to standard installation instructions the
following requirements are mandatory for installa-
tion in a mobile home.
1. The stove must be permanently bolted to
the floor of the Mobile Home using the floor
screws provided.
2. The stove must have a permanent outside
air source for combustion.
3. The stove must be electrically grounded to
the steel chassis of the Mobile Home.
4. A listed chimney system, roof thimble, spark
arrestor and roof flashing kit suitable for use in
Mobile Homes must be used.
5. If the chimney exits the Mobile Home at a
location other than through the roof, and
exits at a point 7ft. (2130mm) or less above
the ground level on which the Mobile Home
is positioned a guard or method of enclosing
the chimney shall be fitted at the point of exit
for a height up to 7ft. (2130mm)
Fig.19

7
MINIMUM CLEARANCES TO COMBUSTIBLE
MATERIALS
From the front of the stove 36” (915mm)
From the side of the stove 16” (406mm)
From wall when installed at 45o
across a corner 12” (305mm)
From back of stove 12” (305mm)
From back of stove horizontal
installation only 6” (150mm)
If the side door is to be used the clearance at
this side must be increased to 36” (915mm)
Mantle clearance 24” (610mm)
Top Trim Clearance 14” (335mm)
Side Trim Clearance 7” (178mm)
Vertical single wall flue pipe 12” (305mm)
This stove may be installed in an alcove measuring
at least 60” (1525mm) high x 58” (1475mm) wide
and no greater than 48” (1220mm) deep (See Fig.
22)
Fig.20
Fig.21
Fig.22
Fig.23
Fig.24 Fig.25
Fig.26 Fig.27
Without Side Load Door
With Side Load Door
16” 16”
12”
(305mm)
12” (305mm)
(405mm) (405mm)
36”16”
(406mm) (915mm)
12” (305mm)
58”
(1475mm)
24” 610mm
7” 7”
6”
150mm

ADDITIONAL CLEARANCES TO COMBUSTIBLES
Appliance Clearances Unprotected Surfaces Protected Surfaces (NFPA - 211)
Parallel Corner Parallel Corner
Side Rear Side Rear
No Heat Shields 16-in 12-in 12-in 7-in 6-in 6-in
405-mm 305-mm 305-mm 180-mm 150-mm 150-mm
Flue Collar and 14-in 6-in 10-in 7-in 6-in 6-in
Connector Shield 355-mm 150-mm 255-mm 180-mm 150-mm 150-mm
Double Wall Connector 14-in 6-in 10-in 7-in 6-in 6-in
355-mm 150-mm 255-mm 180-mm 150-mm 150-mm
Minimum alcove 58-in 40-in
Width 1475-mm 1015-mm
Maximum alcove 48-in 48-in
Width 1220-mm 1220-mm
Alcove Ceiling Above 34-in 12-in
Stove top 865-mm 305-mm
Hearth Mount Side Trim Top Trim Mantle
7-in 14-in 24-in
180-mm 355-mm 610-mm
Chimney Connector Unprotected Surfaces (vert) Protected Surfaces (vert).
No heat shields 12-in 6-in
305-mm 150-mm
Using Connector Shield 6-in 6-in
150-mm 150-mm
Double Wall Connector 6-in 6-in
150-mm 150-mm
Unprotected Surfaces (horiz.) Protected Surfaces (horiz.)
Single Wall Connector 18-in 12-in
460-mm 305-mm
Double Wall Connector 6-in 6-in
150-mm 150-mm
FLOORING REQUIREMENTS
The unit must be placed on non-combustible material extending 2-in (50mm) beyond each side, 2-in (50mm)
beyond the rear, and 2-in (50mm) beyond each side of the chimney connector. If the optional side fuelling
door is used, the floor protection must extend 16-in (410mm) beyond the door. Combustible flooring 16-in
(410mm) beyond the front and 8-in (200mm) beyond each side of the front fuel opening must be protected
by either a listed non-combustible insulative floor protector or a field installed non-combustible insulative floor
protection with an R value of at least 1.2.
For use in Canada, the non-combustible floor protection must be extended to 18-in (460mm) beyond the fire
door(s) and 8-in (200mm) beyond the sides and rear of the stove.
8

9

REDUCED CLEARANCES
Under certain conditions the minimum clearances
may be reduced by means of:
(a) The use of Listed pipe shields, installed in
accordance with the manufacturer’s
instructions.
(b) Shields constructed in accordance with NFPA
211 (USA), CAN3-B365 (CANADA) installation
codes.
(c) When listed pipe shields are used - top exit
option only - the clearances may be reduced
to 6” (150mm) from the pipe shield and 8”
(225mm) from stove back.
All clearances must be measured from the outer
surface of the combustible material to the nearest
point on the surface of the stove disregarding any
intervening protection applied to the combustible
material.
Listed Heat Shields must be installed in accor-
dance with the manufacturer’s instructions.
DOUBLE WALL CONNECTIONS
Double wall chimney connectors may be substitut-
ed for the shielded pipe provided it is UL/ULC list-
ed for a 9” (225mm) clearance or less.
WALL HEAT SHIELDS/PROTECTORS
Shields intended to reduce clearance to com-
bustibles must be installed in accordance with the
appropriate codes.
To allow for the circulation of cooling air leave a
space of at least 1” (25mm) between the wall and
the shield. Leave a gap of at least 1” (25mm)
between the top of the shield and the ceiling and
between the bottom of the shield and the floor.
10
Fig.28
Fig.29 Fig.30
Parallel side
and back
wall to stove
Fig.31
Fig.32
Fig.33
6”
150mm 7”
178mm 178mm
7”

CHIMNEY
The Ashling is a radiant room heater and must be
connected to a chimney of the proper size and
type capable of providing an adequate continuous
draught of 0.04” wg - 0.06” wg. A 6” diameter
Factory Built Chimney is ideal. Connection to a
larger size may result in somewhat less draught.
DO NOT CONNECT TO A CHIMNEY SERVING
ANOTHER APPLIANCE.
Minimum chimney height is 15 feet from floor on
which stove is installed. An existing masonry
chimney should be inspected and, if necessary,
repaired by a competent mason or relined using an
approved relining system. The stove must be con-
nected to a chimney with a continuous draught of
0.04” wg - 0.06”wg. Poor draught conditions will
result in poor performance.
Excessive draught can cause overfiring. If any
components start to glow red, the stove is operat-
ing in an overfiring condition and the primary air
needs to be reduced to eliminate the overfiring as
overfiring voids the warranty. Warped components
are indicative of overfiring and will not be covered
under warranty.
The use of a surface mounted thermometer is
recommended to monitor the hotplate centre tem-
perature. If the hotplate exceeds 900oF the stove
is overfiring.
Note: The fitting of a flue damper can help reduce
the draught in chimneys with excessive draught.
CHIMNEY TYPES: USA ONLY
The stove must be connected to a UL 103 Listed
HT Type Factory Built Chimney for Residential
Type and Building Heating Appliances, installed in
accordance with the manufacturer’s instructions or
a masonry chimney constructed in accordance
with NFPA 211 Chimney Vents and Solid Fuel
Burning Appliances.
CHIMNEY TYPES: CANADA ONLY
The stove must be connected to an Underwriters
Laboratories of Canada Labelled factory built
650oC chimney, installed in accordance with the
manufacturer’s instructions or to a lined masonry
chimney acceptable to the authority having juris-
diction.
CHIMNEY CONNECTOR
The chimney connector (smoke pipe) is used to
connect the Ashling Stove to the chimney
described above. The chimney connector must be
made of Corrosion Resistant Steel, 24 gauge or
heavier (black or equivalently treated steel). Be
sure to fasten the chimney connectors together
and also to the flue outlet of the stove through the
two holes provided. Use at least two screws for
each joint/connection. Be sure that the joints are
tight and fully sealed.
Achimney connector shall not pass through an
attic or roof space, closet or similar concealed
space, floor or ceiling.
Where passage through a wall or partition of com-
bustible construction is desired, the installation
shall conform to NFPA 211 or CAN/CSA - B365.
The connector should maintain a pitch or rise of at
least 1/4” per foot from the stove to the chimney. It
should be installed so as to avoid sharp turns or
other combustion features that would create
excessive resistance to the flow of flue gases. It
should be securely supported. The entire length of
a connector should be readily accessible for
inspection, cleaning and replacement.
CONNECTING TO MASONRY CHIMNEY
The connector may pass through walls or parti-
tions constructed of combustible material to a
masonry chimney provided the connector system
selected is installed in accordance with the proper
clearances and conditions. The thimble (breach
pipe) must extend to, but not beyond the inner face
of the masonry chimney liner and be firmly
cemented in place. A fire clay liner (ASTM C315
or equivalent) or stainless steel, at least 24 gauge
may be used.
The following methods may be employed:
Method 1:
Minimum 31/2” (90mm) thick brick masonry wall
framed into combustible wall with a min. of 12”
(300mm) brick separation from clay liner to com-
bustibles.
Method 2:
Solid insulated Listed factory-built chimney length
of the same inside diameter as the chimney con-
nector and having 1” (25mm) or more of insulation
with a min. 9” (228mm) air space between the
outer wall of the chimney length and combustibles.
The inner end of the chimney length shall be flush
11

with the inside of the masonry chimney flue and
shall be sealed to the flue and to the brick mason-
ry penetration with non-water-soluble refractory
cement. Supports should be securely fastened to
wall surfaces on all sides. Fasteners between
supports and the chimney length must not pene-
trate the chimney liner.
Method 3:
Sheet steel chimney connector min. 24 gauge
stainless steel with a ventilated thimble, having
two 1” (25mm) air channels, separated from com-
bustibles by a min. of 6” (150mm) of non-com-
bustible insulation having a thermal conductivity of
1.0 Btu.in./ft.F (4.88kg. cal/hr.m.C) or less. The
opening should be covered and thimble supported
with sheet steel. Supports should be securely fas-
tened to wall surfaces on all sides and should be
sized to fit and hold the chimney connector.
Method 4:
Asolid insulated, Listed factory - built chimney
length with an inside diameter 2” (50mm) larger
than the chimney connector and having 1” (25mm)
or more of insulation, serving as a pass-through for
a single wall sheet steel chimney connector of
min.24 gauge thickness with a min.2” (50mm) air
space between the outer wall of chimney section
and combustibles. Minimum length of chimney
section must be 12” (305mm) Chimney section
concentric with a space 1” (25mm) away from con-
nector by means of sheet steel support plates on
both ends of chimney section. The opening must
be covered and the chimney section supported on
both sides.
Fig. 34
Fig.35
MASONRY FIREPLACE
If the stove is to be installed on the hearth exten-
sion of a masonry fireplace a continuous chimney
liner must be attached to the flue collar. In the
USA this liner may terminate at or above the first
flue tile. In Canada the liner must extend to the top
of the chimney. For clearance to combustible
mantle and tile trim see ‘Minimum Clearances to
Combustibles (page 7).
Before installation, the entire fireplace system
should be inspected for condition and code compli-
12
Minimum 12”
(305mm) to
combustibles
(50mm)
(228mm)
(228mm) minimum
(50mm)
Minimum 6”
(150mm) glass
fibre insulation
(25mm)
(50mm)
(25mm) constructed of

ance. Older fireplaces and chimneys may not
comply with current day codes.
The fireplace and chimney should be in, or bought
up to, acceptable conditions and proper clear-
ances should be met before connecting the stove
to the fireplace chimney.
The size of the flue must be considered. If the fire-
place chimney is too large, reline the chimney
using an approved relining system.
Connection to a masonry chimney may be done by
breaching into the chimney from the front of the
fireplace, no less than 8” 200mm above the bottom
of the first flue tile, by installing a stainless steel or
other Listed chimney connector from the fireplace
damper and smoke chamber, terminating at the
first flue tile, or by installing a stainless steel or
other Listed relining system from the flue outlet up
the entire length of the chimney, where necessary.
13
Fig.36
In Canada when connecting to a masonry fireplace
the steel chimney connector must terminate at the
top of the masonry chimney or flue liner.
Fig.37
IMPORTANT: BURN WOOD ONLY. DO NOT
BURN COAL, SYNTHETIC LOGS OR OTHER
FUELS.
BURN DIRECTLY ON HEARTH, DO NOT USE A
GRATE OR ELEVATE FIRE.
“NEVER USE GASOLINE”, GASOLINE TYPE
LANTERN FUEL, KEROSENE, CHARCOAL
LIGHTER FLUID OR SIMILAR LIQUID TO
START OR “FRESHEN UP” A FIRE IN THIS
HEATER. KEEP ALL SUCH LIQUIDS WELL
AWAY FROM THE HEATER WHILE IT IS IN USE.
OPERATE STOVE ONLY WITH FUELLING
DOOR AND ASH DOOR CLOSED.
VENTILATION & COMBUSTION AIR
REQUIREMENTS
Ventilation is necessary to supply combustion air
to the appliance. Refer to your Local Authority for
current requirements in your jurisdiction.
Outside combustion air may be required if:
1. The solid-fuel-fired appliance does not draw
steadily, smoke rollout occurs, fuels burns
poorly, or back drafts occur whether or not
there is combustion present.
2. Existing fuel-fired equipment in the house,
such as fireplaces or other heating appli
ances, smell, do not operate properly, suffer
smoke rollout when opened, or back-draft
whether or not there is combustion present.
3. Opening a window slightly on a calm (wind
less) day alleviates any of the above symp-
toms.
4. The house is equipped with a well-sealed
vapour barrier and tight fitting windows
and/or has any powered devices that exhaust
house air (e.g. extraction hoods, tumble dry-
ers).
5. There is excessive condensation on windows
in the winter.
6. A ventilation system is installed in the house.
If these or other indications suggest that infiltration
air is inadequate, additional combustion air should
be provided from the outdoors. Outside combus-
tion air can be provided to the appliance by the fol-
lowing means:
1. Direct connection: Refer to O.S.A. Hook-up in
this manual.
2. Indirect method: for an appliance not certi-
fied for direct connection of outside com-
bustion air, the outside air is ducted to a point
no closer than (12”) 300mm from the appli-

14
ance, to avoid affecting the performance of
the appliance.
3. A mechanical ventilation system: if the
house has a ventilation system (air change
or heat recovery):
a. The ventilation system may be able to
provide sufficient combustion make-up air
for the solid-fuel-fired appliance.
b. The householder should be informed that
the ventilation system might need to be
re-balanced by a ventilation technician
after installation of the appliance. In all
installations a spillage test should be car-
ried out to ensure there is sufficient com
bustion air.
SPILLAGE TEST
In all installations a spillage test should be carried
out to ensure there is sufficient combustion air and
the flue system is adequate.
1. Light/burn appliance under normal condtions
in accordance with this installation manual.
2. Close all doors and windows.
3. Operate all appliances requiring air at full rate
(eg. extraction hoods, tumble dryers etc).
4. Check for spillage.
PRIMARY AIR SETTINGS
The primary air setting adjuster rod is located
between the centre of the ash tray and door to the
front of the appliance. (see Fig. 38). Movement in
or out of the adjuster rod will achieve the following
settings:
LOW-BURN (MIN) - Fully closed setting, adjuster
rod is fully pulled out.
MEDIUM LOW BURN - Adjuster rod is pushed in
6mm (0.236”) from fully closed setting.
HIGH BURN (MAX) - Fully opened setting,
adjuster rod is pushed in fully.
MEDIUM HIGH BURN - Adjuster rod is pushed in
8mm (0.315”) from fully closed setting.
Fig.38
LOW OR OVERNIGHT BURN
NOTE: The duration of low or overnight burn is
affected by draught conditions: Excessive draught
reduces burn time and quality of fuel load. If the
stove and flue temperature at the start of a low or
overnight burn are too high it will result in reducing
burn time.
1. Allow the fire bed to cool down.
2. Re-load using full length wood (preferably
unsplit).
3. Do not pack the fuel load as high as the top
air duct.
4. An air space is necessary between the fuel
load and secondary air baffle to avoid
impingement of the secondary air on the top
of the fuel load resulting in speeding up the
burn rate.
5. Adjust the primary air control lever to the
minimum setting by pulling it all the way
forward.

LIGHTING
1. Replace ashpan (item 31), close ash door (item 18), and make sure the ash
dump sliding door (item 26) is closed by pushing in ash dump lever (item 33a)
located at the bottom of the left side panel when looking from the front of stove.
2. Open fuel loading door and open the primary air duct by sliding the primary air
control lever (item 32) located at the front ashtray (item 23) in towards the stove.
3. Cover hearth with crumpled pieces of paper. Lay dry pieces of kindling approxi-
mately 1/2” (12mm) x 1/2” (12mm) x 20” (508mm) long on top of the paper
towards the back of the firebox. Ignite and close the fuel loading door.
4. When the kindling has ignited, open the fuel loading door and add larger pieces
of dry wood. Close the fuel loading door.
5. When a hot bed of coals is established add the normal fuel of well seasoned split
logs, which can have a maximum length of 20” (508mm).
6. Once the logs are well lighted, adjust the primary air control lever (item 32) to
the required output.
Refuelling - Open the fuel loading door and carefully level the embers and re-load with
logs, close the fuel loading door.
15

IMPORTANT NOTES
Now that your Ashling Wood Stove is installed and no doubt you are looking forward to many comforts it will
provide, we would like to give you some tips on how to get the best results from your stove.
1. We would like if you could take some time to read the operating instructions/hints, which we
are confident, will be of great benefit to you.
2. Do not burn fuel with a high moisture content. This will only result in a build up of tar in the
stove and in the chimney.
3. Clean the flue-ways of the stove every week and ensure that there are no blockages. Please
refer to manual for instructions.
4. Before loading fresh fuel into the firebox, riddle fully to remove all ashes this will allow better
and cleaner burning. See directions in manual.
5. Never allow a build up of ashes in the ash pan, as this will cause the grate to burn out prema-
turely.
6. Allow adequate air ventilation to ensure plenty of air for combustion.
7. Do not burn rubbish/household plastic.
8. Do not leave ash-door open for long periods as this will over heat the unit causing unneces-
sary damage.
9. Clean the chimney at least twice a year.
10. Keep all combustible materials a safe distance away from unit, please see section for clear-
ances to combustibles.
11. For safety reasons never leave children unaccompanied while stove is in use.
12. Avoid contact with unit when in use as stove reaches very high operating temperatures.
16

MAINTENANCE
DE-ASHING (When the fire has burned out)
When the ash build - up becomes excessive in the
fire chamber (3 1/2” (88mm) deep or so) it must be
removed by allowing the fire to burn out. When
the fire has burned out, open the firedoor. Open
the ashpit shutter (item 26) by pulling the ash
dump lever (item 33a) to the left. Rake the ash
into the ashpan through the grating in the centre of
the hearth.
DISPOSAL OF ASHES
Remove ash carefully. Ashes should be placed in
a metal container with a tight fitting lid. The closed
container of ashes should be placed on the
ground, well away from all combustible materials,
pending final disposal. If the ashes are disposed of
by burial in soil or otherwise locally dispersed they
should be retained in closed container until all cin-
ders have thoroughly cooled.
Fig.39
CREOSOTE (Formation and the need for
removal)
When wood is burned slowly, it produces tar and
other organic vapours, which combine with
expelled moisture to form creosote. The Creosote
vapours condense in the relatively cool chimney
flue of a slow burning fire. As a result creosote
residue accumulates on the flue lining. When ignit-
ed this creosote makes an extremely hot fire. The
chimney connector and chimney should be
inspected at least twice monthly during the heating
season to determine if a creosote build-up has
occurred. If creosote has accumulated it should
be removed to reduce the risk of chimney fire.
NEVER STORE FUEL WITHIN SPACE HEATER
INSTALLATION CLEARANCES OR WITHIN THE
SPACE REQUIRED FOR CHARGING AND ASH
REMOVAL
Inspect the chimney connector frequently. Tap the
connector with your finger when the pipe is cool. If
you hear a dull echo, the pipe may need cleaning.
Disassemble the chimney connector and clean the
sections. Replace corroded pipe sections. The fit-
ting of a slip-joint in the stove makes the disman-
tling easy for cleaning and inspection of chimney
and stove. Replace the empty ashpan (item 31) in
the stove, close the ash door (item 18) and re-light
the fire.
When inspecting a masonry chimney, start at the
cleanout door, normally found in the basement, at
the base of the chimney, or on the outside. If your
chimney does not have a clean-out door it must be
inspected and cleaned by removing stove from
chimney.
GLASS REPLACEMENT
(a) Open the front door fully.
(b) Remove the 3/16” screws and door glass
frame (item 45) and carefully remove the bro-
ken glass.
(c) Clean the glass recess in the door.
(d) Attach adhesive thermal tape to the perimeter
of the replacement glass.
(e) Place the thermal taped side of the glass into
the firedoor recess and replace the door glass
frame (item 45) and screws.
(f) Tighten screws.
(g) Replace glass only with ceramic glass 3/16”
(5mm) thick
17
Fig.40
CAUTION:
DO NOT OPERATE APPLIANCE WITH BROKEN
OR CRACKED GLASS. ABUSE SUCH AS
STRIKING, SLAMMING AND USE OF SUBSTI-
TUTE MATERIALS SHOULD BE AVOIDED.
NOTE: Do not build fire against the glass, always
place fuel behind the andirons fitted to the front of
the combustion chamber/firebox.

18
GLASS CLEANING
The glass will clean itself when there is sufficient
heat generated by the burning fuel. If a build-up of
creosote occurs on the glass due to poor draught
conditions, poor quality fuel or very low burning for
long periods of time, it is best to clean the glass
manually when glass is thoroughly cooled.
VITREOUS ENAMEL CLEANING
General cleaning must be carried out when the
stove is cool.
If this stove is finished in a high gloss vitreous
enamel, to keep the enamel in the best condition
observe the following tips:
1. Wipe over daily with a soapy damp cloth,
followed by a polish with a clean dry duster.
2. For stubborn deposits a soap impregnated
pad can be carefully used on the vitreous
enamel.
3. DO NOT USE ABRASIVE PADS OR OVEN
CLEANSERS CONTAINING CITRIC ACID
ON ENAMELLED SURFACES. ENSURE
THAT THE CLEANSER MANUFACTURERS
INSTRUCTIONS ARE ADHERED TO.
FIRE SAFETY
To provide reasonable fire safety the following
should be given serious consideration.
(1) Do not overfire the stove. If the stove or chim-
ney connector glows, you are overfiring.
(2) Overfiring will also damage painted or enamel
finishes on the stove.
(3) The installation of fire detectors.
(4) A conveniently located class “A” fire extin-
guisher to contend with small fires resulting
from burning embers.
(5) A practical evacuation plan.
(6) A plan to deal with a chimney fire as follows:
IN THE EVENT OF A CHIMNEY FIRE
(a) Notify the fire department.
(b) Prepare occupants for immediate evacuation.
(c) Close all openings into the stove.
(d) While awaiting the fire department watch for
ignition to adjacent combustibles from over-
heated stove pipe or from hot embers or sparks
from the chimney.

ASHLING
POÊLE À BOIS
CONSIGNES DE SÉCURITÉ
Veuillez lire ce manuel dans son intégralité avant d’installer ou d’utiliser votre nouvel appareil de chauffage.
Tout manquement aux instructions délivrées dans ce manuel pourrait provoquer des dégâts matériels,
entraîner des blessures graves, voire la mort. Un incendie pourrait également résulter de la mauvaise instal-
lation de votre poêle à bois. Pour votre sécurité, veuillez donc suivre à la lettre les consignes d’installation.
Nous vous recommandons par ailleurs de consulter le service d’urbanisme de votre municipalité ainsi que la
brigade des sapeurs-pompiers afin de vous informer des restrictions et obligations en matière d’inspection
qui sont en vigueur dans votre localité.
Fabriqué par Waterford Stanley (Marketing) Limited, Bilberry, Waterford, Irlande.
CONSIGNES D’INSTALLATION ET MODE D’EMPLOI
Table of contents
Languages:
Other Waterford Stove manuals
Popular Stove manuals by other brands

Duraflame
Duraflame DFI-6518-02 quick start guide

Morso
Morso 3600 Series Installation and operating instructions

Ravelli
Ravelli Francesca 2015 brochure

Coleman
Coleman 9911-750 parts list

Drolet
Drolet Atlas DB04810 Installation and operation

GABRIEL KAKELUGNAR
GABRIEL KAKELUGNAR G310 Kungsholm Assembly instructions/use and care manual