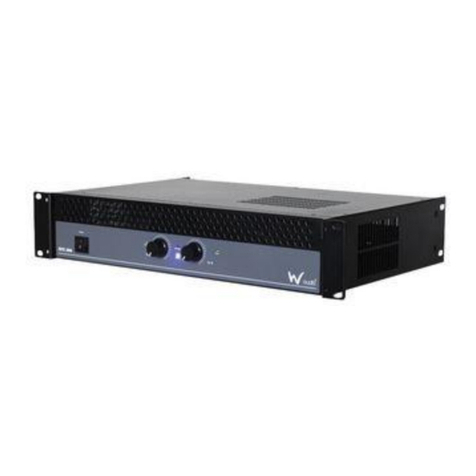
Waudio EPX Series User manual

Order codes:
AMP24 - EPX 300
AMP25 - EPX 500
AMP26 - EPX 800
AMP27 - EPX 1200
AMP28 - EPX 2200
EPX Series
Power Ampliers
User Manual
POWER
PROTECT
I
O
CLIPCLIP
POWER
CH A CH B
POWER
PROTECT
I
O
CLIPCLIP
POWER
CH A CH B
POWER
PROTECT
I
O
CLIPCLIP
POWER
CH A CH B
POWER
CLIPCLIP
POWER
I
O
PROTECT
BR PRST
CH A CH B
POWER
CLIPCLIP
POWER
I
O
PROTECT
BR PRST
CH A CH B
All manuals and user guides at all-guides.com
all-guides.com

www.prolight.co.uk EPX Series Power Ampliers User Manual
2
Safety advice
WARNING
FOR YOUR OWN SAFETY, PLEASE READ THIS USER MANUAL
CAREFULLY BEFORE YOUR INITIAL START-UP!
• Immediatelyuponreceivingthisproduct,carefullyunpackthecartonandcheckthecontents
toensurethatallthepartsarepresent.
• Beforeinitialstart-up,pleasemakesurethatthereisnodamagecausedduringtransportation.
• Shouldtherebeanydamage,consultyourdealeranddonotusetheequipment.
• Retainthecartonandallpackagingmaterials.
• Intheeventthattheequipmentmustbereturnedtothesupplier,itisimportantthat
theequipmentisreturnedintheoriginalcartonandpackaging.
• Tomaintaintheequipmentingoodworkingconditionandtoensuresafeoperation,
itisnecessaryfortheusertofollowthesafetyinstructionsandwarningnoteswritteninthismanual.
• Pleasenotethatdamagescausedbyusermodicationstothisequipmentarenotsubjecttowarranty.
IMPORTANT:
The manufacturer will not accept liability for any resulting damages caused by the non-observance
of this manual or any unauthorised modication to the equipment.
OPERATING DETERMINATIONS
Ifthisequipmentisoperatedinanyotherway,thanthosedescribedinthismanual,theproductmaysufferdamageand
thewarrantybecomesvoid.Incorrectoperationmayleadtodangere.g:short-circuit,burnsandelectricshocksetc.
Incaseofmalfunctionthisunitshouldbereturnedforserviceorinspection.
Donotendangeryourownsafetyandthesafetyofothers!
Incorrectinstallationorusecancauseseriousdamagetopeopleand/orproperty.
• Neverletthepowercablecomeintocontactwithother
cables.Handlethepowercableandallmainsvoltage
connectionswithcaution!
• Neverremovewarningorinformativelabelsfromthe
equipment.
• Donotopenormodifytheequipment.
• Donotconnectthisequipmenttoadimmer-pack.
• Donotswitchtheequipmentonandoffinshortintervals,
asthiswillreducethesystem’slife.
• Onlyusetheequipmentindoors.
• Donotexposetoammablesources,liquidsorgases.
• Alwaysdisconnectthepowerfromthemainswhen
equipmentisnotinuseorbeforecleaning!Onlyhandle
thepowercablebytheplug.Neverpullouttheplugby
pullingthepowercable.
• Makesurethattheavailablevoltage
isbetween220V/240V.
• Makesurethatthepowercableisnevercrimped
ordamaged.Checktheequipmentandthepower
cableperiodically.
• Iftheequipmentisdroppedordamaged,disconnect
themainspowersupplyimmediately.Haveaqualied
engineerinspecttheequipmentbeforeoperatingagain.
• Iftheequipmenthasbeenexposedtodrastictemperature
uctuation(e.g.aftertransportation),donotswitchiton
immediately.Thearisingcondensationmightdamagethe
equipment.Leavetheequipmentswitchedoffuntilithas
reachedroomtemperature.
• Iftheproductfailstofunctioncorrectly,discontinueuse
immediately.Packsecurely(preferablyintheoriginal
packingmaterial),andreturntoyourdealerforservice.
• Onlyusefusesofsametypeandrating.
• Repairs,servicingandpowerconnectionmustonlybe
carriedoutbyaqualiedtechnician.THISUNITCONTAINS
NOUSERSERVICEABLEPARTS.
• WARRANTY:Oneyearfromdateofpurchase.
CAUTION!
KEEP THIS EQUIPMENT
AWAY FROM MOISTURE,
RAIN AND LIQUIDS, AND
OUT OF DAMP/HUMID
ENVIRONMENTS
CAUTION!
TAKE CARE USING
THIS EQUIPMENT!
HIGH VOLTAGE-RISK
OF ELECTRIC SHOCK!!
All manuals and user guides at all-guides.com

www.prolight.co.uk EPX Series Power Ampliers User Manual
3
Product overview
Aprofessionalrangeofpower
ampliersofferingsuperiorreliability
andperformance,withafullrange
ofpoweroptionsavailabletosuita
varietyofapplications.
•Shortcircuit,overloadand
thermalprotection
•Fancooled
•Groundlift
EPX Series Power Ampliers
Specications EPX 300 EPX 500 EPX 800 EPX 1200 EPX 2200
Outputpower1kHz,
THD+N≤0.5%
Stereo8Ω 2x90W 2x180W 2x270W 2x400W 2x850W
Stereo4Ω 2x150W 2x250W 2x400W 2x600W 2x1100W
Bridge8Ω - - - 1200W 2200W
Frequencyresponse 20Hzto20kHz±1.0dB
Inputsensitivity 0.775V/1.0V/1.44V
S/Nratio(a-weighted,RMS) >95dB >100dB
>70dB
Crosstalkatratedpoweroutput
(8Ωat1kHz) >55dB >65dB
Dampingfactor(f=1kHz@8Ω) >60 >150dB >200
Protectioncircuits Thermal,shortcircuit,overload,DCfaultprotection
&ACpowersupplyfuse
Softstart,limit,thermal,shortcircuit,
overload,DCfaultprotection
&ACpowersupplyfuse
LEDindicators Power,protect&clip Power,protect,clip,stereo,parallel&bridge
Connectors Inputs:2xphonosockets,2x1/4”jacksockets
Outputs:2xlockingspeakerconnectors,2xbindingposts
Inputs:2xXLRsockets,2x1/4”jacksockets
Outputs:2xlockingspeakerconnectors,
2xbindingposts,1xlockingspeaker
bridgeconnector
Coolingsystem Low-noisecoolingfans,variablespeedfan
Powersupply AC240V/50Hz
Dimensions(HxWxD) 87x481x297mm 87x481x297mm 87x481x297mm 87x481x450mm 87x481x450mm
Weight 9.5kg 10kg 10.5kg 18kg 21kg
Ordercode AMP24 AMP25 AMP26 AMP27 AMP28
Inthebox:
1 x power amplier,
1 x power cable
& 1 x user manual
POWER
PROTECT
I
O
CLIPCLIP
POWER
CH A CH B
POWER
PROTECT
I
O
CLIPCLIP
POWER
CH A CH B
POWER
PROTECT
I
O
CLIPCLIP
POWER
CH A CH B
POWER
CLIPCLIP
POWER
I
O
PROTECT
BR PRST
CH A CH B
POWER
CLIPCLIP
POWER
I
O
PROTECT
BR PRST
CH A CH B
All manuals and user guides at all-guides.com

www.prolight.co.uk EPX Series Power Ampliers User Manual
4
EPX 300, EPX 500 &
EPX 800 dimensions
EPX 1200 &
EPX 2200 dimensions
Product overview
481mm
87mm 264mm
297mm
426mm
481mm
87mm 421mm
450mm
426mm
All manuals and user guides at all-guides.com

www.prolight.co.uk EPX Series Power Ampliers User Manual
5
EPX 300, EPX 500 & EPX 800 front panel
EPX 300, EPX 500 & EPX 800 rear panel
Technical specications
01-ClipLEDs-TheseLEDsashredtoindicatewhenthe
outputoftheamplierhasreachedthemaximum,andis
rightontheedgeofclipping.Clippingisbadforspeakers
andshouldbeavoided.ItisokayiftheLEDblinks
occasionally.Itmeansthatthetransientpeaksofthe
musicarejusthittingthefulloutputoftheamplier.
02-Gaincontrol-Thesetwoknobscontrolthelevelsof
Channels1and2.Usually,thesecontrolsaresetall
thewayup.Youmightturnthemdownslightlyifyou
havehigh-efciencyspeakers.Also,youcouldusethem
tocontrolthelevelofline-levelsourcessuchasaCD
playerconnecteddirectlytotheamplierwithouta
pre-amplierormixer.Afteryouhavesetthelevels
forthemixer(orothersignalsource),adjustthelevel
controlsontheamplierasthenaladjustmenttoset
theoverallvolumeforthesystem.
Instereoandmonomode,usebothlevelcontrolsto
controlthelevelsgoingtoeachspeaker.
03-PowerLED-ThisLEDilluminateswhentheamplier
isswitchedon
04-ProtectLED-IfthisLEDisilluminatedduringoperation,
oneoftheprotectioncircuitsisactive.Pleasetakethe
amplieroutofoperationandhaveittested
05-Powerswitch-Pressthisswitchtostarttheoperation
POWER
PROTECT
I
O
CLIPCLIP
POWER
CH A CH B
01 0205 02
0304
01
INPUTS
GROUNDLIFT
LIFT GND
B A
RIGHT LEFT
POWER AMPLIFIER
240V~50Hz
Serial no.
CAUTION!
Remove the mains power before opening
the unit. No user serviceable parts inside,
refer to qualied service personnel.
Protect the unit against moisture and heat.
Operating temperature range 0-40°C.
This product is not intended for use
other than stated.
MAINS
T3.15 A
240V~50Hz
!
OUTPUTS
(4Ω min.)
01-¼”jackinputs-Theseinputsallowyoutoconnect
¼”unbalancedjackplugs
02-Phonoinputs-Theseinputsallowyoutoconnect
unbalancedphonoplugs
03-Therearethreewaysofconnectingyourspeakers:
Lockingspeakerconnectors,¼”jackorbindingposts.
Theconnectorsarewiredinparallel.(e.g.Channel1
bindingpost,jackandlockingspeakerconnectorsarein
parallelandthesameforchannel2).
04-Powercablesocket-Thisiswhereyouconnectthe
detachablepowercable.Connecttheotherendtoa
240VACoutlet.
05-Groundliftswitch-Thisswitchallowsthesignalground
orchassisgroundtobeseparatedincaseofaground
conict.Forthehighestsafetyoftheequipment,itis
recommendedtokeepthe“groundliftswitch”inthe
GNDposition.Incaseofagroundconictpleasesetthe
groundliftswitchtoGNDLIFT.
0201 01 040305
All manuals and user guides at all-guides.com

www.prolight.co.uk EPX Series Power Ampliers User Manual
6
Technical specications
EPX 1200 & EPX 2200 front panel
01-ClipLEDs-TheseLEDsashredtoindicatewhenthe
outputoftheamplierhasreachedthemaximum,andis
rightontheedgeofclipping.Clippingisbadforspeakers
andshouldbeavoided.ItisokayiftheLEDblinks
occasionally.Itmeansthatthetransientpeaksofthe
musicarejusthittingthefulloutputoftheamplier.
02-Gaincontrol-Thesetwoknobscontrolthelevelsof
Channels1and2.Usually,thesecontrolsaresetallthe
wayup.Youmightturnthemdownslightlyifyouhave
high-efciencyspeakers.Also,youcouldusethemto
controlthelevelofline-levelsourcessuchasaCDplayer
connecteddirectlytotheamplierwithouta
pre-amplierormixer.Afteryouhavesetthelevels
forthemixer(orothersignalsource),adjusttheLevel
controlsontheamplierasthenaladjustmenttoset
theoverallvolumeforthesystem.
Instereoandmonomode,usebothlevelcontrolsto
controlthelevelsgoingtoeachspeaker.Inbridged
mode,turnthechannel2levelcontroldown,andjust
usethechannel1control.
03-PowerLED-ThisLEDilluminateswhentheamplier
isswitchedon
04-ProtectLED-IfthisLEDisilluminatedduringoperation,
oneoftheprotectioncircuitsisactive.Pleasetakethe
amplieroutofoperationandhaveittested
05-StereoLED-Thisilluminatesinstereomode
06-BridgedLED-Thisilluminatesinbridgedmode
07-ParallelLED-ThisLEDilluminatesinparallelmode
08-Powerswitch-Pressthisswitchtostarttheoperation
POWER
CLIPCLIP
POWER
I
O
PROTECT
BR PRST
CH A CH B
01 0208 02
0403
01
0605 07
All manuals and user guides at all-guides.com
all-guides.com

www.prolight.co.uk EPX Series Power Ampliers User Manual
7
EPX 1200 & EPX 2200 rear panel
!
POWER
AMPLIFIER
240V~50Hz
Serial no.
CAUTION!
Remove the mains power before
opening the unit. No user serviceable
parts inside, refer to qualied service personnel.
Protect the unit against moisture and heat.
Operating temperature range 0-40°C.
This product is not intended for use
other than stated.
OUTPUTS
CH-B
OUTPUTS
CH-A
OUTPUT
BRIDGE
T10.0 A
240V~50Hz
MAINS
GROUNDLIFT
LIFT GND
LIMITER
ON OFF
PR STBR
LOWHIGH BYPA SS LOWHIGH BY PASS
INPUTS
CH-B
LINK
CH-B
LINK
CH-A
INPUTS
CH-A
01-XLRinputs-Theseinputsallowyoutoconnectbalanced
XLRplugs.Thesearewiredwithpin2hot,pin3coldand
pin1ground
02-¼”jackinputs-Theseinputsallowyoutoconnect¼”
unbalancedjackplugs
03-Therearetwowaysofconnectingyourspeakers:
Lockingspeakerconnectorsorbindingposts.
Theconnectorsarewiredinparallel.(e.g.Channel1
bindingpostandlockingspeakerconnectorsarein
parallelandthesameforchannel2).
Whentheamplierisusedinbridgedmonomodeuse
eithertheoutputbridgedlockingspeakerconnectorsor
thetworedbindingposts.
04-Lockingpowersocket-Thisiswhereyouconnectthe
detachablelockingpowercable.Connecttheotherend
toa240VACoutlet.
05-Ampmode-Thisswitchdeterminestheinputsignal
routingwithintheamplier.Formostapplicationsstereo
willbeused.
Stereo:Thisisthenormalmodeforamplifyingstereo
signals.Itacceptsleftandrightinputsandroutesthem
totheleftandrightoutputs.
Parallel:Thismodeisusedwhenyouwanttosend
monosignalstobothoutputs.Itacceptsasingleinput
intochannel1androutesittoboththechannel1and
channel2outputs.Eachchannelslevelcontroladjusts
thegainforeachchannel.
Bridge:Thismodeacceptsasingleinputintochannel1
andusesbothamplieroutputstodoublethepowerto
onespeakeroutput.Usechannel1levelcontroltoadjust
thegain.Turnchannel2levelcontroltominimum.
06-Whenengagedthelimiterswitchprotectsyour
speakersfromtheeffectsofclipping.Itisdesignedto
bevirtuallytransparentandyoushouldhearverylittle
audibledifference.Itisrecommendedthatyoualways
havethisswitchactiveunlessyouareusingexternal
compressor/limiters.
07-Groundliftswitch-Thisswitchallowsthesignalground
orchassisgroundtobeseparatedincaseofaground
conict.Forthehighestsafetyoftheequipment,itis
recommendedtokeepthe“groundliftswitch”inthe
GNDposition.Incaseofagroundconictpleaseset
thegroundliftswitchtoGNDLIFT.
08-ThesebalancedXLRoutputscanbeusedtoloop
throughthesignaltoadditionalpowerampliers.
09-Crossover:Fornormaloperationsetthemodeswitchto
Bypass.Low/HighPassMode:Whenusingthe“Low/
HighPassMode”,theampliercanbeconguredfor
HighPassorLowPassoperation.
04 03
02 0909 010808 0506 070102
Technical specications
All manuals and user guides at all-guides.com

www.prolight.co.uk EPX Series Power Ampliers User Manual
8
Operating instructions
Rack installation
TheEPSeriesisbuiltfor19”racks.Therackyouuseshouldbea‘doubledoorrack’whereyoucanopen
thefrontandrearpanel.Whenmountingtheamplierintotherack,pleasemakesurethatthereis
enoughspacearoundtheamplier.
Becarefulwhenmountingtheamplierintotherack.Puttheheaviestproductsintothelowerpart
oftherack.Beawarethatfasteningtheamplierwithfourscrewsonthefrontpanelisnotenough.
Iftheracksarebeingtransportedorusedformobileuse,additionallyfastentheproductsby
connectingtherearbracketswiththesideorgroundbarsoftherack.Inthisway,theamplier
cannotbepushedbackwards.Thefrontpanelisnotdesignedtoabsorbaccelerationforces
occuringduringtransportation.
Inputs
Shortcablesrunsimprovethesoundqualityremarkably.Inputcablesshouldbeshortanddirect,
sincehighfrequencieswillmostlybeabsorbedifthecablesareunnecessarilylong.Besidesthata
longercablemayleadtohummingandnoiseproblems.Ifthecablerunsareunavoidable,youshould
usebalancedcables.
Outputs
Thehighdampingfactorofyourampliersuppliesaclearsoundreproduction.
Unnecessarilylongandthincableswillinuencethedampingfactorandthusthelowfrequencies
inanegativeway.Inordertosafeguardgoodsoundquality,thedampingfactorshouldliearound50.
Thelongeracablehastobethethickeritshouldbe.
ConnectyourspeakersystemsviathelockingspeakerconnectorsortheBannana/Screwcombination
(red+,black-)
Connection to the mains
Connecttheamplieronlyafterhavingmadesurethatthecorrectvoltage(240V)issuppliedandthat
thegroundcableisearthed.ThisproductfallsunderClass1.Donotdetachthegroundcable.
All manuals and user guides at all-guides.com

www.prolight.co.uk EPX Series Power Ampliers User Manual
9
Operating instructions
Operation
Afterhavingconnectedyourampliertothemains,turnbothgaincontrolscounterclockwisetothe
“min”position.Thelastproducttobeswitchedonisamplier.The“ON”and“PROTECT”LEDlightsup
now.Ifitdoesnot,checkiftheamplierisconnectedtothemainscorrectly.
Aftertheturnondelaythespeakersareactivated(PROTECT-LEDisoff).
Afterhavingsetthevolumecontrolsofthepre-ampliertothe“OFF”position,turnthegaincontrolsof
yourampliertomid-position.NowadjustthevolumewiththegaincontrolsCHAandCHB.
Allimportantoperatingmodesoftheamplierarearrangedonthefrontpanel.
Ifyouwanttoswitchoffthesystem,switch off the amplier rstinordertoavoid
acousticshocksonthespeakers.
Problem Chart
-20dBto30dB -Outputlevel
Clip -Shortcircuitorimpedancetooloworsignaldistorted
Protect -Activeduringstabilisationperiodafterswitchingonorwhenone
oftheprotectivecircuitsisactivated
Problem Cause Solution
Nopower Thepowercableisnotconnected Checkthepowercableandanyextensioncables
Nosound
Thepowercableoftherespectiveproductis
notconnectedcorrectlyornotatall.
Checkthepowercableandiftheplugsareproperly
connectedwiththesockets
Theconnectionsocketortheplugisdirty Cleanthesocketand/ortheplug
Noise Theinputsignalistoostrong Reducetheinputsignalviathegaincontrol
Fandoesnotwork,
LEDsdonotlightup Thepowercableisnotconnected Connectthepowercable
ProtectLEDlights
uppermanently
DCvoltageoninput Switchamplieroffandhavetheproductchecked
byaservicetechnician
Amplieroverheatsduetoobstruction Cleanthefangrill
Impedanceofspeakerstoolow Ensureminimum4Ωload
Shortcircuitinspeakerconnection
orinspeakers Checkspeakersandconnections
All manuals and user guides at all-guides.com

www.prolight.co.uk EPX Series Power Ampliers User Manual
10
Operating instructions
Cleaning and Maintenance
Werecommendafrequentcleaningoftheproduct.Pleaseuseasoftlintfreeandmoistenedcloth.
Neverusealcoholorsolvents.
Therearenoserviceablepartsinsidetheproductexceptforthefuse.Maintenanceandservice
operationsareonlytobecarriedoutbyauthoriseddealers.
Replacing the fuse
Onlyreplacethefusewithafuseofthesametypeandrating.
Beforereplacingthefuse,unplugthemainscable.
Procedure:
Step 1:Openfuseholderontherearpanelwithascrewdriver.
Step 2:Removetheoldfusefromthefuseholder.
Step 3:Installthenewfuseinthefuseholder.
Step 4:Replacethefuseholderinthehousing.
Shouldyouneedanyspareparts,pleaseusegenuineparts.
Shouldyouhaveanyfurtherquestions,pleasecontactyourdealer.
CAUTION! - DANGER TO LIFE
DISCONNECT FROM THE MAINS BEFORE
STARTING MAINTENANCE OPERATION
All manuals and user guides at all-guides.com

www.prolight.co.uk EPX Series Power Ampliers User Manual
11
WEEE notice
Correct Disposal of this Product
(Waste Electrical & Electronic Equipment)
(Applicable in the European Union and other European countries
with separate collection systems)
Thismarkingshownontheproductoritsliterature,indicatesthatitshouldnotbedisposedof
withotherhouseholdwastesattheendofitsworkinglife.Topreventpossibleharmtothe
environmentorhumanhealthfromuncontrolledwastedisposal,pleaseseparatethisfromother
typesofwastesandrecycleitresponsiblytopromotethesustainablereuseofmaterialresources.
Householdusersshouldcontacteithertheretailerwheretheypurchasedthisproduct,ortheir
localgovernmentofce,fordetailsofwhereandhowtheycantakethisitemforenvironmentally
saferecycling.
Businessusersshouldcontacttheirsupplierandcheckthetermsandconditionsofthe
purchasecontract.Thisproductshouldnotbemixedwithothercommercialwastesfordisposal.
All manuals and user guides at all-guides.com
all-guides.com

www.prolight.co.uk EPX Series Power Ampliers User Manual 12
All manuals and user guides at all-guides.com
This manual suits for next models
10
Table of contents
Other Waudio Amplifier manuals

Waudio
Waudio TPX SERIES User manual

Waudio
Waudio ZENITH 3000 User manual

Waudio
Waudio DP34258 User manual

Waudio
Waudio EPX 300 User manual

Waudio
Waudio DMA 200 User manual

Waudio
Waudio EP-300 User manual

Waudio
Waudio SB-300 User manual

Waudio
Waudio ZENITH 2K5 User manual

Waudio
Waudio AMP50 - XTR 1000 User manual

Waudio
Waudio Horizon 300 User manual