Wayland Folding Kayaks MK II FORMOZA 550 SOF COMBAT User manual

1
Producent kajaków i łodzi składanych
06-500 Mława, Parcele Łomskie 15 tel / fax (+48) (0) 23 654 44 06, 509793269 www.wayland.com.pl e-mail: kajak@hot.pl
ASSEMBLY INSTRUCTIONS
MK II -550 / 600
MK II FORMOZA 550 SOF COMBAT
MK II FORMOZA 600 SOF COMBAT
(NATO Stock Number) NSN: 1940-43-001-7175

2
Producent kajaków i łodzi składanych
06-500 Mława, Parcele Łomskie 15 tel / fax (+48) (0) 23 654 44 06, 509793269 www.wayland.com.pl e-mail: kajak@hot.pl
1. LIST OF PARTS - MILITARY KAYAK MKII FORMOZA 550 COMBAT
PK1 –hull pcs1
KWG2 –airsponson upper pcs 2
KWGD2 –airsponson under pcs 2
SP1 –keel (floor) front pcs1
ST1 –keel (floor) rear pcs1
StD1 –wooden bow pcs1
StR –wooden stern pcs1
W1 - rib 1 pcs1
W2 - rib 2 pcs1
W3 - rib 3 pcs1
W4 - rib 4 pcs1
W5 - rib 5 pcs1
W6 - rib 6 pcs1
W7 - rib 7 pcs1
DBP2 –side ladder front pcs2
DBT2 –side ladder rear pcs 2
WPP1 - deckbar front pcs1
WPT1 –deckbar rear pcs1
ZWDP1 –pole hook front pcs1
ZWDT1 –pole hook rear pcs 1
WDD2 –pole bottom front pcs2
WDR2 –pole bottom rear pcs2
K1 –snap fitting pcs 30 - 34
ZDB2 –sling side ladder pcs 2
GWD14 –pole seat pcs 14
KP1- clamp floor pcs 1
KB2 –clamp side ladder pcs 2
ZTB1 –brekwater rim (bumerang)
PP1- slider control peddals
B1 –breakwater kit pcs 1

3
Producent kajaków i łodzi składanych
06-500 Mława, Parcele Łomskie 15 tel / fax (+48) (0) 23 654 44 06, 509793269 www.wayland.com.pl e-mail: kajak@hot.pl
2. PLACE FOR KAYAK ASSEMBLY
It is necessary to get flat place free of natural obstacles like stones, roots etc to
assembly the kayak properly.
It is very important for symmetrical and proper adjustment the frame inside the hull
.
3. ASSEMBLY
Expand and align the hull to make possible inserting of the frame.
Unfold front keel SP 1 and attach front stem StD1 by placing Ericcson nuts onto the alu brackets in the end of
front keel SP1 and then unclench the front keels rods and insert alu pins into proper holes placed in front of keel
rods (p. fot.2, p. fot.3.)
Front (rear) bottom poles WDD2 & WDR2 plug in proper fittings ZWD2 placed on stem and stern, by use of
hooks screwed on the ends of poles. Proper plug in of poles must be from the outside of stem (stern and rotating
them to the center of boat. (p. fot.4,5) . Insert hooks into the brackets ZWD in opposite direction to the final
location and now rotate them of 180 to the boat center. Now insert poles into the rubber pole seats GP14 riveted
on the ribs.
Fot.1

4
Producent kajaków i łodzi składanych
06-500 Mława, Parcele Łomskie 15 tel / fax (+48) (0) 23 654 44 06, 509793269 www.wayland.com.pl e-mail: kajak@hot.pl
Rear floor keel ST1 must be prepared analogously.
So prepared keels (front and rear) place along the hull properly in direction of bow and stern.
Mount ribs W1 and W2 onto the front floor keel by placing snap fittings L1 riveted on them on the suitable
hooks riveted on the keel (p. fot.6) Ribs are supplied with numbers compatible to the numbers on keel.
Analogously ribs 6 and 7 attach to the rear floor keel (p. fot.7)
Side ladders left / right must be now attached to the floor keels front and rear. Place the bracket located on the
end of each ladder into the proper chink on the alu slings ZDB2 riveted on the stem (blue) and stern (red). Now
join side ladders to the ribs by use of special snap fittings riveted on the ribs and corresponding hooks Zac2 on
the ladders (see fot. 8, 9, 10, 11).

5
Producent kajaków i łodzi składanych
06-500 Mława, Parcele Łomskie 15 tel / fax (+48) (0) 23 654 44 06, 509793269 www.wayland.com.pl e-mail: kajak@hot.pl
Mount deckbars front and rear WPP1 , WPT1. Place blue / red hook riveted on one end of deckbars into the due
chink on the stem / stern sling. Second end deckbar tongue into the snapp fitting riveted in the upper part of rib
2 (front) and rib 6 (rear) (see fot.12)
This way prepared kayak parts are ready to insert them into the hull. Now introduce integrated front frame into
the front part of hull and rear frame into the rear part of the hull. To perform this it is recommended to stand
astride over the hull in its central part and taking eg front part of frame and carefully insert it to the hull then
repeat operation with the rear part of the frame (see fot.13)
Assemby must be performed symmetricaly. Airsponsons should be ideally located along the side ladders –it is
necessary to control it visually . It is most important for boat behave on the water.
Join both floor keels (front and rear) by use of alu clamp KP1 riveted on the front keel and corresponding
wooden block riveted on the rear floor keel. Lift up movable middle parts of keels then insert wooden block into
the clamp and move down keels by pressing carefully until they will parallel to the ground (see fot.14). (see
fot.14)
NOTE : Node must be still pressed to avoid serious injure when the springing keel releases itself

6
Producent kajaków i łodzi składanych
06-500 Mława, Parcele Łomskie 15 tel / fax (+48) (0) 23 654 44 06, 509793269 www.wayland.com.pl e-mail: kajak@hot.pl
Now it is necessary to continue pressing onto the floor until the side ladders are joined the same way. Insert
wooden block riveted on the rear side ladder into the clamp on front ladder and push it outside do the same with
remaining side ladder (see fot. 15, 16)
Attach bottom central poles front and rear WDSP2 i WDST2. Insert their metal ends in the bushes on front and
rear poles already attached to the stern and stem. Now join them in the central part by use of movable bushes
with grooves fixed on the front central poles. (see fot. 17)
Assemble ribs W3, W4, W5 in proper places signed 3,4,5 on the keel central part. Ribs need to be joined by
use of snap fittings on the corresponding hooks riveted on the keel. Same way assemble ribs to the side ladders
Bottom poles place in rubber pole seats riveted on ribs ( see fot. 18) (see fot 19, 20)

7
Producent kajaków i łodzi składanych
06-500 Mława, Parcele Łomskie 15 tel / fax (+48) (0) 23 654 44 06, 509793269 www.wayland.com.pl e-mail: kajak@hot.pl
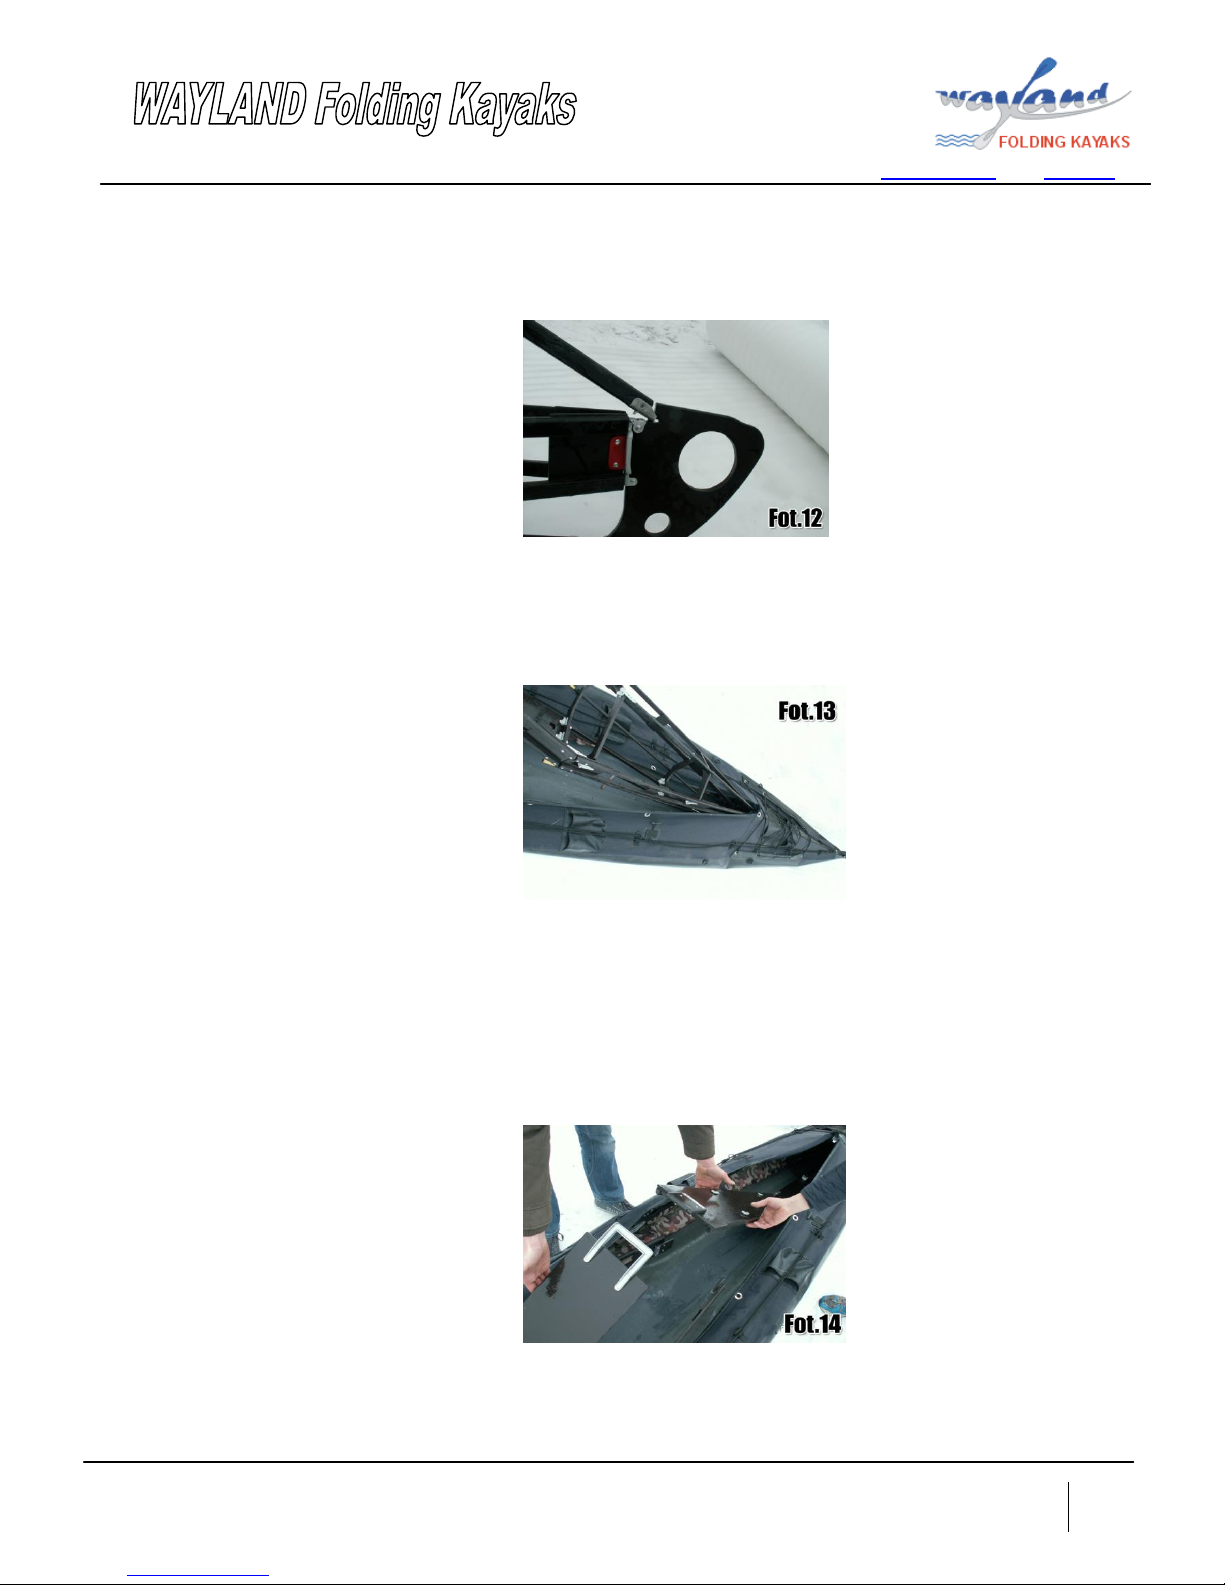
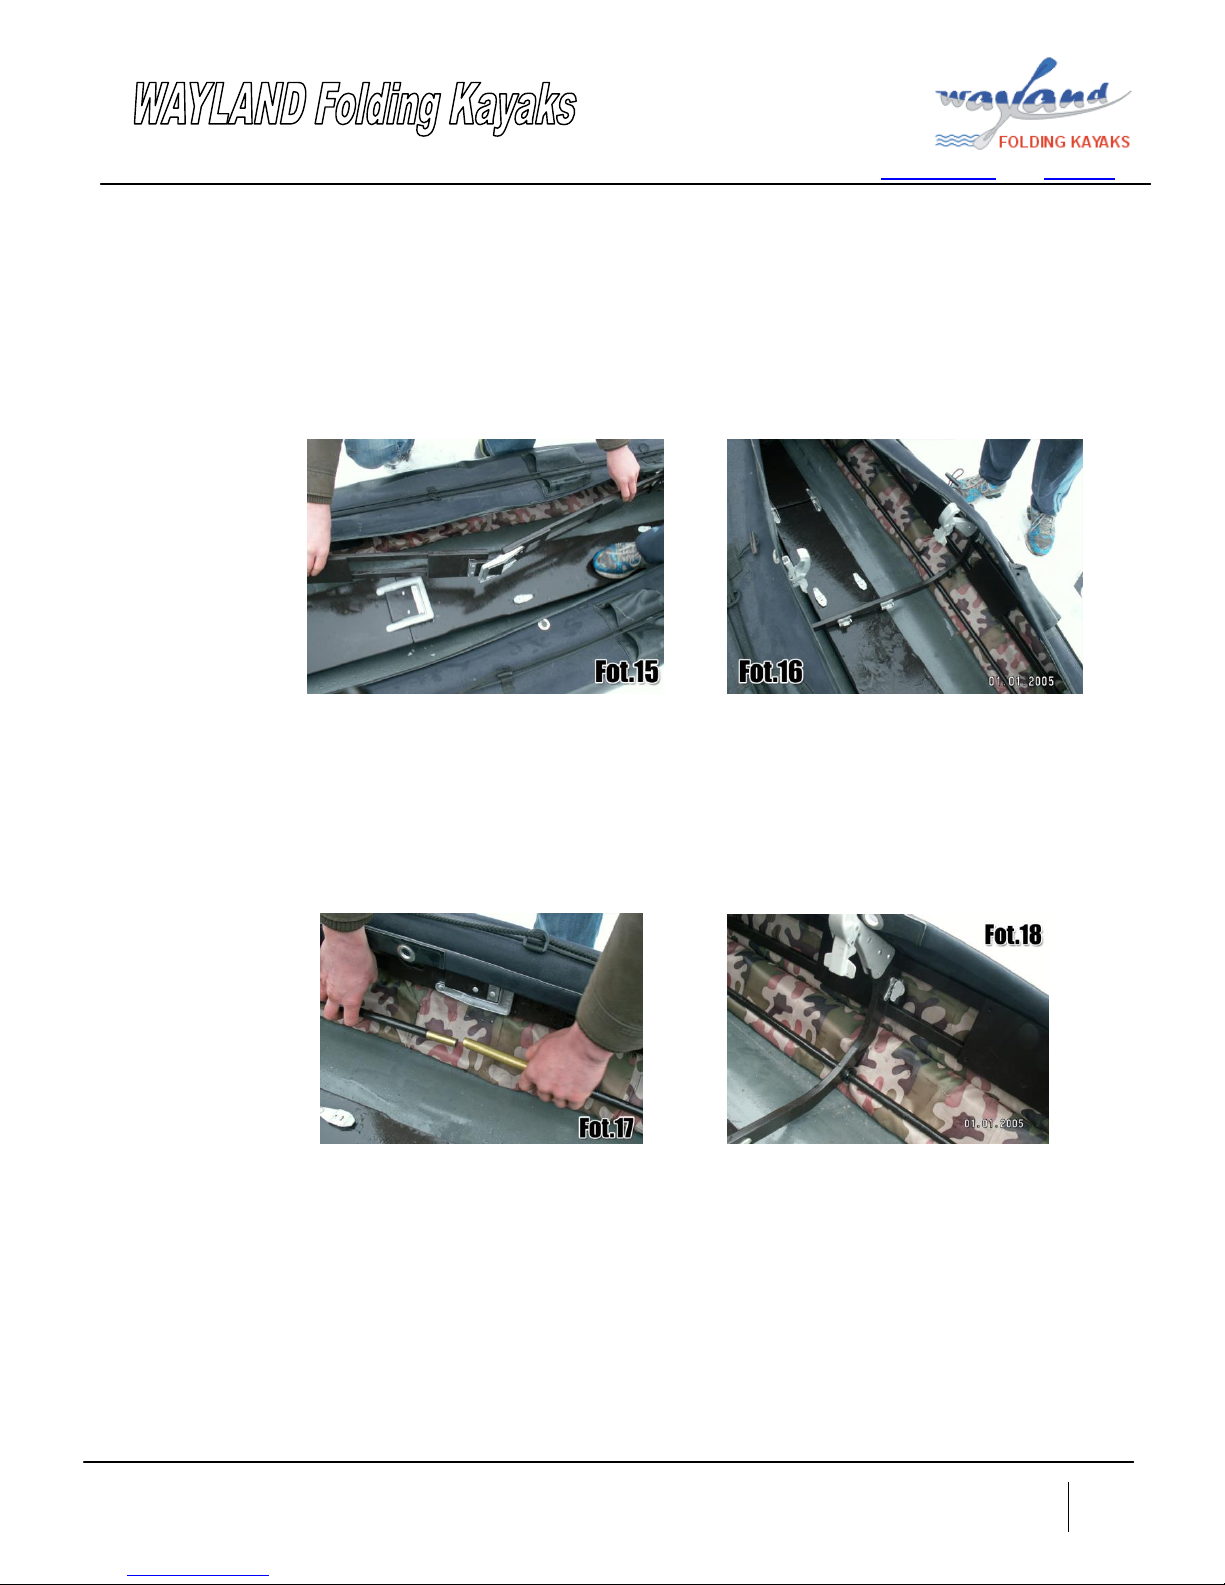
Assemble breakwater. T-shape hook GB1 insert to the groove in the tongue of front deckbar WPP1 and then
close the connection rotating brekwater to the position parallel with the boat axis. Go to the rear cockpit and
join breakwater with rib W6 using fittings riveted on the breakwater ends and brackets on the rib W6 (see fot.
21)
Insert remaining T-shape hooks screwed on breakwaters across the corresponding steel eyelets on the upperdeck
and then insert them to the locks on the ribs W3, W4 i W5 and latch the locks pressing the lever.
Now insert the trimmed edge of cockpit into the groove in the upper side of breakwater (see pic 21)
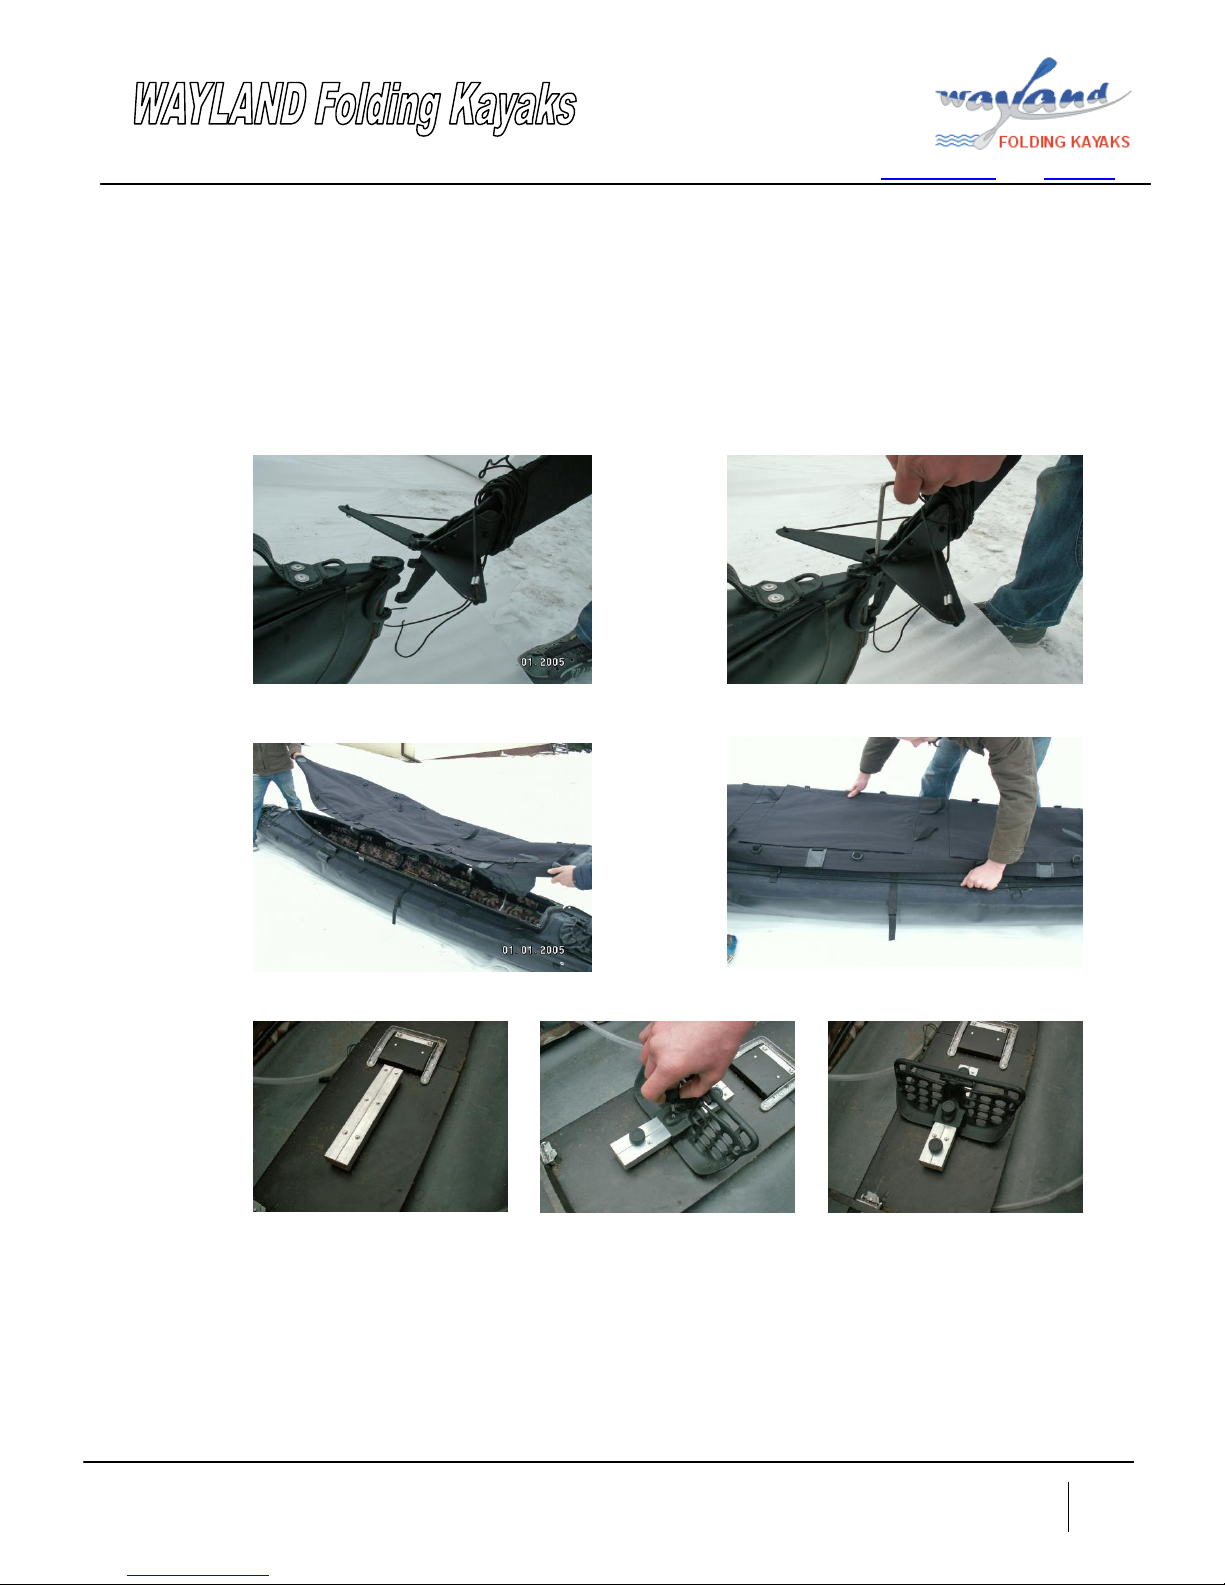
Assemble breakwater rim ZTB1 (bumerang)
Now fill four airsponsons, symmetrically, by use of proper pipe valves on the sides of them. Filling of
airsponsons must be alternately left side / right side / and again left side / right side until the airsponsons are
filled and reasonably stiff to get symmetry of the boat shape. Pressure inside the airsponsons should not exceed
1.2 ATM .
Mount seats. Unbuckle seats sets and pump airchambers included inside, depending on required height. There
are two airchambers for seat and one for backrest. Now place seats on the places with attached velcro types
Velcro types attached to the floor and seats keep seats in stable position Now join seats side straps to the D-rings
mounted on the side ladders in corresponding position.
Now the kayak is ready for use
Disassembly must be performed in opposite way

8
Producent kajaków i łodzi składanych
06-500 Mława, Parcele Łomskie 15 tel / fax (+48) (0) 23 654 44 06, 509793269 www.wayland.com.pl e-mail: kajak@hot.pl
Accessory assembly
1. Steering device and rudder assembly
Assemble steering pedals. Insert screw with romboidale nut to the slider riveted on the floor. Now adust the position of
the peddals accordingly to your legs length and your comfort. Tighten the screw to fix peddals on slider. Ster założyć na
okucie rufowe i zabezpieczyć załączona szpilką. Linki sterowe przeciągnąć przez otwory w bumerangu ZTB i ew.
fartuchu i dołączyć do pedałów sterowych przez przywiązanie i zabezpieczenie pętlą.
2. Spraycover assembly
3. Montaż podstopnika

9
Producent kajaków i łodzi składanych
06-500 Mława, Parcele Łomskie 15 tel / fax (+48) (0) 23 654 44 06, 509793269 www.wayland.com.pl e-mail: kajak@hot.pl
4. SPRAYCOVER ASSEMBLY:
This manual suits for next models
3
Table of contents
Popular Boat manuals by other brands

SARDINE MARINE
SARDINE MARINE SM-12X Owner's and operator's manual

Walker Bay
Walker Bay 310 FTD Owners & safety manual

Boston Whaler
Boston Whaler 255 Conquest user manual

Edgewater Networks
Edgewater Networks 205EX owner's manual

Point 65
Point 65 martini user manual

Yamaha
Yamaha FX High Output WaveRunner 2005 Owner's/operator's manual

Sportsman
Sportsman Masters 267OE 2022 Owner's manual and quick reference guide

TRAK Kayaks
TRAK Kayaks T-1600 Assembly and disassembly guide

Advanced Elements
Advanced Elements StraitEdge Kayak instruction manual

Maxum
Maxum 3700 SY Owner's manual supplement

Carver
Carver 410 Sport Sedan Operation manual

Four winns
Four winns 358 VISTA owner's manual