manuals.online logo
Brands
  1. Home
  2. •
  3. Brands
  4. •
  5. Weefine
  6. •
  7. Camera Accessories
  8. •
  9. Weefine WFH TG-Pro User manual

Weefine WFH TG-Pro User manual

R
e
l
e
a
s
e
P
o
r
t
①
② ③
Product introduction
Description of components
Ball Mount
M16×0.75 threaded
interface
Optical cable fixing plate
Flash window
Hinge
LOGO nameplate
Front shell
Indicator light
Manual/Wi-Fi key
Battery/switch of
vacuum system
Down key
Right key
Up key
Information key
Video key
Mode knob
Control knob
Thumb stopper
Pumping seal cover
Monitor window strip
Monitor window
Back shell
Playback key
Left key
OK/AFL key
Lens mount
Lens
Handle
Lock disk
Zoom key
Shutter
Power switch
Operating instructions
Please read this Manual carefully before use and keep it for future reference
Operation Manual for Dive Housing
WFH TG-Pro
Product features
① ② ③
One 18650 battery,
lasting more than 6 hours
Patented design “automatic
vacuum-pumping system”
M16×0.75 thread interface,
for external interface
In the off state, long press the key for 1 second to turn on the power and make the power
indicator on ;
In the on state, long press the key for 3 seconds to shut it down.
Startup/shutdown
The indicator light of the product is used both for power status and vacuum detection
status; it indicates the percentage of battery level within the first 5 seconds after startup;
it then indicates vacuum detection status after going off for 2 seconds.
Battery indicator and vacuum-pumping system
After startup, Press the button to start pumping. When the pumping is completed, the air
pump will automatically stop.
Vacuum detection function
In the on state, long press the key for 1 second to switch the 5 V power output status:
cycling (on-off).
5V power output control
Weefine’s dedicated optical cable WFA76/WFA78 should be used. Insert the WFA76/WFA78
in the optical cable fixing plate on the waterproof shell, and connect the other end to the
external flash, then the external flash can be triggered.
Installing optical cable and remote control
Since the shell needs to be opened frequently to take out the camera, the main O-ring
of the back shell is easy to stick to debris, making it dry and unlubricated. Therefore,the
O-ring needs regular maintenance. If it is found damaged, replace it with the spare O-ring ;
Replacing with body spare O-ring
First pick out the O-ring on the body with the disassembly tool, and then install the spare
O-ring on the back shell (spare O-ring should be lubricated).
How to replace it with the spare O-ring
Indicator light Pressure in the shell Working state
Red light flashing
Red and green lights
flashing alternately
Green light flashing Negative pressure
Pressure change
Pumping or intaking disabled
Pumping or intaking
Pumping completed and sealed
Ordinary pressure
Indicator light Battery level
Blue light
Green light
Red light
Red light flashing
80~100%
30~80%
10~30%
<10%
WEEFINE WFH TG-Pro Dive Housing is an upgrade of Weefine’s WFH-TG6. It is a
professional waterproof camera shell created specifically for underwater
photographers. The front shell and back shell of the product are hard oxidized with
black aluminum alloy, and the water-resistant depth can reach 80m ; the product is
equipped with an automatic vacuum-pumping system to detect its waterproofness
by detecting the internal sealing performance. In addition, it can be connected with
external display (M16 thread interface), and it allows the camera to be charged
(Weefine’s patent for invention), which greatly improves its usage time.
1. Weefine’s patented design, “automatic vacuum-pumping system” is provided,
which can be used to detect whether the product is sealed before the user enters the
water. Its detection feedback allows users to know the waterproofness of the product
all the time and makes them relieved with no need to worry about the risk of
leakage.
2. The product is equipped with M16×0.75 thread interface, which allows the
connection of an external display through the camera’s HDMI interface. The external
display with large sight window makes it easier for users to view and correct the
current shooting picture, so that they can take more perfect photos and videos.
3. The product is equipped with an 18650 battery, which can supply power to the
vacuum-pumping system and charge the camera through its built-in 5V power
supply system. The camera can last more than 6 hours under normal shooting
conditions.
⑤
⑥ ⑦
④
Product safety and Information
Quality assurance
Specification
Accessories in package
OLYMPUS TG7 / TG6 / TG5 camera
Hardened PC
One 18650 battery WBL-11N
80m/264ft(IP68)
M52x0.75
M16×0.75 (for external interface)
Aluminum alloy
Hard anodizing
185.9x75x128.2mm
1155g (with camera + battery on the land)
300g (with camera + battery underwater)
Applicable camera
Display window
Battery
Water-resistant depth
Threaded interface of lens
External thread
Material
Surface treatment
Dimension
Weight
1. Press the latch.2. Turn the lock disc 90° clockwise to the
position that can be opened.
1. Close the waterproof shell in alignment
with the notch of the lock disc.
2. Turn the lock disc 90° counterclockwise
to the position that can be locked.
Opening waterproof shell:
Closing waterproof shell:
Opening and closing waterproof shell
Mounting camera
Camera
1. Insert the USB cable into the charging interface of the camera ;
2. Place the camera in the waterproof shell as shown ;
3. Close the waterproof shell and check that all controls of the
shell are used correctly.
Lens mount
USB cable
* The lens mount must be removed before
mounting the camera in the waterproof shell.
Always check the camera before mounting it in the waterproof shell
1. Confirm the battery
Confirm the battery is loaded ;
2. Remove the hand strap the camera
If the camera is loaded without removing the hand strap, the hand strap may get caught between
the camera gap and cause water leakage ;
3. Remove the lens mount from the digital camera and install it to the waterproof shell
* Do not disassemble the waterproof shell yourself to avoid damage caused by artificial disassembly
which can not be repaired.
* Do not place the waterproof shell in direct sunlight or high temperature environment for a long time.
* If it is intended not to use the waterproof shell for a long time, remove the battery in time and store
it in a dry and cool place.
* Before use, it is necessary to carefully check the O-ring to ensure that the it is not damaged, with no
sand or other debris attached. The disassembly tool in accessories should be used to disassemble the
waterproof ring for cleaning. Do not disassemble it with sharp tools to avoid damage. Do not clean it
with organic solution to avoid aging and deformation.
* Always use original lubricants and original O-rings.
* Do not open the waterproof shell when used underwater.
* After leaving the water, be sure to wipe off the water on the surface of the waterproof shell before
opening it, so as to avoid beads on the shell entering the interior and damaging the internal parts.
* After use, be sure to shake the waterproof shell in fresh water and soak it for 30 minutes to remove
the salt and impurities attached to the diving recorder and avoid corrosion and rust of metal parts on
the waterproof shell. If the parts are rusted due to not cleaned after use, which affects the waterproofness
and leads to water leakage, the cost of maintenance must be borne by the user.
We guarantee against the manufacturer’s defects for 1 year from the date of purchase ;
the manufacturer’s defects occurring within 15 days from the date of purchase resulting in the
replacement of the seller’s products, as well as all other manufacturer’s defects occurring within 1 year
from the date of purchase can be repaired free of charge.
The warranty excludes the following circumstances:
1. Damage caused by failing to use, maintain and store the product in accordance with the operation
manual ;
2. The product is repaired or altered by unauthorized service office or personnel ;
3. Damage caused by force majeure, e.g., geological disaster, war, etc.
1. Turn the battery cover knob to the open state, then open the cover and install an 18650
lithium battery (notice the positive and negative electrodes).
2. Close the battery cover and turn the knob to the closed state.
* Make sure the lithium battery is full.
Battery installation and use
Checking camera
Checking waterproof shell
18650 lithium battery
Open the battery cover Battery cover knob switch
Open state Closed state
Hand strap x1
WFA76 x1
Hex wrench x1
Operation Manual x1 Guarantee Card x1 HDMI-DD-C3 x1WFH TG-Pro x1
Disassembly tool x1
Silicone oil x1Spare O-ring x1Ball head x1Adapter board x1
◆ Water leakage function detection
Check the main waterproof O-ring to ensure that there is no debris, broken filament, damage,
or indentation.
1. Before use, unscrew the pumping seal cover, and then press the vacuum system switch for
pumping. The indicator flashes between red and green when pumping; the green light flashes
and the motor stops, indicating that pumping is completed; then tighten the pumping seal cover.
2. Put the waterproof shell on the land for 30 minutes. After that, If the water leakage detection
indicator flashes green, the shell is properly sealed, and it can then be used in the water.
3. If the red and green lights still flash alternately after pumping, then the waterproof shell is poorly
sealed and it must be checked before use.
4. Before open the waterproof shell after use, open the pumping seal cover and press the air release
valve to inject the air.
* Attention: Be sure to tighten the pumping seal cover before entering the water.
The red light flashes before pumping
The red and green lights flash alternately during pumping
The green light flashes after pumping

This manual suits for next models

1

Other Weefine Camera Accessories manuals

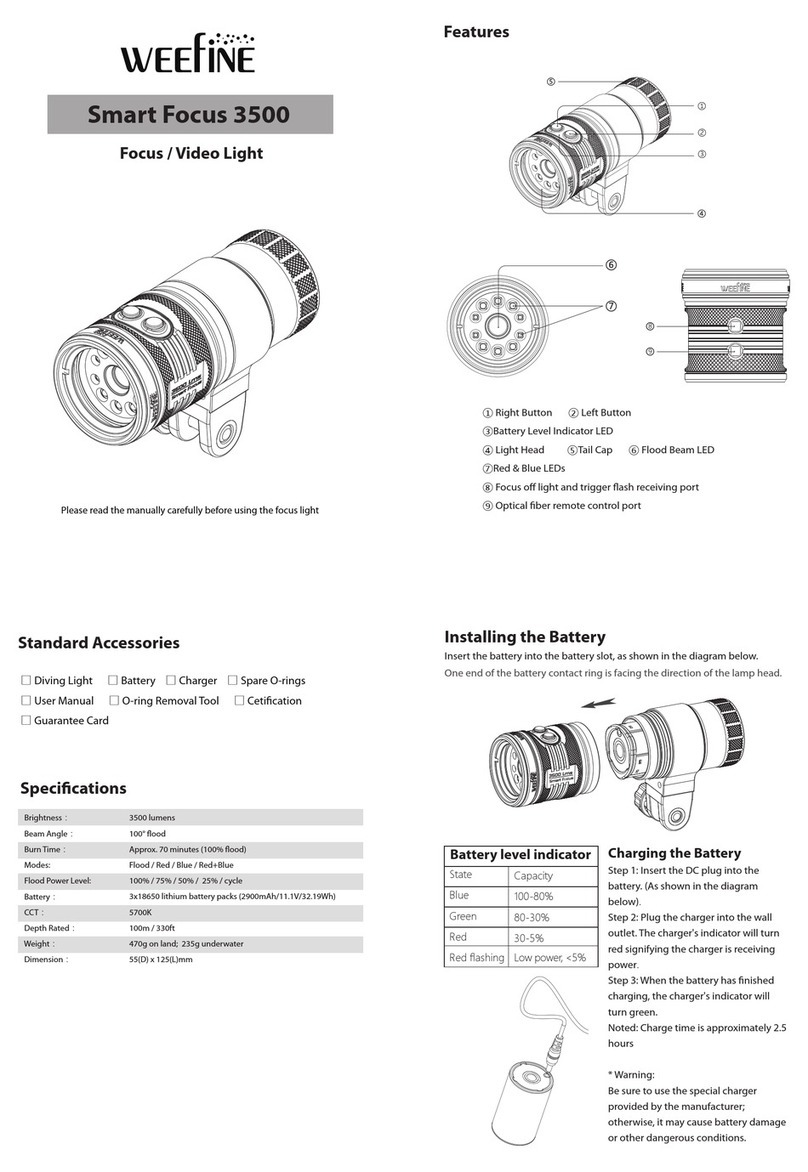
Weefine Smart Focus 3500 User manual

Weefine

Weefine Smart Focus 3500 User manual

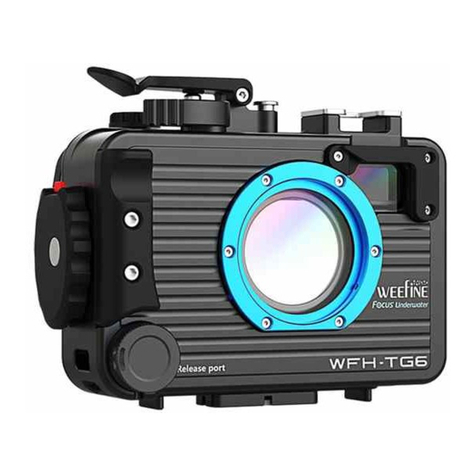
Weefine WFH TG-6 User manual

Weefine

Weefine WFH TG-6 User manual

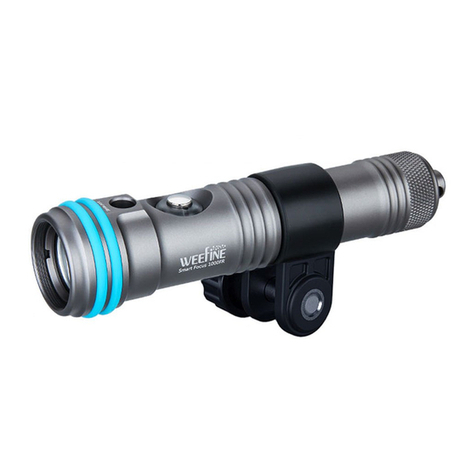
Weefine Smart Focus 1200 User manual

Weefine

Weefine Smart Focus 1200 User manual

Popular Camera Accessories manuals by other brands

Nikon WM-E80 instruction manual

Nikon

Nikon WM-E80 instruction manual

INON Z-240 user manual

INON

INON Z-240 user manual

Photoflex Adjustable ShoeMount2 Hardware instruction manual

Photoflex

Photoflex Adjustable ShoeMount2 Hardware instruction manual

Glidecam Smooth Shooter Quick setup guide

Glidecam

Glidecam Smooth Shooter Quick setup guide

eltima electronic Jokie 2 user manual

eltima electronic

eltima electronic Jokie 2 user manual

Rotolight NEO user manual

Rotolight

Rotolight NEO user manual

GREEN BANK LB24250 user guide

GREEN BANK

GREEN BANK LB24250 user guide

ProMediaGear Modular L-Bracket instructions

ProMediaGear

ProMediaGear Modular L-Bracket instructions

Pylontech US3000C Operation manual

Pylontech

Pylontech US3000C Operation manual

Kodak TIB5200 technical information

Kodak

Kodak TIB5200 technical information

Olympus PT-026 - Underwater Housing For Stylus 500 Digital... instruction manual

Olympus

Olympus PT-026 - Underwater Housing For Stylus 500 Digital... instruction manual

Sanyo UF-1311 Specification sheet

Sanyo

Sanyo UF-1311 Specification sheet

AODELAN TGTE3T manual

AODELAN

AODELAN TGTE3T manual

dji OSMO user manual

dji

dji OSMO user manual

ORION TELESCOPES & BINOCULARS Tritech II-M instruction manual

ORION TELESCOPES & BINOCULARS

ORION TELESCOPES & BINOCULARS Tritech II-M instruction manual

GPX TPD108 user guide

GPX

GPX TPD108 user guide

Sony LA-EA2 Specifications

Sony

Sony LA-EA2 Specifications

EnerSys DataSafe XE Series Installation, operation and maintenance manual

EnerSys

EnerSys DataSafe XE Series Installation, operation and maintenance manual

manuals.online logo
manuals.online logoBrands
  • About & Mission
  • Contact us
  • Privacy Policy
  • Terms and Conditions

Copyright 2025 Manuals.Online. All Rights Reserved.