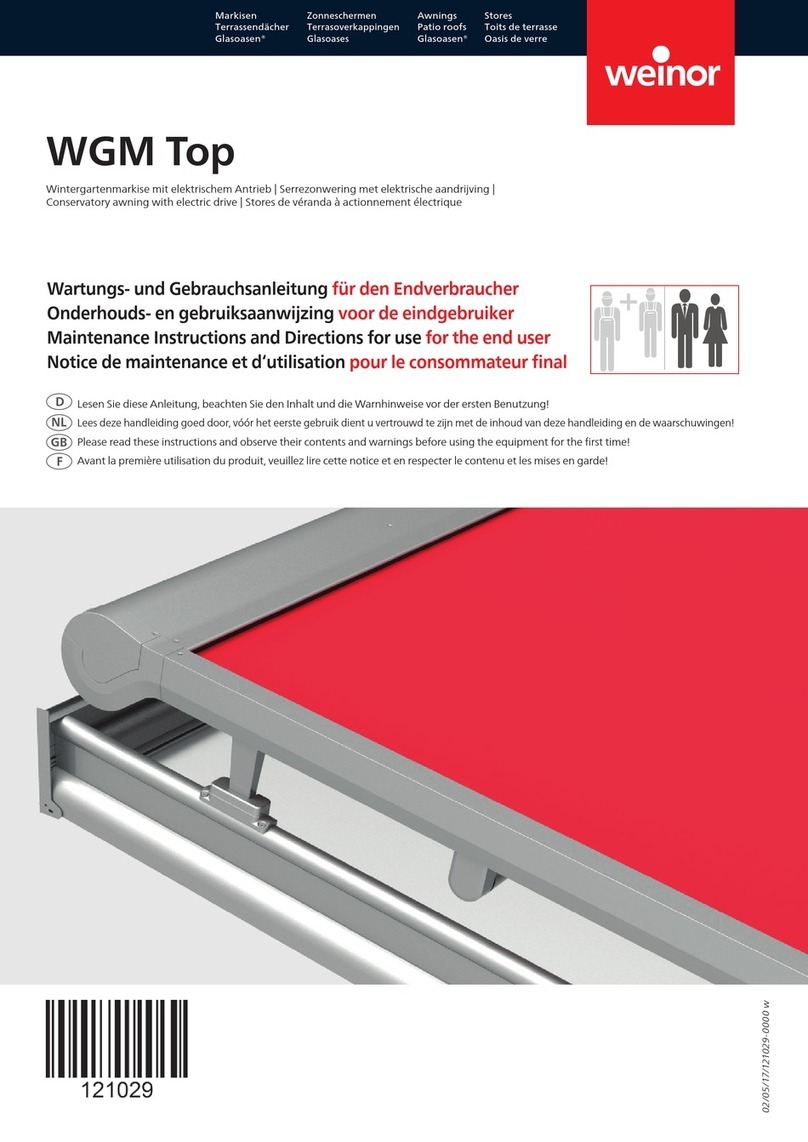
weinor WGM Top Assembly instructions

2020-04-27/v4.3/121028-0000 w
WGM Top
Wintergartenmarkise mit elektrischem Antrieb
Serrezonwering met elektrische aandrijving
Conservatory awning with electric drive
Stores de véranda à actionnement électrique
Montageanleitung nur für das Fachunternehmen
Montagehandleiding alleen voor het vakbedrijf
Instructions for assembly only for the specialist retailer
Instructions de montage seulement pour l‘entreprise spécialisée
Awnings
Patio roofs
Glasoasen®
Markisen
Terrassendächer
Glasoasen®
Zonneschermen
Terrasoverkappingen
Glasoases
®
Stores
Toits de terrasse
Oasis de verre®

2Technische Änderungen vorbehalten | Technische wijzigingen voorbehouden | We reserve the right to make technical changes | Sous réserve de modifications techniques
2
1
3
4
4
5
11
12
13
6
8
10
7
9
OPTION
OPTIE
OPTION
OPTIE
OPTION
OPTIE
OPTION
OPTIE
80
150
220 120 - 165
165 - 210
210 - 255
120
14
16
17
15
18
1Markise (Kassette)
2Tuch
3Ausfallprofil
4Transportprofil
5Stützfuß top (Standard 120 mm)
6Stützfuß top (Option)
7Stützfuß top verstellbar (Option)
8Stützfuß top (Reihenanlage), verstellbar
9Konsole(n) (Option)
10
Bedienungs-/Wartungs- und Montageanleitungen
11 Stützfuß top Adapter (Terrazza)
12 Distanzrohr
13 Netz (Flachseile fixieren)
14 Endkappen
15
Fernbedienung
16 E-Box
17 Montagehilfe
18 Stützfuß Terrazza Pure
Produktübersicht
Inhaltsverzeichnis
- Werkzeugliste → weinor Downloadcenter (DLC)
- Explosionsansicht → weinor Downloadcenter (DLC)
Produktübersicht | Inhaltverzeichnis 2
Allgemeines 3
Maße und Abstände 10
Stützfüße top – Varianten und Verwendung 11
Stützfüße montieren 12
Transportprofile auf die Stützfüße schieben 13
Transportprofile bei eingeschränkten Platzverhältnissen anbringen
13
Bestelloption „vormontiertes Ausfallprofil“ 14
Transportprofile montieren*
*(Bestelloption „vormontiertes Ausfallprofil“)
15
Flachseile mit Seilklemme verbinden und spannen* 16
Flachseile auf korrekten Verlauf prüfen* 16
Grüne Federspannbänder entfernen* 17
Flachseile an der Seilklemmne fixieren und nicht kürzen* 17
Montagehilfe entfernen und Verschraubungen festziehen 18
Ausfallprofildeckel mit Auflaufnocken anbringen und festschrauben
18
WGM Top Bestelloption „nicht vormontiertes Ausfallprofil“ 19
Transportprofile montieren**
**„nicht vormontiertes Ausfallprofil“
20
Flachseile durch Endkappen führen** 21
Flachseile in das Ausfallprofil einführen** 21
Ausfallprofi l in Führungsprofi le einschieben** 22
Tuch mit Kederprofil an Ausfallprofil einhängen** 23
Flachseile mit Seilklemme verbinden und spannen** 24
Flachseile auf korrekten Verlauf prüfen** 24
Grüne Federspannbänder entfernen** 25
Flachseile für künftiges Nachspannen vorbereiten** 25
Flachseile im Ausfallprofil fixieren und nicht kürzen**
26
Montagehilfe entfernen und Verschraubungen festziehen 26
Ausfallprofildeckel mit Auflaufnocken anbringen 27
Montage Distanzrohr 27
Option Konsolenmontage 28
Markise an Konsolen anbringen 29
Wandanschlussdach anbringen und verschrauben 29
Option Konsolenmontage an Dachsparrenhaltern 30
Option Reihenanlage 31
Schaltpläne 32
Motorendlage einstellen 33
Überprüfung der Montage – visuelle Prüfung, Funktionsprüfung 34
Fehlerbeseitigung 35
Übergabe 38
Entsorgung 39
Leistungserklärung 40
Konformitätserklärung 41
Symbole 44
WGM Top | 121028-0000 w | v4.3 | 2020-04-27 | Montageanleitung | Montagehandleiding | Instructions for assembly | Instructions de montage

3
Technische Änderungen vorbehalten | Technische wijzigingen voorbehouden | We reserve the right to make technical changes | Sous réserve de modifications techniques
Lesen Sie diese Anleitung, beachten Sie den Inhalt und die
Warnhinweise vor der Montage!
Bestimmungsgemäße Verwendung
Die Wintergartenmarkise (WGM Top) ist eine Sonnenschutzmarkise, die
vorrangig als solche eingesetzt werden darf. WGM Top kann bedingt als
Regenschutz eingesetzt werden, unter Berücksichtigung der Hinweise zum
geregelten Regenablauf*. Eine missbräuchliche Nutzung der Markise, sowie
Veränderungen, An- oder Umbauten an der Markise, die ohne schriftliche
Genehmigung von weinor vorgenommen werden, können zu Beschädigun-
gen, Gefährdungen oder zum Absturz der Markise führen. Diese sind nicht
zulässig und führen zum Verlust der Garantieansprüche.
(* Nutzung der WGM Top als Regenschutz nur unter Aufsicht und nur bei
gesichertem Regenablauf, um eine Beschädigung der Anlage durch Wasser-
sackbildung im Tuch abzuwenden. Wird das Markisentuch nass eingefahren,
kommt es zu Schimmel- und Fleckenbildung! Nasse Markise nur im Notfall
einfahren (z. B. bei Sturm-, Frost- oder Schneefallgefahr)! Ein Nasses Tuch
muss schnellstmöglich bei ausgefahrener Markise getrocknet werden!)
CE Kennzeichnung
Die weinor GmbH & Co. KG erklärt, dass sich die WGM
Top in Übereinstimmung mit den grundlegenden
Anforderungen und relevanten Vorschriften der EN
Normen befindet. Die WGM Top erfüllt die Anforde-
rungen der im CE- Konformitätszeichen angegebenen
Windwiderstandsklasse. Die Anforderungen werden
nur erfüllt, wenn die Herstellerhinweise berücksichtigt
werden.
Qualifikation
Diese Anleitung richtet sich an geschulte Monteure und setzt folgende
Qualifikationen und Kenntnisse in der Montagetechnik voraus:
- Arbeitsschutz, Betriebssicherheit und Unfallverhütungsvorschriften
- Handhabung von Leitern, Gerüsten, Werkzeugen und Maschinen
- Transport von langen, schweren Bauteilen und Glasscheiben
- Beurteilung der Bausubstanz und Einbringen von Befestigungsmitteln
- Montage, Inbetriebnahme und Betrieb des Produkts.
Beauftragen Sie fachkundige Montageunternehmen, wenn Sie nicht über
diese Qualifikationen verfügen!
Sicherheitszeichen
Warnung! Stromschlaggefahr! Gefahrenstufe III
Vorsicht! Personenschäden! Gefahrenstufe II
Achtung! Produkt- und Sachschäden Gefahrenstufe I
Sicherheitshinweise
Warnung! Stromschlaggefahr!
ş Elektrische Festinstallation darf nur durch Elektrofachkraft gemäß
VDE 100 erfolgen!
ş Montagehinweise der mitgelieferten Elektrogeräte befolgen!
ş Elektroanschlüsse während der Montage vom Stromnetz trennen!
ş Elektrischer Festanschluss darf nur an Leistungsnetze mit allpoliger Trenn-
vorrichtung und mit mindestens 3 mm Kontaktöffnungsweite erfolgen!
ş Anlage nur anschließen, wenn Angaben am Produkt hinsichtlich Span-
nung, Frequenz und Leistung mit der Stromquelle übereinstimmen!
Vorsicht! Personenschäden!
ş Sicherheitshinweise befolgen, um Personenschäden abzuwenden!
ş Montage- und Einstellanleitungen der Motor-, Schalter- und Steuerungs-
hersteller beachten!
ş Verpackungen, Folien und Kleinteile von Kindern fernhalten (Erstickungs-
gefahr)!
ş Stromzufuhr bei Arbeiten im Fahrbereich der Anlage unterbrechen (Ste-
ckerkupplung am Motor trennen oder kontrollierte Stromunterbrechung
von außen installieren)!
ş Sicherungen und automatische Steuerung ausschalten, um Quetsch- oder
Absturzgefahren durch unkontrollierte Bewegungen der Anlage abzu-
wenden!
ş Bei Betrieb der Markise durch mehrere Nutzer: Vorrangig schaltende
Verriegelungsvorrichtung (kontrollierte Stromunterbrechung von außen)
betätigen, um jegliches Ein- und Ausfahren der Markise auszuschließen!
Aufstiegshilfen:
ş Aufstiegshilfen nicht an der Markise anlehnen oder befestigen!
ş Aufstiegshilfen müssen einen festen Stand haben und genügend Halt
bieten!
ş nur Aufstiegshilfen mit ausreichende Tragkraft verwenden!
Absturzsicherung:
ş Geeignete Absturzsicherungen verwenden, um Absturzgefahren insbe-
sondere bei Arbeiten in größeren Höhen abzuwenden!
Montagekonsolen:
ş Art und Anzahl der gelieferten Montagekonsolen auf Übereinstimmung
mit der Bestellung prüfen!
ş Den tatsächlich vorgefundenen Befestigungsuntergrund auf Übereinstim-
mung mit den Angaben der Bestellung prüfen! Bei sicherheitrelevanten
Abweichungen ist eine Montage unzulässig!
Befestigungsmittel:
ş Geeignete Montage- und Befestigungsmaterialien (Dübel, Kleber etc.)
entsprechend der bauseitigen Gegebenheiten und Traglasten verwenden!
Dabei die vom Hersteller angegebenen Dübelauszugskräfte beachten und
berücksichtigen!
ş Die Markise mit der vom Hersteller empfohlenen Konsolenanzahl und -art
montieren.
Quetsch- und Scherbereiche:
ş Zwischen beweglichen Komponenten und den sich begegnenden Mar-
kisenteilen (Ausfallprofil, Kasten, Gelenkarme, Profile) bestehen Quetsch-
und Scherbereiche, die Kleidungsstücke oder Körperteile erfassen und mit
einziehen können!
ş Markisen bis 2,5 m Montagehöhe nur betätigen, wenn die Sicht auf bewe-
gende Teile besteht! Elektrische Steuerungen, Funkantriebe mit Rastschal-
tern, Rastschalter usw. sind in diesem Fall unzulässig!
ş Tastschalter in Sichtweite des Ausfallprofils in einer Höhe von 1,5 m und
von beweglichen Teilen entfernt anbringen (nationale Bestimmungen
hinsichtlich behinderter Personen beachten)!
Teilmontierte Markisen:
ş Bei werkseitig teilmontierten Markisen sind die unter Federspannung
stehenden Teile (durch den Hersteller gekennzeichnet) gegen unbeabsich-
tigtes Öffnen gesichert.
Achtung! Diese Sicherung erst nach vollständiger Montage der Markise
entfernen, um eine hohe Verletzungsgefahr abzuwenden, die durch un-
kontrolliertes Öffnen der unter Federspannung stehenden Teile besteht!
Probelauf:
ş Stellen Sie Sicher, dass sich niemand beim ersten Ausfahren im Fahrbereich
oder unter der Markise befindet!
ş Unterziehen Sie Befestigungsmittel und Konsolen nach dem ersten Aus-
fahren einer optischen Kontrolle.
ş Führen Sie niemals Probeläufe über Automatiksteuerungen oder Schalter
durch, wenn sich die Markise dabei außerhalb des Blickfeldes des Bedie-
ners befindet!
ş Probekabel für den Motoranschluss verwenden!
Achtung! Produkt-/Sachschäden!
ş Transportgut sachgerecht und sicher befestigen!
ş Verpackung vor Nässe schützen (aufgeweichte Verpackungen können sich
beim Transport lösen)!
ş Bereits geöffnete Verpackungen wieder sachgerecht für den Weitertrans-
port verschließen!
ş Markise seitenrichtig zum Anbringungsort transportieren, damit die Mar-
kise nicht unter engen Platzverhältnissen gedreht werden muss.
Markise mit Hilfe von Seilen in einen höheren Bereich hochziehen:
ş Markise aus der Verpackung entnehmen und mit Zugseilen fest verbinden!
ş Markise in waagerechter Lage gleichmäßig hochziehen!
Allgemeines
weinor GmbH & Co. KG
Mathias-Brüggen-Straße 110
50829 Köln
17
EN 13 561
Markise für die Verwendung
im Außenbereich
Windwiderstandsklasse:
Klasse 3
WGM Top | 121028-0000 w | v4.3 | 2020-04-27 | Montageanleitung | Montagehandleiding | Instructions for assembly | Instructions de montage

4Technische Änderungen vorbehalten | Technische wijzigingen voorbehouden | We reserve the right to make technical changes | Sous réserve de modifications techniques
Productoverzicht
Inhoudsopgave
- Gereedschapslijst → weinor Downloadcenter (DLC)
- Opengewerkte tekening → weinor Downloadcenter (DLC)
Productoverzicht | Inhoudsopgave 4
Algemeen 5
Maten en afstanden 10
Steunvoeten top – varianten en gebruik 11
Steunvoeten monteren 12
Transportprofielen op de steunvoeten schuiven
13
Transportprofielen bij beperkte ruimte aanbrengen 13
Besteloptie “voorgemonteerd uitvalprofiel“
14
Transportprofielen monteren* *
(Besteloptie “voorgemonteerd uitvalprofiel“)
15
Platte kabels met kabelklem verbinden en spannen* 16
Controleer de platte kabels op juist verloop* 16
Groene klembanden verwijderen* 17
Platte kabels aan de kabelklem vastzetten en niet inkorten* 17
Montagehulpmiddel verwijderen en schroefverbindingen vastdraaien
18
Uitvalprofieldeksel met oploopnokken aanbrengen en vast
schroeven 18
WGM Top besteloptie “niet voorgemonteerd uitvalprofiel“ 19
Transportprofielen monteren**
**
(besteloptie “niet voorgemonteerd uitvalpro
fiel“
)
20
Platte kabels door eindkappen leiden** 21
Platte kabels in het uitvalprofiel leiden** 21
Uitvalprofiel aanbrengen aan Transportprofielen** 22
Doek met kederprofiel aan uitvalprofiel hangen** 23
Platte kabels met kabelklem verbinden en spannen** 24
Controleer de platte kabels op juist verloop** 24
Groene klembanden verwijderen** 25
Platte kabels voorbereiden voor later naspannen** 25
Platte kabels aan de kabelklem vastzetten en niet inkorten** 26
Montagehulpmiddel verwijderen en schroefverbindingen vastdraaien 26
Uitvalprofieldeksel met oploopnokken aanbrengen en vastschroeven 27
Montage afstandsbuis 27
Optie montage van de consoles 28
Zonnescherm gemonteerd op consoles 29
Wandaansluitingsoverkapping aanbrengen en vastschroeven 29
Optie montage van de consoles op dakspanthouder 30
Optie serie-installatie 31
Elektrisch schakelschema 32
Eindpositie van de motor instellen 33
Controle van de montage – visuele controle, functiekeuring 34
Fouten verhelpen 35
Oplevering 38
Verwijdering 39
Prestatieverklaring 40
EU-conformiteitsverklaring 41
Symbolen 44
2
1
3
4
4
5
11
12
13
6
8
10
7
9
OPTION
OPTIE
OPTION
OPTIE
OPTION
OPTIE
OPTION
OPTIE
80
150
220 120 - 165
165 - 210
210 - 255
120
14
16
17
15
18
1Zonnescherm (Kast)
2Doek
3Uitvalprofiel
4Transportprofielen
5Steunvoeten top (standaard 120 mm)
6Steunvoeten top (Option)
7Steunvoet top verstelbaar (optie)
8Steunvoet top (serie-installatie), verstelbaar
9Consoles (optie)
10
Bedienings-/onderhouds- en montagehandleidingen
11 Steunvoeten top Adapter (Terrazza)
12 Afstandsbuis
13 Net (platte kabels vastzetten )
14 Eindkappen
15
Afstandsbediening
16 E-Box
17 Montagehulpmiddel
18 Steunvoeten Terrazza Pure
WGM Top | 121028-0000 w | v4.3 | 2020-04-27 | Montageanleitung | Montagehandleiding | Instructions for assembly | Instructions de montage
5
Technische Änderungen vorbehalten | Technische wijzigingen voorbehouden | We reserve the right to make technical changes | Sous réserve de modifications techniques
Lees deze handleiding goed door, vóór de montage dient u
vertrouwd te zijn met de inhoud van deze handleiding en de
waarschuwingen!
Reglementair gebruik
WGM Top is een zonnescherm, dat alleen als zodanig mag worden gebruikt.
WGM Top kan onder voorwaarden worden gebruikt als regenbescherming,
rekening houdend met de instructies voor een gecontroleerde regenafvoer*.
Oneigenlijke benutting van het zonnescherm, veranderingen, aanbouwen
aan of verbouwingen van het zonnescherm die zonder schriftelijke goedkeu-
ring van weinor worden uitgevoerd, kunnen tot beschadigingen, gevaren of
instorten van het zonnescherm leiden. Voornoemde handelingen zijn niet
toegestaan en leiden tot het verlies van de rechten op garantie.
(* Gebruik van de WGM Top alleen onder toezicht als regenbescherming en alleen als de
regenafvoer gewaarborgd is om schade aan het systeem door de vorming van waterzak-
ken in het doek te voorkomen. Als het doek van het zonnescherm nat ingeschoven wordt,
kunnen er schimmels en vlekken ontstaan! Een nat zonnescherm alleen in geval van nood
inschuiven (bijv. bij gevaar voor storm, vorst of sneeuwval)! Nat doek moet zo snel mogelijk
bij uitgeschoven zonnescherm worden gedroogd!)
CE-markering
Hierbij verklaart de weinor GmbH & Co. KG, dat de
WGM Top in overeenstemming is met de basiseisen
en andere relevante voorschriften van de EN-normen.
De WGM Top voldoet aan de eisen van de in het CE-
conformiteitskenmerk aangegeven windweerstands-
klasse. Aan de eisen wordt alleen voldaan, wanneer de
instructies van de fabrikant worden aangehouden.
Kwalificatie
Deze handleiding is bedoeld voor geschoolde monteurs die over de volgen-
de kwalificaties en kennis op het gebied van montagetechniek beschikken:
-
Voorschriften voor veiligheid op het werk, bedrijfsveiligheid en ongevallenpreventie
- Gebruik van ladders, steigers, gereedschappen en machines
- Transport van lange, zware componenten en glazen ruiten
- Beoordeling van de bouwsubstantie en aanbrengen van bevestigingsmiddelen
- Montage, inbedrijfstelling en gebruik van het product.
Geef een deskundig montagebedrijf opdracht voor de uitvoering wanneer u
niet over deze kwalificaties beschikt!
Veiligheidssymbolen
Waarschuwing! Elektrische schokken! Gevarenklasse III
Voorzichtig! Persoonlijk letsel. Gevarenklasse II
Attentie!
Product- en materiële schade!
Gevarenklasse I
Veiligheidsinstructies
Waarschuwing! Gevaar voor elektrische schokken!
ş Elektrische vaste installatie alleen laten uitvoeren door een elektrotechnicus
conform VDE 100!
ş Houd de montage-instructies van de meegeleverde elektrische apparaten aan!
ş Maak de elektrische aansluiting los van het voedingsspanningsnet tijdens de
montage!
ş Elektrische vaste aansluiting alleen aansluiten op voedingsnetten met schei-
dingsinrichting over alle polen en met minimaal 3mm contactopening!
ş Installatie alleen aansluiten, wanneer de specificatie op het product voor wat
betreft spanning, frequentie en vermogen kloppen met die van de stroombron!
Voorzichtig! Persoonlijk letsel!
ş Veiligheidsinstructies aanhouden, om persoonlijk letsel te voorkomen!
ş Montage- en instelhandleidingen van de motor-, schakelaar- en bestu-
ringsfabrikant aanhouden!
ş Verpakkingen, folie en kleine onderdelen buiten bereik van kinderen
houden (gevaar voor verstikking)!
ş Bij werkzaamheden binnen het bewegingsgebied van de installatie de
voedingsspanning onderbreken (stekkerkoppeling op motor losmaken of
gecontroleerde spanningsonderbreking van buiten installeren)!
ş Zekeringen en automatische besturing uitzetten, om beknellings- en valge-
vaar door ongecontroleerde bewegingen van de installatie te voorkomen!
ş Bij gebruik van het zonnescherm door meerdere gebruikers: met voorrang scha-
kelende vergrendelingsvoorziening (gecontroleerde stroomonderbreking van
buiten) bedienen, om elk in- en uitschuiven van het zonnescherm uit te sluiten!
Klimhulpmiddelen:
ş Klimhulpmiddelen niet tegen het zonnescherm zetten of aan het scherm
bevestigen!
ş Klimhulpmiddelen dienen stabiel te staan en voldoende houvast te bieden!
ş Gebruik alleen klimhulpmiddelen met voldoende draagvermogen!
Beveiliging tegen vallen:
ş Gebruik geschikte beveiliging tegen vallen, om vooral bij het werken op
grotere hoogte het valgevaar af te wenden!
Montageconsoles:
ş Controleer of het soort en aantal van de montageconsoles overeenkomt
met hetgeen op de bestelling staat!
ş De werkelijk aanwezige bevestigingsondergrond controleren op
overeenstemming met de specificaties op de bestelling! Bij veiligheidsrele-
vante afwijkingen is montage niet toegestaan!
Bevestigingsmiddelen:
ş Gebruik geschikte montage- en bevestigingsmaterialen (pluggen, lijm,
enzovoort) passend bij de bouwzijdige omstandigheden en draaglasten!
Neem daarbij de door de fabrikant aangegeven uittrekkrachten van de
pluggen in acht!
ş Monteer het zonnescherm met het door de fabrikant aanbevolen aantal
en type consoles.
Gevaar voor beknelling en snijden:
ş Tussen bewegende componenten en de bewegende zonneschermdelen
(uitvalprofiel, kast, scharnierarmen, profielen) bestaan beknellings- en
gevarenzones, die kleding of lichaamsdelen kunnen grijpen en intrekken!
ş Zonneschermen tot 2,5m montagehoogte alleen bedienen, wanneer
de bewegende delen ongehinderd in zicht zijn! Elektrische besturingen,
draadloze aandrijvingen met vergrendelbare schakelaars, vergrendelbare
schakelaars enz. zijn in dit geval niet toegestaan!
ş De drukschakelaar in het zicht van het uitvalprofiel op een hoogte van
1,5 meter en op afstand van bewegende delen aanbrengen (nationale
voorschriften over personen met een beperking in acht nemen)!
Gedeeltelijk gemonteerde zonneschermen:
ş Bij af fabriek gedeeltelijk gemonteerde zonneschermen zijn onder veer-
spanning staande delen (door de fabrikant gekenmerkt) gezekerd tegen
onbedoeld openen.
Attentie! Deze zekering pas na de volledige montage van het zonne-
scherm verwijderen, om groot gevaar voor persoonlijk letsel te voor-
komen, die door ongecontroleerd openen van de onder veerspanning
staande delen bestaat!
Proefloop:
ş Zorg dat er zich niemand in het bewegingsgebied of onder het zonne-
scherm bevindt bij de eerste keer uitschuiven!
ş De bevestigingsmiddelen en consoles na het eerste uitschuiven visueel
controleren.
ş Voer nooit proeflopen uit via automatische besturingen of schakelaars,
wanneer het zonnescherm zich daarbij buiten het blikveld van de bedie-
nende persoon bevindt!
ş Testkabel voor de motoraansluiting gebruiken!
Attentie! Product- en materiële schade!
ş De te transporteren goederen correct en veilig bevestigen!
ş Bescherm de verpakking tegen vocht (zacht geworden verpakking kan
tijdens transport open gaan)!
ş Al geopende verpakkingen weer goed voor het verdere transport afsluiten!
ş Het zonnescherm met de juiste zijde voor naar de montagelocatie trans-
porteren, zodat het zonnescherm niet meer gedraaid hoeft te worden.
Zonnescherm met behulp van kabels naar een hoger gelegen
gedeelte hijsen:
ş Zonnescherm uit de verpakking nemen en met de hijskabels verbinden!
ş Zonnescherm in horizontale positie gelijkmatig omhoog trekken!
Algemeen
weinor BV
Mathias-Brüggen-Strasse 110
50829 Keulen
17
EN 13 561
Zonnescherm voor gebruik
buiten
Windweerstandsklasse:
klasse 3
WGM Top | 121028-0000 w | v4.3 | 2020-04-27 | Montageanleitung | Montagehandleiding | Instructions for assembly | Instructions de montage

6Technische Änderungen vorbehalten | Technische wijzigingen voorbehouden | We reserve the right to make technical changes | Sous réserve de modifications techniques
Product overview
Contents
Product Overview | Contents 6
General 7
Dimensions and spacing 10
Top support bracket – versions and use 11
Assembling support brackets 12
Pushing side channels onto the support brackets 13
Fitting side channels in a confined space 13
Order option “Pre-mounted projection profile“ 14
Mounting the side channels*
*(Order option “Pre-mounted projection profile“)
15
Connect the flat rope, using a rope clamp and tighten it* 16
Check the flat rope runs correctly* 16
Removing the green spring tension straps* 17
Fixing the flat rope to the rope clamp and not trimming it* 17
Removing the assembly aid and tightening the bolting 18
Fitting and screwing tight the projection profile cover with stop cams 18
WGM Top order option “Not Pre-mounted projection profile“ 19
Mounting the side channels** 20
Guiding the fl at rope through the end caps** 21
Insert the fl at rope in the projection profi le** 21
Attaching the projection profile to side channels** 22
Attaching the fabric with beaded profile to the projection profile** 23
Connect the flat rope, using a rope clamp and tighten it** 24
Check the flat rope runs correctly** 24
Removing the green spring tension straps** 25
Preparing the flat rope for future retightening** 25
Fixing the flat rope in the projection profile and not trimming it**
26
Removing the assembly aid and tightening the bolting 26
Fitting and screwing tight the projection profile cover with stop cams 27
Tightening bolting 27
Option mounting of the brackets 28
Install Awning on consoles 29
Fitting and screwing tight the wall connection roof 29
Option mounting of the brackets on rafter mounting 30
Multi-section unit option 31
Circuit diagram 32
Adjusting the drive‘s end position 33
Checking the installation – visual inspection, functional check 34
Rectifying faults 35
Handover 38
Disposal 39
Declaration of performance
40
EU Declaration of Conformity
41
Symbols 44
2
1
3
4
4
5
11
12
13
6
8
10
7
9
OPTION
OPTIE
OPTION
OPTIE
OPTION
OPTIE
OPTION
OPTIE
80
150
220 120 - 165
165 - 210
210 - 255
120
14
16
17
15
18
1Awning (Housing)
2Fabric
3Projection profile
4Side channels
5Adjustable top (standard 120 mm)
6Adjustable top (option)
7Adjustable top support bracket (option)
8Adjustable top support bracket (multi-section unit)
9Brackets (option)
10
Operation-/maintenance- and assembly instructions
11 Adapter Adjustable top (Terrazza)
12 Fabric support roller
13 Net (fixing the flat rope)
14 End caps
15
Remotecontrol
16 E-Box
17 Installation aid
18 Adjustable Terrazza Pure
- Tool list → weinor download centre (DLC)
- Exploded drawing → weinor download centre (DLC)
WGM Top | 121028-0000 w | v4.3 | 2020-04-27 | Montageanleitung | Montagehandleiding | Instructions for assembly | Instructions de montage

7
Technische Änderungen vorbehalten | Technische wijzigingen voorbehouden | We reserve the right to make technical changes | Sous réserve de modifications techniques
Please read these instructions and observe their contents and
warnings before assemble the equipment!
Intended use
WGM Top is a sun protection awning that can primarily be used for this
purpose. WGM Top can be used as rain protection contingent on the inst-
ructions for controlled rain drainage*. Misuse of the awning, as well as any
alterations, changes or additions to the awning that are carried out without
weinor‘s written permission can lead to damage, hazards or the collapse
of the awning. These are not permitted and will result in the voiding of the
guarantee claims.
(* Use of the WGMTop as rain protection only under supervision and only
when the rain drainage is guaranteed to prevent damage to the system due
to pooling in the fabric. If the awning fabric is retracted while still wet, mould
and stains may form! Only retract a wet awning in the event of an emergency
(e.g. with the risk of a storm, frost or snowfall)! Wet fabric must be dried out
as quickly as possible when the awning is open!)
CE mark
Weinor GmbH & Co. KG declares that the WGMTop
is in compliance with the basic requirements and
relevant provisions of the EN standards. WGMTop
meets the requirements of the wind resistance class in-
dicated in the CE conformity marks. The requirements
shall only be deemed as having been met once the
manufacturer's instructions have been adhered to.
Qualifications
These instructions are addressed to trained fitters and require qualification
and knowledge of installation techniques:
- Occupational safety at work, operating safety and accident prevention
regulations
- Handling of ladders, scaolding, tools and machines,
- Transport of long, heavy components and glass panes,
- Estimation of the building structure and fitting the fixing materials,
- Installation, start-up and operation of the product.
Employ a professional installation company if you do not possess these
qualifications!
Safety symbols
Warning! Risk of electric shock! Danger level III
Careful! Personal injury! Danger level II
Caution! Product and property damage! Danger level I
Safety instructions
Warning! Risk of electric shock!
ş Electrical fixed installation may only be carried out by electrically skilled
person according to VDE 100!
ş Observe the installation instructions for the electrical devices included in
the delivery!
ş Separate the electrical connections from the mains during the installation!
ş Only connect electrical termination to mains system with all-pole discon-
necting device and with min. 3 mm contact opening width!
ş Only connect the construction if indications on product relating to voltage,
frequency and output match those of the power source!
Caution! Personal injury!
ş Follow safety instructions in order to prevent personal injury!
ş Observe the instructions for installation and setting from the manufactu-
rer of the drive, commutator and control!
ş Keep packaging, sheeting and small parts away from children (choking
hazard)!
ş Disconnect current supply when working within the movement range of
the construction (disconnect connector coupling on driver or install cont-
rolled power interruption from the outside)!
ş Switch off fuses and automatic control in order to prevent risk of crushing
or falling due to uncontrolled movements of the construction!
ş If awnings are operated by several users: a priority locking device must
be activated (controlled interruption of the power supply from outside),
making it impossible to open or retract the awning at all!
Ladders:
ş Do not lean ladders against the awning or fix them to the awning!
ş Ladders must be on a firm base and provide adequate support!
ş Only use ladders with adequate load-bearing capacity!
Anti-fall guards:
ş Use appropriate anti-fall guards to prevent the danger of falling especially
when working at considerable heights!
Mounting brackets:
ş Check that the type and number of the mounting brackets supplied are
compliant with the order!
ş Check that the information provided in the order about the installation
surface tallies with the actual installation surface on site! Installation is
inadmissible in case of safety-relevant deviations!
Fixing material:
ş Use suitable installation and fitting materials (plugs, glue, etc.) correspon-
ding to onsite conditions and loads! In doing so, the extraction forces
specified by the manufacturer must be observed and taken into account!
ş The awning must be fitted with the type and number of brackets recom-
mended by the manufacturer.
Crushing and cutting zones:
ş Crushing and shearing zones exist between movable components and
moving awning parts (projection profile, housing, folding arms, profiles)
which could catch and draw in clothing or body parts!
ş Only activate awnings up to 2.5 m installation height if the moving parts
are within your line of vision! Electrical controls, radio controls with latch
switches, stand-alone latch switches, etc. are not permissible in this case!
ş The key switch must be fitted in the line of vision of the projection profile,
but far enough removed from the movable parts, at a height of 1.5 metres
(national regulations relating to disabled people must be observed)!
Partly mounted awnings:
ş In awnings which are partly mounted in the factory, secure the spring-
tensioned parts (designated by the manufacturer) against unintentional
opening.
Caution! Do not remove this locking device until the installation of the
awnings has been completed in order to prevent the high risk of injury
that could result from unintentional opening of spring-tensioned parts!
Test run:
ş When ascending the awning for the first time, make sure that the working
range of the awning and the area below it is kept clear!
ş A visual inspection of the fixing material and brackets must be performed
after the awning has been extended for the first time.
ş When carrying out test runs, never use automatic system control or swit-
ches if the awning is not in the operator's line of vision!
ş Use test cable for the motor input!
Caution! Product and property damage!
ş Secure cargo properly and safely!
ş Protect the packaging from moisture (dampened packaging can come
loose during transport)!
ş Seal open packaging for further transport!
ş The awning must be carried to the place of installation the right way
round so it does not have to be turned round again in a confined space.
Raising the awning to a higher level using ropes:
ş Remove awning from the packaging and secure tightly with hauling
ropes!
ş Lift the awning horizontally and evenly!
General
Weinor GmbH & Co. KG
Mathias-Brüggen-Straße 110
50829 Cologne (Germany)
17
EN 13 561
Awning for use in exterior
area
Wind resistance class:
Class 3
WGM Top | 121028-0000 w | v4.3 | 2020-04-27 | Montageanleitung | Montagehandleiding | Instructions for assembly | Instructions de montage
8Technische Änderungen vorbehalten | Technische wijzigingen voorbehouden | We reserve the right to make technical changes | Sous réserve de modifications techniques
Aperçu des produits
Table des matières
Aperçu des produits | Table des matières 8
Généralités 9
Dimensions et distances 10
Pieds supports top – variantes et utilisation 11
Monter des pieds supports
12
Déplacer les profilés de transport sur les pieds supports 13
Fixer les profilés de transport lors d‘espace restreint 13
Commande d‘option « barre de charge prémonté » 14
Monter les profilés de transport*
*Commande d‘option « barre de charge prémonté »
15
Relier les câbles plats avec un serre-câble et tendre* 16
Vérifier le bon déroulement des câbles plats* 16
Enlever les tendeurs verts* 17
Fixer les câbles plats aux serre-câbles et ne pas raccourcir* 17
Retirer l‘aide au montage et serrer les fixations 18
Monter le couvercle de barre de charge avec les cames d‘arrêt*
18
WGM Top commande d‘option « barre de charge non prémonté »
19
Monter les profilés de transport**
(**Commande d‘option « barre de charge non prémonté» )
20
Faire passer les câbles plats par les embouts** 21
Faire passer les câbles plats par le profi lé de défection** 21
Monter le profi lé de défection sur les profi lés de guidage** 22
Accrocher la toile au barre de charge avec le profilé-jonc** 23
Relier les câbles plats avec un serre-câble et tendre** 24
Vérifier le bon déroulement des câbles plats** 24
Enlever les tendeurs verts** 25
Préparer les câbles plats à une tension ultérieure** 25
Fixer les câbles plats aux serre-câbles et ne pas raccourcir** 26
Retirer l‘aide au montage et serrer les fixations 26
Monter le couvercle de barre de charge avec les cames d‘arrêt
27
Montage du tube d‘écartement 27
Option montage de console 28
Installation du store sur les consoles 29
Monter le toit de raccordement mural puis visser 29
Option montage de console pour chevron de toit 30
Installation alignée en option 31
Schéma des connexions 32
Ajuster la position de fin de course du moteur 33
Vérification du montage – contrôle visuel, essai fonctionnel 34
Dépannage 35
Remise de l‘installation et des documents 38
Gestion des déchets 39
Déclaration de performance 40
Déclaration de conformité CE 41
Symboles utilisés 44
2
1
3
4
4
5
11
12
13
6
8
10
7
9
OPTION
OPTIE
OPTION
OPTIE
OPTION
OPTIE
OPTION
OPTIE
80
150
220 120 - 165
165 - 210
210 - 255
120
14
16
17
15
18
1Store (Boîtier)
2Toile
3Barre de charge
4Profilés de transport
5Pied support top (standard 120 mm)
6Pied support top (option)
7Pied support top réglable (option)
8Pied support top (installation alignée), réglable
9Console (option)
10
Instructions d‘utilisation / de maintenance et des instructions de montage
11 Adaptateur Pied support top (Terrazza)
12 Tube d‘écartement
13 Filet (fixer les câbles plats)
14 Embouts
15
Télécommande
16 E-Box
17 Aide au montage
18 Pied support Terrazza Pure
-Liste d’outils → weinor Downloadcenter (DLC)
- Vue éclatée → weinor Downloadcenter (DLC)
WGM Top | 121028-0000 w | v4.3 | 2020-04-27 | Montageanleitung | Montagehandleiding | Instructions for assembly | Instructions de montage

9
Technische Änderungen vorbehalten | Technische wijzigingen voorbehouden | We reserve the right to make technical changes | Sous réserve de modifications techniques
Avant la montage du produit, veuillez lire cette notice et en
respecter le contenu et les mises en garde!
Utilisation conforme
WGMTop est un store de protection solaire qui doit être utilisé essentielle-
ment en tant que tel. WGMTop peut être utilisé comme protection contre la
pluie en tenant compte des consignes sur l’écoulement régulé de la pluie*.
Une utilisation non conforme du store ainsi que des modifications, ajouts et
transformations apportés sur le store sans autorisation écrite de weinor peu-
vent constituer un danger et endommager ou faire chuter le store. Ils ne sont
pas autorisés et entraînent la perte des droits à la garantie.
(* Utilisation de la WGMTop l’installation comme une protection contre la pluie sous sur-
veillance uniquement afin d’éviter tout endommagement de l’installation dû à la formati-
on de poches d’eau. Apparition de moisissure et de taches si la toile de store est enroulée
alors qu‘elle est mouillée ! Enrouler le store humide uniquement en cas d‘urgence (par ex.
en cas de risque de tempête, de gel ou de chutes de neige) ! Une toile mouillée doit être
déroulée pour être séchée le plus rapidement possible ! )
Marquage CE
La société weinor GmbH & Co. KG déclare que
WGMTop est conforme aux exigences fondamentales
et aux spécifications correspondantes des normes EN.
Le produit WGMTop répond aux exigences de la classe
de résistance au vent indiquée sur le signe de confor-
mité CE. Les critères d'exigences sont remplis unique-
ment si les indications du fabricant sont respectées.
Qualification
Cette notice s’adresse aux monteurs qui ont été formés, et implique de dispo-
ser des qualifications et connaissances en technique de montage suivantes:
- Sécurité au travail, sécurité de fonctionnement et prescriptions en matière
de prévention des accidents,
- Manipulation d'échelles, d'échafaudages, d'outils et de machines,
- Transport d'éléments de construction et de vitrages longs et lourds,
- Évaluation du bâti et mise en place d'éléments de fixation,
- Montage, mise en service et fonctionnement du produit.
Si vous ne disposez pas de ces qualifications, adressez-vous à des entreprises
de montage professionnelles!
Symboles de sécurité
Attention ! Risque d‘électrocution ! Niveau de danger III
Attention ! Blessures corporelles! Niveau de danger II
Attention ! Dommages matériels ! Niveau de danger I
Instructions de sécurité
Avertissement! Risque d'électrocution!
ş L'installation électrique fixe doit être réalisée exclusivement par une per-
sonne qualifiée en électricité, conformément à VDE 100!
ş Suivre les instructions de montage des appareils électriques fournis!
ş Débrancher les raccordements électriques de l'alimentation réseau pen-
dant le montage!
ş Brancher un raccordement électrique fixe uniquement sur des réseaux
pourvus d'un sectionneur multipolaire et avec une largeur d'ouverture de
contact d'au moins 3mm!
ş Raccorder l'installation uniquement lorsque les indications du produit en
termes de tension, de fréquence et de puissance correspondent à celles de
la source d'alimentation électrique!
Prudence! Dommages aux personnes!
ş Respecter les instructions de sécurité pour éviter des blessures corporelles!
ş Respecter les instructions de montage et de réglage du fabricant du mo-
teur, de l'interrupteur et de la commande!
ş Garder les emballages, films et les petites pièces hors de portée des en-
fants (risque d'étouffement)!
ş Couper l'alimentation électrique avant de procéder à des travaux dans la
zone de mouvement de l'installation (débrancher la fiche de connexion du
moteur ou installer un coupe-circuit à commande externe)!
ş Couper les fusibles et la commande automatique afin d'éviter de se coin-
cer les doigts ou de faire chuter le store en cas de mouvements incontrôlés
de l'installation!
ş Dans le cas où les stores sont utilisés par plusieurs personnes: actionner un
dispositif de verrouillage de commutation prioritaire (coupure de courant
contrôlée depuis l'extérieur) afin d'empêcher alors tout mouvement de
déploiement/ d'escamotage du store.
Aides à la montée:
ş Ne pas appuyer ou fixer d'aides à la montée contre le store!
ş Les aides à la montée doivent être stables et offrir un maintien suffisant!
ş Utiliser uniquement des aides à la montée qui présentent une capacité de
charge suffisante!
Protection antichute:
ş Utiliser des protections antichute adaptées afin d'éviter les risques de
chute, en particulier en cas de travaux en hauteur!
Consoles de montage:
ş Vérifier que le nombre et le type de consoles de montage correspondent à
la commande!
ş Vérifier que le support de fixation effectivement fourni correspond aux
indications de la commande! En cas de différences pouvant affecter la
sécurité, le montage est interdit!
Éléments de fixation:
ş Utiliser un montage et des matériaux de fixation adaptés (chevilles, colle,
etc.) selon les conditions de construction sur place et les charges à suppor-
ter! Observer et prendre en compte les forces pour extraire les chevilles
indiquées par le fabricant!
ş Monter le store avec le type et le nombre de consoles recommandés par le
fabricant.
Zones d'écrasement et de cisaillement:
ş Entre les composants mobiles et les parties du store qui leur font face (bar-
re de charge, boîtier, bras articulés, profilés), il y a des zones d'écrasement
et de cisaillement où des pans de vêtements ou des parties du corps
peuvent se coincer et être attirées!
ş Les stores d'une hauteur de montage allant jusqu'à 2,5m ne doivent être
actionnés que si les pièces mobiles sont visibles! Les commandes élec-
triques, les moteurs radio avec commutateur à crans, les commutateurs à
crans, etc. ne sont pas autorisés dans ce cas!
ş Placer le bouton-poussoir dans le champ visuel du barre de charge à une
hauteur de 1,5m et à distance des pièces mobiles (respecter les disposi-
tions relatives aux personnes handicapées)!
Stores partiellement montés:
ş Pour les stores partiellement montés en usine, les pièces pré-tendues (mar-
quées par le fabricant) sont sécurisées contre une ouverture involontaire.
Attention! Retirer cette sécurité uniquement une fois le store entièrement
monté, pour éviter un risque élevé de blessure dû à une ouverture incon-
trôlée des pièces pré-tendues!
Marche d'essai:
ş Lors du premier déploiement, s'assurer que personne ne se trouve dans la
zone de mouvement du store ou sous celui-ci!
ş Après le premier déploiement du store, contrôler visuellement les élé-
ments de fixation et consoles.
ş Ne procéder jamais à une marche d'essai avec les commandes ou interrupteurs
automatiques si le store se trouve en dehors du champ de vision de l'utilisateur!
ş Utiliser un câble de test pour le raccord moteur!
Attention! Dommages matériels/sur le produit!
ş La marchandise transportée doit être fixée correctement et de manière sûre!
ş Protéger l'emballage de l'humidité (des emballages détrempés peuvent se
défaire pendant le transport)!
ş Les emballages déjà ouverts doivent être correctement refermés pour
poursuivre le transport!
ş Transporter le store du bon côté jusqu'au lieu de montage afin de ne pas
avoir à le tourner dans un espace restreint.
Utiliser des câbles pour soulever le store dans une zone surélevée:
ş Sortir le store de son emballage et bien l'attacher à l'aide de câbles de traction!
ş Soulever le store régulièrement en le maintenant à l'horizontale!
weinor GmbH & Co. KG
Mathias-Brüggen-Straße 110
50829Cologne
17
EN 13 561
Store destiné à une utilisation
en extérieur
Classe de résistance au
vent: classe 3
Généralités
WGM Top | 121028-0000 w | v4.3 | 2020-04-27 | Montageanleitung | Montagehandleiding | Instructions for assembly | Instructions de montage

10 Technische Änderungen vorbehalten | Technische wijzigingen voorbehouden | We reserve the right to make technical changes | Sous réserve de modifications techniques
30,5
min. 30
127
T
83
210
Ausfall | Uitval | Projection | Projection
160
80
100 100
240 - 350
50 - 800
50 - 800
70 - 2000
166
52
Ausfall | Uitval | Projection | Projection
Achsmaß | Asmaat | Distance between centre lines | Entraxe
Kassettenbreite | Cassettebreedte | Cassette width | Largeur de la cassette
kein Tuchspalt bei OptiStretch-Variante
geen lichtspleet bij OptiStretch-variant
no fabric gap in the OptiStretch version
pas d'écartement de la toile pour la variante OptiStretch
Tuchspalt
lichtspleet
fabric gap
écartement de la toile
Ausfallprofil | Uitvalprofiel | Projection profile | Barre de charge
30,5
min. 30
≤ 25
Führungsprofil
Geleiderprofiel
Guide profile
Profilé de guidage
Maße und Abstände
Maten en afstanden
Dimensions and spacing
Dimensions et distances
WGM Top | 121028-0000 w | v4.3 | 2020-04-27 | Montageanleitung | Montagehandleiding | Instructions for assembly | Instructions de montage

11
Technische Änderungen vorbehalten | Technische wijzigingen voorbehouden | We reserve the right to make technical changes | Sous réserve de modifications techniques
Stützfüße top – Varianten und Verwendung
Steunvoeten top – varianten en gebruik
Top support bracket – versions and use
Pieds supports top – variantes et utilisation
Stützfuß top verstellbar
Steunvoet top verstelbaar
Adjustable top support bracket
Pied support top réglable
Stützfuß top (Reihenanlage), verstellbar
Steunvoet top (serie-installatie), verstelbaar
Adjustable top support bracket
(multi-section unit)
Pied support top
(installation
alignée),
réglable
120-165 165-210 210-255
80 120 150 220
Stützfuß top für Montage an Fremdprodukt
Steunvoet top voor montage aan
extern product
Top support bracket for assembly
on a third-party product
Pied support top avec adaptateur
pour montage sur
produit tiers
Stützfuß top mit Adapter für die
Montage an weinor Terrazza
Steunvoet top met adapter voor
montage aan weinor Terrazza
Top support bracket with adapter for
assembly on a weinor Terrazza
Pied support top avec adaptateur pour
montage sur weinor Terrazza
Stützfuß top mit Adapter für die
Montage an weinor Terrazza Pure
Steunvoet top met adapter voor
montage aan weinor Terrazza Pure
Top support bracket with adapter for
assembly on a weinor Terrazza Pure
Pied support top avec adaptateur
pour montage sur weinor Terrazza Pure
WGM Top | 121028-0000 w | v4.3 | 2020-04-27 | Montageanleitung | Montagehandleiding | Instructions for assembly | Instructions de montage
12 Technische Änderungen vorbehalten | Technische wijzigingen voorbehouden | We reserve the right to make technical changes | Sous réserve de modifications techniques
Stützfüße montieren
Steunvoeten monteren
Assembling support brackets
Monter des pieds supports
5,2 mm
...an Fremdprodukt befestigen
...aan extern product) bevestigen
...mounting on third-party products
...Fixer sur un produit tiers
...mit Adaptern auf einem weinor Terrazza Pure
...met adapters aan een weinor Terrazza Pure
...with adaptors on a weinor Terrazza Pure
...avec des adaptateurs sur un weinor Terrazza Pure
...mit Adaptern auf einem weinor Terrazza
...met adapters aan een weinor Terrazza
...with adaptors on a weinor Terrazza
...avec des adaptateurs sur un weinor Terrazza
WGM Top | 121028-0000 w | v4.3 | 2020-04-27 | Montageanleitung | Montagehandleiding | Instructions for assembly | Instructions de montage

13
Technische Änderungen vorbehalten | Technische wijzigingen voorbehouden | We reserve the right to make technical changes | Sous réserve de modifications techniques
Transportprofile auf die Stützfüße schieben
Transportprofielen op de steunvoeten schuiven
Pushing side channels onto the support brackets
Déplacer les profilés de transport sur les pieds supports
2a
2b
*
3a
3b
3c
3d
Verschraubung nur
leicht festziehen!
Schroefverbinding
slechts licht aan-
draaien!
Only slightly tighten
the bolting!
Serrer que légère-
ment la fixation par
vis!
Transportprofile bei eingeschränkten Platzverhältnissen anbringen
Transportprofielen bij beperkte ruimte aanbrengen
Fitting side channels in a confined space
Fixer les profilés de transport lors d‘espace restreint
Verschraubung nur leicht
festziehen!
Schroefverbinding slechts
licht aandraaien!
Only slightly tighten the
bolting!
Serrer que légèrement la
fixation par vis!
WGM Top | 121028-0000 w | v4.3 | 2020-04-27 | Montageanleitung | Montagehandleiding | Instructions for assembly | Instructions de montage

14 Technische Änderungen vorbehalten | Technische wijzigingen voorbehouden | We reserve the right to make technical changes | Sous réserve de modifications techniques
ca. 400 mm
Markise für Montage der Trans-
portprofile vorbereiten
Zonnescherm voor montage van
de transportprofielen voorbe-
reiden
Preparing the awning for instal-
lation of side channels
Préparer le store pour le monta-
ge des profilés de transport
Markise/Kassette und
Terazza/Wintergarten gegen
Verkratzen und Abrutschen
mit geeigneten Mitteln
(Schaumstoff, Polsterfolie,
etc.) absichern!
Cassettehaak met de
klemschroeven aan de
zijkant slechts aan een zijde
vastdraaien! (Zijde willekeu-
rig) Middelste cassettehaak
(optie) altijd losgedraaid
laten!
Only tighten the housing bra-
cket with side housing clips
on one side! (any side) Always
leave the middle housing
bracket (option) loose!
Serrer d‘un seul côté l‘attache
pour caisson avec les vis de
serrage latérales! (N‘importe
quel côté) Toujours laisser
l‘attache pour caisson centrale
(option) desserrée!
Bestelloption „vormontiertes Ausfallprofil“
Besteloptie “voorgemonteerd uitvalprofiel“
Order option “Pre-mounted projection profile“
Commande d‘option «barre de charge prémonté»
WGM Top | 121028-0000 w | v4.3 | 2020-04-27 | Montageanleitung | Montagehandleiding | Instructions for assembly | Instructions de montage

15
Technische Änderungen vorbehalten | Technische wijzigingen voorbehouden | We reserve the right to make technical changes | Sous réserve de modifications techniques
Transportprofile montieren*
Transportprofielen monteren*
Mounting the side channels*
Monter les profilés de transport*
2*
max. 40
1
3
2
Zip / OptiStretch
Option/Optie (2*)
*(Bestelloption „vormontiertes Ausfallprofil“)
*(Besteloptie “voorgemonteerd uitvalprofiel“)
*(Order option “Pre-mounted projection profile“)
*(Commande d‘option «barre de charge prémonté»)
WGM Top | 121028-0000 w | v4.3 | 2020-04-27 | Montageanleitung | Montagehandleiding | Instructions for assembly | Instructions de montage

16 Technische Änderungen vorbehalten | Technische wijzigingen voorbehouden | We reserve the right to make technical changes | Sous réserve de modifications techniques
Flachseile mit Seilklemme verbinden und spannen*
Platte kabels met kabelklem verbinden en spannen*
Connect the flat rope, using a rope clamp and tighten it*
Relier les câbles plats avec un serre-câble et tendre*
L1L1 PS
5 Nm 5 Nm
2
2
2
4
3
1
1
1
55
5
4
4
3
3
23
1
5
4
Flachseile auf korrekten Verlauf prüfen*
Controleer de platte kabels op juist verloop*
Check the flat rope runs correctly*
Vérifier le bon déroulement des câbles plats*
*(Bestelloption „vormontiertes Ausfallprofil“)
*(Besteloptie “voorgemonteerd uitvalprofiel“)
*(Order option “Pre-mounted projection profile“)
*(Commande d‘option «barre de charge prémonté»)
WGM Top | 121028-0000 w | v4.3 | 2020-04-27 | Montageanleitung | Montagehandleiding | Instructions for assembly | Instructions de montage

17
Technische Änderungen vorbehalten | Technische wijzigingen voorbehouden | We reserve the right to make technical changes | Sous réserve de modifications techniques
L1
L1
L1 PS
PS
ca. 300 mm
Grüne Federspannbänder entfernen*
Groene klembanden verwijderen*
Removing the green spring tension straps*
Enlever les tendeurs verts*
Flachseile an der Seilklemmne fixieren und nicht kürzen*
Platte kabels aan de kabelklem vastzetten en niet inkorten*
Fixing the flat rope to the rope clamp and not trimming it*
Fixer les câbles plats aux serre-câbles et ne pas raccourcir*
S SLS PS LS
max. 150
LSPS S
max. 150
Vorsicht Federspannung! Verletzungsgefahr! Vor-
sichtsmaßnahmen bei Arbeiten an Flachseilen treffen!
Voorzichtig veerspanning! Letselgevaar!
Neem voor-
zorgsmaatregelen bij werkzaamheden aan platte kabels!
Caution spring tension! Risk of injury! Take precautio-
nary measures when working on flat ropes!
Prudence tension de ressort! Risque de blessure !
Prendre des précautions en travaillant avec les câbles
plats!
*(Bestelloption „vormontiertes Ausfallprofil“)
*(Besteloptie “voorgemonteerd uitvalprofiel“)
*(Order option “Pre-mounted projection profile“)
*(Commande d‘option «barre de charge prémonté»)
WGM Top | 121028-0000 w | v4.3 | 2020-04-27 | Montageanleitung | Montagehandleiding | Instructions for assembly | Instructions de montage

18 Technische Änderungen vorbehalten | Technische wijzigingen voorbehouden | We reserve the right to make technical changes | Sous réserve de modifications techniques
Ausfallprofildeckel mit Auflaufnocken anbringen und festschrauben
Uitvalprofieldeksel met oploopnokken aanbrengen en vastschroeven
Fitting and screwing tight the projection profile cover with stop cams
Monter le couvercle de barre de charge avec les cames d‘arrêt puis serrer avec les vis
3
Montagehilfe entfernen und Verschraubungen festziehen
Montagehulpmiddel verwijderen en schroefverbindingen vastdraaien
Removing the assembly aid and tightening the bolting
Retirer l‘aide au montage et serrer les fixations
*(Bestelloption „vormontiertes Ausfallprofil“)
*(Besteloptie “voorgemonteerd uitvalprofiel“)
*(Order option “Pre-mounted projection profile“)
*(Commande d‘option «barre de charge prémonté»)
WGM Top | 121028-0000 w | v4.3 | 2020-04-27 | Montageanleitung | Montagehandleiding | Instructions for assembly | Instructions de montage
19
Technische Änderungen vorbehalten | Technische wijzigingen voorbehouden | We reserve the right to make technical changes | Sous réserve de modifications techniques
ca. 400 mm
Markise für Montage der Trans-
portprofile vorbereiten
Zonnescherm voor montage van
de transportprofielen voorberei-
den
Preparing the awning for installa-
tion of side channels
Préparer le store pour le montage
des profilés de transport
Markise/Kassette und Terazza/
Wintergarten gegen Verkratzen
und Abrutschen mit geeigneten
Mitteln (Schaumstoff, Polsterfo-
lie, etc.) absichern!
Cassettehaak met de klem-
schroeven aan de zijkant slechts
aan een zijde vastdraaien! (Zijde
willekeurig) Middelste cassette-
haak (optie) altijd losgedraaid
laten!
Only tighten the housing bra-
cket with side housing clips on
one side! (any side) Always lea-
ve the middle housing bracket
(option) loose!
Serrer d‘un seul côté l‘attache
pour caisson avec les vis de ser-
rage latérales! (N‘importe quel
côté) Toujours laisser l‘attache
pour caisson centrale (option)
desserrée!
Bestelloption „nicht vormontiertes Ausfallprofil“
Besteloptie “niet voorgemonteerd uitvalprofiel“
Order option “Not Pre-mounted projection profile“
Commande d‘option «barre de charge non prémonté»
WGM Top | 121028-0000 w | v4.3 | 2020-04-27 | Montageanleitung | Montagehandleiding | Instructions for assembly | Instructions de montage

20 Technische Änderungen vorbehalten | Technische wijzigingen voorbehouden | We reserve the right to make technical changes | Sous réserve de modifications techniques
max. 40
1 2
2*
3
Zip / OptiStretch
Option/Optie (2*)
Transportprofile montieren**
Transportprofielen monteren**
Mounting the side channels**
Monter les profilés de transport**
**(Bestelloption „nicht vormontiertes Ausfallprofil“)
**(Besteloptie “niet voorgemonteerd uitvalprofiel“)
**(Order option “not pre-mounted projection profile“)
**(Commande d‘option «barre de charge non prémonté»)
WGM Top | 121028-0000 w | v4.3 | 2020-04-27 | Montageanleitung | Montagehandleiding | Instructions for assembly | Instructions de montage
Other manuals for WGM Top
3
Table of contents
Other weinor Patio Furniture manuals
Popular Patio Furniture manuals by other brands

Derby
Derby 85897E-BAY manual

BCP
BCP SKY5897 instruction manual

Home Decorators Collection
Home Decorators Collection 1006215481 quick start guide

Royalcraft
Royalcraft AMALFI IVORY 2.3M PARASOL Assembly instructions

Country Living
Country Living Brookshire owner's manual

Keter
Keter 17188185 Assembly instructions