Weiom WT-01 User manual

USER MANUAL
WT-01
Preface
Thank you for purchasing WT-01. This manual shows how to operate the device smoothly and correctly. Make sure to read this
manual carefully before using this product. Please note that specification and information are subject to changes without prior
notice in this manual. Any change will be integrated in the latest release. The manufacturer assumes no responsibility for any errors
or omissions in this document.
1

Content
1Notes and Cautions………………………………...………………….………...……………………...3
2System Introduction…………………………..…………………….………………………………….3
2.1 Appearance…………………..………………………………………..…..……..…………….…3
2.2 Full Kit……………………….……………………………………………………….………..…3
2.3 Specifications……………………………………………………….……………………...……..3
3Get Started………………………………………………………….…………….…………………..…4
3.1 Install Software…………………………………………………...………....................................4
3.2 Battery Charging & SIM Card Installation...…………………………………………….….6
A. Battery Charging..…………………………………………….……………….………...….6
B. SIM Card Installation……….…………………………………………...…..………….….6
3.3 SET Parameter Instructions……………………………………...……..…………………...….6
4Set Up……………………………………………...…………………………….……………..………..9
4.1 Set up on Watch Screen……………...…………………...…………..…………………..….......9
4.2 Set up on computer via USB Cable………....……………………….……….………………...12
4.3 Set up by SMS Commands…….………………………………...…….…….……………...….15
5SMS Tracking……………………………………………...…………...…………………….……….18
5.1 Change the Inquiry Mode……………...………………………...…………..………………....18
5.2 In Normal Mode…………………………....……………………….……..…….……………...18
5.3 In GOOGLEMAP Mode…….……………………………………...….…….…...………..…..19
5.4 Track on Google Earth & Google Map…………………………………………………..……20
6GPRS Tracking………………………..….…………………..………………………………….……21
6.1 Check APN, Set up IP Address & Port Number…….…………………..………………...….21
6.2 Start Tracking……………………………………………………………..…….…………...…25
7Data Logger………………….……………………………………………….….…………………….27
A. Setting of the Logger………..…………….…………………………………….……………27
B. View the Recorded Waypoints…………………..…………………………….…………....28
C. Photo Logging…………………………………..…………………………………………....29
8 Troubleshooting………………………………………………………………………………….……32
9Worldwide APN (Access Point Name) List………………………….………………………………33
2

1Notes and Cautions
GSM network connection will determine the performance of the device.
The satellite signal will be blanketed by cement and metallic material, so it’s recommended to use it in
an open field.
To keep the best connection, please make sure the GPS antenna looks skywards.
Do make sure the PIN code is deactivated.
Don’t let the device run at or above 50 degrees by, such as, exposing the device under the sunshine for
a long time, for safety consideration.
Put it in a covert place if using it for anti-theft.
Risk of explosion may exist, if the battery is replaced by an incorrect type.
Disposal of used battery should comply with the legal instructions.
2System Introduction
2.1 Appearance
Speaker
Reset
Joystick
Note:
Mic
Button A
Button A is the “backward” key; Joystick is the “enter” key.
When there is an incoming call, you can press Joystick to answer, and press Button A to hang off. If you cancel the
call by Button A without answering it, or don’t pick up the call and the call cancels auto in the end, the watch will
send out a location message to TIMER number (mentioned later).
If the watch malfunctions, activate the “reset” button.
2.2 Full Kit
GPS Watch
1100mAh Polymer Li-ion Battery (built-in)
CD (User manual, Software included)
2 PIN AC Adapter
3

2.3 Specifications
GSM/GPRS
GSM/GPRS module Simcom300 Tri-Band GSM module (GSM900/1800/1900MHz) (quad-band is
optional)
GSM Antenna
GPS module
Build-in
SIRF III 20 channels
GPS
Protocol
GPS Antenna
Accuracy
Update rate
Start time
Operating Voltage
Charge voltage
Standby 15mA
Operating
Battery
Size
Weight
3Get Started
3.1 Install Software
NMEA-0183 compliant protocol
Build-in active high sensitivity antenna
1-5m
1 HZ
Cold start: 42s
Warm start: 35s
Hot start : 1s
Electrical
3.3V
4.5~5V
80mA
Polymer Li-ion 1100mAh (built-in)
other
65mm*43mm*19mm
45g(including battery)
Before installing the GPS Server software, you should install dotnetfx.exe, Google Earth.exe. To
configure the unit on computer, you also need install a driver. All are included in the CD.
Install USB Driver
Power on the watch until the unit boots in, and then connect it with computer by USB cable, and the
computer will ask you to install the driver. Please go to “My computer” and right click and choose the
“properties”, and move to “hardware” and choose “devices manager”, to see “USB Device” in yellow
4

exclamatory mark ( ), and right click as below:
Choose “Update Driver”, and choose option “Advanced”:
Choose the directory of the Driver and move to the next, and until finish installation:
5

3.2 Battery Charging & SIM Card Installation
A. Battery Charging
At the first use, please charge the battery for 8 hours to full capacity.
In later use, please charge 3-4 hours to its full. It is better to power off the device before charging.
Connect the charger to power supply
The background light will turn off when the battery is full.
B. SIM Card Installation
Place the SIM card in place as below:
3.3 Parameter instruction
The watch’s working is controlled by a parameter. It consists of 26 digits, while divided into 9 different
parts. The system recognizes it by sequence as below:
Digit
Definition
Value& Meaning
Remarks
1st-5th
6th-7th
8th-9th
10th
Time Zone GMT+12:00(01200) to GMT -13:00(11300)
GPS 00: keep receiving GPS.
Reception 01-99: turn on to receive GPS data in every 1 minute to 99 minutes.
Timer
SMS/GPRS 00: device doesn’t auto report location.
Location 01-99: device auto reports to mobile phone in every 1 minute to 99
Report Timer minutes
0: device doesn’t check the battery level.
Battery 1-9: device will check the battery in every 1-9 minutes and alarm in SMS
Monitor when the battery level is too low.
GMT+00:00(00000)
00: keep receiving GPS.
6

Device
11th-16th Set a 6 digits password as from 000000-999999.
Password
It ranges between “00”-“99”, and is calculated this way: **×50m(** is
17th-18th Geofence the value.), say, 03 is 150m, 14 is 700m.
Default value is 000000.
“00”, Geofence is off.
19th-20th Speeding
alarm
It ranges between “00”-“99”, and is calculated this way: **×10km/h(**
is the value.), say, 04 is 40km/h, 08 is 80km/h.
“00”, Speeding alarm is
off.
21st
22nd-26th
Logging mode “0” means to record by time; “1” means to record by distance.
Logging By time, it is “1-99999”s; By distance, it is “50-65000”meter.
Interval
Other input is invalid.
Distance below 50m will
cause drift in position.
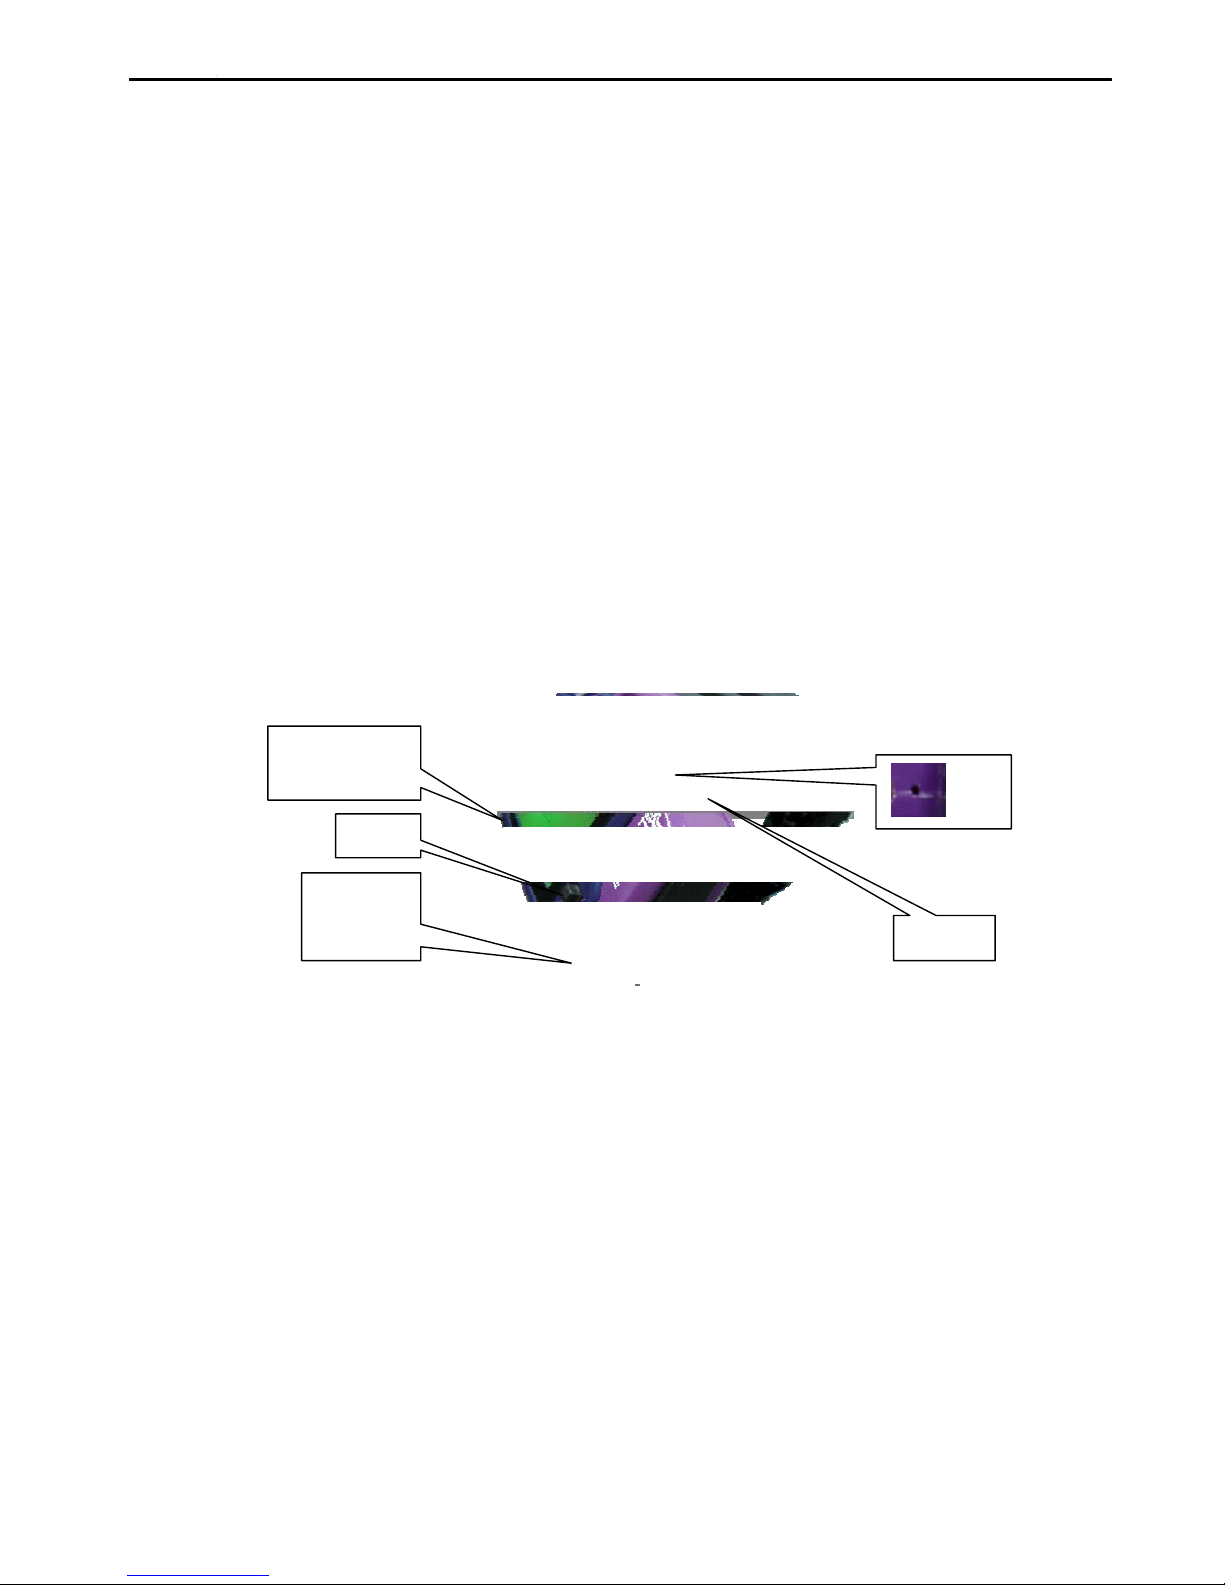
Note: This parameter is very important. It controls all the actions of our unit, such as Geofence alert,
Speeding alert etc. The user can change those values by:
a). Remotely sending SMS commands
b). Connecting to computer via a USB cable
c). Setting it up directly on the screen.
For example: To send text message to establish or change this parameter, you can send the text command as below:
00800: China’s Time zone: GMT+8:00.
00: The watch keeps receiving GPS signal.
01: The watch auto reports the location in every 1 minute.
9: The watch will check the battery level every 9 minutes.
654321: The password is 654321.
06: Geofence district is formed on a 300 meters radius (6×50m).
08: The speed limit is 80km/h (8×10km/h).
0: The waypoints are recorded by time.
00050: The time interval is 50 seconds.
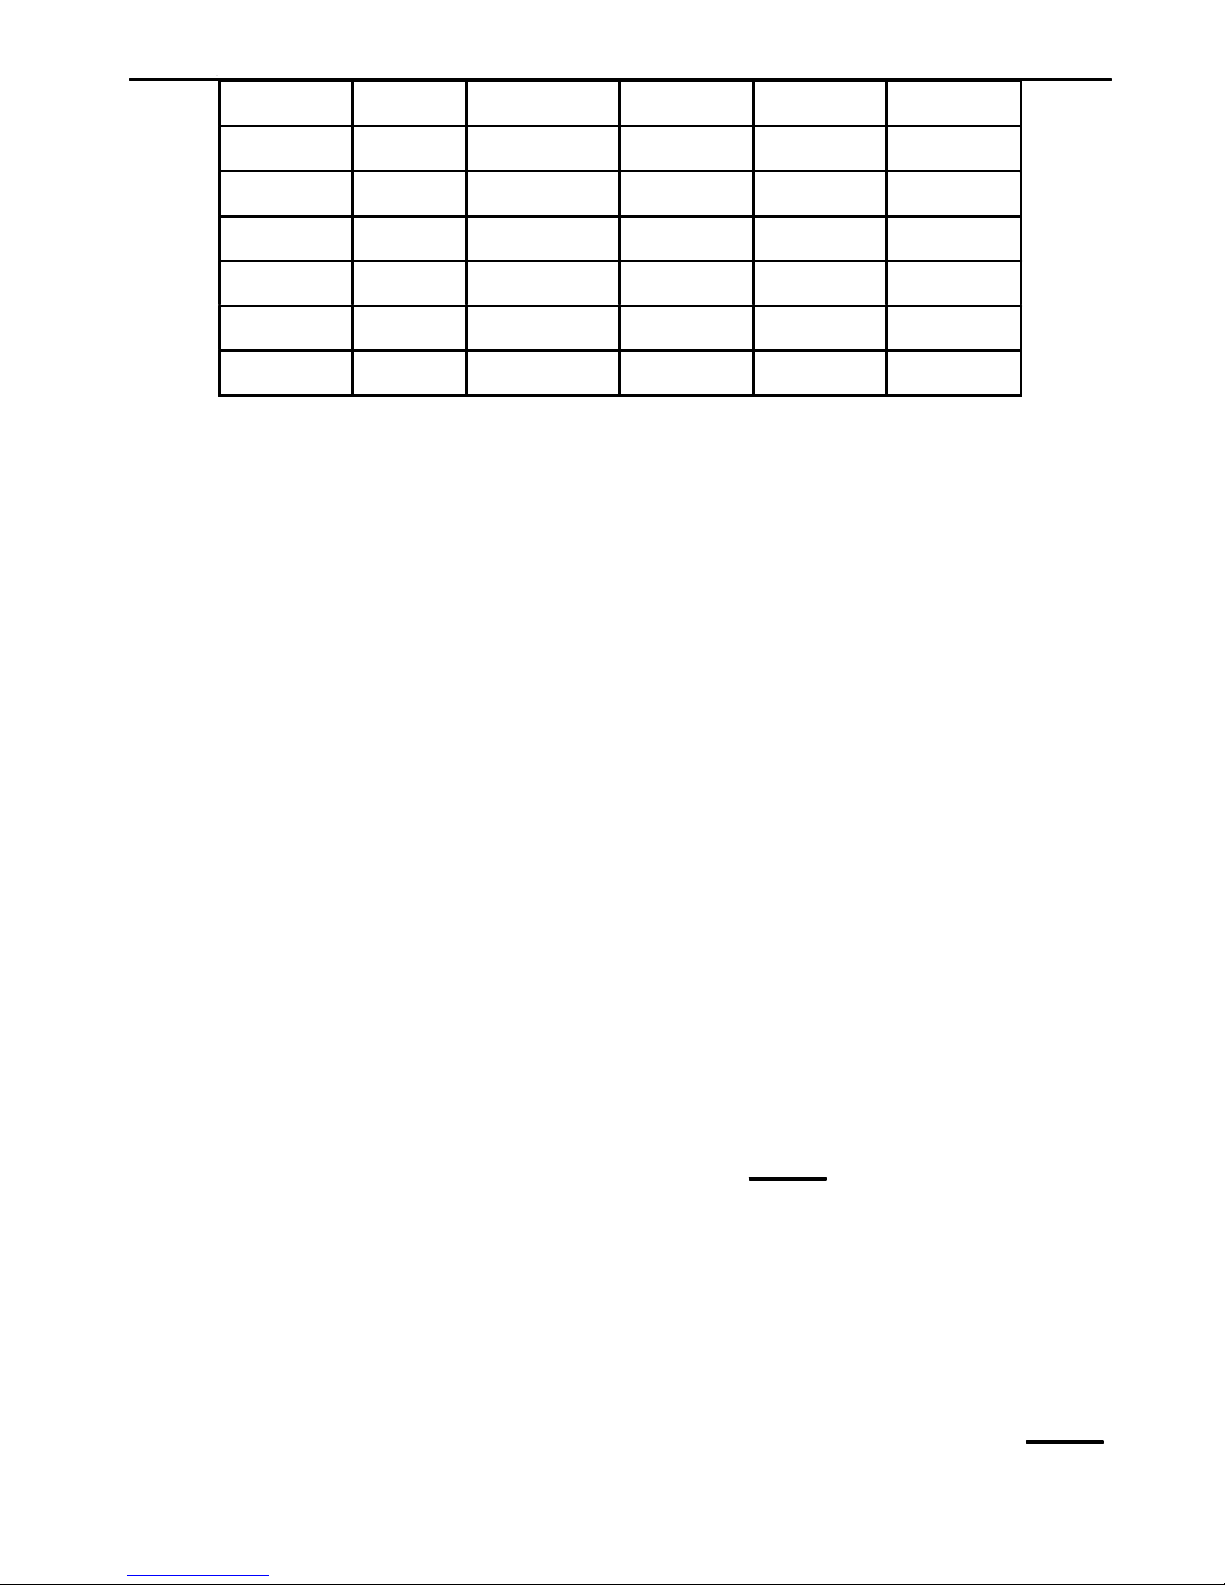
Time Zone
The device receives the time in Greenwich Mean Time (GMT). It is suggested setting it by the local
TimeZone when using it.
1st digit indicates ‘+’ (0) or ‘-’ (1)
2nd and 3rd digits indicate hour difference to GMT.
4th and 5th digits indicate minute difference to GMT.
Values of time zones are shown as below:
Time Zone
GMT-12:00
GMT-11:00
GMT-10:00
GMT-9:00
Value
11200
11100
11000
10900
Time Zone
GMT-2:00
GMT-1:00
GMT
GMT+1:00
Value
10200
10100
00000
00100
Time Zone
GMT+5:45
GMT+6:00
GMT+6:30
GMT+7:00
Value
00545
00600
00630
00700
7

GMT-8:00 10800 GMT+2:00 00200
GMT+8:00
00800
GMT-7:00
GMT-6:00
GMT-5:00
GMT-4:00
GMT-3:00
GMT-3:30
10700
10600
10500
10400
10300
10330
GMT+3:00
GMT+3:30
GMT+4:00
GMT+4:30
GMT+5:00
GMT+5:30
00300
00330
00400
00430
00500
00530
GMT+9:00
GMT+9:30
GMT+10:00
GMT+11:00
GMT+12:00
GMT+13:00
00900
00930
01000
01100
01200
01300
Note: Other input is regarded as the default value (00000).
GPS Reception Timer
This value controls the GPS reception. The watch will fix GPS according to this timer.
“00”: the watch is always on, to receive GPS data;
“01”-“99”: the watch will turn on to receive GPS in every 1-99 minutes.
Note: Other input is regarded as the default value (00).
SMS/GPRS Location Report Timer
This value controls the auto location report in SMS as well as in GPRS.
“00”: there is no auto location report;
“01”-“99”: the watch will auto report according to the timer.
Note: Other input is regarded as the default value (00).
Battery Monitor
The watch will check the battery level at a predefined interval. When the battery runs away to a low level, it
will send an alarm.
Note: The normal battery level ranges from 3400mv to 4200mv.
Geofence
Geofence defines a circular district. This circular district forms on a radius predefined by this value. After
Geofence is set up, on breach of it, the watch will send two alerts to TIMER.
Note: a).You can specify the center point by a text command (refer to Clause 4.3), as well as by turning on
Geofence on the watch screen.
b).The tracker will specify the first fixed location as the center point, when you turn on Geofence function
while the tracker doesn’t fix GPS.
Speeding Alarm
This value defines the speed limit. When the watch moves over the limit, it will send two alerts to TIMER.
It is suggested the speed limit be set no less than 50km/h. The limit below 50km/h may cause inaccurate
8

alert, for GPS signal may be affected.
Logging Mode
The watch can record the waypoints by time or distance. “0” means it records by time. “1” means it records
by distance.
Logging Interval
Recording by time, the value can be defined in the range of “1s-99999s”; Recording by distance, the value
can be defined in the range of “50m-65000m”.
Note: Input out of the range is invalid. You can define the distance by below 50m, but this may cause drift
in position
4Set up
4.1 Set up on Watch Screen
Primary Menu Memory Battery usage GSM Geofence
GPS indicator: it will
flash when having
fixed GPS.
Last fixed location
Speeding
Current Speed
Geofence
Time of last fixed
After entering into this interface, you can check out the time & date, as well as other different information.
As illustrated above:
indicates GPS reception. When it fixes GPS, this indicator will begin flash.
indicates memory usage, for waypoints storage.
indicates battery usage.
indicates GSM connection.
indicates Geofence & Speeding alert. If you turn on Geofence, “D” will show. If you turn on Speeding
alert, “V” will show.
indicates the currently fixed location if GPS is available, and the current time. If
GPS is not available, it indicates the last location, and the time of last fixed location.
System Menu A
Press Button A, to switch to System Menu A, and then scroll down / up to choose the option.
Choose this option, and press
Joystick to send SOS message.
Choose this option, and press
Joystick to turn off the unit.
Choose this option, and press Joystick,
to turn on / off Geofence.
Choose this option, and press Joystick,
to turn on / off Speed Alarm.
9

Note: When you want to activate Geofence, please stand still at the point, and then turn on Geofence. This
point is the center point on which the round Geofence district is formed based.
System Menu B
Press Joystick, to enter into System menu B as below.
This menu includes functions, such as GPS, Text message, Track Friends, Sports, Call out, Phone Book,
Alarm Clock & System Settings.
GPS
Friends (also called “Track Friends”)
Check NMEA
Turn on / off GPS reception.
Determine at what interval
it receives GPS.
Determine at what radius it
forms Geofence circle.
Determine at what speed
limit it activates a Speeding
alert.
Check Data logging status,
and set by it records the
waypoints by time or
distance, and at what value.
If A wears this watch, and B, C, D, E, F wears another 5 watches or GPS trackers
. A can track down the others directly on the screen by distance & direction. It is set this
way: on B, C, D, E, F, A’s number must be saved. Also, A should save B, C, D, E, F’s numbers as well.
10

A B
A: Choose “Tracking”
B: Back to choose “View Location”, and check locations of friends.
C: Scroll up / down to check which friend you are checking.
C
Settings
Note: In the GPRS setting:
Set up Time Zone, so that
the watch adjusts to the
local time.
If GSM mode is off, no
data can send out.
Restore to factory setting.
This setting decides how frequently the watch
sends the text location report & GPRS location
report, and its “ON/OFF” status.
Normal: text location report is coordinates.
GMaps: text location report is a link to google
maps web. It requires the mobile phone able to
browse internet, and GPRS activated.
Those not listed in the phonebook will add a
password, when requesting location report.
Command: W,******(password)
Check software version, and device’s IMEI
code.
APN: at the end of this user manual, there is an APN table list.
11

User Name & Password: for GPRS service, the operators of different countries may provide a User Name
& Password.
IP Address: set up the public IP (the router or the modem IP) here. For details, please refer to Clause 6.1.
Port Number: set up Port Number here. For details, please refer to Clause 6.1.
Phone Book
only 11 numbers can be saved on the watch, and are named separately as TIMER, SOS1-5,
FRIEND1-5 as follows:
The numbers can be deleted, stored here, and you can make a callout here.
Note: The 11 numbers are saved in the watch’s memory, not on the SIM card.
Text Message
you can send / read text message here.
Call Out
you can make a callout here.
Sports
you can turn on / off “Stop Watch”, specify the activity at “Running or Cycling”, and input the
weight on which the calorie is calculated based.
Alarm Clock
you can turn on / off alarm, set up the alarm time as well as a beep once every hour.
4.2 Set up on Computer via USB Cable
You can set up most of the functions by USB cable, except “Sports”, “Alarm Clock”.
Build up Connection
12


Note: When configuring the unit via USB cable, you can’t send SMS to the unit, for the GSM module
is turned off at the time.
4.3 Set up by SMS commands
You can set up the watch by SMS commands as below.
Commands List
This list includes all the commands. It will tell you how to set up / check the watch’s working status, get the
location reports.
Working Command
S,SET:xxxxxxxxxxpppp
ppxxxx
S,SOFF
S,SON
S,ROFF
S,RON
S,SPDOFF
S,SPDON
Definition
Establish/Change the “SET” parameter, to set up
the unit’s working status.
Turn off the Auto SMS sending.
Turn on the Auto SMS sending.
Turn off the GPS reception.
Turn on the GPS reception.
Turn off the Speeding Alarm.
Turn on the Speeding Alarm to get alerted when
the speed limit is breached.
Remarks
Refer to the below.
Auto SMS report relates with Location
SMS/GPRS Report Timer It is suggested you
turn off this function, if you do not want the auto
location report, otherwise, it will keep sending
your location SMS, to cost you much.
GPS reception relates with GPS Reception
Timer.
S,GEOFENCEOFF Turn off the Geofence.
Turn on the Geofence to specify the centre point
S,GEOFENCEON of Geofence.
S,GPRSOFF Turn off the auto GPRS location report.
Auto GPRS Sending relates with Location
Setup S,GPRSON
N,NAME:number
N, NAME: D
N, NAME:?
S,F
Turn on the auto GPRS location report.
Save the number and define the NAME.
Delete the number of Name’s.
Check the number of Name’s.
Restore the default setting.
Report Timer.
E.g. to save number 13714742568 as SOS2, the
command is “N, SOS2:13714742568”.
E.g. to delete SOS2, the command is “N, SOS2:
D”.
E.g. to check SOS2’s number, the command is
“N, SOS2:?”.
Default Setting:
Auto SMS Sending ON; Auto GPRS Sending
OFF; GPS Reception ON; Speeding Alarm ON;
Geofence ON; Location Report in
COORDINATES; Password 000000.
POWER OFF,IMEI Power off the unit.
A,APN,username,passwo
Location
rd,IP address, port
number
A,CLR
D,E
S,LF:NORMAL
Set up the APN for GPRS tracking on computer. Refer to the below.
Clear APN setting.
Clear Recorded Waypoints data.
Location report on mobile phone is in
15

Inquiry
coordinates.
Location report on mobile phone is a link, To open the link, you can view the real location
S,LF:GOOGLEMAP connecting with Google Map. on mobile phone.
WNumbers not in the phonebook have to input the
Inquire the location by these two commands.
W,******(password) password to inquire the location.
Check
S,?
A,?
I,?
Check the unit’s working status.
Inquiry APN status.
Check IMEI number, battery level, and memory
level, hardware version and software version
Refer to the below.
Note: Make sure there is 1 number saved on the watch. Otherwise you can’t configure it by text message.
Commands in detail
Every command will get a confirmation after being sent. Hereunder presents several examples for
clarifications:
Example 1: S,SET: xxxxxxxxxxppppppxxxxxxxxxx
The parameter can be established via this SMS command and changed later via this SMS command.
Establish or change the parameter by this
SMS command S, SET:
xxxxxxxxxxyyyyyyxxxxxxxxxx” (26 digits
of parameter without space).
Confirm
Notes:
If the command is incorrect in format, it
will reply: SET! SET data format
error!
If “SET” is not replaced successfully, it
will reply: SET! SET data save error!
Please try again.
For safety consideration, the device’s password can’t be changed by SMS command; these 6 digits in
SMS must be the same with the old one which is pre-set. If the SIM card isn’t pre-set before, the default
value will be 000000.
In case of accident (such as the watch is processing power-off when the SMS is sent out), this operation
may cause the parameter setting returns to the default value (including the password).
Example 2: S,?
This command can check the watch’s working status.
16

Confirm
The meaning for the reply of confirmation is as below:
GMT:+08:00 Time Zone is 00800 GPS RT:00
Fix GPS with no interval
SMS ST:01
S Timer: off
Geo:05
SPD:ON
To report a location every 1 minute
SMS sending is off
Geofence district is 250m in radius
Speeding Alarm is on
GPS R:on
B Alarm:9
SPD:07
GPRS:on
GPS reception is on
Auto check the battery level every 9
minutes
Speed limit is 70km/h
Auto GPRS sending is on
Geofence:off
Geofence function is off
LF:NORMAL Location report is in coordinates
Save by time:1s Record the waypoints in every 1
second.
Example 3: A, APN, username, password, IP address, port number
To view the location on computer via GPRS, you need activate the GPRS function: first to set up APN;
second to turn on GPRS (refer to the above Commands List.). To set up APN as below:
Confirm
APN Please refer to the last APN
table or consult with the
operator if not available in the
table.
Username/
Password
Some operators may provide Username
& Password for using GPRS. Check with
the operator if you don’t know. If they
don’t exist, you can leave two commas
“,” in their places.
17

IP address Public IP (router or modem’s
IP)
Note:
Port Number Related the computer’s IP address.
If APN, username, password do not change when you re-set the watch, you can leave three commas in their places. In
fact, as long as any index of the command does not change, you can send the command this way.
The IP address in this command should be public IP address, say Router’s / Modem’s IP address. (Public IP address is
assigned by the ISP (Internet Service Provider). You can check the public IP address by logging on to your router.
(Refer Clause 6) or on this reference web: www.myipaddress.com
After GPRS data comes into router, router will forward the data to one of the computers via the Port number. The Port
number is related with the computer’s private IP address. Please set up the “forwarding rule” on router. (Private IP
address is the local IP. You can check it on your computer by DOS command: winipcfg (Windows98) OR ipconfig
(Windows2000/XP)。) (Refer to Clause 6)
5SMS Tracking
There are two inquiry modes:
NORMAL: You can check the location by coordinates.
GOOGLEMAP: You can check the real location with a mobile phone. The mobile phone must be able to
browse the internet.
5.1 Change the Inquiry Mode
You can send a SMS command to change the inquiry mode. The SMS command is as below:
Confirm
You can send “S, LF: NORMAL” to the watch to switch to NORMAL mode.
5.2 In Normal mode
By SMS
18

Reply
Note: Any number can send “W+Password” to check the location, while only numbers saved can send
“W” to check the location.
By Phone Call
Note: Only numbers saved can dial up the watch. If you cancel the call by Button A without answering it,
or don’t pick up the call until it hangs off by itself, the watch will send out a location report.
5.3 In GOOGLEMAP mode
By SMS
By Phone Call
Reply
Check
19

Check
5.4 Track On Google Earth & Google Map
After having received the coordinate, manually input it to Google Earth (download from earth.google.com)
or Google Maps (maps.google.com), then you can find the real location on the map.
Note: The received coordinate is this: N, Lat: 2233.0361, E, Lon: 11404.9644, but when you input it, you
should use this format: N22 33.0361, E114 04.9644. There is a space between N22 and 33.0361; E114 and
04.9644.
20
Table of contents