Wemars WS-ST38G User manual

WS-ST38G

Contents
Introduction.....................................................................2
Safety..............................................................................4
Assembly......................................................................8
Operation......................................................................12
Maintenance................................................................. 16
Technical Data ........................................................... 18
Introduction
Product description
The product is a grass trimmer with a combustion
engine.
Work is constantly in progress to increase your safety
and efficiency during operation. Speak to Wemars
service for more information.
Intended use
The product can be used with a trimmer head to cut
grass. Do not use the product for other tasks than grass
trimming and grass clearing.
Note: National or local regulations may regulate the use.
Comply to given regulations.
Bevel Gear Shaft A
U-Handle
Throttle Trigger
Stop Switch
Spark Plug
Shaft Coupling
Fuel Tank
Handle Adjustment
Trigger Lockout
Starter Handle
Spacer
Harness Eyelet
Product overview
Harness Trimmer Head 3 T Blade Manual
Shaft B
Knob
Troubleshooting............................................................ 19
Gasoline Container
02
Cutting Attachment Guard

Symbols on the product
Be careful and use the product correctly.
This product can cause serious injury or
death to the operator or others.
Read the operator's manual carefully and
make sure that you understand the
instructions before you use this product.
Use a protective helmet in locations where
objects can fall on you. Use approved
hearing protection. Use approved eye
protection.
Use approved protective gloves.
Use heavy-duty slip-resistant boots.
The product can cause objects to eject,
which can cause injury.
Maximum speed of the output shaft.
50FT
15 m
50FT
15 m
Keep a minimum of 15 m distance to
persons and animals during operation of the
product.
Hex Wrench Screwdriver
Wrench Allen Key
Tools Bag
Tools bag
Choke off
Fuel.
Product liability
As referred to in the product liability laws, we are not
liable for damages that our product causes if:
•the product is incorrectly repaired.
• the product is repaired with parts that are not from
the manufacturer or not approved by the
manufacturer.
• the product has an accessory that is not from the
manufacturer or not approved by the manufacturer.
• the product is not repaired at an approved service
center or by an approved authority.
Choke on
Air Primer Bulb
03
Spacer Catcher

Safety
Safety definitions
Warnings, cautions and notes are used to point out
specially important parts of the manual.
WARNING: Used if there is a risk of injury or
death for the operator or bystanders if the
instructions in the manual are not obeyed.
CAUTION: Used if there is a risk of damage
to the product, other materials or the
adjacent area if the instructions in the
manual are not obeyed.
Note: Used to give more information that is necessary in
a given situation.
Safety instructions for operation
WARNING: Read the warning instructions
that follow before you use the product.
• You must understand the difference between grass
clearing and grass trimming before use.
•If you encounter a situation where you are uncertain
how to proceed you should ask an expert. Contact
Wemars service . Avoid all usage which you
you consider to be beyond your capability .
• Never use a product that is faulty. Carry out the
safety checks, maintenance and service instructions
described in this manual. Some maintenance and
service measures must be carried out by trained and
qualified specialists.
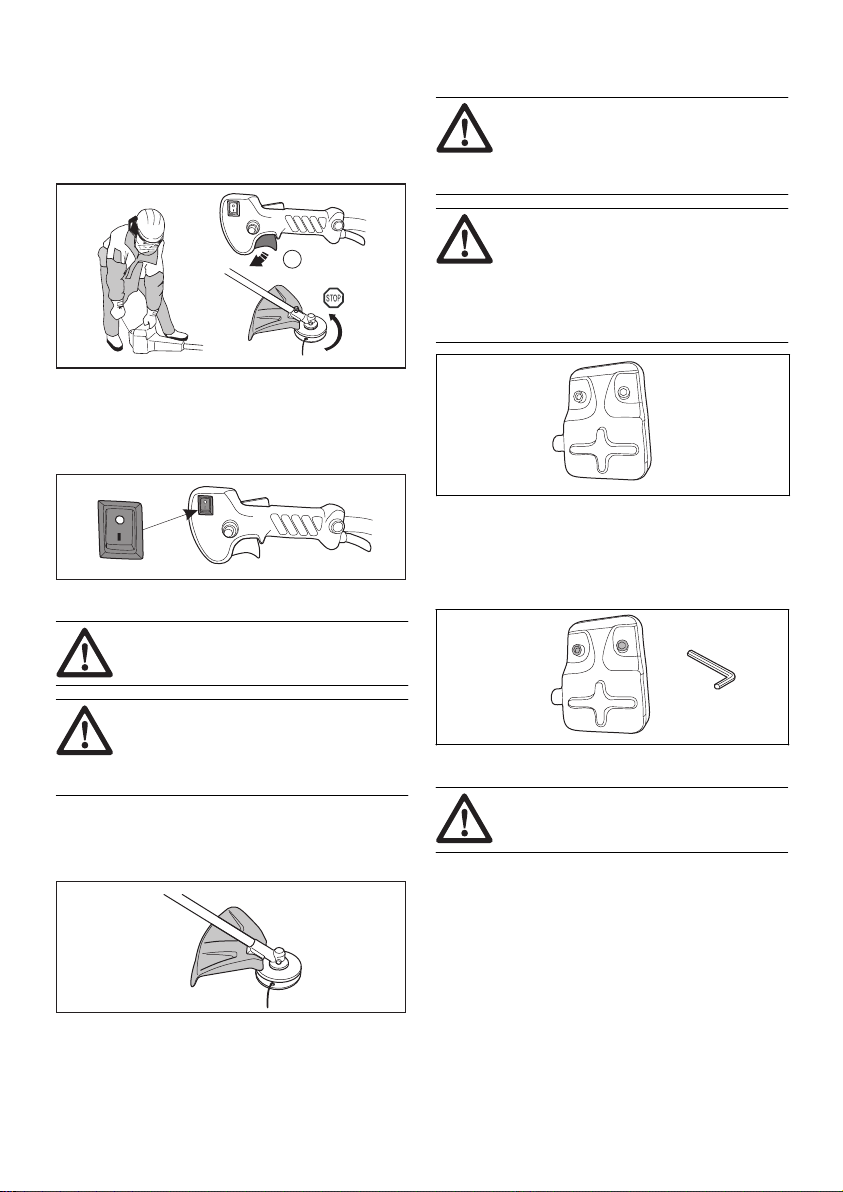
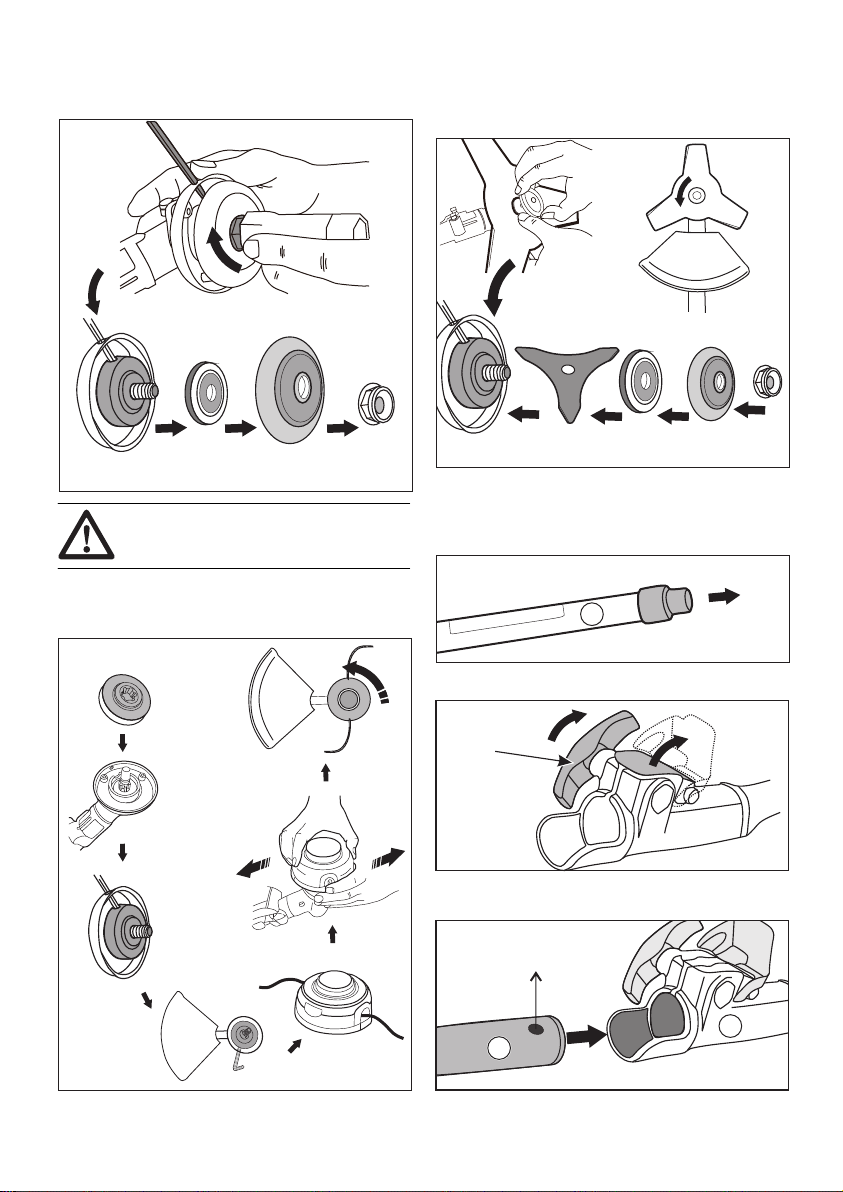
• All covers, guards and handles must be fitted before
you start the product. Ensure that the spark plug cap
and ignition lead are undamaged to avoid the risk of
electric shock.
• Never use the product if you are fatigued, while
under the influence of alcohol or drugs, medication
or anything that could affect your vision, alertness,
coordination or judgement.
• Do not use the product in bad weather such as
dense fog, heavy rain, strong wind, intense cold,
etcetera. Working in bad weather is tiring and often
brings added risks, such as icy ground,
unpredictable felling direction, etcetera.
• The only accessories you can operate with this
engine unit are the cutting attachments that we
recommend.
• Never allow children to use or be in the vicinity of the
product. As the product is equipped with a spring-
loaded start/stop switch and can be started by low
speed and force on the starter handle, even small
children under some circumstances can produce the
force necessary to start the product. This can mean
a risk of serious personal injury. Therefore remove
the spark plug cap when the product is not under
close supervision.
• Running an engine in a confined or badly ventilated
area can result in death due to asphyxiation or
carbon monoxide poisoning.
• The complete clutch cover and shaft must be fitted
before the product is started, otherwise the clutch
can come loose and cause personal injury.
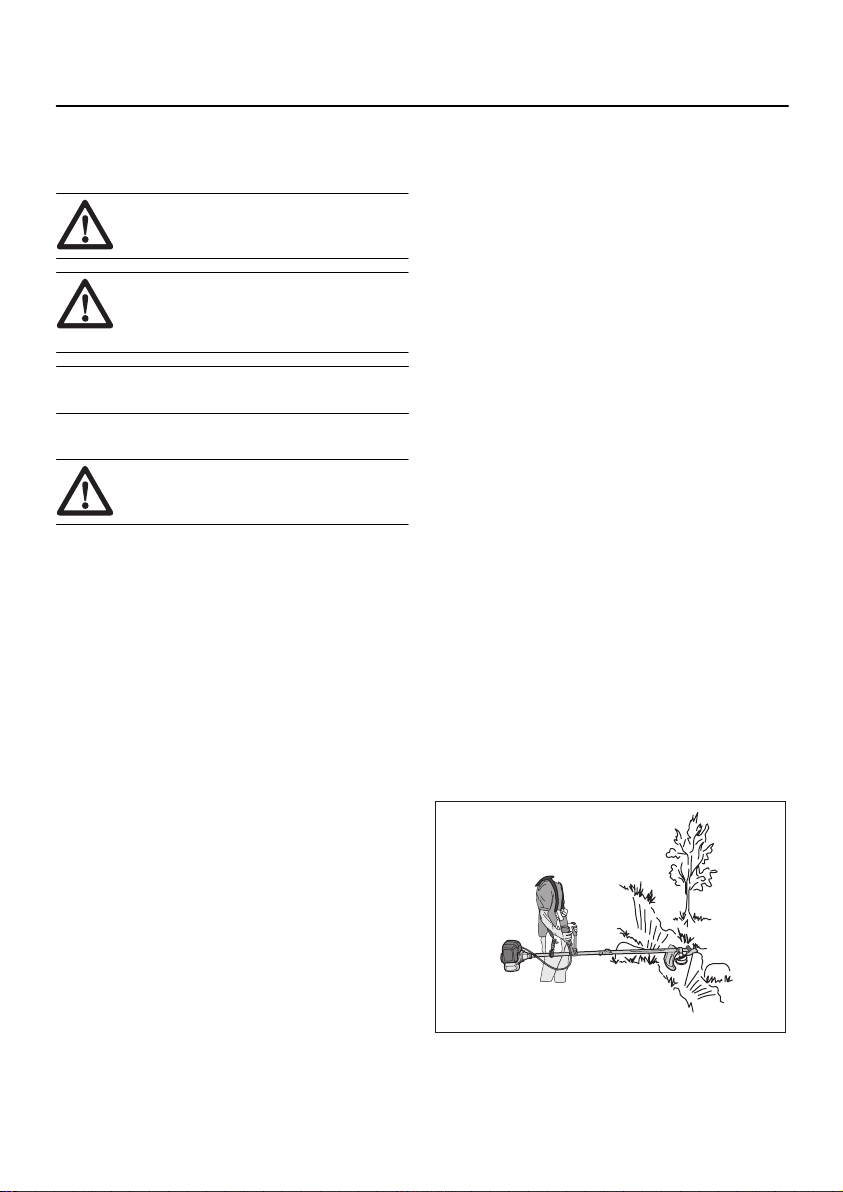
• Ensure that no people or animals come closer than
15 m while you work. When several operators are
working in the same area the safety distance should
be at least 15 m. Otherwise there is a risk of serious
personal injury. Stop the product immediately if
anyone approaches. Never swing the product
around without first checking behind you to make
sure that noone is within the safety zone.
• Ensure that people, animals or other things can not
affect your control of the product or that they do not
come in contact with the cutting attachment or loose
objects that are thrown out by the cutting
attachment. However, do not the product unless you
are able to call for help in the event of an accident.
• Always inspect the working area. Remove all loose
objects such as stones, broken glass, nails, steel
wire, string, etcetera, that could be thrown out or
become wrapped around the cutting attachment.
• Make sure that you can move and stand safely.
Check the area around you for possible obstacles
(roots, rocks, branches, ditches, etcetera) in case
you have to move suddenly. Take great care when
you work on sloping ground.
04

• Keep a good balance and a firm foothold at all times.
Do not overreach.
•Always hold the product with both hands. Hold the
product on the right side of your body.
• Keep the cutting attachment below waist level.
• Switch off the engine before you move to another
area. Fit the transportation guard before you carry or
transport the equipment any distance.
• Never put the product down with the engine running
unless you have it in clear sight.
• Stop the engine and cutting equipment before you
remove material that has wound around the blade
shaft. Neither the operator of the product nor anyone
else may attempt to remove the cut material while
the engine is running or the cutting equipment is
rotating, as this can result in serious injury. The
bevel gear can get hot during use and may remain
so for a while afterwards. You could get burnt if you
touch it.
•Watch out for thrown objects. Always wear approved
eye protection. Never lean over the cutting
attachment guard. Stones, rubbish, etcetera, can be
thrown up into the eyes which can cause blindness
or serious injury.
• Sometimes branches or grass get caught between
the guard and cutting attachment. Always stop the
engine before you clean the product.
• Always slow the engine to idle speed after each
working operation. Long periods at full throttle
without any load on the engine can lead to serious
engine damage.
• Listen out for warning signals or shouts when you
wear hearing protection. Always remove your
hearing protection as soon as the engine stops.
• Overexposure to vibration can lead to circulatory
damage or nerve damage in people who have
impaired circulation. Contact your doctor if you
experience symptoms of overexposure to vibration.
These symptoms include numbness, loss of feeling,
tingling, pricking, pain, loss of strength, changes in
skin color or condition. These symptoms normally
appear in the fingers, hands or wrists.
• Do not use a product with a damaged spark plug
cap.
• Do not use a product with a defective muffler.
• Keep all parts of your body away from the rotating
cutting attachment and hot surfaces.
• Never use a product with a faulty muffler
• Never start or use the product indoors, near
combustible material or in spaces that lacks proper
ventilation. The exhaust fumes from the engine
contain carbon monoxide, an odorless, poisonous
and highly dangerous gas. Also, the exhaust fumes
are hot and may contain sparks that can start a fire.
Personal protective equipment
WARNING: Read the warning instructions
that follow before you use the product.
• Always use approved personal protective equipment
when you use the product. Personal protective
equipment cannot fully prevent injury but it
decreases the degree of injury if an accident does
occur. Let your dealer help you select the right
equipment.
• Use a protective helmet where there is a risk of
falling objects.
• Use approved hearing protection that provides
adequate noise reduction. Long-term exposure to
noise can result in permanent hearing impairment.
• Use approved eye protection. If you use a visor, you
must also use approved protective goggles.
Approved protective goggles must comply with the
ANSI Z87.1 standard in the USAs or EN 166 in EU
countries.
• Use gloves when necessary, for example when you
attach, examine or clean the cutting equipment.
05

• Use protective boots with steel toes and non-slip
soles.
• Use clothing made of a strong fabric. Always use
heavy, long pants and long sleeves. Do not use
loose clothing that can catch on twigs and branches.
Do not wear jewelry, short pants, sandals or go with
bare feet. Put your hair up safely above shoulder
level.
• Keep first aid equipment close at hand.
Safety devices on the product
WARNING: Read the warning instructions
that follow before you use the product.
In this section the product’s safety features, its purpose
and how checks and maintenance should be carried out
to ensure that it operates correctly. See instructions
under the heading to find where these parts are located
on your product.
The life span of the product can be reduced and the risk
of accidents can increase if product maintenance is not
carried out correctly and if service and/or repairs are not
carried out professionally. If you need further information
please contact Wemars service .
WARNING: Never use a product with
defective safety components. The product's
safety equipment must be inspected and
maintained as described in this section. If
your product fails any of these checks,
contact Wemars service to get it repaired.
CAUTION: All servicing and repair work on
the machine requires special training. This is
especially true of the machine′s safety
equipment. If your machine fails any of the
checks described below you must contact
Wemars service .
To do a check of the throttle trigger lockout
The throttle lockout is designed to prevent accidental
operation of the throttle control.
1. Press the throttle trigger lockout (A) and make sure
that the throttle control (B) is released . When you
release the handle the throttle control and the throttle
trigger lockout both move back to their initial
positions. This movement is controlled by two
independent return springs. This arrangement
means that the throttle control is automatically
locked at the idle setting.
2. Make sure that the throttle control is locked at the
idle setting when the throttle trigger lockout is
released.
3. Press the throttle trigger lockout and make sure that
it returns to its intial position when you release it.
4. Do a check of the throttle control and throttle trigger
lockout move freely and that the return springs work
properly.
06
A
B
B
A
B
A

5. Start the product
and apply full throttle.
6. Release the throttle and make sure that the cutting
attachment stops and remains at a standstill. If the
cutting attachment rotates with the throttle in the idle
position the carburettor idle setting must be checked.
See instructions under the chapter
.
To do a check of the stop switch
1. Start the engine.
2. Move the stop switch to the stop position and make
sure that the engine stops.
To do a check of the cutting attachment guard
WARNING: Do not use a cutting attachment
without an approved and correctly attached
cutting attachment guard.
WARNING: Always use the recommended
cutting attachment guard for the cutting
attachment that you use. If an incorrect or
faulty cutting attachment guard is fitted this
can cause serious personal injury.
The cutting attachment guard prevents injuries from
objects that eject in the direction of the operator. It also
prevents injuries that occur if you touch the cutting
attachment.
1. Do a visual check for damages, for example cracks.
2. Replace the cutting attachment guard if it is
damaged.
To do a check of the muffler
WARNING: Bear in mind that the exhaust
fumes from the engine are hot and may
contain sparks which can start a fire. Never
start the product indoors or near
combustible material!
WARNING: Never use the product indoors
or in spaces lacking proper ventilation.
Exhaust fumes contain carbon monoxide, an
odorless, poisonous and highly dangerous
gas.
WARNING: Never use a product with a
faulty muffler.
The muffler keeps noise levels to a minimum and sends
exhaust fumes away from the operator.
•Do a visual check for damage and deformation.
• Make sure that the muffler is correctly attached to
the product.
Safety instructions for maintenance
WARNING: Read the warning instructions
that follow before you use the product.
• Only use cutting attachments with the guards we
recommend.
• Always stop the engine before you do any work on
the cutting attachment. The cutting attachment
continues to rotate even after the throttle has been
released. Ensure that the cutting attachment has
stopped completely and disconnect the spark plug
before you start to work on it.
• A faulty cutting attachment may increase the risk of
accidents.
• Make sure that the trimmer cord is wound tightly and
evenly around the drum, otherwise the product will
generate harmful vibration.
07
B

Assembly
4.Turn the output shaft until one of the holes in the
drive disc aligns with the related hole in the gear
housing.
5. Put the locking (allen key) in the hole to lock the shaft.
1. Install the grass catcher
To assemble the cutting attachment
guard and trimmer head
08
U Handle
Introduction
WARNING: Before you assemble the
product, you must read and understand the
safety chapter.
1. Remove the Handle Adjustment screws.
To assemble the U handle
2.Install the u handle and tighten the screws .
Catcher
Cutting Attachment Guard
3. Tighten the screws .
attachment guard
Spacer
2. Install the spacer and attachment guard on the shaft.

6. Remove the shaft nuts clockwise by Hex wrench.
Drive disc Washer Cover Nuts
Drive disc
Trimmer Head.
Hold the allen key turn the trimmer head anti-clockwise
Remove the nuts cover and washer .
To assemble the two-piece shaft
1. Remove the shaft A cap
3. Align the tab of the cutting attachment (A) with the
arrow of the coupling (B).
B
2. Turn the knob to loosen the coupling.
Knob
A
A
To assemble the 3T blade head
Drive disc Washer Cover Nuts
Blade head
Hold the allen key turn the nuts anti-clockwies
To assemble the trimmer head
WARNING:
guard all the time .
If not you can’t take down the trimmer head .
Keep the drive disc in the shaft
09

To wear the harness
1. Take out harness from the package .
2. Pull the snap and open the lock .
3. The rope on the back plate faces out.
5. Make sure soft side is down . the shoulder strap
4 Make sure you back looks like this ..
6. Make sure the board is on the right side of your body.
7. Wearing the harness . (Front / Right )
4. Carefully push the shaft(A) into the coupling until you
hear a click.
A
B
5.Push the coupling down and tighten the knob fully .
A
10

1. Put the buckle through the hook.
To attaching the harness
G
Buckle
Hook
2. Loosen the hook screw and move it to the best position
B
B
Hook screw
3. Emergency Release
Pull the red tag (G) the buckle will breaks away .
3. Maintain balance and reduce burden on hands.
8. Closed the buckle.
9. Adjust the rope to the best condition
11

12
Operation
Fuel
This product has a four-stroke engine.
Gasoline
The machine is equipped with a four-stroke
engine. Make sure that there is always sufficient oil in the
oil tank.
CAUTION:
Fuel handling
Never start the machine:
1 If you have spilled fuel on it. Wipe off the spillage and
allow remaining fuel to evaporate.
2 If you have spilled fuel on yourself or your clothes,
change your clothes. Wash any part of your body that
has come in contact with fuel. Use soap and water.
3 If the machine is leaking fuel. Check regularly for
leaks from the fuel cap and fuel lines.
Fuel and fuel fumes are
highly inflammable and can cause
serious injury when inhaled or allowed to
come in contact with the skin. For this
reason observe caution when handling
fuel and make sure there is adequate
ventilation.
WARNING:
Take care when handling fuel.
Bear in mind the risk of fire, explosion
and inhaling fumes.
WARNING:
Always use an unleaded quality petrol of at least 90
octane (RON).
Use low-emission gasoline, also known as alkylate
gasoline, if it is available.
• The lowest recommended octane grade is 87
((RON+MON)/2). If you run the engine on a lower
octane grade than 87 so-called knocking can occur.
This gives rise to a high engine temperature and
increased bearing load, which can result in serious
engine damage.
• When working at continuous high revs a higher octane
rating is recommended.
• If the machine is not used for some time the fuel tank
should be emptied and cleaned. Drain the tank into
the appropriate containers and in a well ventilated
area.
Fuel Tank Oil Tank
Check the oil level before starting the machine. A too low
oil level can cause serious damage to the engine.
When the machine is new the engine oil should be
changed after the first month or after 10 hours of
operation.
• For the best result and function use 4-Stroke
engin oil.
•For 4-Stroke engine oil quality class at least API SG.
In general viscosity class SAE 10W-40 is
recommended.
• Never use oil intended for two-stroke engines.
Engine Oil
The machine must be switched off and placed on a flat
surface when you check the oil level.
Oil level
Unscrew the oil cap, clean the dipstick located on the cap
and insert the cap again without screwing it down. Check
the oil level on the dipstick.
When the oil level is low, top up using engine oil to the
edge of the oil refill hole.
Only use recommended engine oil.
Oil Tank
Oil Tank

To fill the fuel tank
CAUTION: Contamination in the tanks
causes malfunction. Clean the fuel tank
regularly and replace the fuel filter one
time a year or more.
Before you operate the product
•Examine the work area to make sure that you know
the type of terrain. Examine the slope of the ground
and if there are obstacles such as stones, branches
and ditches.
• Do an overhaul inspection of the product.
• Do the safety inspections, maintenance and
servicing that are given in this manual.
• Make sure that all covers, trimmer guard and
trimmer head correctly attached and not damaged or
cracked. Replace if they are exposed to impact or
cracked.
WARNING: Do not use the product without a
guard or a guard that is defective.
To start a cold engine
13
Always use a fuel container with an anti-spill valve.
Clean around the fuel cap. Clean the fuel and oil tank
regularly. The fuel filter should be changed at least once
a year. Contamination in the tanks causes malfunction.
Always move the machine about 3 metres from the
refuelling position before starting.
1.Open the engine (I-open/o-stop )
3.Push the air primer bulb 6-10 times .
4. Move the choke control up into choke on position.
Primer Bulb
5. Pull the starter rope until the engine warm up .
6. Push the choke control down into the choke off .
Warm up ( Engine start / Try to start ) .
Pull Max 6 times .
2.Hold the trigger and trigger lockout press the lock button .
lock button

7.Pull the starter rope again until the engine start .
CAUTION: Do not pull the starter rope all
the way out and do not let go off the
starter rope handle when the starter rope
is fully extended. This can cause
damage to the product.
To stop the engine
To start a warm engine
2.Push the air primer bulb 6-10 times .
Primer Bulb
3.Pull the starter rope again until the engine start .
4.Use the machine .
9. Make sure the engine runs smoothly.
8. Operate the throttle gradually when the engine starts.
If the engine won’t start please back to step 2 .
14
Stop the engine (o-stop/I-open).
1.Open the engine (I-open/o-stop).

About the surface
WARNING: Do not touch the area that is
identified with gray in the illustration. There
is a risk of burn injuries when the product is
hot. There is a risk of electrical shock if the
spark plug cap is damaged. Do not use a
product that has a damaged spark plug cap.
Grass trimming with a trimmer head
To trim the grass
1. Hold the trimmer head immediately above the
ground at an angle. Do not push the trimmer line into
the grass.
2. Decrease the length of the trimmer line by 10-12
cm / 4-4.75 in.
3. Decrease the engine speed to decrease the risk of
damage to plants.
4. Use 80 % throttle when you cut grass near objects.
To cut the grass
1. Make sure that the trimmer line is parallel to the
ground when you cut the grass.
2. Do not push the trimmer head to the ground. This
can cause damage to the product.
3. Move the product from side to side when you cut
grass. Use full speed.
To sweep the grass
The airflow from the rotating trimmer line can be used to
remove cut grass from an area.
1. Hold the trimmer head and the trimmer line parallel
to the ground and above the ground.
2. Apply full throttle.
3. Move the trimmer head from side to side and sweep
the grass.
WARNING: Clean the trimmer head cover
each time you assemble new trimmer line to
prevent unbalance and vibrations in the
handles. Also do a check of the other parts
of the trimmer head and clean it if
necessary.
15

Maintenance
Maintenance schedule
16
The following is a list of the maintenance that must be performed on the machine. Most of the items are described in the
Maintenance section. The user must only carry out the maintenance and service work described in this manual.
Maintenance Daily
maintenance
W y eekl
maintenance
Monthly
maintenance
Clean the outside of the machine. X
Make sure the throttle trigger lock and the throttle function correctly
from a safety point of view. X
Check that the stop switch works correctly. X
Check that the handle and handlebar are undamaged and secured
correctly. X
Check that the cutting attachment does not rotate at idle. X
Clean the air lterfi. Replace if necessary. X
Check that the guard is undamaged and not cracked. Replace the
guard if it has been exposed to impact or is cracked. X
Check that the trimmer head is undamaged and not cracked.
Replace the trimmer head if necessary. X
Check that the locking nut of the cutting equipment is tighten
correctly. X
Check that nuts and screws are tight. X
Check that there are no fuel leaks from the engine, tank or fuel lines. X
Check the engine oil level and top up if necessary. X
Check the starter and starter cord. X
Check that the vibration damping elements are not damaged. X
Clean the outside of the spark plug. Remove it and check the
electrode gap. Adjust the gap to 0,6-0,7 mm, or replace the spark
plug. Check that the spark plug is fitted with a suppressor.
X
Clean the machine’s cooling system. X
Clean or replace the spar uf er (only k arrestor screen on the m fl
applies to mufflers without a catalytic converter). X
Clean the outside of the carburettor and the space around it. X
Check that the bevel gear is filled three-quarters full with lubricant.
Fill if necessar .y using special grease X
Check the fuel filter for contamination and the fuel hose for cracks
or other defects. Replace if necessary. X
Check all cables and connections. X
Check the clutch, clutch springs and the clutch drum for wear.
Replace if necessary by an autorized service workshop. X
Replace the spark plug. Check that the spark plug is fitted with a
suppressor. X
Check and clean the spark arrestor screen on the muffler (only
applies to mufflers fitted with a catalytic converter). X
Change the engine oil. X

To adjust the idle speed
1. Make sure that the air filter is clean and the air filter
cover is installed.
2. Adjust the idle speed with the idle adjustment screw.
The idle adjustment screw T is identified with a "T"
mark.
3. Turn the idle adjustment screw clockwise until the
cutting attachment starts to turn.
4. Turn the idle adjustment screw counterclockwise
until the cutting attachment stops.
The idle speed is correct when the engine operates
smoothly in all positions. The idle speed must be below
the speed when the cutting attachment starts to turn.
WARNING: If the cutting attachment does
not stop when you adjust the idle speed,
Speak to Wemars service . Do not use the
product until it is correctly adjusted or repaired.
T
To examine the spark plug
CAUTION: Always use the recommended
spark plug type. Incorrect spark plug type
can cause damage to the product.
• Examine the spark plug if the engine is low on
power, is not easy to start or does not operate
correctly at idle speed.
•To decrease the risk of unwanted material on the
spark plug electrodes, obey these instructions:
a) Make sure that the idle speed is correctly
adjusted.
b) Make sure that the fuel mixture is correct.
c) Make sure that the air filter is clean.
• If the spark plug is dirty, clean it and make sure that
the electrode gap is correct.
• Replace the spark plug if it is necessary.
To do maintenance on the trimmer
head
1. Only use the recommended cutting attachment and
cutting attachment guard.
2. Make sure that the cutter on the cutting attachment
guard is not damaged, it cuts the cord to the correct
length.
3. Install the cord as the illustrations on the last pages
of the manual shows.
Air filter
Remove dust and dirt from the air filter to keep it clean in
order to prevent:
•Carburettor malfunctions.
• Starting problems.
• Loss of engine power.
• Unnecessary wear to engine parts.
• Too much fuel consumption.
Clean the air filter at an interval of 25 hours, or more
regularly if conditions are unusually dusty.
To clean the air filter
CAUTION: A air filter that is damaged, very
dirty or soaked with fuel must always be
replaced.
If you use an air filter for a long time it cannot be fully
cleaned. Replace the air filter with a new one at regular
intervals.
17

Spool for grass trimmer line
Engine idling speed
WS-ST38G
18
38.9cc
26mm/9Teeth
0.65L
4-Stroke
2

Troubleshooting
The engine does not start
Check Possible cause Procedure
Stop switch. The stop switch is in the stop position. Set the stop switch to the start position.
Starter pawls. The starter pawls cannot move freely. Remove the starter cover and clean around
the starter pawls.
Let an approved service help you.
Fuel tank. Incorrect fuel type. Drain the fuel tank and fill with correct fuel.
Spark plug. The spark plug is dirty or wet. Make sure that the spark plug is dry and
clean.
The spark plug electrode gap is incorrect. Clean the spark plug. Make sure that the
electrode gap is correct. Make sure that the
spark plug has a supressor.
Refer to technical data for correct electrode
gap.
The spark plug is loose. Tighten the spark plug.
The engine starts but stops again
Check Possible cause Procedure
Fuel tank. Incorrect fuel type. Empty the fuel tank and fill it with cor-
rect fuel.
Air filter. The air filter is clogged. Clean the air filter.
19

X
15CM
6" “Click”
10"
20"
9
20
Table of contents