Westinghouse Q75AD1425-06 User manual

Screws (4)Wall Anchors (4)
CAUTIONS: BATTERY INSTRUCTIONS
PRE INSTALLATION
•Do not expose the light to re or intense heat.
•Do not immerse in water.
•Your motion light and solar panel are both weather-resistant.
•Never look directly into the solar motion light when illuminated.
HARDWARE INCLUDED (note: some parts may be pre-assembled)
USE RECHARGEABLE BATTERIES ONLY.
•Always purchase the correct size and grade of battery most suitable for the intended
use.
•Remove batteries from equipment which is not to be used for an extended period of
time.
•Dispose of the battery in accordance with local, state and federal regulations. (Do not
burn or discard the battery in a municipal water system or other body of water.)
CARE AND MAINTENANCE
CARE & MAINTENANCE
•From time to time, ensure the plug between the solar panel and light is securely
connected.
•The solar panel should be cleaned with a damp cotton cloth on a regular basis.
This will ensure optimal performance and battery charging.
•Never let any abrasive material come into contact with the solar panel.
INSTALLATION
ITEM: Q75AD1425-06
SAFETY INFORMATION
05/09/2017
1/2 E
A B c
PARTS
A - Light Fixture
B - Solar Panel
C - Mounting Bracket
INSTALLING THE LIGHT
FIXTURE
4
Mark the hole locations of the mounting
bracket, then set the mounting bracket
aside. Check that the marked areas are
clear of obstacles such as cables and
electrical lines. Drill holes for the enclosed
screws and wall anchors. Insert the wall
anchors then secure the mounting bracket
in place with the screws.
INSTALLING THE SOLAR PANEL
1
CONNECTING THE WIRES
Carefully route the power cord of the
solar panel to the light xture and plug
into the socket located on the light.
Only use solar panels for power charging.
It is not allowed to access other external
charging equipment.
Locate the mounting bracket six to eight
feet above ground on a solid surface
capable of supporting the light xture
and secure enough so that it will not move
when exposed to vibrations or wind. The
light xture must be high enough to allow
for motion detection and light distribution.
2
3
MOUNTING THE SOLAR PANEL
ON THE MOUNTING BRACKET
Slide the mounting bracket into the slot on
the back of the solar panel. Option 1:
Slide the light xture into the xed block
on the back of the mounting bracket.
5
Mark the hole locations of the light
xture, then set the light xture
aside. Check that the marked areas are
clear of obstacles such as cables and
electrical lines. Drill holes for the enclosed
screws and wall anchors. Insert the wall
anchors then secure the light xture
in place with the screws.
Option 2:
WARNING: Read all safety precautions and installation instructions carefully
before installing or servicing this xture. Failure to comply with these instructions
could result in a potentially fatal electric shock and/or property damage.

For additional help and information regarding installation, contact Customer Service at 1-844-551-0680, 8am-5pm, CST Monday – Friday
, WESTINGHOUSE, are trademarks of Westinghouse Electric Corporation. Used under license by Sky Rich Star Limited. All Rights Reserved.
REPLACING THE BATTERIES
WARNING: Do not dispose batteries in municipal waste stream or by fire as batteries may
explode. Do not open, short circuit, or mutilate batteries. Dispose of batteries in accordance
with Local, State, and federal regulations. Contains no toxic metals. Do not mix old and new
batteries. Do not mix alkaline, standard (Carbon-Zinc), or rechargeable (Nickel Cadmium or
Nickel Hydride) batteries with Lithium batteries.
OPERATION
TROUBLESHOOTING
Before the solar security light can operate to its full capacity, the solar panel needs to be in sunlight for 8-12 hours to fully
charge the battery. Turn the light switch to the “OFF” position. After charge, turn the light switch to “ON” position.
•Adjust the motion sensor head toward desired detection area.
•Turn the light switch to “ON” position, the light can be used as a standard light.
NOTE: Avoid aiming the control at:
•Objects that change temperature rapidly to prevent false triggering, such as heating vents
and air conditioners.
•Moving objects such as trees and street trac.
!
OPERATION
Use a Phillips head screwdriver to remove the 6 screws holding the battery cover in place.
Gently pull battery pack away from the light xture and disconnect the battery connector.
Replace old battery pack with a new 6V AA Ni-Mh 2000mAh rechargeable battery pack.
Connect the battery connector and insert battery pack into the light xture.
Replace the battery cover by aligning it properly and replacing the 6 screws removed earlier.
ITEM: Q75AD1425-06
05/09/2017
2/2 E
PROBLEM
Lights will not come on.
Lights ash on and o.
Lights come on for no
apparent reason.
A. Light switch is turned o.
B. Cable connection is loose.
C. Motion sensor head is not aimed correctly.
A. Low battery..
A. Motion sensor maybe sensing moving objects
such as trees, trac, etc.
A. Turn light switch to ON.
B. The Solar Panel needs to be in sunlight for 8-12 hours
to fully charge the battery.
C. Re-aim the motion sensor to cover the desired area.
A. With light switch set to “OFF”, allow to charge in full
sunlight for 8-12 hours before further use.
A. Reposition motion sensor.
POSSIBLE CAUSE SOLUTION
B. Heat being reected from other objects may
be turning the motion sensor on and o.
B. Reposition motion sensor.
ON OFF

Tornillos (4)
PRECAUCIONES: INSTRUCCIONES SOBRE BATERÍAS
ANTES DE LA INSTALACIÓN
ADVERTENCIA: Lea atentamente todas las precauciones de seguridad e
instrucciones de instalación antes de instalar o dar mantenimiento al dispositivo. La
falta de cumplimiento de estas instrucciones puede resultar en choque eléctrico
potencialmente mortal o daño a la propiedad.
•No exponga la lámpara al fuego o al calor intenso.
•No la sumerja en el agua.
•Tanto la lámpara con sensor de movimiento como el panel solar son resistentes a la
intemperie.
•Nunca mire directamente a la luz de la lámpara cuando esté encendida.
HERRAJES INCLUIDO
(nota: algunas partes quizá ya pudieran estar ensambladas)
USE SOLO BATERÍAS RECARGABLES.
•Siempre compre las baterías del tamaño y grado correctos, las más adecuadas para el
uso planeado.
•Retire las baterías del equipo que no se use por un período prolongado de tiempo.
•Deseche la batería de acuerdo con las regulaciones locales, estatales y federales. (No
queme ni deseche la batería en un sistema de agua municipal u otro cuerpo de agua.)
CUIDADO Y MANTENIMIENTO
•De vez en cuando, asegúrese de que el enchufe que conecta el panel solar y la
lámpara esté bien asegurado.
•Se debe limpiar el panel solar con regularidad con un paño de algodón húmedo. Esto
asegurará el funcionamiento y carga óptima de la batería.
•No permita que ningún material abrasivo entre en contacto con el panel solar.
INSTALACIÓN
ITEM: Q75AD1425-06
Anclajes de
Pared (4)
INFORMACIÓN DE SEGURIDAD
05/09/2017
1/2 S
PARTES
A - La Lámpara
B - Panel Solar
C - Soporte De Montaje
A B c
4
1
2
3
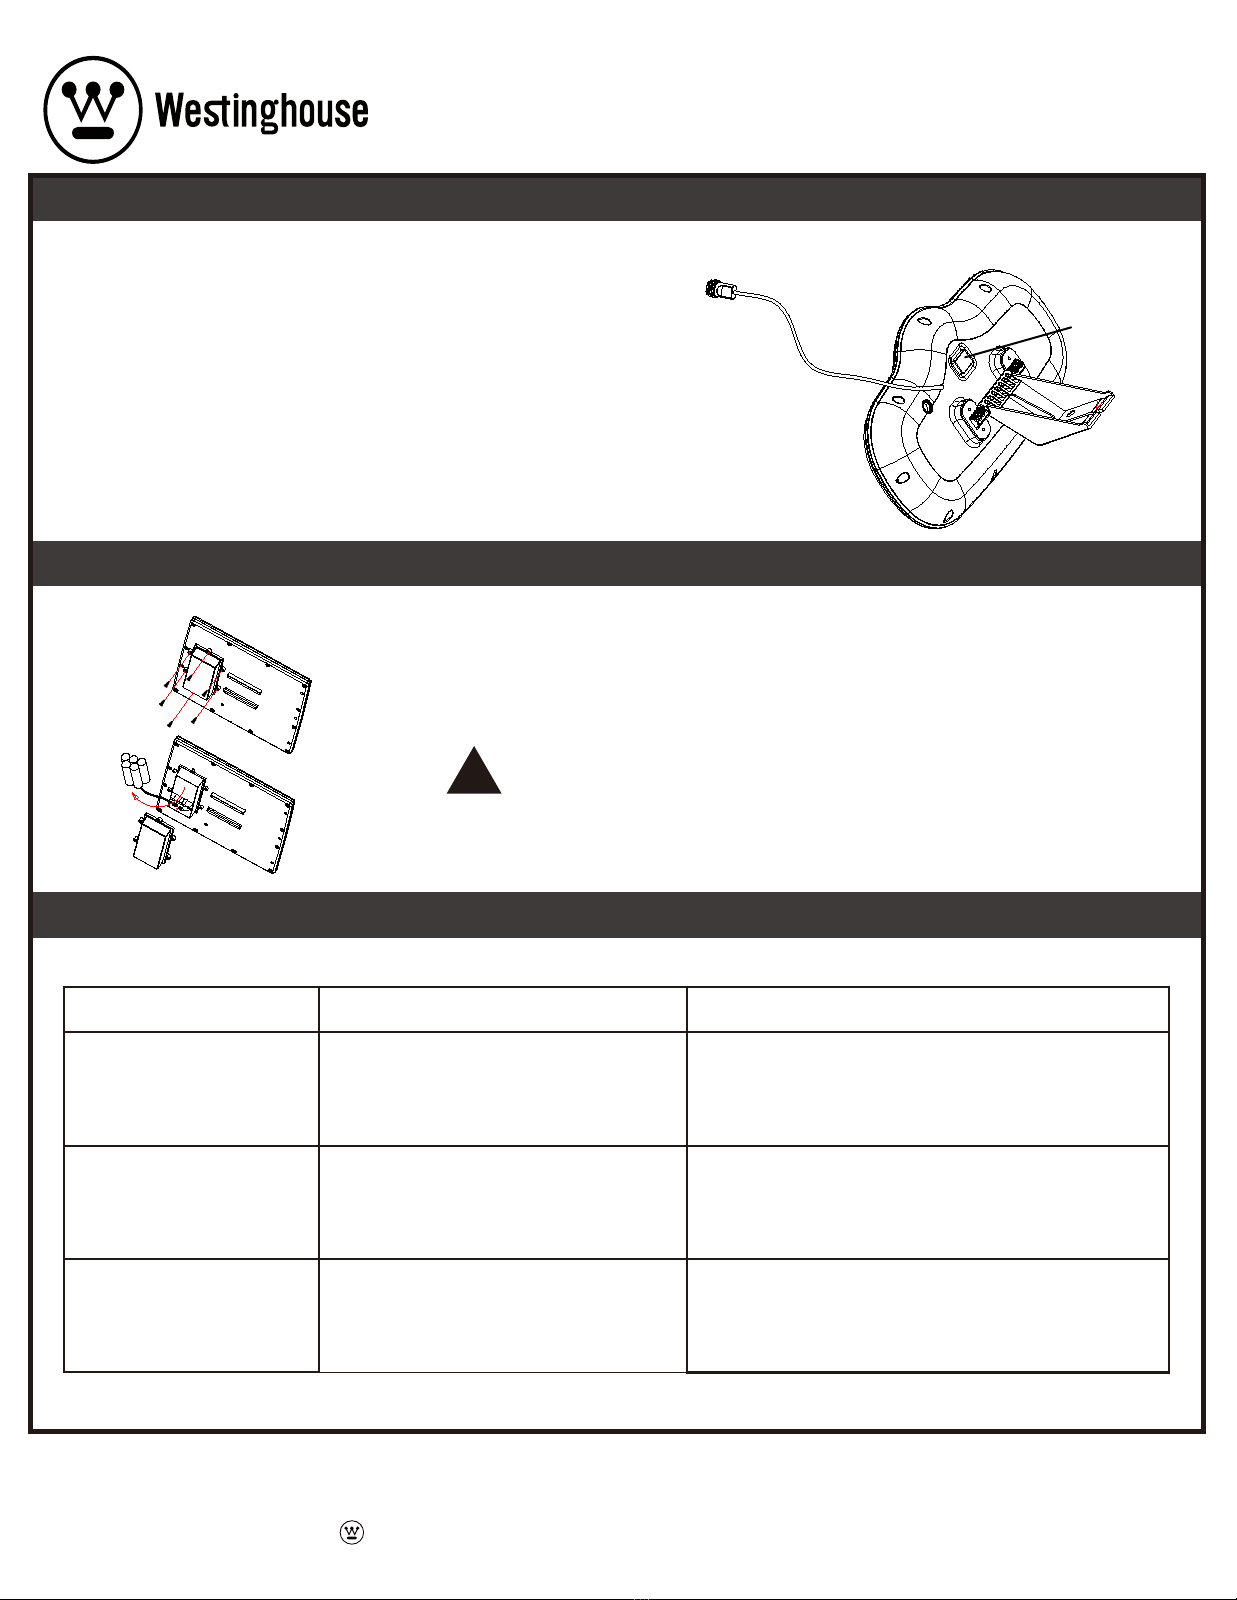
Deslice el soporte de montaje en la
ranura en la parte posterior del
panel solar.
Opción 1:
Deslice la lámpara en el bloque jo en
la parte posterior del soporte de montaje.
5
Opción 2:
Marque las ubicaciones de los agujeros del
soporte de montaje y deje a un lado el
soporte de montaje. Verique que las áreas
marcadas estén libres de obstáculos como
cables y líneas eléctricas. Perfore agujeros
para los tornillos y anclajes de pared que
se adjuntan. Inserte los anclajes de pared y
después asegure el panel solar en su lugar
con los tornillos.
4
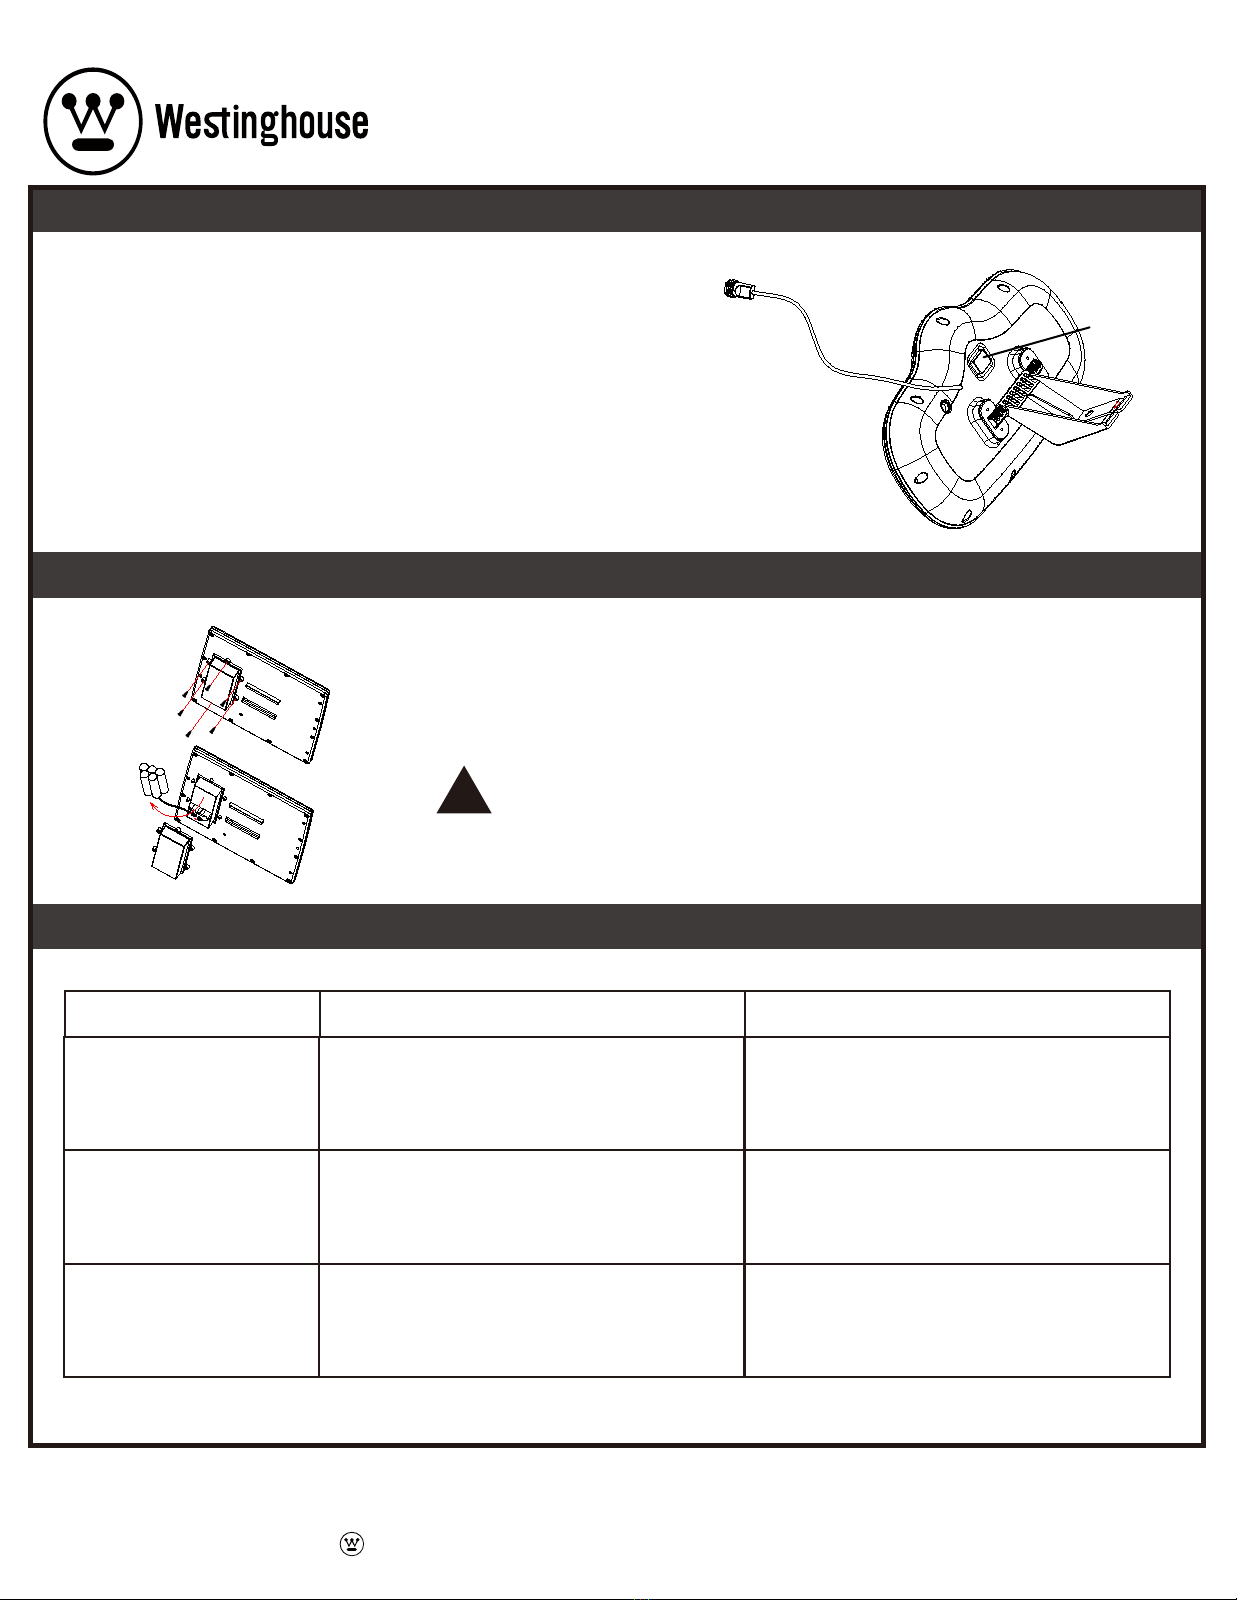
INSTALACIÓN DEL PANEL SOLAR
MONTAJE DE PANEL SOLAR EN
EL SOPORTE DE MONTAJE
Coloque el soporte de montaje de seis a
ocho pies sobre el nivel del suelo, en una
supercie sólida capaz de soportar la
lámpara y sucientemente segura para
que no se mueva por vibraciones o viento.
La lámpara debe estar lo sucientemente
alta para permitir la detección de
movimiento y la distribución de la luz.
CONEXIÓN DE LOS ALAMBRES
Conduzca cuidadosamente el cable de
alimentación del panel solar a la iluminación
y enchúfelo en el enchufe ubicado en la luz.
Utilice sólo paneles solares para cargar la
energía. No está permitido el acceso a otro
equipo de carga externo.
INSTALACION DEL LA LÁMPARA
Marque las ubicaciones de los agujeros del
la lámpara y deje a un lado el la lámpara.
Verique que las áreas marcadas estén
libres de obstáculos como cables y líneas
eléctricas. Perfore agujeros para los tornillos
y anclajes de pared que se adjuntan. Inserte
los anclajes de pared y después asegure
la lámpara en su lugar con los tornillos.

CÓMO REEMPLAZAR LAS BATERÍAS
ADVERTENCIA: No deseche las baterías en el basurero municipal ni las incinere ya que
pueden explotar. No abra, haga corto circuito ni mutile las baterías. Deseche las baterías de
acuerdo con las regulaciones locales, estatales y federales. No contiene metales tóxicos. No
mezcle baterías nuevas con baterías viejas. No mezcle baterías alcalinas, estándar
(carbón-zinc) o baterías recargables (níquel-cadmio o níquel-hidruro metálico) con baterías
de litio.
Antes de que la luz del sensor solar pueda funcionar a toda su capacidad, el panel solar debe
permanecer a la luz del sol de 8 a 12 horas para cargar totalmente la batería.
Gire el interruptor de la lámpara a la posición “OFF”. Después cargar, gire el
interruptor de la lámpara a la posición “ON”.
•Ajustar la cabeza del sensor de movimiento hacia el área de detección
deseada.
•Gire el interruptor de la lámpara a la posición “ON” y la lámpara se puede usar como una lámpara común.
NOTA: Evite apuntar el sensor a:
•Objetos que cambian la temperatura rápidamente para evitar el encendido en falso, como ductos de
ventilación de la calefacción o aire acondicionado.
•Objetos con movimiento como árboles o tráfico en la calle.
!
Use un destornillador Phillips (estrella) para retirar los 6 tornillos que sostienen la tapa de las batería.
Retire con cuidado el paquete de baterías de la lámpara y desconecte el conector de las baterías.
Reemplace el paquete de baterías usadas por un paquete nuevo de baterías recargables
6V Ni-Mh 2000mAh. Conecte el conector de baterías e inserte el paquete de baterías en la lámpara.
Vuelva a colocar la tapa de las batería alineándola adecuadamente y vuelva a colocar los 6 tornillos
que retiró anteriormente.
ITEM: Q75AD1425-06
SOLUCIÓN DE PROBLEMAS
OPERACIÓN
OPERACIÓN
, WESTINGHOUSE, are trademarks of Westinghouse Electric Corporation. Used under license by Sky Rich Star Limited. All Rights Reserved.
Para obtener ayuda e información adicional acerca de la instalación,comuníquese con Servicio a Clientes al 1-844-551-0680 de Lunes a Viernes de 8:00 A.M. a 5:00 P.M. en el horario del centro de EE. UU.
05/09/2017
2/2 S
PROBLEMA
Las luces no se encienden.
Las luces se encienden y
apagan de forma
intermitente.
Las luces se encienden sin
razón aparente.
A. El interruptor de la lámpara está apagado.
B. El cable de conexión está suelto.
C. La cabeza del sensor de movimiento no
apunta correctamente.
A. Se están agotando las baterías.
A. El sensor de movimiento puede estar
percibiendo objetos en movimiento como
árboles, el tráfico, etc.
A. Gire el interruptor de la lámpara a la posición ON.
C. Reacomode el sensor de movimiento para que cubra el área
deseada.
A. Con el interruptor de la lámpara en la posición “OFF”, permita
que se cargue la lámpara a plena luz del sol durante 8 a 12 horas
días antes de volver a usarla.
A. Cambie la posición del sensor de movimiento.
POSIBLE CAUSA SOLUCIÓN
B. Reposicione el sensor de movimiento.
B. El calor que se refleja de otros objetos puede
estar activando el sensor de movimiento.
B. El panel solar debe permanecer a la luz del sol de 8 a 12
horas para cargar totalmente la batería.
ON OFF
Table of contents
Languages:
Other Westinghouse Floodlight manuals
Popular Floodlight manuals by other brands

A-Collection
A-Collection aFlood tec Mounting instructions

BEKA Schreder
BEKA Schreder OMNIblast-E Maxi Series installation instructions

Saxby Lighting
Saxby Lighting Laryn 5278J Instruction leaflet

Nature Power
Nature Power 23401 instruction manual

Eurolux
Eurolux FS252 manual

thomann
thomann Ignition Co9 LED Flood IP65 540W RGBW user manual