Standard Reference Mode
• ABS/ZERO allows you to measure angles in standard reference mode (true horizontal). Below is an example for measuring actual angles in this
mode.
1. “ABS” mode is active
when the “ABS” icon is
visible and the readout
is 0° when the unit is
located in the horizontal
position.
2. Put the unit on the surface needed to
be measured. The protractor shows
the angle of the surface from the
horizontal (to get the most accurate
reading, allow the unit to settle for 6
seconds before noting the angle).
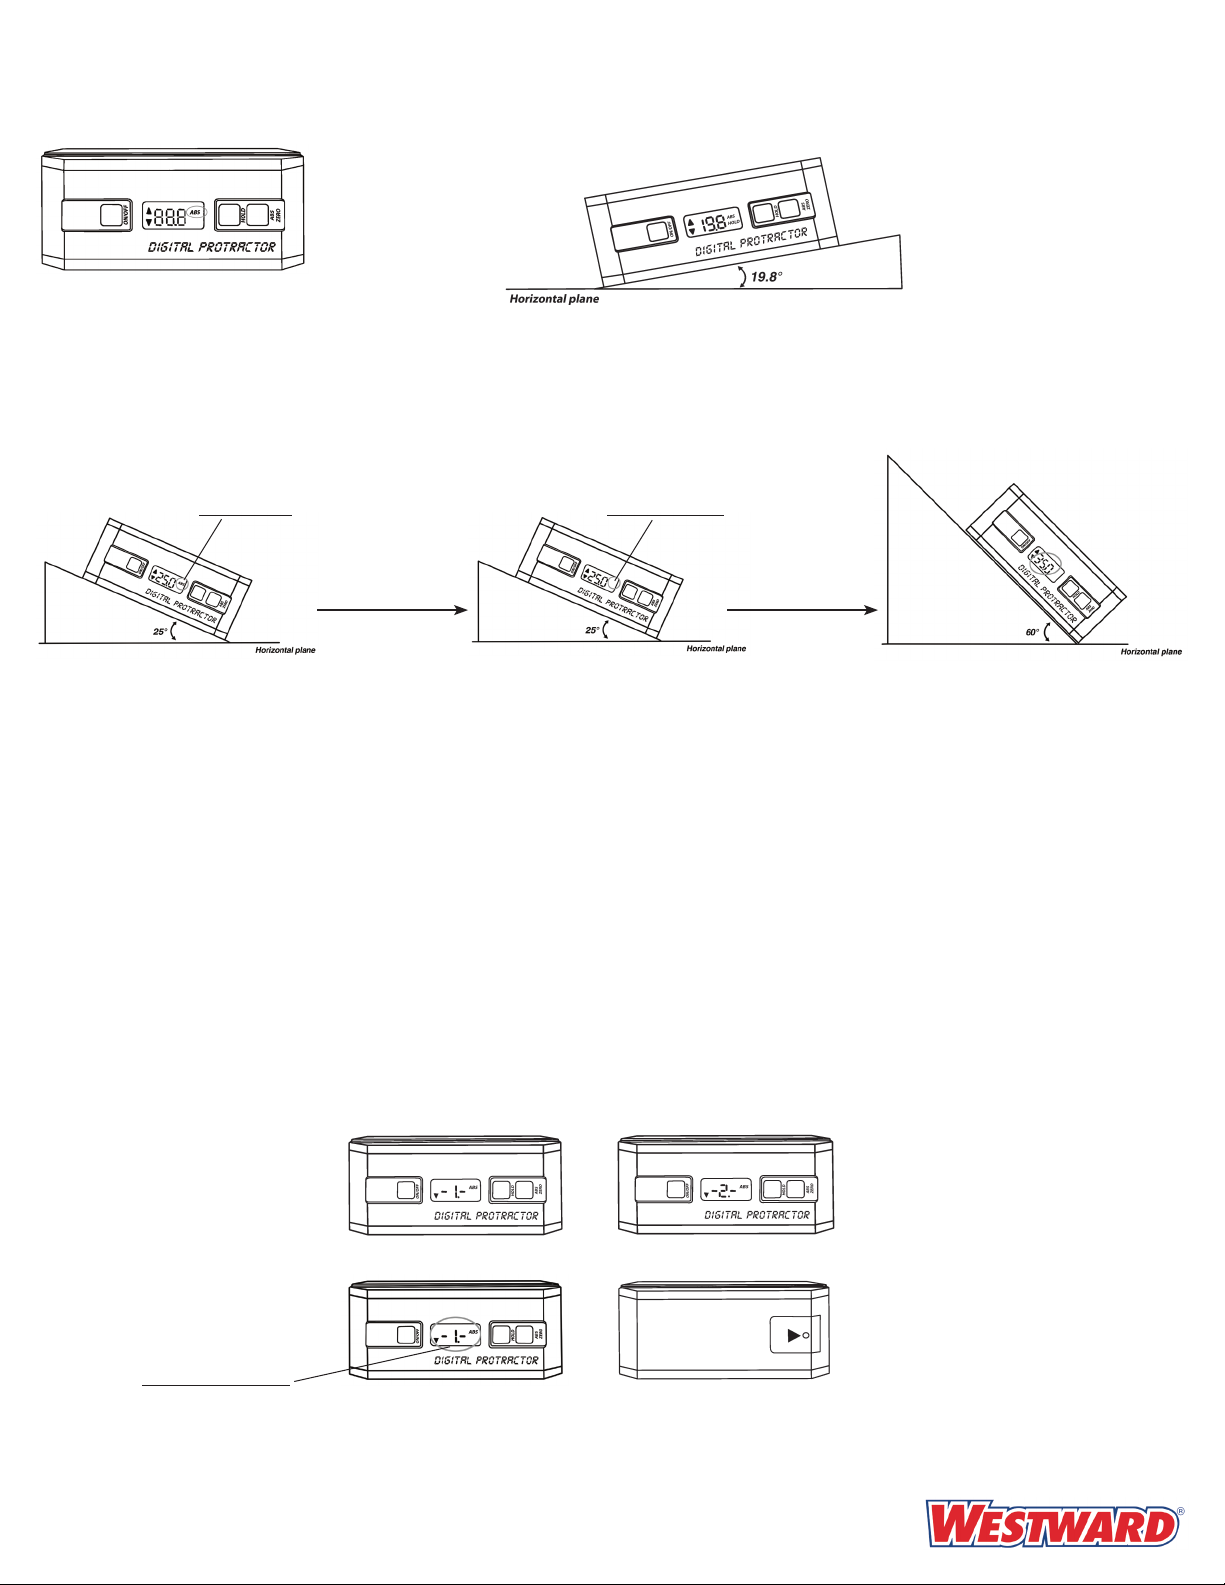
Alternate Reference Mode
• ABS/ZERO allows you to set any angle as a 0.0° reference point from which to take measurements. For example, you may want a surface that
is actually 25° off horizontal displayed as 0.0°, then you can measure all other angles from that benchmark. In the below example, the unit
displays 35.0° for an actual 60.0° angle.
Change to relative
measurement mode by
pressing ZERO button.
Readout is 00.0°
The angle readout is 25° in
horizontal measurement mode.
“ABS” is visible “ABS” is not visible
The angle readout is 0° in
relative measurement mode.
The angle readout is 35° in
relative measurement mode.
1. The unit is in horizontal measurement
mode (the icon “ABS” is visible). Put the
protractor on the surface that is actually 25°
off the horizontal.
2. Press the ZERO button to change to rela-
tive measurement mode (the icon “ABS” is
not visible, the angle readout is 00.0°).
3. Put the protractor on the surface that is
actually 60° off the horizontal. “35°” showed
on the display is relative to the benchmark
of the surface that is actually 25° off the
horizontal.
ON/OFF
• Simply press this button to turn the unit on, it will display the angle reading immediately. Set the unit on the surface to be measured and read
the angle (To get the most accurate reading, allow the unit to settle for 6 seconds before noting the angle).
• When you press the ON/OFF button for more than 6 seconds, the unit will be completely turned off, and you will need to recalibrate it once you
turn it on again. Please check Calibrating Instructions.
Recalibration
• Normally the digital protractor doesn’t need to be recalibrated if you do not take the battery out of the unit, or you do not turn it off by pressing
the ON/OFF button for more than 6 seconds. Below is the calibration procedure.
Manufactured for Grainger International Inc.
100 Grainger Pkwy., Lake Forest IL 60045 U.S.A.
FOW236
Printed in China
09/08
For Replacement Parts Call 1-800-323-0620
24 hours a day – 365 days a year
1. Place the unit on a at surface where the
display faces you and the lettering on
face is right-side up. Align with an edge or
line. Press the ON/OFF button, the “-1-”
appears.
2. Press the ZERO button and the “-1-” starts
blinking.
3. Wait 6 seconds until the “-2-” appears.
4. Rotate the unit 180 degrees horizontally so
the display faces away from you, the lettering
should be still be right-side up. Align with the
same edge or line. Press the ZERO button and
the “-2-” starts blinking, wait 6 seconds until
the actual angle is visible. The calibration is
completed.
The icon “-1-” is blinking


