VeriLUX User Manual
5
Operating Instructions
• Operational Panel
1Display: View the menu and related functions for Favorite, Material Library, Customize,
and System Setting.
2Back: Back to the previous page
3START/STOP: Start/Stop curing process
4Micro SD Card reader
5 Knob: Turn the knob in either direction to view the available options; Press the knob
for entering and selecting from the menu
• Settings Parameters
• Intensity Output (P)
Select the light intensity according to the material characteristics, shape, and thickness.
Level 1 is the lowest light intensity output; Level 16 is the highest light intensity output.
Range of light intensity output:
LED current: 43.8 — 700 mA
Light intensity: 7018 — 112,295 mW/cm2
NOTE: For the best curing results for a flat and thin print, we strongly recommend
using a lower intensity output and a longer curing time.
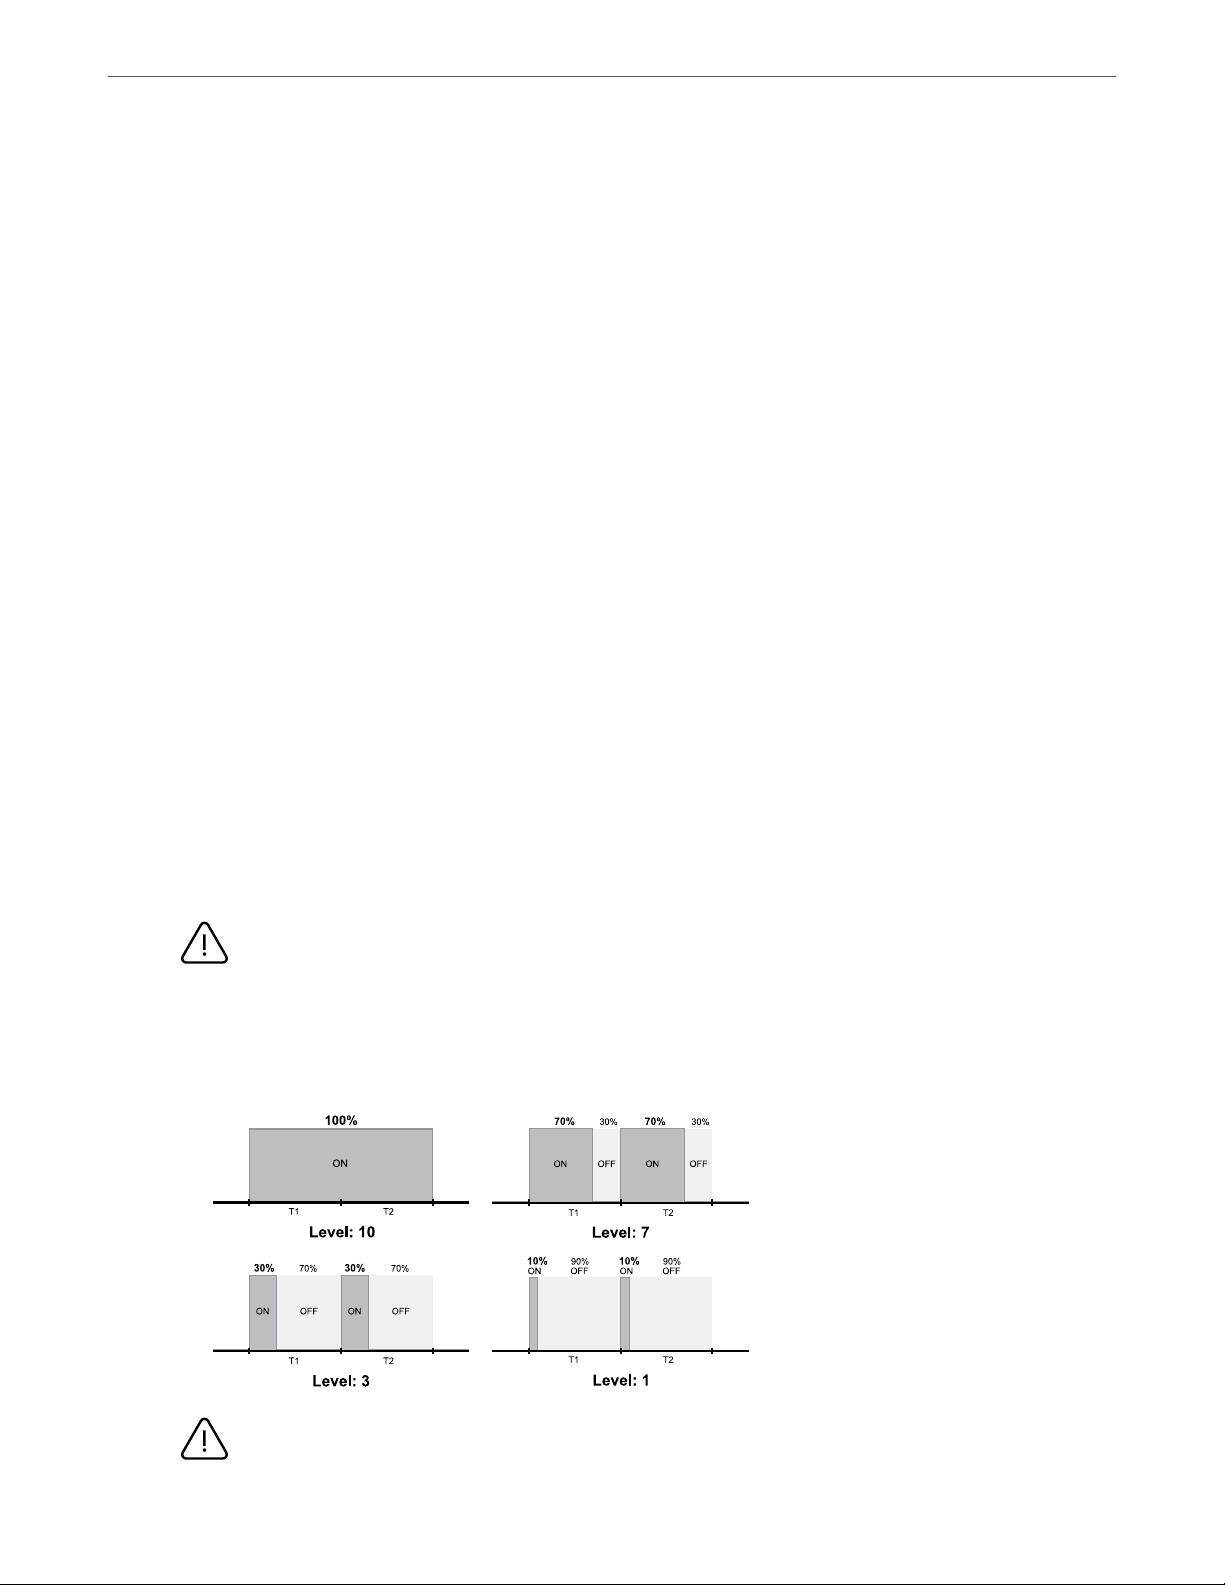
• Duty Cycle (D)
It is the ratio of pulse duration and time gap. Select the period of illumination per cycle
according to the characteristics of the print. Level 1 is 10% working cycle (shortest period
of illumination); Level 10 is 100% working cycle (constant illumination).
Package Contents
Product Specifications
Weight 3 Kg
Curing Time One second to 20 minutes
Quantity of LEDs 31
Wavelength of LED 365, 385, and 405 nm
Power Supply 100-240 V AC, 50-60Hz
75 WPower consumption
Fuse 2 A
Operating Environment Indoor use only at ambient temperature
and relative humidity.
200 (L) x 220 (W) x 160 mm (H)Machine Size
Operating Instructions
• User Interface
CURIE Power Cable
UV Box Overview
❶Display ❷Handle Window
❹❸ Controller
❺Cooling Fan ❻Outlet ❼Fuse ❽Power Switch
❼❽
❻
❺
USEONLY WITH A 250V FUSE
❹
❸
❶
❷
BACK
❶ ❷ ❸ ❹ ❺
Micro SD Card reader
❹
❺
❶Display: View the menu and related functions for Favourite, Material Library,
Customise, and System Setting.
❷Back: Back to the previous page
❸START/STOP: Start/Stop curing process
Controller: Turn the knob in either direction to view the available options; Press the
knob to select an option
Machine Settings
• Intensity Output (I)
Select the light intensity according to the material characteristics, shape, and thickness.
Level 1 is the lowest output (i.e. 43.8 mA LED for 7018 mW/cm2 light intensity); Level 16 is the
highest (i.e. 700 mA LED for 112295 mW/cm2 light intensity)
NOTE: For the best results curing a flat and thin print, we strongly recommend using a lower intensity output
and a longer curing time.
• Duty Cycle (D)
Select the period of illumination per cycle according to the characteristics of the print.
Level 1 is the shortest period of illumination (i.e. 10% of the cycle); Level 10 is constant illumination.
NOTE: For the best results curing a small print, we
strongly recommend using a lower intensity
output and a longer curing time.
• Curing Time (T)
Select the duration of the curing process. The curing time can be set to any value between one
second and 20 minutes.
NOTE: For the best results curing a small print, we strongly recommend using a lower
intensity output and a longer curing time.