manuals.online logo
Brands
  1. Home
  2. •
  3. Brands
  4. •
  5. Whirlpool
  6. •
  7. Air Conditioner
  8. •
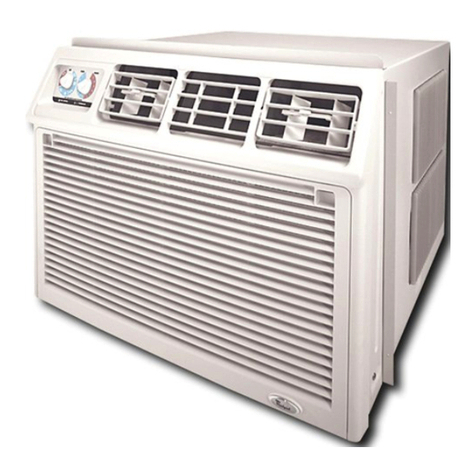
  9. Whirlpool AC0062XM0 User manual

Whirlpool AC0062XM0 User manual

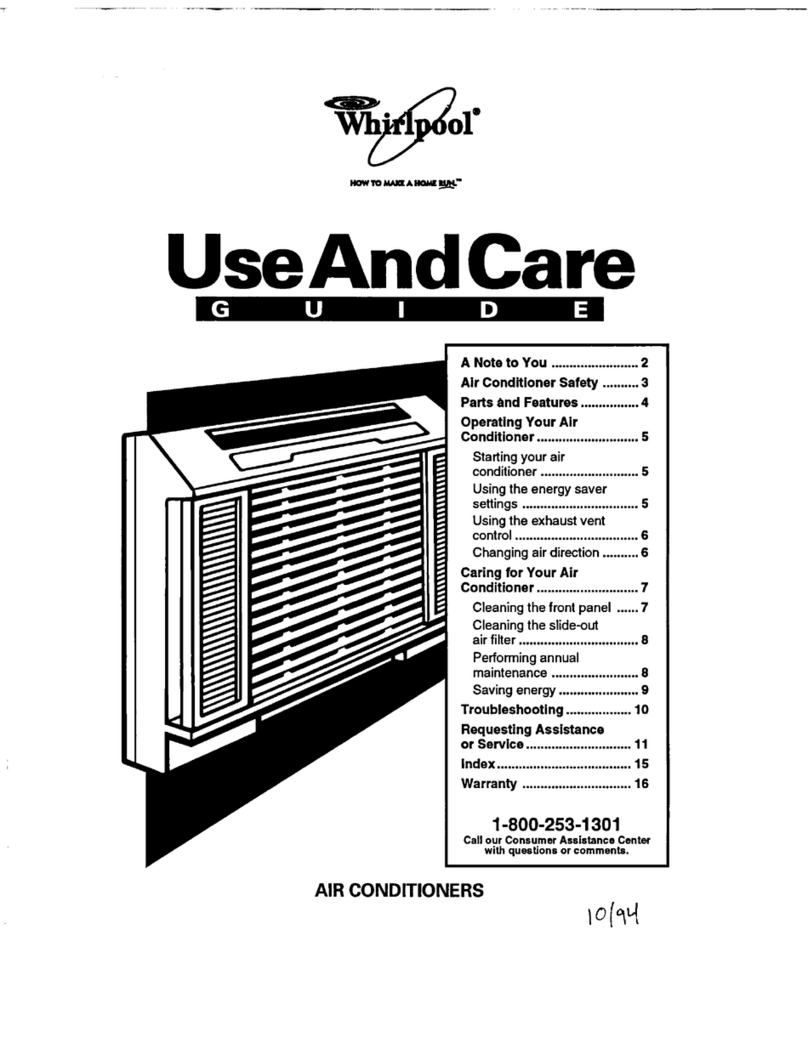
AIR
CONDITIONER
?Ovens, Compactors, Room Air Conditioners, Dehumidifiers, Automatic Washers, Clothes Dryers, Freezers,
Refrigerator-Freezers,
Ice Makers,Dishwa!
Copy your Model and
Serial Nurnbers here.. .
When you need service or call with a question, have
this information ready:
1.
Complete Model and Serial Numbers.
To
find Model and Serial Numbers remove the
front panel (see page 16). The numbers are
located on a
label
attached to the evaporator
coil cover near the top of the unit.
SERIAL LAB.3
A
2. Purchase date from sales slip.
Copy this information in the spaces below.
Keep this book, your warranty and sales slip
together in a handy place.
Model Number
Senal Number
Purchase Date
Service Company and Telephone Number
BEFORE YOU USE YOUR
AIR CONDITIONER
It is your responsibilityto make
surethat your air conditioner:
l
Has been properly installed.
l
Is the right size for the area you want
to cool.
l
Is properly connected to electricity.
l
Is properly electrically grounded.
l
Is properly used only for the job it was
intended to do.
l
Is not used by children or anyone not
able to operate it properly.
l
Is properly maintained.
l
Also, remove energy label and buy guide.
Use damp cloth to take off any glue
residue. Do not use a sharp instrument
or any harsh or abrasive cleaners.
Energy SavingTips
l
Improve home insulation (seal doors,
windows, and close fireplace flue).
l
Close blinds or drapes on sunny side of
house; add window awnings.
l
Keep air filter clean. Don’t block air flow
with drapes or furniture.
l
Ventilate attic (high temperature levels
add to normal cooling load).
l
Try not to use heat producing appliances
during the hottest part of the day. Turn
lights, radios, televisions, and other
appliances off when not needed.
l
Keep heat registers and cool air returns
closed or blocked off so cooled air won’t
escape.
l
Use a vent fan in areas where cooking,
laundry, or bathing is done to pull out
extra heat and moisture near its source.
F3efore You U, e Your Air Conditioner
Energy Tips
Electrical ReqLlirernents
Installation InGructions
How to Start and
I Use Your Air Conditioner
Contents
tjage page
2 Cleaning and Caring for Your
2 Air Conditioner . . 16
3 Cooling Load Guide 18
6 Self-Service Checklist 19
Service Information 19
14
‘- 1987 Whirlpool Corporation
2
Electrical Requirements
For Your Air Conditioner
BELOW ARE EL.ECTRICAL PLUG VARIA-
T-IONS. CHOOSE THE ONE WHICH
MATCHES THE AMPERE RATING OF YOUR
UNIT. THE NUMBER OF AMPERES IS
PRINTED ON THE SERIAL LABEL,
ATTACHED TO THE FRONT OF THE UNIT,
BEHIND THE FRONT PANEL (SEE PAGE 2).
PLUG TYPE
3-PRONG
GROUNDING PLUG
I
POWER SUPPLY
J-PRONG
GROUNDING PLUG
POWER SUPPLY
3- PRONG
GROUNDING
TYPE WALL
RECEPTACLE
CORD
SEE ELECTRICAL
REQUIREMENTS
A
n
For 115 volt models with
serial plate amperes up
through 7.5
D
B
D
For 115 volt models with
serial plate amperes of
7.6 through 12.0
For 230 volt and 2301208
volt models with serial
plate amperes up through
12.0
ELECTRICAL
REQUIREMENTS
For 115 volt models with serial plate amperes up
through 7.5
OBSERVE ALL LOCAL GOVERNING CODES
AND ORDINANCES
Do not, under any circumstances, remove the
power supply cord ground prong.
RECEPTACLE WIRING
RECEPTACLE WIRING should be at least as
large as 14 gauge. Use copper wire only. It is the
personal responsibility and obligation of the
customer to provide proper and adequate
receptacle wiring installed by a qualified electri-
cian. OBSERVE NATIONAL ELECTRICAL
CODE AND ALL LOCAL GOVERNING
CODES AND ORDINANCES.
Electrical Requirements
A 115 volt (103.5 min., 126.5 max.) 60 hertz
AC only, 15 ampere fused electrical supply is
required (time delay fuse or time delay circuit
breaker required). See Figure 1 on page 4.
It
is
recommended that a separate circuit, serving
only this appliance, be provided.
Do not use an
extension cord.
Electrical Connection
Electrical Ground is Required on this Appliance
RECOMMENDED GROUNDING METHOD
For your personal safety, this appliance must be
grounded. This appliance is equipped with a
power supply cord having a 3-prong grounding
plug. To minimize possible shock hazard, the
cord must be plugged into a mating 3-prong
grounding type wall receptacle, grounded in
accordance with the National Electrical Code
and local codes and ordinances. If a mating wall
receptacle is not available, it is the personal
responsibility and obligation of the customer to
have a properly grounded 3-prong wall receptacle
installed by a qualified electrician. See Figure 1
on page 4.
Figure 1
TACLE
POWER-SUPPLY CORD
ALTERNATE GYOUNDING METHOD
f changing ano proper!y grounding the wall
receptacle is imrjossible and where local codes
permit iconsult your electrrcal inspector), a
remporary adapter may be plugged into the
existing 2-prong wall receptacle to mate with the
3-prong power s~:pply cord. See Figure 2. THIS,
HOWEVER. IS ~JOT RECOMMENDED.
of tnis is done, y )u rnusr connect the grounded
eyelet on the adapter to the wall receptacle
cover plate screw and from this same screw, you
tnust connect a separate copper ground wire
I -14 minimum) IO a grounded cold water pipe. r
See Figure 2. Do not ground to a gas supply
pipe. Do not connect to electrical supply until
(appliance is permanently grounded.
ELECTRICALLY
GROUNDED MET
COLD WATER PIP
(REMOVE PAINT, e
GROUND ASSEMBLY
(ATTACH TO GROUNDED
METAL COLD
WATER PIPE)
PLATE
WALL
RECEPTACLE
POWER SUPPLY CORD
‘Cold water pipr rnust have metal continuity to
electrical grounrl and not be interrupted by
plastic, rubber c)r other electrically insulating
<onnectors (incleilding water meter or pump)
without adding a jumper wire at these con
iel:tions.
ELECTRICAL
REQUIREMENTS
For 115 volt models with serial plate amperes of
7.6 through 12.0
OBSERVE ALL LOCAL GOVERNING CODES
AXD ORDlhANCES
Do not, under any circumstances, remove the
power supply cord ground prong.
RECEPTACLE WIRING
RESEPTACLE WIRING should be at least as
large as 14 gauge. Use copper wire only. It is the
personal responsibility and obligation of the
customer to provide proper and adequate
receptacle wiring installed by a qualified electri-
cian. OBSERVE NATIONAL ELECTRICAL
CODE AND ALL LOCAL GOVERNING
CODES AND ORDINANCES.
Electrical Requirements
A 115 volt (103.5 min., 126.5 max.) 60 hertz
AC only, 15 ampere fused electrical supply is
required (time delay fuse or time delay circuit
breaker required). See Figure 3. lt is required
that a separate circuit, serving only this appliance,
be provided.
Do not use an extension cord.
Electrical Connection
Electrical Ground is Required on this Appliance
RECOMMENDED GROUNDING METHOD
For your personal safety, this appliance must be
grounded. This appliance is equipped with a
power supply cord having a 3-prong grounding
plug. To minimize possible shock hazard, the
cord must be plugged into a mating 3-prong
grounding type wall receptacle, grounded in
accordance with the National Electrical Code
and local codes and ordinances. If a mating wall
receptacle is not available, it is the personal
responsibility and obligation of the customer to
have a properlv grounded 3-pronq wall receptacle
installeb by a qualified
Figure 3
3.PRONG
GROUNDING PLUG
.
electrician. See Fig.ure 3.
GROUNDING
TYPE WALL RECEPl
POWER SUPPLY CORD -ACLE
ALTERNATE GROUNDING METHOD
If changing and properly grounding the wall
receptacle is impossible and where local codes
permit (consult your electrical inspector), a
temporary adapter may be plugged into the
existing 2-prong wall receptacle to mate with the
3-prong power supply cord. See Figure 4. THIS,
HOWEVER, IS NOT RECOMMENDED.
If this is done, you must connect the grounded
eyelet on the adapter to the wall receptacle
cover plate screw and from this same screw, you
must connect a separate copper ground wire
(#14 minimum) to a grounded cold water pipe.*
See Figure 4. Do not ground to a gas supply
pipe. Do not connect to electrical supply until
appliance is permanently grounded.
Figure 4
ELECTRICALLY
GROUNDED META
COLD WATER PIP
(REMOVE PAINT,
SCRE
J-PRONG
GROUNDI
PLUG
RECEPTACLE
ROUND PRONG
POWER SUPPLY CORD
*Cold water pipe must have metal continuity to
electrical ground and not be interrupted by
plastic, rubber or other electrically insulating
connectors (including water meter or pump)
without adding a jumper wire at these con-
nections.
cc
ELECTRICAL
REQUIREMENTS
For 230 and 230/208 volt models with serial
plate amperes up through 12.0
Refer to Chart C for specific wiring and re-
ceptacle information to be used.
OBSERVE ALL LOCAL GOVERNING CODES
AND ORDINANCES
Do not, under any circumstances, remove the
power supply cord ground prong.
ELECTRICAL GROUND IS REQUIRED ON
THIS APPLIANCE.
A three-wire, single-phase 60 hertz AC only
electrical supply is required.
A separate electrical supply is required on a
separately fused circuit. Do not fuse ground-
neutral.
See Chart C for receptacle voltage requirements,
proper fuse size, wire size and wiring connec-
tions which must conform with rating of the
appliance.
Do not use an extension cord.
Chart-C
PLUG AND
I
RATING IN I SEE BELOW
AMPS I I
RECEPTACLE WIRING
RECEPTACLE WIRING should be at least as
large as size shown on electrical Chart C. Use
copper wire only. It is the personal responsibility
and obligation of the customer to provide
proper and adequate receptacle wiring installed
by a qualified electrician. OBSERVE NATIONAL
ELECTRICAL CODE AND ALL LOCAL
GOVERNING CODES AND ORDINANCES.
RECOMMENDED GROUNDING METHOD
For your personal safety, this appliance must be
grounded. This appliance is equipped with a
power supply cord having a 3-prong grounding
plug. To minimize possible shock hazard, the
cord must be plugged into a mating 3-prong
grounding type wall receptacle, grounded in
accordance with the National Electrical Code
and local codes and ordinances. If a mating wall
receptacle is not available, it is the personal
responsibility and obligation of the customer to
have a properly grounded 3-prong wall receptacle
installed by a qualified electrician.

This manual suits for next models

10

Other Whirlpool Air Conditioner manuals
Whirlpool Comfore-aire RA51K0 User manual

Whirlpool

Whirlpool Comfore-aire RA51K0 User manual

Whirlpool ACD052MM0 User manual

Whirlpool

Whirlpool ACD052MM0 User manual

Whirlpool AMD 084 User manual

Whirlpool

Whirlpool AMD 084 User manual

Whirlpool 4380701 User manual

Whirlpool

Whirlpool 4380701 User manual

Whirlpool ACSIOZ ACS520 User manual

Whirlpool

Whirlpool ACSIOZ ACS520 User manual

Whirlpool ACQ142XA0 User manual

Whirlpool

Whirlpool ACQ142XA0 User manual

Whirlpool AC1 352 User manual

Whirlpool

Whirlpool AC1 352 User manual

Whirlpool AMD 018 User manual

Whirlpool

Whirlpool AMD 018 User manual

Whirlpool COOL IMPRESSION SERIES User manual

Whirlpool

Whirlpool COOL IMPRESSION SERIES User manual

Whirlpool R153 User manual

Whirlpool

Whirlpool R153 User manual

Whirlpool ACC108PS User manual

Whirlpool

Whirlpool ACC108PS User manual

Whirlpool 1188177 User manual

Whirlpool

Whirlpool 1188177 User manual

Whirlpool 1188018 User manual

Whirlpool

Whirlpool 1188018 User manual

Whirlpool FM07IDU32 User manual

Whirlpool

Whirlpool FM07IDU32 User manual

Whirlpool ACM102 User manual

Whirlpool

Whirlpool ACM102 User manual

Whirlpool ACM102XF0 User manual

Whirlpool

Whirlpool ACM102XF0 User manual

Whirlpool ACD052PK0 User manual

Whirlpool

Whirlpool ACD052PK0 User manual

Whirlpool 1163505 User manual

Whirlpool

Whirlpool 1163505 User manual
Whirlpool YACQ108MR0 User manual

Whirlpool

Whirlpool YACQ108MR0 User manual

Whirlpool WHAW050CW User manual

Whirlpool

Whirlpool WHAW050CW User manual

Whirlpool WHAP081AW User manual

Whirlpool

Whirlpool WHAP081AW User manual

Whirlpool BHAC1400XS0 User manual

Whirlpool

Whirlpool BHAC1400XS0 User manual

Whirlpool WHHW182AW User manual

Whirlpool

Whirlpool WHHW182AW User manual

Whirlpool 947596 B User manual

Whirlpool

Whirlpool 947596 B User manual

Popular Air Conditioner manuals by other brands

Fujitsu ASYG 09 LLCA installation manual

Fujitsu

Fujitsu ASYG 09 LLCA installation manual

York HVHC 07-12DS Installation & owner's manual

York

York HVHC 07-12DS Installation & owner's manual

Carrier Fan Coil 42B Installation, operation and maintenance manual

Carrier

Carrier Fan Coil 42B Installation, operation and maintenance manual

intensity IDUFCI60KC-3 installation manual

intensity

intensity IDUFCI60KC-3 installation manual

Frigidaire FAC064K7A2 Factory parts catalog

Frigidaire

Frigidaire FAC064K7A2 Factory parts catalog

Sanyo KS2432 instruction manual

Sanyo

Sanyo KS2432 instruction manual

LG MultiV Series installation manual

LG

LG MultiV Series installation manual

CLIMAVENETA a-CHD U-2T 606+2209 OPERATING AND INSTALLATION Manual

CLIMAVENETA

CLIMAVENETA a-CHD U-2T 606+2209 OPERATING AND INSTALLATION Manual

Midea EWK06CW5 user manual

Midea

Midea EWK06CW5 user manual

Pioneer FAB Series installation manual

Pioneer

Pioneer FAB Series installation manual

SPT WA-1511S user manual

SPT

SPT WA-1511S user manual

Mitsubishi Electric Mr.Slim MSZ-A24NA operating instructions

Mitsubishi Electric

Mitsubishi Electric Mr.Slim MSZ-A24NA operating instructions

Mitsubishi Electric PUHZ-RP50VHA4 Service manual

Mitsubishi Electric

Mitsubishi Electric PUHZ-RP50VHA4 Service manual

Panasonic CS-S18HKQ Service manual

Panasonic

Panasonic CS-S18HKQ Service manual

Panasonic CS-E15NKE3 operating instructions

Panasonic

Panasonic CS-E15NKE3 operating instructions

Gree GWH18TC-K3DNA1B/I Service manual

Gree

Gree GWH18TC-K3DNA1B/I Service manual

Friedrich ZoneAire Compact P08SA owner's manual

Friedrich

Friedrich ZoneAire Compact P08SA owner's manual

Daikin R32 Split Series installation manual

Daikin

Daikin R32 Split Series installation manual

manuals.online logo
manuals.online logoBrands
  • About & Mission
  • Contact us
  • Privacy Policy
  • Terms and Conditions

Copyright 2025 Manuals.Online. All Rights Reserved.