manuals.online logo
Brands
  1. Home
  2. •
  3. Brands
  4. •
  5. Whirlpool
  6. •
  7. Bathtub
  8. •
  9. Whirlpool 215WP User manual

Whirlpool 215WP User manual

IMPORTANT: Read this manual before proceeding with installation of the bathtub and keep it with the other accompanying documents.This manual is valid for the installation of tubs both with and without whirlpool.
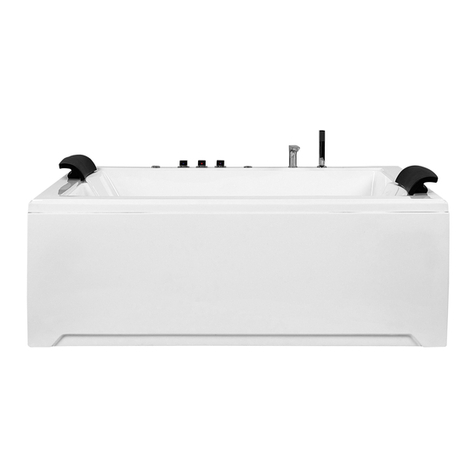
Massage bathtub
Page 7 of 7User’s Guide4、Waterfall function :
Press “ ”or“ ”toselect the waterfall icon ,as shown to the right :
5、Ozone function (Configuration Options):
Press “ ”or“ ”to select the ozone icon ,as shown to the right :
To press OKfor ON or OFFOK6、Lamp :
Press “ ”or“ ”to select the lamp icon ,as shown to the right :
To press OKfor ON or OFFOKTo press OKfor ON or OFFOKNotice :the work timing is 15 minutes .
(It will be turned off automatically every 60minutes .)
6.Items For Attention :
3、The motor must be erected flatly and stably and the shell shall be firmly earthed .
4、The whole set is usually under standby state. If it is not used please pull off the master power switch. for long time,5、During erection, it is required to consider load capacity of power supply circuit, otherwise it may influence the normal working of the system or cause accident. 6、During erection, all the electric appliances and electric parts shall be provided with moisture resistant measures. 1、The system must be erected by qualified technical person and the leakage switch shall be mounted in place of easy control . 2、 It must be connected firmly during erection .In the case of loss due to improper earthling ,the manufacturer will not assume any responsibility . OK( )or( )within 30℃--42℃(default 38℃),When the water temperature Notice :only under the surfing function on ,the heating function can be launched ,and control by the preset temperature .Press ( ) 2 seconds ,the number of temperature will flicker ,then the preset temperature can be changed by pressing reach to the preset temperature ,it will turn into constant temperature .
7、Ensure that the main power supply is not cut-off.Drainage function after power off:after turning off the control panel,the drainage magnetic valve will automaticly startup and shut-off after 30 minutes.
SIZE:1820X1210X590mmMODEL:WP-215
Model:215WP
1
Massage bathtubMassage bathtub
Page 6 of 7 Page 1 of 7
4.Panel description:
5.Operation: 1、ON/OFF:insert the plug ,press( ) to switch on the power .The screen will show( SPA ),if there is heating function 's model ,it will show the temperature of water .You can perform setting and operation of various function according to the requirement of users .The system can be directly switch off by pressing(  ) .
OKScreen Confirm ON/OFFleftRight No heating and ozone function Long shows is the actual temperature The flicker is the preset temperatureHeating function's model :3、Heating function(Configuration Options):
Press “ ”or“ ”to select the heating icon ,as shown to the right :
To press OKfor ON or OFFOK
2、Surfing function :
Perss “ ”or“ ”to select the water pump icon ,as shown to the right:
To press OKfor ON or OFFOKNotice :The water pump is limited by water level ,it only be launched under the condition of water level .If short of water ,the " “the will flicker ,water pump can not start .The pump will be turned off automatically every 60 minutes .Plane chartInstall the diagram
Tap takes over sketch
drainage
Cold waterHot waterWaterfall drain
Sprinkler drain
Clear drainCold and hot water switchExchange switchSprinklerRegulation of airFaucetDrainage switchBig nozzleSmall nozzleDrainagePillowReturn net
connect the power supply
Remote control panel
1、Electricity parameterRated voltage Rated electric current Reference circuit voltage220VAC2750W<4A12VRated power 2、Electric installation2.1 2.2 2.3 2.4 power supply's establishment should be compled with nation security standard, voltage and frequency also shoule be accord withproduct's nameplate.Especially install creep- age protect switch and also check whether can connect with ground.The wire collected to the massage bathtub should be fitting permanent., and the wire should be a three-core wire, the sectional acreage of each core cannot less than 12A. when wire pass the wall,it should be use bushing for protection until theAC outlet.Ground wire of bathtub should be test whether works with house appliance ground wire.The wire end of electricity control box should connect to the control panel, water bottomlight, loudspeaker, electrical engineering and the detector protection respectively.3、Water supply device3.1 This device's hydraulic pressure is 0.2-0.4Mpa.3.2 The water supply characteristics on the wall: The cold or hot water supplies inside the bathroom also establish in the shelter of the massage tub, use the hose to connect with the cold or hot joint of the tub. the pipe towards is decide by the customer, the machine do not go with the hose.4.1 4.2 4.3 4.4 4.5 Before install, must consider the place of install massage bathtub whether can supportthis device's pressure.Place the massage bathtub on the install position, adjust level to make the drain system smooth.Adjust the leg's screw to make sure all of the screw touch ground completely.Install the drain hose, and make some measure to against on the connecter.Fix cold and hot water-pipe well, then install the showerhead. And then put drain into downcomer, finally connect with power and make sure whether device connected with ground can work.5、Using Method4、Installation introduction
5.1 5.2 5.3 Turn on faucet, adjust water's temperature, add water to the massage bathtub.when the highest water level exceed the highest nozzle about 20-30mm and reach the detector, press the switch button to let the electric machine.Revolve the adjust switch ,and choose the proper surf pressure.After finishing if should turn off pump at first, then open drain button,when water is all out ,please make a clean of bathtub to keep in good.
Page 2 of 7
6、Clean and keep in good condition
..6.1 usually use soft cloths and general liquid cleanser can wash away dirt , but forbid to use the cleanser with acetone or the ammon ia composition;when disinfect, forbid to use the disinfector contained the formaldehyde.6.2 the dirty spot of surface can use the toothpaste to wipe with the soft cloth 6.3 to the low-grade chafe of the surface or burned by cigarette, can soak in water to whet with 2000# levigation sand paper, then polishing.6.4 If the electroplate piece contain stain, use the soft cloth to wipe lightly, avoid to wiping with coarse cloth6.5 often clean up the backwater net cover, prevent it from stop;
Massage bathtubMassage bathtub
Page 5 of 7
1.Features(371): 1、 Automatic testing water level by microcomputer. 2、Surfing function . 3、Bubble bath massage function . 4、External thermostat function (Configuration Options ) 5、Underwater light .
6、Ozone sterilization function (Configuration Options )
2.Specifications: 1、:AC190V--240V 50-60Hz Power supply 5、:1500V 1minDielectric strength
6、:<0.25mA Leak current 7、Lamp:AC12V 10W
8、Ozone :AC12V 8W()Configuration Options
4、:AC220V 2W()Heater power Configuration Options
9、:IPX4Waterproof grade
2、Water pump1 load: AC220V-240V 1500W 3、 pump2 load: AC220V-240V 750WWater
3.Install sketch:(the configuration of installation should be accroding to the selected model)
12V10WLamp
Water pump Water level sensor Electric box
16A PlugHeater
220V/2KW
Control panel
AC220VINPUTOzone devi ce AC12V/8W
OK
Water pump
Check circuitryInsert again or change power lineConnect again or changeChangeConnect with supplierFix tightly againAdjust
Way
Change Fix againChange Voltage unstablePower connector didn't connect well or open circuitThe windpipe connect air switch fall off or break
Cause
Power's parameter is not same as nameplateFixed screw did'n fix or fall offSupport's leg screw did not touch groundThe joint did not fix wellWater pipe or accessory leakAging
Machine or equipment doesn't work
water pipe leak out
Big nose of machineFault
The air switch failure
7、Fault eliminate
Remark: except this fault, please according to situation to resolve, or find experienced people to repair.
8、special remind
8.1 please find qualified people to install bathtub according to introduction.8.2 when you are using it, first of all you have to inject the cold water and then inject the hot water. Don't inject the hot water first.2 8.3 bathtub's machine must connect on ground, support must use 1.5mmyellow/green double wire connect with ground and check whether effective. 8.4 please do not turn on machine without water, before draining should turn off machine.8.5 children should be looked after in bathtub.8.6 bathtub's temperature cann't higher than people average temperature, and the best is 32-37centigrade.8.7 after shower ,please cut off power.8.8 if have these situation ,please do not enter into massage bathtub.8.8.1 younger than 4 years old's child;8.8.2 blood circulation unstabled people;8.8.3 sot;8.8.4 suffer from flu;8.8.5 heart disease;8.8.6 already have sauna;8.8.7 after meal in half a hour;Remark: our company has the right to modify the above mention without further notice.
Page 3 of 7
6.6 Check whether have break on pipe and waterway aperiodically.6.7 Please check whether there is fall off or breakage on wire, switch,connector plugs so that repair in time.6.8 In order to keep to use in a long term ,please remember, don't use more than 3 hours continuely.
Massage bathtubMassage bathtub
Page 4 of 7Bathtub User’s GuideWARNINGS CONTENTSI. Safety Precautions II. Brief Introduction III.Operation of Control PanelIV.Precautions for Installation and Use 1.Please follow the instruction contained in the attached installation manual to ensure that the product is installed properly.the manuf- acturer will not be held liable for damages or injuries caused by im- proper installation. 2.Follow the instructions contained in this manual when using the product. 3.Before using the bathbub, check the local voltage that if reach to the rated voltage(pre-installation card).

Other Whirlpool Bathtub manuals

Whirlpool SALAMANCA User manual

Whirlpool

Whirlpool SALAMANCA User manual

Whirlpool Ariel ARL-702 User manual

Whirlpool

Whirlpool Ariel ARL-702 User manual

Whirlpool RIHO User manual

Whirlpool

Whirlpool RIHO User manual

Popular Bathtub manuals by other brands

Senior Bad F01 Assembly instructions

Senior Bad

Senior Bad F01 Assembly instructions

ZEN Cedar Assembly instructions

ZEN

ZEN Cedar Assembly instructions

Aquatica Digital True Ofuro Tranquility Series manual

Aquatica Digital

Aquatica Digital True Ofuro Tranquility Series manual

DURAVIT Darling New 700246 Mounting instructions

DURAVIT

DURAVIT Darling New 700246 Mounting instructions

Casabath MY SPACE installation instructions

Casabath

Casabath MY SPACE installation instructions

agape CUNA AVAS1079 Assembly instructions

agape

agape CUNA AVAS1079 Assembly instructions

American Standard Bathing Pool with Integral Apron 2083.102 Features & dimensions

American Standard

American Standard Bathing Pool with Integral Apron 2083.102 Features & dimensions

Kohler K-1170-H2 Homeowner's guide

Kohler

Kohler K-1170-H2 Homeowner's guide

Kohler K-1477 Homeowner's guide

Kohler

Kohler K-1477 Homeowner's guide

American Standard EverClean 2675.002 Specification sheet

American Standard

American Standard EverClean 2675.002 Specification sheet

Access 3260 Series INSTALLATION & OPERATIONAL INSTRUCTIONS

Access

Access 3260 Series INSTALLATION & OPERATIONAL INSTRUCTIONS

Clou InBe IB/05.40402 installation instructions

Clou

Clou InBe IB/05.40402 installation instructions

Crosswater Romano Petite US-N11ACS installation instructions

Crosswater

Crosswater Romano Petite US-N11ACS installation instructions

RAVAK VANDA II Assembly

RAVAK

RAVAK VANDA II Assembly

GALA mitta installation instructions

GALA

GALA mitta installation instructions

Crosswater Florenza US-N23CS installation instructions

Crosswater

Crosswater Florenza US-N23CS installation instructions

Kohler VINTAGE K-700 Roughing-In Guide

Kohler

Kohler VINTAGE K-700 Roughing-In Guide

Laufen Kartell 2.2233.2 installation instructions

Laufen

Laufen Kartell 2.2233.2 installation instructions

manuals.online logo
manuals.online logoBrands
  • About & Mission
  • Contact us
  • Privacy Policy
  • Terms and Conditions

Copyright 2025 Manuals.Online. All Rights Reserved.