manuals.online logo
Brands
  1. Home
  2. •
  3. Brands
  4. •
  5. Whirlpool
  6. •
  7. Cooktop
  8. •
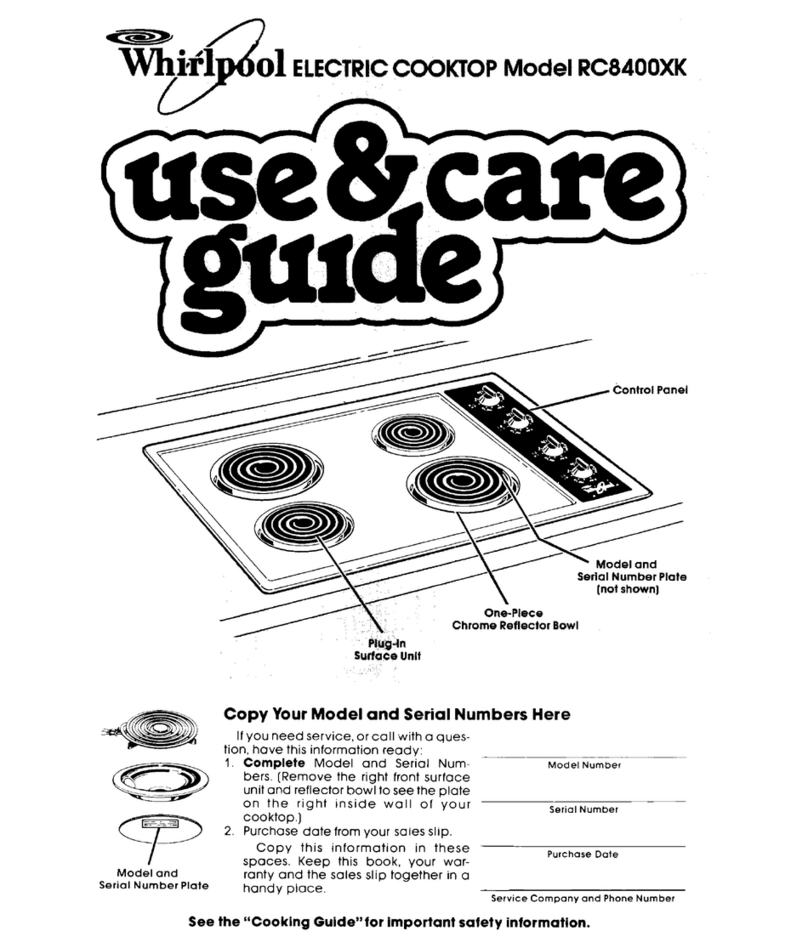
  9. Whirlpool CSEA300ACD Installation instructions

Whirlpool CSEA300ACD Installation instructions

I
\
cUsc
Care
Instructions for your Electric Cooktop
CONTENTS
SAFETY INSTRUCTIONS .................... 1-3
USING YOUR COOKTOP ................... 4-11
Coilelements .......................... 4- 5
Smoothtopcooktop ..................... 6- 7
Soliddiscelements ...................... 9-11
UTENSIL INFORMATION ..................... 12
GENERAL CLEANINGCHART ................ 13
SERVICE .................................. 14
Circuitbreaker (Canada Only)
WARRANTY ............................... 15
INST Themodelandserialnumbersofyourappliancearefoundontherating
platewhichislocatedunderthesurfaceelementforcoiltypecooktopsand
ALLERPleaseleave this onthebottomsideofthesmoothtopandsoliddiscelementcooktops.
manual with this appliance.
Modelnumber:
"-" CONSUMER Tosaveyoutime,
energyandmoney,readandkeepthis Serialnumber:
manualforfuturereference.Dateofpurchase:
8112P102-60
(7/91)
I
SAFETY INSTRUCTIONS
GLAZED COOKING UTENSILS- Only certain types VENTILATING HOODS:
ofglass, glass/ceramic,ceramic, earthenware, orCLEAN VENTILATING HOODS FREQUENTLY-
otherglazedutensilsare suitableforrange-top serv- Grease shouldnotbe allowedtoaccumulateonhood
icewithoutbreakingduetothesuddenchangeintern- or filter.Whenflamingfoodsunderthehood,turnthe
perature,fan off.Thefan, ifoperating,may spreadtheflame.
IMPORTANT SAFETY NOTICE ANDWARNING
UTENSIL HANDLES TheCaliforniaSafeDrinkingWaterandToxicEnforce-
=_ _ SHOULD BE mentAct°f 1986(Pr°p°siti°n 65)requirestheGOVer-
TURNED INWARD norofCaliforniatopublisha listofsubstancesknown
AND NOT EXTEND totheStateofCaliforniatocausecancerorreproduc-
OVER ADJACENT tiveharm,andrequiresbusinessestowarncustomers
SURFACE UNITS - ofpotentialexposurestosuchsubstances.
To reducetherisk of
burns,ignitionof flare- Usersofthisapplianceare herebywarnedthatwhen
mabiematerials, and theapplianceisengagedintheself-cleancyclethere
spillage dueto unin- may besomelow-levelexposuretosomeofthelisted
tentionalcontactwiththeutensil,the handleofa uteri- substances,includingcarbonmonoxide.Exposureto
silshouldbepositionedsothatitisturnedinward,and thesesubstancescanbeminimizedbyproperlyvent-
does notextendoveradjacentsurfaceelements, ingtheappliancetotheoutdoorsduringtheself-clean
cycle.
DO NOT SOAK REMOVABLE HEATING ELE-
MENTS - Heating elements should never beira- DEEP FAT FRYERS:
mersed in water. Immersingelementin water would Useextremecautionwhenmovingthegreasekettleor
damageinsulatingmaterialinsideelement, disposingof hotgrease.
DO NOT TOUCH SURFACE ELEMENTS OR OVEN
OVENS: ELEMENTS, AREAS NEAR ELEMENTS OR INTE-
USE CARE WHEN OPENING DOOR - Let hotairor RIOR SURFACESOF OVEN - Elementsmaybehot
steam escapebeforeremovingorreplacingfood. eventhoughtheyaredarkincolor.Areasnearsurface
elementsand interiorsurfaces ofoven may become
DO NOT HEAT UNOPENED FOOD CONTAINERS - hot enoughtocauseburns.Duringand after use,do
Build-up ofpressure maycausecontainertoburstand not touchor let clothingor other flammable materials
result in injury,contact heating elements, areas near elements or in-
terior surfaces of oven until they have had sufficient
time to cool. Among theseareas arethe cooktop,sur-
KEEP OVENVENT DUCTS(located under rear ele- faces facing the cooktop, oven vent opening and sur-
ment; rear corner of cooktop; between oven door and faces nearthis opening,oven door,and ovenwindow.
control panel of wall oven or on backguard) UNOB- Also, do not allow aluminum foil, meat probes or any
STRUCTED. Blockage of vent prevents proper oven other metal object, other than a utensil on a surface
air circulation and will affect oven performance. Avoid element, to contact heating elements.
touching oven vent area while oven is on and forsev-
eral minutesafter ovenisturnedoff.Some partsof the ANTI-TIP BRACKET:
vent andsurroundingareabecomehot enoughto WARNING: To reducetheriskoftippingoftheappli-
causeburns,ance from unusualusageor by excessiveloadingof
theoven door,theappliancemustbesecured by a
PLACEMENT OFOVEN RACKS- Alwaysplaceoven properlyinstalledanti-tipdevice.Tocheckif deviceis
racksin desired locationwhileoven iscool. Ifrack installedproperly:Useaflashlightandlookunder-
mustbe movedwhilehot,usecaretoavoidcontactof neathrangetosee thatoneoftherearlevelinglegsis
potholderwithovenelement, engagedinthebracketslot.Whenremovingappliance
forcleaning,besureanti-tipdeviceisengagedwhen
rangeisreplaced.Theanti-tipdevicesecurestherear
levelinglegto thefloor,whenproperlyengaged.
--2--
I
USING YOUR COIL ELEMENT COOKTOP
SURFACE ELEMENTS upon outeredgeof element(opposite pad.Topreventscratchingthefinish,do
Surface elements are self cleaning. Do terminal-side of element) while insert- not use abrasive cleaning agents.
not immerse elements in water. When ing terminals into receptacle. Gently Rinse,dryand replace.
an element is turned on,it will cycleon press down on outer edge of element
and offto maintainthe heatsetting, untilelement sitslevel on drip bowl To prevent risk ofelectricshockor fire,
donotlinedrip bowlswith aluminumfoil.
TO remove: Raise element WHENDRIP BOWLS
COOL andcarefullypullout and awayThedripbowls,locatedundereachsur-
fromthe receptacle, faceelement,aredesignedtocatchany CONTROL KNOBS
spills orboilovers.Yourcooktopis equippedwithcontrol
[ _ ] knobs that provide an infinitechoice of
Be sure drip bowls are in place. Ab- settings from LOW to HIGH.The knob
sence of these bowls during cooking canbe seton anyof the numberedset-
may subjectwiring or component parts tingsorbetweenthenumberedsettings.
underneath the cooktopto damage.
To operate: Pushdown andturnknobto
Clean after each use with soap and thedesired setting.Asignal light will
To replace: Insertthe terminals on the water. Remove stubborn stains with turn on to indicate that one or more of
element into thereceptacle. Gently lift bakingsodapaste and plastic scouring the surface elements are on.
SUGGESTED HEAT SETTINGS
UsethefollowingchartasaGUIDELINEuntilyoubecomemorefamiliarwithyourcooktop.Keepinmindthatdifferenttypesof
utensilmaterialsrequiredifferentheatsettingsforthesamecookingoperation.Wesuggestthatyouexperimenttofindtheheat
settingthatbest suitsyourparticularcookingneeds.Informationinthechart isbasedonheavygaugealuminumcookware.
Lowertheheat settingif usingstainlesssteel,cast ironutensilsorglasswaredesignedforsurfacecooking.
HEAT SET'rINGS USES ..... =*..... .... '
HITo bringliquidtoa boil,blanch,preheatskillet,orbringpressureupinpressurecooker.(Note:
Alwaysfollowinstructionsinpressurecookeruse/carebook.)Alwaysreducetoa lowerheatset-
tingwhenliquidsjustbegintoboil or food beginsto cook. !
.... 9Tobrownmeat,heatoilfor deep fat fryinglscald:......
8 To fast saute orfry. To maintain fast boil for largeamounts of liquids.
7 Forslower frying or sauteing operations_ .....
6-5 To maintain moderate to slow boil for large amounts of liquids.
4 To continue cooking uncovered foods; and for mostfrying.[
3 To continue cooking covered foods,maintainboil pressure inmost pressure cookers.Stewl q
braiseor steam.
2 To maintain boil, poach, steam or simmer.
LO To keep foods warm before serving.
NOTE: Referto utensil manufacturer's recommendationsfor suggested heatsettings.Some manufacturersdo notrecom-
mend the use of HIGH orthe use of HIGH for extended cooking operations.
-4-
USING YOUR SMOOTHTOP COOKTOP
COOKING AREAS SIGNAL LIGHTS materials can cause permanent dam-
Thefour surface cooking areas on your Cooktopsare equipped with one to four age to the cooktop.
cooktop are identified by permanent signal lights to indicate when a surface
patterns inthe cooktop. There are two element is on. The light will remain on IMPORTANT; Watch sugary solu-
large and two small areas. Use the until the element is turned off.After a tions carefully to avoid boilover. If
smallerareasfor smallcooking utensils cookingoperation, besure elementand sugar solution (such as jam, jelly,
and the larger areas forlargeutensils, signal light are off. candy) isallowedtoboilover,itmaypit
the glass. Wipeup sugaryboilovers
Immediately- turnelementto LOW.
HOT SURFACE LIGHT Useawooden-handled metalspatula
Thecooktopisequippedwith a HOT toscrapeboilovertoacoolerareaof
_i____ _ SURFACE light.This red lightwill turn the cooktopor useseveral layers of
Oon-to indicate that the cookingarea is dry papertowelstowipeupspillover.lf
_ _) hotandwillremain on untilthe areahas apaper towel is used,becarefulto
cooled,avoid steam bums.Turn element off.
_/1_ (_ When cool,use asinglHdge razor
@"_///1__" blade such as Widget by Gillette to
®COOKING HINTSscrapeoff soil.Cleanwith Elco Cook-
During the first few hours of use, you top Cean ng Creme rinse and dry.
may notice that the cooktop emits a
slight burning odor and a light smoke. To protect the top, it is not recom-
Bothofthese conditionsare normaland mendedtousethe top asaworksurface
When a cooking area is turned ON, are caused by the insulation materialof or as a cutting board orto cookfood di-
the coil element under the cooktop the heating elements ina new cooktop, rectly on the cooktop without a utensil.
willheatup andaredglowfrom the
coilcanbeseenthroughthesmooth-
top.The elementwillcycleonandoff To helpkeep cooktopclean be sureDonotuseatrivetormetalstand(such
to maintainthe heat setting.When cookingarea and utensil bottomare asa wokring)betweenthe utensiland
theelementcycleson,it isnormalto cleananddry beforeuse. thecooktop.Theseitemscan mark or
etchthesurfaceandaffectcookingeffi-
seea redglow. ciency.
Turncontrolknob to thedesiredheat
KNOBS setting. Ifindoubtas tothe correctset-
ting, itis better to select a lower setting Thin gaugealuminum cookware, alumi-
Thecooking areacontrolsarecalled IN- and increase to a higher setting as num foil or foil containers such as pop-
FINITE controls. This type of control needed.It will take longerfor the cook- corn poppers are NOT recommended
provides an infinitechoice of heat set- ing area to cool to a lowertemperature for use on the cooktop. They will leave
tings from LOW to HIGH. The control than toheat upto a higher temperature, metalmarksand maypermanently melt
can be set either on any of the num- onto the top.
bered settings or between the num-
beredsettings.Iffood iscookingtoofastor ifboilovers Do not slide -glassitemsacross the
occur,removelidand reducetoa lower cooktop.They may scratchor damage
To operate control: Pushdown and setting.Allowenoughtimeforthecook- thetop.
turnknob,ineitherdirection,tothe de- ingareatoadjusttothenewsetting.
sired heat setting.Do NOT slide aluminum cookware
THINGSTO REMEMBER across thecooktop.This may result in
Do notallowplasticobjects,aluminum aluminummarkswhichthenmustbeim-
foil,sugar,orfoodswithhighsugaroon- mediately removed with a recom-
tenttomeltontothehotcooktop.Meltedmendedcooktopcleaner.
-6-
L
USING YOUR SMOOTHTOP COOKTOP
WARNING:BEFORE CLEANING, CLEANING CHART
BE CERTAIN ALL ELEMENTS ARE
TURNED OFF ANDTHE COOKTOP Daily cleaning, Elco Cooktop Cleaning Gentlyapplywitha non abrasiveplastic
lightto moder- Creme.Liquiddishwash- brush,nylonor plasticpad,orpaper tow-
iS COOL. atestains, ing detergent.Paste ofcling, rinsecompletely and dry.
baking soda and water.
Clean smoothtop after each use.Use
only cleaning agents recommended in
the cleaning chart. Other materials Heavystains, EicoCooktep Cleaning Gentlyscourwithpasteandpapertowel
may damage the finish of thesmooth- burned onfood.Creme. Paste of baking toremoveasmuchaspossible.Thenre-
top.soda or and water, apply paste and let stand for 30 to 45
minutes. Cover withdamp papertowel-
Carefully blot up spillovers around the ingtokeeppastemoist.Scourtoremove
outside of the cooking area as they co- remaining stain. Rinse completely and
curwith drypaper towels. BE CARE- dry.
FUL NOT TO BURN HANDS WHEN
WIPING UP SPILLS.DO NOT USE A Bumedon orSingle-edgerazor blade Whenco0ktopiscool:Placeedgeofsin-
DAMPCLOTH WHICH MAY CAUSE crusty soil. such as Widgetby Gil- gle edge razor on ceramicccoktop at a
lette. 30°angle.=VeryCAREFULLY scrapoff
STEAM BURNS.=_ ...... soil.Cleanremaining soilwithEtco
Whensurface iscoo},cleanas directed:..... CooktopCleaningCreme.
in the chart. DO NOT USE thefollow-Brownor grayElco Cooktap CleaningGently scour withpasteto remove as
ing cleaning agents, stainsfrom Creme. muchaspossible.Reapplypasteandlet
•Abrasives (metalscouringpads, HARD WATER stand for 30 minutes. Scourwith addi-
cleansingpowders, scouring clean- or metal marks, tional paste to remove remaining stain.
ors or pads) will scratch the smooth- Rinse completely anddry.
top.
• Chemicals (oven cleaners, chlorine
bleaches, rust removers or ammo-
nia) may damage the finish of the
smoothtop.
• Cleaning agentsdesigned for glass-
ware which contain ammonia may PROBLEM SOLVING CHART
harm the smoothtop.
•Soiled cloth or sponge will leave an PROBLEM CAUSE TO PREVENT
invisible filmon thecooktop which
maycausediscolorationthenext Tinyscratches Coarse par*Jcles (dust Tiny _cratchesare not remOVableand
time the cooktop isused,orabrasions salt and sand) between do not affect cooking, In time, the
cookwarebottom endscratches Wi//becomesmootherand
cooktop,ncorrectclean- lessvisible Besure cookwarebottoms
CAUTION: ing materials: Sliding andcooktopareclean beforeUse. Do
Ifmetal meltsonto the smoothtop,DOglasswareor metal net useglasswareutensils.Usecook-
NOT USE TOP.CALL AN AUTHOR- asrosstoporusingcook- warewithasmooth,non-scratchingbot-
IZED SERVICER. Do not attemptto re- werewithroughbottoms, tom. = ....
pair cooktop yourself. -Metal-marking Sliding or scraping metal Do not slide any metal object across
Toprevent permanent damage to the utensils or oven racks cooktop.Clean immediately with EIco
cooktop, do not allow utensils toboil across cooktop.CooktopCleaning Creme.
dry.Brownstreaks Encrustedbelievers:In:Removebelievers beforereusingthe
Donot place plasticsona warm or hot andspecks correctcleaning mated-cooktop.Use a cleanctothorsponge.
cookingarea. They wiltmelt and ad- als.Usedsoiledclothor
here to the smoothtop.The smoothtop sponge.
maychipor pitin attempting to remove Areasof discol- Mineral deposits from Use cookware with bottoms that are
melted plastic from the top. oration with a water and foods,clean and dry. Use correct heatsetting
metallic sheento preventbelievers,
To prevent scratching or damage to the
smoothtop: Donot leave sugar, salt, Pittingor flak- Sugarybelievers fromUsecorrectheat settingand large
sand, soil, shortening or other fats on ing. sugar syrups, candy, enough utensil.Watch cooking opera-
jams,jellies,dessert lion to prevent beilovarsorspattering.
the cooking area.Besure areais free sauces,etc. See"THINGS TOREMEMBER"on
from these before turning on cooking page 5forcleaninginstructions.-
area.
_8_
USING YOUR SOLID DISC COOKTOP
Usethe followingchartas aGUIDELINEuntilyou become morefamiliarwithyourcooktop.Keepinmindthatdifferenttypesof
utensilmaterials requiredifferentheatsettingsfor the samecookingoperation.We suggestthatyouexperimenttofindtheheat
setting that best suits your particularcooking needs. Information in the chart is basedon heavygauge aluminumcookware.
Lowerthe heat setting if using stainless steel, cast iron utensils or glasswaredesigned for surfacecooking.
NOTE: Refer to utensil manufacturer's recommendations for suggested heat settings. Some manufacturers do not recom-
mendthe use of HIGHor the use of HIGH for extended cooking operations.
FOR RED DOT ELEMENT
HEATSE'I-FINGS USES
HIGH To bringliquidto a boil,blanch,preheatskillet,orbringpressureup inpressurecooker.(Note:
AlwaysfollowinstructionsinpressurecookerUse/Carebook).Alwaysreducetoa lowerheatset-
tingwhenliquidsboilor food beginstocook.
SETTINGS To brown orsear meat, heat oil for deepfat frying,scald.
7-9 To fast saute orfry.To make candy.
To maintain fast broil for large amounts of liquids,for slowerfrying orsauteing.
SETTINGS To maintain moderate to slow boil for large amountsof liquids.
5-6
SETTINGS To continue cooking uncovered foods, and for most frying.
2-4 To continue cooking covered foods, maintain boil pressure in most pressure cookers. Stews,
braise orsteam.
To maintain boil, poach, steam or simmer.
LOW To keep foods warm before serving.
FOR SENSOR SOLID ELEMENT
HEAT SE'I-rlNGS USES
HIGH To boillargequantitiesofwater,
SETTINGS Todeepfat fry, blanch.
10-11 To pan fry.Fry in succession.
Tobraise, to brown orsear meat.
SETTINGS To fast saute, deep fat fry small quantities.
6-9 To make candy, reheat, scald.
To steam, boil small quantities.
SETiINGS To slow saute, stew.To maintain pressure in most pressure cookers.
2-5 To scramble eggs. Egg based sauces. Pot roast.
To thicken sauces, heat milk, poach, simmer.
To meltchocolate, butter or fat.
LOW To keep foods warm. Thaw. Melt.
-10-
UTENSIL INFORMATION
Cookingperformanceisgreatlyaffected TO DETERMINE IF THE UTENSIL CharacteristicsofUtensil Materials:
by the typeofutensils used.UtensilsHAS A FLAT So'FrOM: Aluminum utensils heat quickly and
SHOULDHAVEAFLATBOTTOM.The1. Placethe edgeoftheruleracross evenly.Bestsuitedforsimmering,brais-
flatbottomallowsgoodconductivitybe- thebottomoftheutensil,ing,boilingandfrying.Donotusewhen
tweenthe utensiland the elementto cookingacidbasedfoodssuchas spa-
provideuniformcookingresults,faster2.Holdutensiluptothe light, ghettisauce.
heating andmore efficient useofen-
ergy. 3. Nolightshouldbevisibleunderthe
ruler. Specialprecautionsfor aluminum
I I _--, , , .. sUs:foilandaluminumcookinguten-
i' : q, Aluminum foil will damagethe
NOTOK smoothtop ¢ooktop if it melts
Utensils with uneven, warped, or -- ontothe glass.Donotuse alum(-
grooved bottomsdonot make good J _,=r- num foil or foil-type containers
contact, reduce heat conductivity and L_ _ under anycircumstances.
result inslower, lesseven heating.A _______; _; _._
utensilwitha badlycurvedbottom will • Aluminum utensils will cause
notmake goodcontactwiththeelement NOTOK _metalmarkson theglass ifyou
andmay notgetenough heatto bring I F=rr slidethemacross thesmoothtop
water to aboil. _ cooktop. Remove any metal
marks immediately.See page 8.
NOTOK Stainless Steel isa poorheatconduc-
CANNING totanddevelopshotspots.Ifcombined
Acceptablewater-bath or pressure withothermetalssuchasaluminumand
copper,however,they will evenly dis-
cannersshouldnot beoversizedand tributeheat. Usefor cookingfunctions
must havea flat bottom.Thefollowing similartoaluminum.
are not recommended:Cannerswith
ridged bottoms, oversized canners
(2-inches largerthanthesurfaceele-Cast Iron utensilsareslowtoheat but,
Fitthe sizeof theutensiltothe sizeofment)or a very largecannerthat restscook moreevenlyoncetemperatureis
the element. Thisconservesenergy, ontwosurfaceelements,reached. Usefor longterm, low heat
Oversized utensilsor utensilsthat rest ,.., cookingor for browningand frying.
across two elements may trap enough .-_.. TT ._._.J
heatto cause damageto the cooktopor
elements.Glass ceramic,earthenware,heatproof
glass or glazed utensils can be used if
• recommended by the manufacturer fer
Do not use woks equipped with round surface cooking.Do notuse with trivets
metal rings.The ring,which isdesigned .,,,,r _ P. or other heat retarding pads with solid
tosupport thewokabbvetheelement,Jr_ discelements. Utensilmustbein direct
will trap heat and may damage the ele- contactwiththe solidelement for proper
merit and the cooktop.- conductionof heat.Best used on low to
medium heatsettings.
When canning, usethe HIGH setting
Solid elements heat by conduction,just untilwater comes to a boil or pres-
Thegreaterautensils'scontactwith sureisreachedinthepressurecanner. Glass ceramic,earthenware,
the element,thebetter thecooking Then, reducetothelowestheatsettingheatproof glass or glazed utensils
=performance. that maintainstheboilorpressure,may scratch the smoothtop cook-
top and are thereforenot recom-
It is essentialthat a FLAT bottom mended for use on the smoothtop.
pan be used withtheSOLIDDISCProlongeduseoftheHIGH setting,or Do not slideglassware across
ELEMENT: If thepan doesnot theuse ofincorrectcanning utensils cooktop to prevent scratching the
make good contact withthe ele- produce excessive heat. Excessiveglass cooktop.
ment, foodwillnot cook properly heat can cause permanentdamage to
and water may not come toa boil theporcelaincooktop,surfaceelement
andthe dripbowl.
-12-
SERVICE
TROUBLESHOOTING CHART
PROBLEM CAUSE CORRECTION
Surface elements fail to turn on or a.Appliance notconnected to a. Connect appliance to wall outlet,
heatfood properly,powersupply, check circuitbreakeror fuse box.
b. Defective element,b. Have service technician check
element.
c.Used incorrectutensil, c. For optimum results,utensil
MUST HAVE A FLAT bottom.
(This is CRITICAL for solid ele-
ments.) See page 12 for addi-
tional information.
d. Canadian cooktoponly - tripped d.Resetcircuitbreaker to ON posi-
circuit breaker, tion.
SERVICE modeland serialnumbers of theappti-CIRCUIT BREAKER
Do notattemptto servicetheapplianceance, thenameand addressoftheCANADIAN APPLIANCE ONLY
yourselfunlessdirectedto dosointhis dealerfrom whom you purchasedtheYourapplianceisequippedwithacircuit
book.Contactthedealerwhosoldyou appliance,thedateofpurchaseandde-breaker box.Thebox islocatedeither
the appliancefor service, tailsconcerningyourproblem, ona wallor inacabinetnexttoor near
the appliance.If part orall ofthe appli-
HOWTO OBTAIN SERVICE If you did not receive satisfactoryserv- ance does not operate, check to see if
ice through your servicer or Maycor you one of the breakers has tripped. Reset
When your cooktop requires service or may contact the Major ApplianceCon- the breakerto the ON position.
replacementparts, contact your Dealer
or Authorized Servicer.Consultthe Yel- sumer Action Panel by letter including
low Pages in your telephone directory your name, address, and telephone
under ranges for the service source number, aswell asthe modeland serial
numbers ofthe appliance.O
nearest you. Be sure to include your
name, address, and phone number,
along with the model and serial num- MajorApplianceConsumerActionPanel
bers of the appliance. (See front cover 20NorthWackerDrive
for location of your model and serial Chicago,IL60606
numbers.) e
MACAP (Major Appliance Consumer I_l_ll_l[]l
If you arenot satisfied withthe localre- Action Panel)isanindependentagency
sponse to your service requirements, sponsored by three trade associations [ ]
callor writeMAYCOR PartsandService asa courtofappeals onconsumer com- I@
Company, 240 Edwards Street, S.E., plaints which have not been resolved
Cleveland, TN 37311, (615)472-3500. satisfactorily withina reasonable period
Includeor have available the complete of time.
-14- -- _ J=

Other Whirlpool Cooktop manuals

Whirlpool RCS3004RS03 User manual

Whirlpool

Whirlpool RCS3004RS03 User manual

Whirlpool G7CE3034X - DIMENSIONS GUIDE Parts list manual

Whirlpool

Whirlpool G7CE3034X - DIMENSIONS GUIDE Parts list manual

Whirlpool RCS2012 User manual

Whirlpool

Whirlpool RCS2012 User manual

Whirlpool GJC3034RB00 User manual

Whirlpool

Whirlpool GJC3034RB00 User manual

Whirlpool GJC3054RB03 User manual

Whirlpool

Whirlpool GJC3054RB03 User manual

Whirlpool WCG75US0D User manual

Whirlpool

Whirlpool WCG75US0D User manual

Whirlpool RCC3024RB03 User manual

Whirlpool

Whirlpool RCC3024RB03 User manual

Whirlpool KECT 365 User manual

Whirlpool

Whirlpool KECT 365 User manual

Whirlpool SC8900EX User manual

Whirlpool

Whirlpool SC8900EX User manual

Whirlpool KECC568RPS User manual

Whirlpool

Whirlpool KECC568RPS User manual

Whirlpool RC8900XMH User manual

Whirlpool

Whirlpool RC8900XMH User manual

Whirlpool RCS2002RS - Electric Cooktop User manual

Whirlpool

Whirlpool RCS2002RS - Electric Cooktop User manual

Whirlpool GJC3634RB03 User manual

Whirlpool

Whirlpool GJC3634RB03 User manual

Whirlpool RC8600XB User manual

Whirlpool

Whirlpool RC8600XB User manual

Whirlpool GOA 9523/WH User manual

Whirlpool

Whirlpool GOA 9523/WH User manual

Whirlpool KGCC506RWW User manual

Whirlpool

Whirlpool KGCC506RWW User manual

Whirlpool WRD 6030 B User manual

Whirlpool

Whirlpool WRD 6030 B User manual

Whirlpool GJC3654RP04 User manual

Whirlpool

Whirlpool GJC3654RP04 User manual

Whirlpool WCE55US4HB User manual

Whirlpool

Whirlpool WCE55US4HB User manual

Whirlpool GW397LXU User manual

Whirlpool

Whirlpool GW397LXU User manual

Whirlpool GLT3014 User manual

Whirlpool

Whirlpool GLT3014 User manual

Whirlpool RC8700ED User manual

Whirlpool

Whirlpool RC8700ED User manual

Whirlpool RCS2002 User manual

Whirlpool

Whirlpool RCS2002 User manual

Whirlpool Gold GJC3055R User manual

Whirlpool

Whirlpool Gold GJC3055R User manual

Popular Cooktop manuals by other brands

Signature LSCG366 Series installation manual

Signature

Signature LSCG366 Series installation manual

NEFF T69S76N0 operating instructions

NEFF

NEFF T69S76N0 operating instructions

Clatronic EKI 3569 instruction manual

Clatronic

Clatronic EKI 3569 instruction manual

Thermador CEM304 Care and use installation instructions

Thermador

Thermador CEM304 Care and use installation instructions

Electrolux EW30CC55GW - 30in Electric Cooktop Dimension Guide

Electrolux

Electrolux EW30CC55GW - 30in Electric Cooktop Dimension Guide

Hotpoint CD67V9H2CA/UK manual

Hotpoint

Hotpoint CD67V9H2CA/UK manual

Dacor EG366SCH Planning guide

Dacor

Dacor EG366SCH Planning guide

Electrolux EW30IC60IS - 30" Induction Cooktop Manuel d’utilisation et d’entretien

Electrolux

Electrolux EW30IC60IS - 30" Induction Cooktop Manuel d’utilisation et d’entretien

Euro Appliances ECT900GBK2 Usage and care guide

Euro Appliances

Euro Appliances ECT900GBK2 Usage and care guide

Wolf ICBIM15G Use & care information

Wolf

Wolf ICBIM15G Use & care information

Summit Professional GC22SS Instructions and recommendations for the use, installation and maintenance

Summit Professional

Summit Professional GC22SS Instructions and recommendations for the use, installation and maintenance

saro FINJA instruction manual

saro

saro FINJA instruction manual

Burton 6200 operating instructions

Burton

Burton 6200 operating instructions

KitchenAid KECC567KBL02 parts list

KitchenAid

KitchenAid KECC567KBL02 parts list

DCS CDV2 SERIES user guide

DCS

DCS CDV2 SERIES user guide

Aarrow Gas Stove Installation

Aarrow

Aarrow Gas Stove Installation

Hotpoint Hotpoint RGB790SEHSA Specifications

Hotpoint

Hotpoint Hotpoint RGB790SEHSA Specifications

Bosch NET8068SUC installation manual

Bosch

Bosch NET8068SUC installation manual

manuals.online logo
manuals.online logoBrands
  • About & Mission
  • Contact us
  • Privacy Policy
  • Terms and Conditions

Copyright 2025 Manuals.Online. All Rights Reserved.