Whirlpool WHP44 User manual

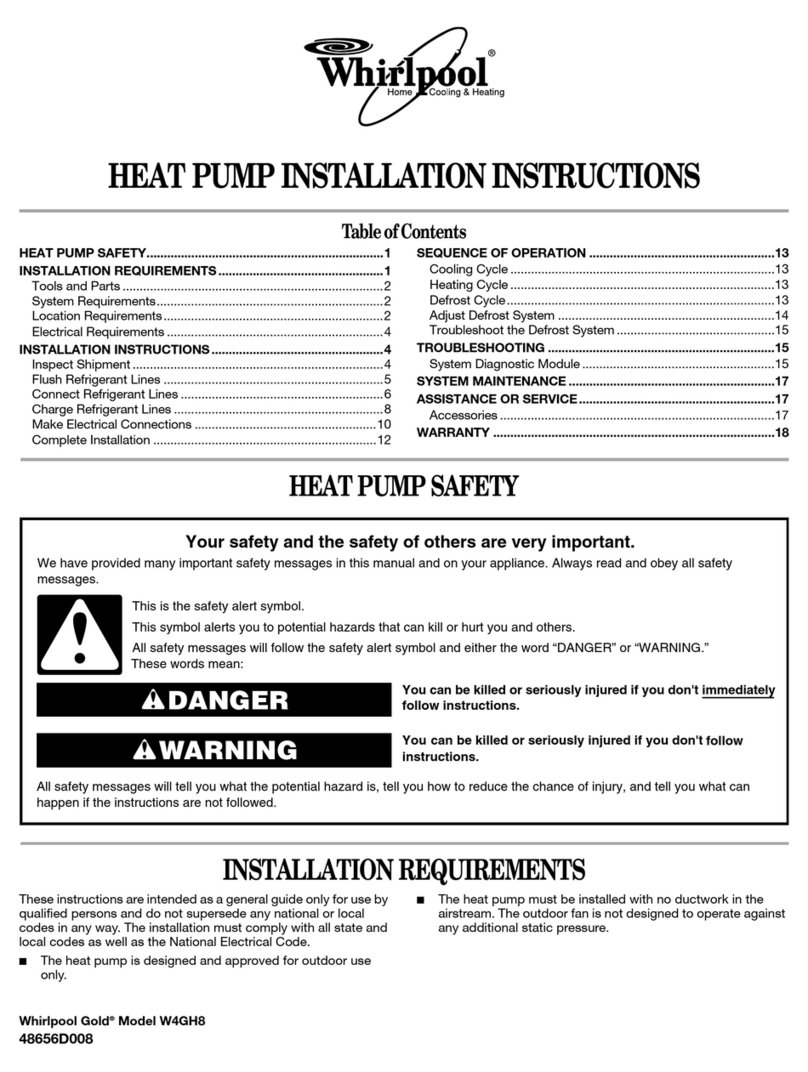
HEAT PUMP INSTALLATION INSTRUCTIONS
HEAT PUMP UNIT SAFETY
Recognize this symbol as a safety precaution.
Recognize Safety Symbols, Words and Labels
The following symbols and labels are used throughout this
manual to indicate immediate or potential hazards.It is the
owner’s responsibility to read and comply with all safety
information and instructions accompanying these symbols.
Failure to heed safety information increases the risk of serious
personal injury or death, property damage and/or product
damage.
Table of Contents
HEAT PUMP UNIT SAFETY...........................................................1
INSTALLATION REQUIREMENTS................................................2
Tools and Parts ............................................................................2
System Requirements..................................................................2
Location Requirements................................................................3
Electrical Requirements ...............................................................3
INSTALLATION INSTRUCTIONS..................................................4
Inspect Shipment .........................................................................4
Flush Refrigerant Lines ................................................................4
System Installation .......................................................................4
Connect Refrigerant Lines ...........................................................5
Make Electrical Connections .......................................................6
Charge Refrigerant Lines .............................................................8
Complete Installation..................................................................11
TROUBLESHOOTING ..................................................................12
SYSTEM MAINTENANCE ............................................................16
ASSISTANCE OR SERVICE.........................................................16
Accessories ................................................................................16
Whirlpool®and Whirlpool Gold®Models WHP43, WHP44, WGHP43, WGHP44, WGHP46 and WGHP48
WPIO-259G
Goodman 1
Hazards or unsafe practices could result in property
damage, product damage, severe personal injury or death.
Hazards or unsafe practices may result in property
damage, product damage, personal injury or death.
WARNING
CAUTION
Goodman 9
Hazards or unsafe practices may result in property
or product damage.
CAUTION
Goodman 7
Installation and repair of this unit should
be performed ONLY by individuals meeting
the requirements of an “Entry Level Technician”
as specified by the Air-Conditioning, Heating and
Refrigeration Institute (AHRI). Attempting to
install or repair this unit without such background may
result in product damage, personal injury or death.
WARNING
Goodman 6
HIGH VOLTAGE!
WARNING
Disconnect ALL power before servicing.
Multiple power sources may be present.
Failure to do so may cause property damage,
personal injury or death.
Goodman 32
WARNING
Scroll equipped units should never be used to evacuate
the air conditioning system. Vacuums this low can cause
internal electrical arcing resulting in a damaged or failed
compressor.

2
IMPORTANT: The United States Environmental Protection
Agency (EPA) has issued various regulations regarding the
introduction and disposal of refrigerants in this unit. Failure to
follow these regulations may harm the environment and can lead
to the imposition of substantial fines. These regulations may vary
by jurisdiction. A certified technician must perform the installation
and service of this product. Should questions arise, contact your
local EPA office.
This product is designed and manufactured to permit installation
in accordance with national codes. It is the installer’s
responsibility to install this unit in accordance with national codes
and/or prevailing local codes and regulations.
INSTALLATION REQUIREMENTS
These instructions are intended as a general guide only for use by
qualified persons and do not supersede any national or local
codes in any way. The installation must comply with all state and
local codes as well as the National Electrical Code.
■The heat pump is designed and approved for outdoor use
only.
■The heat pump must be installed with no ductwork in the
airstream. The outdoor fan is not designed to operate against
any additional static pressure.
Tools and Parts
Gather the required tools and parts before starting installation.
Read and follow the instructions provided with any tools listed
here.
Tools Needed
Parts Needed
Check local codes and HVAC supplier. Check existing electrical
supply, and read “Electrical Requirements,” “Location
Requirements,” “System Requirements” and “Connect
Refrigerant Lines.”
NOTE: Some condensing units do not contain a factory-installed
filter dryer. With those units, a properly sized filter dryer must be
field installed in the liquid (high pressure) line set between the
outdoor condensing unit and indoor evaporator unit.
System Requirements
Heat pump system matches are derived from actual laboratory
testing of matched systems. It is recommended that only
matching equipment be used to ensure proper operation and
efficient performance.
■The designed system matches are listed in the heat pump
specification sheets and on the heat pump refrigerant
charging instructions located on the back of the service
access panel.
■Refrigerant charging instructions include a list of matching
indoor equipment with the proper thermal expansion device
size and amount of refrigerant charge required.
■This heat pump has been factory charged with a quantity of
refrigerant (R-410A) sufficient for a matched indoor coil and a
maximum 15 ft (4.6 m) of refrigerant line.
Goodman 12
WARNING
To avoid possible injury, explosion or death, practice safe
handling of refrigerants.
Goodman 13
WARNING
Refrigerants are heavier than air. They can "push out"
the oxygen in your lungs or in any enclosed space. To
avoid possible difficulty in breathing or death:
• Never purge refrigerant into an enclosed room or
space. By law, all refrigerants must be reclaimed.
• If an indoor leak is suspected, throughly ventilate the
area before beginning work.
• Liquid refrigerant can be very cold. To avoid possible
frostbite or blindness, avoid contact and wear gloves
and goggles. If liquid refrigerant does contact your
skin or eyes, seek medical help immediately.
• Always follow EPA regulations. Never burn refrigerant,
as poisonous gas will be produced.
Goodman 14
WARNING
To avoid possible explosion:
• Never apply flame or steam to a refrigerant cylinder. If
you must heat a cylinder for faster charging, partially
immerse it in warm water.
• Never fill a cylinder more than 80% full of liquid
refrigerant.
• Never add anything other than R-22 to an R-22 cylinder
or R-410A to an R-410A cylinder. The service
equipment used must be listed or certified for the type
of refrigerant used.
• Store cylinders in a cool, dry place. Never use a cylinder
as a platform or a roller.
■Torch
■¹⁄₄" (6.4 mm) nut driver
■Vacuum pump
■Micron gauge
■⁵⁄₁₆" (7.6 mm) nut driver
■Gauge set for R-410A
refrigerant
■Nitrogen system
Goodman 15
WARNING
To avoid possible explosion, use only returnable (not
disposable) service cylinders when removing refrigerant
from a system.
• Ensure the cylinder is free of damage which could lead
to a leak or explosion.
• Ensure the hydrostatic test date does not exceed 5 years.
• Ensure the pressure rating meets or exceeds 400 lbs.
When in doubt, do not use cylinder.

3
Indoor System Thermal Expansion Device
■Check the indoor coil thermal expansion device to see
whether it matches the required thermal expansion device for
the indoor coil and heat pump combination being installed.
■Refer to the refrigerant charge label located on the inside of
the heat pump access panel for the correct thermal
expansion device size required.
■Replace the thermal expansion device with the correct size if
this size is not already installed in the indoor coil. Instructions
for replacing the thermal expansion device are provided with
the indoor coil.
Location Requirements
■This heat pump is designed to be located outdoors with
sufficient clearance for free entrance to the inlet and
discharge air openings. The location must also allow for
adequate service access. See “Installation Clearances.”
■Where possible, select a location for the heat pump which is
shaded from the direct rays of the sun most of the time. North
or east locations are usually most desirable. Position the heat
pump to avoid direct contact with water, snow or ice from a
roofline overhead.
■The heat pump must be installed on a solid, level mounting
pad that will not settle or shift. Isolate the pad from the
building structure to avoid possible transmission of sound or
vibration from the heat pump into the conditioned space.
■The heat pump foundation should be raised to a minimum of
3" (7.6 cm) above finish grade. In areas which have prolonged
periods of temperatures below freezing, and/or snowfall, the
heat pump should be elevated above the average snow line.
If heat pump is to be installed on a flat roof, it should be on a
platform or other support which will raise the inlet air opening
12" (30.5 cm) minimum above the surface of the flat roof.
■Avoid ice accumulation by ensuring free drainage of
condensate from defrost cycles. The heat pump should be
located away from walkways to avoid possible icing from
defrost condensate.
■Avoid placing the heat pump near areas such as sleeping
quarters or study rooms. Normal operating sound levels may
be objectionable if the heat pump is placed near certain
rooms. A shift in sound type does occur during the defrost
mode. The defrost mode generally lasts no longer than
10 minutes.
■Where possible, the top of the condensing unit should be
completely unobstructed.
■If vertical conditions require placement beneath an
obstruction, there should be a minimum of 5 ft (1.5 m)
between the top of the condensing unit and the obstruction.
NOTE: The specified dimensions meet requirements for air
circulation only. Consult all appropriate regulatory codes prior
to determining final clearances.
■Avoid corner installations if possible.
■Either side adjacent to the valves can be placed toward the
structure provided the side away from the structure maintains
minimum service clearance.
Installation Clearances—Single or Multiple Unit Installation
Rooftop Installation
■Check that the roof structure can support the weight of the
condensing unit.
■Keep the weather-tight integrity of the roof during and after
installation.
■Vibration-absorbing pads or springs can be installed between
the condensing unit legs or frame and the roof mounting
assembly to reduce noise vibration.
Electrical Requirements
IMPORTANT: The United States Environmental Protection
Agency (EPA) has issued various regulations regarding the
introduction and disposal of refrigerants in this unit. Failure to
follow these regulations may harm the environment and can lead
to the imposition of substantial fines. These regulations may vary
by jurisdiction. A certified technician must perform the installation
and service of this product. Should questions arise, contact your
local EPA office.
This product is designed and manufactured to permit installation
in accordance with national codes. It is the installer’s
responsibility to install this unit in accordance with national codes
and/or prevailing local codes and regulations.
A. Not recommended
B. 10" (25.4 cm)
C. 18" (45.7 cm)
D. 20" (50.8 cm)
OK!
C
D D
B
B
CC
CC
OK!
OK!
A
D
DD
D
D
B B
B
B
C
C
Goodman 31
WARNING
To avoid the risk of injury, electrical shock or death, the
furnace must be electrically grounded in accordance with
local codes or, in their absence, with the latest edition of the
National Electric Code (NEC).

4
NOTE: All outdoor wiring must be suitable for outdoor use. Use
copper conductors only.
■All field wiring must be done in accordance with National
Electrical Code requirements, applicable requirements of UL,
or local codes, where applicable.
■Electrical wiring, disconnect means and over-current
protection are to be supplied by the installer. Refer to the
rating plate for the maximum over-current protection,
minimum circuit ampacity, and operating voltage. See the
wiring diagrams in “Make Electrical Connections.”
INSTALLATION INSTRUCTIONS
Inspect Shipment
This heat pump is shipped in one package, completely
assembled and wired. The thermostat is shipped in a separate
carton when ordered.
■Check the heat pump rating plate to confirm specifications
are as ordered.
■Upon receipt of equipment, inspect it for possible shipping
damage. Examine the heat pump inside the carton if the
carton is damaged.
■If damage is found, it should be noted on the carrier’s freight
bill. Damage claims should be filed with the carrier
immediately. Claims of shortages should be filed with the
seller within 5 days.
NOTE: If any damages are discovered and reported to the carrier,
do not install the heat pump, because your claim may be denied.
Flush Refrigerant Lines
Refrigerant lines must be flushed by a licensed, EPA certified
refrigerant technician in accordance with established procedures.
NOTES:
■R-410A outdoor systems are not recommended for use with
indoor systems that have used R-22 as the refrigerant.
However, if this condensing unit is being matched with an
approved line set which was previously charged with R-22
refrigerant, the line set must be flushed prior to installation.
See your local distributor for an appropriate flushing kit.
■Check the refrigerant lines for size and length. See “Connect
Refrigerant Lines.”
■Polyol ester (POE) oils are used in Whirlpool units charged
with R-410A refrigerant. Residual mineral oil from the R-22
system can act as an insulator, inhibiting proper heat transfer.
It can also clog the thermal expansion device, reducing
system performance and capacity.
■Where possible, drain as much residual compressor oil from
the existing systems, lines, and traps. Pay close attention to
low areas where oil may collect.
System Installation
Mounting Evaporator Coil Above Condensing Unit
When mounting the evaporator coil above the condensing unit,
an inverted loop in the suction line adjacent or near the
connection to the evaporator coil is required. The top of the loop
must be slightly higher than the top of the evaporator coil.
Mounting Condensing Unit Below Evaporator Coil
When mounting the condensing unit above the evaporator coil,
oil traps are required at equal intervals along the suction line.
■Install 1 oil trap for a height difference of 15 ft to 25 ft (4.6 m
to 7.6 m) between indoor and outdoor units.
■Install 2 oil traps for a height difference of 26 ft to 50 ft (7.9 m
to 15.2 m) between indoor and outdoor units.
■Install 3 oil traps for a height difference of 51 ft to 100 ft
(15.5 m to 30.5 m) between indoor and outdoor units.
A. Condensing unit
B. Suction line
C. Evaporator coil
D. Liquid line
AB
C
D

5
■Install 4 oil traps for a height difference of 101 ft to 150 ft
(30.8 m to 45.7 m) between indoor and outdoor units.
Insulation is necessary to avoid condensation from forming and
dropping from the suction line. Armflex (or satisfactory
equivalent) with ³⁄₈" (1 cm) minimum wall thickness is
recommended. In severe conditions (hot, high humidity areas),
¹⁄₂" (1.3 cm) insulation may be required. Insulation must be
installed in a manner which keeps tubing from damage and
contamination.
Connect Refrigerant Lines
Refrigerant lines must be connected by a licensed, EPA certified
refrigerant technician in accordance with established procedures.
IMPORTANT:
■Connecting refrigerant lines must be clean, dehydrated,
refrigerant-grade copper lines. Heat pumps should be
installed only with specified line sizes for approved system
combinations with elevation differences up to 15 ft (4.6 m)
and total length of up to 50 ft (15.2 m). See the Suction Line
Sizes and Liquid Line Sizes charts.
■Sharp bends or possible kinking in the lines will cause a
reduction in performance.
■To avoid contamination of the refrigerant system, do not
remove the caps from the lines or system connection points
until connections are ready to be completed.
Connect Liquid and Suction Lines
1. Route the suction and liquid lines from the fittings on the
indoor coil to the fittings on the heat pump. Run the lines in
as direct a path as possible, avoiding unnecessary turns and
bends.
2. For product efficiency, be sure that the suction line is
insulated over the entire exposed length and that both
suction and liquid lines are not in direct contact with floors,
walls, ductwork, floor joists, or other piping.
3. Remove valve cores.
4. Wrap the service valves with a wet rag or an approved
thermal trap.
5. If a filter dryer is not provided, install a filter dryer in the liquid
line between the outdoor condensing unit and the indoor
evaporator coil.
NOTE: To reduce oxidation from forming and contaminating
the system, purge the line set/coil with nitrogen (1 to 2 psig)
during the brazing process.
A. Condensing unit
B. Liquid line
C. Suction line
D. Evaporator coil
A
B
CD
Goodman 16
The compressor POE oil for R-410A units is extremely
susceptible to moisture absorption and could cause
compressor failure. Do not leave system open to
atmosphere any longer than necessary for installation.
CAUTION
Goodman 17
WARNING
To avoid the risk of fire or explosion, never use oxygen,
high pressure air or flammable gases for leak testing of a
refrigeration system.
Goodman 18
WARNING
To avoid possible explosion, the line from the nitrogen
cylinder must include a pressure regulator and a pressure
relief valve. The pressure relief valve must be set to open at
no more than 150 psig.

6
6. Connect the suction and liquid lines, using a brazing
compound. Braze with an alloy of silver or copper and
phosphorus with a melting point above 1,100°F (593ºC).
NOTE: Do not use soft solder.
7. Make sure indoor coil has been put in place according to the
Installation Instructions and is connected to the refrigerant
lines.
8. Replace valve cores.
9. Pressurize the lines and indoor coil with a pressure not to
exceed 20 psi.
10. Leak test the lines with a pressure not to exceed 20 psig.
11. Evacuate the indoor coil and lines to a minimum of
500 microns to remove contamination and moisture, then
disconnect the vacuum pump.
12. Open the suction and liquid service valves fully.
13. Insulate the suction line with refrigerant line insulation
material of ¹⁄₄" (6.4 mm) or more wall thickness.
14. Pack insulating material around refrigerant lines where they
penetrate the structure to protect the lines and to minimize
vibration transmission.
Suction Line Sizes
Installations exceeding 74 ft (22.6 m) are not recommended.
Liquid Line Sizes
Installations exceeding 74 ft (22.6 m) are not recommended.
Make Electrical Connections
IMPORTANT:
■Electrical wiring, disconnect means and over-current
protection are to be supplied by the installer. Refer to the
rating plate for the maximum over-current protection,
minimum circuit ampacity, and operating voltage. See wiring
diagrams later in this section.
■Install an adequately sized branch circuit disconnect,
according to the NEC, within sight of and readily accessible
from heat pump.
■The cable or conduit and fittings connected from the
disconnect to the heat pump shall be rated for outdoor use.
A. Insulating material around refrigerant lines
Condensing
Unit Tons Line Set Size—inches (cm) OD
1.5 ⁵⁄₈ (1.6) ³⁄₄ (1.9) ³⁄₄ (1.9)
2⁵⁄₈ (1.6) ³⁄₄ (1.9) ³⁄₄ (1.9)
2.5 ⁵⁄₈ (1.6) ³⁄₄ (1.9) ⁷⁄₈ (2.2)
3³⁄₄ (1.9) ⁷⁄₈ (2.2) 1¹⁄₈ (2.9)
3.5 ⁷⁄₈ (2.2) 1¹⁄₈ (2.9) 1¹⁄₈ (2.9)
4⁷⁄₈ (2.2) 1¹⁄₈ (2.9) 1¹⁄₈ (2.9)
5⁷⁄₈ (2.2) 1¹⁄₈ (2.9) 1¹⁄₈ (2.9)
Line Set
Length Less than
25 ft (7.6 m) 25 ft (7.6 m) to
49 ft (14.9 m) 50 ft (15.2 m) to
74 ft (22.6 m)
A
Condensing
Unit Tons Line Set Size—inches (cm) OD
1.5 ¹⁄₄ (0.6) ³⁄₈ (1) ³⁄₈ (1)
2¹⁄₄ (0.6) ³⁄₈ (1) ³⁄₈ (1)
2.5 ¹⁄₄ (0.6) ³⁄₈ (1) ³⁄₈ (1)
3³⁄₈ (1) ³⁄₈ (1) ³⁄₈ (1)
3.5 ³⁄₈ (1) ³⁄₈ (1) ³⁄₈ (1)
4³⁄₈ (1) ³⁄₈ (1) ³⁄₈ (1)
5³⁄₈ (1) ³⁄₈ (1) ³⁄₈ (1)
Line Set
Length Less than
25 ft (7.6 m) 25 ft (7.6 m) to
49 ft (14.9 m) 50 ft (15.2 m) to
74 ft (22.6 m)
Goodman 31
WARNING
To avoid the risk of injury, electrical shock or death, the
furnace must be electrically grounded in accordance with
local codes or, in their absence, with the latest edition of the
National Electric Code (NEC).

7
Electrical Connections
1. Disconnect power.
2. Remove control box cover.
3. Connect the field supply wires L1 and L2 to contactor
terminals L1 and L2.
4. Connect ground wire to ground lug.
5. Connect low voltage circuit.
Typical Wiring Connection—Low Voltage Circuit
Heat pump control wiring requires 24-Volt minimum, 25VA service from the indoor transformer. Low voltage wiring for two-stage units
depends on the thermostat used and the number of control wires between the indoor unit and the condensing unit. Route the control
wires through the low voltage port and terminate in accordance with the wiring diagram provided inside the control panel cover.
System Composite Diagram—Heat Pumps 10 KW and Below
Goodman 21
HIGH VOLTAGE!
WARNING
Disconnect ALL power before servicing.
Multiple power sources may be present.
Failure to do so may cause property damage,
personal injury or death due to electric shock.
Wiring must conform with NEC or CEC and all
local codes. Undersized wires could cause
poor equipment performance, equipment damage
or fire.
Goodman 22
To avoid the risk of fire or equipment damage, use
copper conductors.
WARNING
Goodman 23
Units with reciprocating compressors and non-bleed
TXV’s require a Hard Start Kit.
NOTICE
A. Ground lug
B. Field supply ground wire
C. 208/230 volt field supply wires
T1T2
L1L2
L1L2
C
A
B
CW2 OYR
R
BR
G
W
R
Y
W
YOCW2 GRE
R
G
W2
C
Heat Pump Conventional
Room Thermostat #18 Gauge - 7 Wire
Indoor Unit
Red
Green
White
Blue
BU
#18 Gauge - 5 Wire
BU
OR See
Note 3
Outdoor Thermostat (Optional) Closed on Temperature Fall
#18 Gauge - 6 Wire Needed When Outdoor Thermostat Is Used
BU W OR Y R
See
Note 4
BU
W
G
R

8
System Composite Diagram—Heat Pumps Above 10 KW
NOTES:
■EHR—Emergency Heat Relay (optional)
1. Outdoor thermostat (OT-1) should be the first to close and the
last to open.
2. Connect white wires and brown wires from air handler
together if OT-2 is not used.
3. Remove wire when using outdoor thermostat.
4. Terminal block markings.
Charge Refrigerant Lines
Heat Pump—Heating Cycle
The proper method of charging a heat pump in the heat mode is
by weight with the additional charge adjustments for the line size,
line length and the other system components.
Charge Using Weigh-In Method (Fixed Orifice/Thermal
Expansion Device Systems)
Use this method if the system is void of refrigerant, or if the
outdoor ambient temperature is cool.
1. Locate and repair any leaks.
2. If necessary, recover the refrigerant from the condensing unit.
3. Conduct a leak check, then evacuate as previously outlined.
4. Weigh in the charge according to the total amount shown on
the condensing unit nameplate.
NOTE: If weighing facilities are not available or if the condensing
unit is being charged during warm weather, follow one of the
other charging methods.
IMPORTANT:
■Refrigerant charge adjustment will be required for line set
lengths greater than 15 ft (4.6 m) and for non system-
matched evaporator coils.
■The condensing unit is factory-charged with the proper
refrigerant charge amount for a matching evaporator and
15 ft of refrigerant line. Refer to the condensing unit rating
plate for the exact amount of this factory charge.
■Adjustment of the refrigerant charge will be necessary based
on the system combination and line length. To adjust the
refrigerant size for increased line lengths, add the following
amount of refrigerant.
CW2 OYR
R
Y
W
W
12
34
G
YOC GRE
R
W2
BR
R
G
W2
C
Red
Green
White
Blue
See
Note 4
BU
W
G
R
W3 Brown
BR
Heat Pump Conventional
Room Thermostat #18 Gauge - 7 Wire
Indoor Unit
Outdoor Thermostat - 2
Outdoor Thermostat - 1
#18 Gauge - 5 Wire
BU BU
OR
EHR
See
Note 3 See
Note 2
See Note 1
BU W OR Y R
Outdoor Thermostat (Optional) Closed on Temperature Fall
#18 Gauge - 7 Wire Needed When 2 Outdoor Thermostats Are Used
Goodman 19
REFRIGERANT UNDER PRESSURE!
Failure to follow proper procedures may cause property
damage, personal injury or death.
WARNING
G
oo
d
man 24
Use care when handling scroll compressors. Dome
temperatures could be hot.
CAUTION
Goodman 25
POSSIBLE REFRIGERANT LEAK
To avoid a possible refrigerant leak, open the service
valves until the top of the stem is ¹⁄₈" (3.2 mm) from the
retainer.
CAUTION
Goodman 26
REFRIGERANT UNDER PRESSURE!
• Do not overcharge system with refrigerant.
• Do not operate unit in a vacuum or at negative
pressure.
Failure to follow proper procedures may cause
property damage, personal injury or death.
WARNING

9
For line set lengths greater than 15 ft (4.6 m), add refrigerant
by weighing in 0.60 oz per ft of ³⁄₈" (1 cm) O.D. liquid line or
0.23 oz per ft of ¹⁄₄" (6.4 mm) O.D. liquid line.
■If necessary, adjust the refrigerant charge for compatibility
with the evaporator coil.
Charge Verification
NOTES:
■Do not overcharge the system with refrigerant.
■Operating the compressor with the suction valve closed will
void the warranty and cause serious compressor damage.
1. Check that the outdoor temperature is 60ºF (15.6ºC) or
higher.
2. Set the room thermostat to COOL.
3. Set the fan switch to AUTO.
4. Set the temperature control well below the room temperature.
5. After the system has stabilized according to the start-up
instructions, check the subcooling and superheat. See
“Charge by System Superheat—Fixed Orifice Metering” and
“Charge by System Subcooling—TXV Metering.”
Charge by System Superheat—Fixed Orifice Metering
1. Purge the gauge lines.
2. Connect the service gauge manifold to the base-valve service
ports.
3. Run the system at least 10 minutes to allow the pressure to
stabilize.
4. Temporarily install a thermometer on the suction (large) line
within 4" to 6" (10.2 cm to 15.2 cm) of the compressor. Check
that the thermometer makes adequate contact. Insulate the
thermometer for the best possible reading.
NOTE: An optional, less accurate, method is to locate the
thermometer at the suction line service valve. Check that the
thermometer makes adequate contact and is insulated.
5. Refer to the following System Superheat table for proper
system superheat. Add charge to lower superheat or recover
charge to raise superheat.
6. Disconnect the manifold set. Installation is now complete.
NOTE: Superheat Formula = Suction Line Temperature - Saturated Suction Temperature
Goodman 20
Prolonged operation at suction pressures less than
20 psig for more than 5 seconds will result in overheating
of the scrolls and permanent damage to the scroll tips,
drive bearings and internal seal.
CAUTION
Goodman 29
Operating the compressor with the suction valve closed
will void the warranty and cause serious compressor
damage.
CAUTION
Goodman 27
Use refrigerant certified to ARI standards. Used
refrigerant may cause compressor damage, and will void
the warranty. Most portable machines cannot clean used
refrigerant to meet ARI standards.
CAUTION
Goodman 28
Violation of EPA regulations may result in fines or other
penalties.
NOTICE
System Superheat
Ambient
Condenser Inlet
Temperature—ºF
(ºC) Dry-Bulb
Return Air Temperature—ºF (ºC) 50% RH
Dry-Bulb Wet-Bulb Dry-Bulb Wet-Bulb Dry-Bulb Wet-Bulb Dry-Bulb Wet-Bulb Dry-Bulb Wet-Bulb
65 (18) 54 (12.2) 70 (21.1) 58 (14.4) 75 (23.9) 63 (17.2) 80 (26.7) 67 (19.4) 85 (29.4) 71 (21.7)
115 (46.1) *** *** *** *** 3
100 (37.8) *** *** *** 5 6
95 (35) *** *** 5 5 9
90 (32.2) *** *** 5 10 11
85 (29.4) *** 5 5 12 17
80 (26.7) 5 5 5 18 20
75 (23.9) 5 5 10 20 22
70 (21.1) 5 6 15 24 25
65 (18) 5 10 20 25 29
60 (15.6) 8 15 21 28 31
*** Flooded region

10
Charge by System Subcooling—TXV Metering
Single Stage Application
1. Purge the gauge lines.
2. Connect the service gauge manifold to the base-valve service
ports.
3. Run the system at least 10 minutes to allow the pressure to
stabilize.
4. Temporarily install a thermometer on the liquid (small) line
near the liquid line service valve with adequate contact.
Insulate the thermometer for the best possible reading.
5. Check the subcooling and superheat. Systems with TXV
application should have a subcooling of 7± 2ºF (1ºC) and
superheat of 7ºF to 9ºF (-13.9ºC to -12.8ºC).
■If the subcooling and superheat are low, adjust TXV to 7ºF
to 9ºF (-13.9ºC to -12.8ºC) superheat. Check subcooling.
NOTE: To adjust the superheat, turn the valve stem
clockwise to increase and counterclockwise to decrease.
■If the subcooling is low and the superheat is high, add
charge to raise the subcooling to 7 ± 2ºF (1ºC). Check
superheat.
■If subcooling and superheat are high, adjust TXV valve to
7ºF to 9ºF (-13.9ºC to -12.8ºC) superheat. Check
subcooling.
■If subcooling is high and superheat is low, adjust TXV
valve to 7ºF to 9ºF (-13.9ºC to -12.8ºC) superheat and
remove charge to lower the subcooling to 7 ± 2ºF (1ºC).
NOTE: Do not adjust the charge based on the suction
pressure unless there is a gross undercharge.
6. Disconnect the manifold set. Installation is now complete.
2-Stage Application
Run the remote on low-stage cooling for 10 minutes until
refrigerant pressures stabilize. Follow the guidelines and methods
below to check the unit operation and ensure that the refrigerant
charge is within limits. Charge the unit on low stage.
1. Purge the gauge lines.
2. Connect the service gauge manifold to the base-valve service
ports.
3. Run the system at least 10 minutes to allow the pressure to
stabilize.
4. Temporarily install a thermometer on the liquid (small) line
near the liquid line service valve with adequate contact.
Insulate the thermometer for the best possible reading.
5. Check the subcooling and superheat. Systems with TXV
application should have a subcooling of 5ºF to 7ºF (-15ºC
to -13.9ºC) and superheat of 7ºF to 9ºF (-13.9ºC to -12.8ºC).
■If the subcooling and superheat are low, adjust TXV to 7ºF
to 9ºF (-13.9ºC to -12.8ºC) superheat. Check subcooling.
NOTE: To adjust the superheat, turn the valve stem
clockwise to increase and counterclockwise to decrease.
■If the subcooling is low and the superheat is high, add
charge to raise the subcooling to 5ºF to 7ºF (-15ºC
to -13.9ºC). Check superheat.
■If subcooling and superheat are high, adjust TXV valve to
7ºF to 9ºF (-13.9ºC to -12.8ºC) superheat. Check
subcooling.
Saturated Suction Pressure Temperature
Suction Pressure Saturated Suction
Temperature ºF (ºC) Suction Pressure Saturated Suction
Temperature ºF (ºC)
PSIG R-410A PSIG R-410A
50 1 (-17.2) 78 20 (-6.7)
52 3 (-16.1) 80 21 (-6.1)
54 4 (-15.6) 85 24 (-4.4)
56 6 (-14.4) 90 26 (-3.3)
58 7 (-13.9) 95 29 (-1.7)
60 8 (-13.3) 100 31 (-0.6)
62 10 (-12.2) 110 36 (2.2)
64 11 (-11.7) 120 41 (5)
66 13 (-10.6) 130 45 (7.2)
68 14 (-10) 140 49 (9.4)
70 15 (-9.4) 150 53 (11.7)
72 16 (-8.9) 160 56 (13.3)
74 17 (-8.3) 170 60 (15.6)
76 19 (-7.2)

11
■If subcooling is high and superheat is low, adjust TXV
valve to 7ºF to 9ºF (-13.9ºC to -12.8ºC) superheat and
remove charge to lower the subcooling to 5ºF to 7ºF
(-15ºC to -13.9ºC).
NOTE: Do not adjust the charge based on the suction
pressure unless there is a gross undercharge.
6. Disconnect the manifold set. Installation is now complete.
NOTE: Subcooling Formula = Saturated Liquid Temperature - Liquid Line Temperature
NOTE: Check the Schrader ports for leaks and tighten the valve cores if necessary. Install caps finger tight.
Complete Installation
1. Operate the heat pump for a period of at least 15 minutes to
allow for pressures and temperatures to stabilize.
2. If heat pump does not appear to be functioning correctly,
have heat pump checked by a person certified by the EPA to
handle refrigerant.
Goodman 30
To prevent personal injury, carefully connect and
disconnect manifold gauge hoses. Escaping liquid
refrigerant can cause burns. Do not vent refrigerant into
the atmosphere. Recover all refrigerant during system
repair and before final unit disposal.
WARNING
Saturated Liquid Pressure Temperature
Liquid Pressure Saturated Liquid
Temperature ºF (ºC) Liquid Pressure Saturated Liquid
Temperature ºF (ºC)
PSIG R-410A PSIG R-410A
200 70 (21.1) 375 112 (44.4)
210 73 (22.8) 405 118 (47.8)
220 76 (24.4) 415 119 (48.3)
225 78 (25.6) 425 121 (49.4)
235 80 (26.7) 435 123 (50.6)
245 83 (28.3) 445 125 (51.7)
255 85 (29.4) 475 130 (54.4)
265 88 (31.1) 500 134 (56.7)
275 90 (32.2) 525 138 (58.9)
285 92 (33.3) 550 142 (61.1)
295 95 (35) 575 145 (62.8)
305 97 (36.1) 600 149 (65)
325 101 (38.3) 625 152 (66.7)
355 108 (42.2)
Goodman 23
Units with reciprocating compressors and non-bleed
TXV’s require a Hard Start Kit.
NOTICE

12
TROUBLESHOOTING
Problem Cause/Test Method and/or Solution
No Cooling ■
■System will not start ■Power failure. Test voltage.
■Blown fuse. Inspect fuse size and type. Replace, if needed.
■Loose connection. Inspect connection. Tighten if needed.
■Shorted or broken wires. Test circuits with ohmmeter. Replace if needed.
■Faulty thermostat. Test continuity of thermostat and wiring. Replace, if needed.
■Faulty transformer. Check control circuit with voltmeter. Replace, if needed.
■Compressor will not start—fan runs ■Shorted or broken wires. Test circuits with ohmmeter. Replace if needed.
■Shorted or open capacitor. Test capacitor.
■Internal compressor overload open. Test continuity of overload.
■Shorted or grounded compressor. Test motor windings.
■Compressor stuck. Use test cord. Replace, if needed.
■Low voltage. Test voltage.
■Unbalanced power, 3PH. Test voltage.
■Compressor and condenser fan will
not start
■Blown fuse. Inspect fuse size and type. Replace, if needed.
■Shorted or broken wires. Test circuits with ohmmeter. Replace if needed.
■Faulty thermostat. Test continuity of thermostat and wiring. Replace, if needed.
■Faulty transformer. Check control circuit with voltmeter. Replace, if needed.
■Faulty compressor contactor. Test continuity of coil and contacts. Replace, if needed.
■Evaporator fan will not start ■Blown fuse. Inspect fuse size and type. Replace, if needed.
■Loose connection. Inspect connection. Tighten if needed.
■Shorted or broken wires. Test circuits with ohmmeter. Replace if needed.
■Open fan overload. Test continuity of overloads.
■Faulty thermostat. Test continuity of thermostat and wiring. Replace, if needed.
■Shorted or open capacitor. Test capacitor.
■Faulty fan relay. Test continuity of coil and contacts.
■Open control circuit. Test control circuit with voltmeter.
■Shorted or grounded fan motor. Test motor windings.
■Condenser fan will not start ■Shorted or broken wires. Test circuits with ohmmeter. Replace if needed.
■Open fan overload. Test continuity of overloads.
■Shorted or open capacitor. Test capacitor.
■Faulty compressor contactor. Test continuity of coil and contacts. Replace, if needed.
■Shorted or grounded fan motor. Test motor windings.
■Faulty defrost control. Test control. Replace, if needed.

13
■Compressor runs—goes off on
overload
■Unbalanced power, 3PH. Test voltage.
■Loose connection. Inspect connection. Tighten if needed.
■Shorted or broken wires. Test circuits with ohmmeter. Replace if needed.
■Shorted or open capacitor. Test capacitor.
■Shorted or grounded compressor. Test motor windings.
■Compressor stuck. Use test cord.
■Faulty compressor contactor. Test continuity of coil and contacts. Replace, if needed.
■Low voltage. Test voltage.
■Overcharge of refrigerant. Recover part of charge.
■Dirty outdoor coil. Inspect coil. Clean, if needed.
■Improperly located thermostat. Relocate thermostat.
■Wrong type of expansion valve. Replace valve.
■Expansion valve restricted. Replace valve.
■Undersized expansion valve. Replace valve.
■Inoperative expansion valve. Check valve operation. Replace if needed.
■Faulty reversing valve. Replace valve or solenoid.
■Compressor cycles on overload ■Unbalanced power, 3PH. Test voltage.
■Shorted or open capacitor. Test capacitor.
■Compressor stuck. Use test cord.
■Low voltage. Test voltage.
■Improper cooling anticipator. Check resistance of anticipator.
■Shortage of refrigerant. Test for leaks. Add refrigerant.
■Restricted liquid line. Replace restricted part.
■Overcharge of refrigerant. Recover part of charge.
■Dirty outdoor coil. Inspect coil. Clean, if needed.
■Noncondensibles. Recover charge. Evacuate and recharge.
■Recirculation of condensing air. Remove obstruction to airflow.
■Wrong type of expansion valve. Replace valve.
■Expansion valve restricted. Replace valve.
■Undersized expansion valve. Replace valve.
Unsatisfactory Cooling
■System runs continuously—little
cooling
■Shortage of refrigerant. Test for leaks. Add refrigerant.
■Restricted liquid line. Replace restricted part.
■Open element or limit on electric heater. Test heater element and controls.
■Dirty air filter. Inspect filter. Clean or replace, if needed.
■Dirty indoor coil. Inspect coil. Clean, if needed.
■Not enough air across indoor coil. Speed blower. Check duct static pressure.
■Infiltration of outdoor air. Check windows, doors, vent fans, etc.
■System undersized. Refigure cooling load.
■Broken valves. Test compressor efficiency.
■Inefficient compressor. Test compressor efficiency.
■Wrong type of expansion valve. Replace valve.
■Expansion valve restricted. Replace valve.
■Oversized expansion valve. Replace valve.
■Undersized expansion valve. Replace valve.
■Inoperative expansion valve. Check valve operation. Replace if needed.
■Flowrator not seating properly. Check flowrator and seat or replace, if needed.
Problem Cause/Test Method and/or Solution

14
■Too cool and then too warm ■Faulty thermostat. Test continuity of thermostat and wiring. Replace, if needed.
■Improper cooling anticipator. Check resistance of anticipator.
■Improperly located thermostat. Relocate thermostat.
■Airflow unbalanced. Readjust air volume dampers.
■Not cool enough on warm days ■Dirty air filter. Inspect filter. Clean or replace, if needed.
■Dirty indoor coil. Inspect coil. Clean, if needed.
■Not enough air across indoor coil. Speed blower. Check duct static pressure.
■Dirty outdoor coil. Inspect coil. Clean, if needed.
■Noncondensibles. Recover charge. Evacuate and recharge.
■Recirculation of condensing air. Remove obstruction to airflow.
■Infiltration of outdoor air. Check windows, doors, vent fans, etc.
■System undersized. Refigure cooling load.
■Wrong type of expansion valve. Replace valve.
■Expansion valve restricted. Replace valve.
■Undersized expansion valve. Replace valve.
■Certain areas too cool, others too
warm
■Dirty air filter. Inspect filter. Clean or replace, if needed.
■Dirty indoor coil. Inspect coil. Clean, if needed.
■Not enough air across indoor coil. Speed blower. Check duct static pressure.
■Infiltration of outdoor air. Check windows, doors, vent fans, etc.
■Airflow unbalanced. Readjust air volume dampers.
■Compressor is noisy ■Overcharge of refrigerant. Recover part of charge.
■Broken internal parts. Replace compressor.
■Broken valves. Test compressor efficiency. Replace if needed.
■Expansion valve bulb loose. Tighten bulb bracket.
■Loose hold-down bolts. Tighten bolts.
■System runs—blows cold air during
heating
■Internal compressor overload open. Test continuity of overload.
■Compressor stuck. Use test cord. Replace, if needed.
■Shortage of refrigerant. Test for leaks. Add refrigerant.
■Open element or limit on electric heater. Test heater element and controls.
■Overcharge of refrigerant. Recover part of charge.
■Noncondensibles. Recover charge. Evacuate and recharge.
■Broken internal parts. Replace compressor.
■Inefficient compressor. Test compressor efficiency.
■Faulty reversing valve. Replace valve or solenoid.
■Faulty defrost control. Test control. Replace if needed.
■Faulty defrost thermostat. Test defrost thermostat. Replace if needed.
■Unit will not terminate defrost ■Faulty reversing valve. Replace valve or solenoid.
■Faulty defrost control. Test control. Replace if needed.
■Faulty defrost thermostat. Test defrost thermostat. Replace if needed.
■Unit will not defrost ■Faulty reversing valve. Replace valve or solenoid.
■Faulty defrost control. Test control. Replace if needed.
■Faulty defrost thermostat. Test defrost thermostat. Replace if needed.
System Operating Pressures
■Low suction pressure ■Faulty evaporator fan motor. Repair or replace.
■Shortage of refrigerant. Test for leaks. Add refrigerant.
■Restricted liquid line. Replace restricted part.
■Dirty air filter. Inspect filter. Clean or replace, if needed.
■Dirty indoor coil. Inspect coil. Clean, if needed.
■Not enough air across indoor coil. Speed blower. Check duct static pressure.
Problem Cause/Test Method and/or Solution

15
■Low suction pressure ■Dirty outdoor coil. Inspect coil. Clean, if needed.
■Wrong type of expansion valve. Replace valve.
■Expansion valve restricted. Replace valve.
■Undersized expansion valve. Replace valve.
■Inoperative expansion valve. Check valve operation. Replace if needed.
■Faulty defrost control. Test control. Replace if needed.
■Faulty defrost thermostat. Test defrost thermostat. Replace if needed.
■Low head pressure ■Shortage of refrigerant. Test for leaks. Add refrigerant.
■Restricted liquid line. Replace restricted part.
■Too much air across indoor coil. Reduce blower speed.
■Broken valves. Test compressor efficiency. Replace if needed.
■Inefficient compressor. Test compressor efficiency.
■Wrong type of expansion valve. Replace valve.
■Expansion valve restricted. Replace valve.
■Faulty reversing valve. Replace valve or solenoid.
■Faulty defrost control. Test control. Replace if needed.
■Faulty defrost thermostat. Test defrost thermostat. Replace if needed.
■Flowrator not seating properly. Check flowrator and seat or replace, if needed.
■High suction pressure ■Too much air across indoor coil. Reduce blower speed.
■Overcharge of refrigerant. Recover part of charge.
■Broken valves. Test compressor efficiency. Replace if needed.
■Inefficient compressor. Test compressor efficiency.
■Expansion valve bulb loose. Tighten bulb bracket.
■Faulty reversing valve. Replace valve or solenoid.
■Faulty defrost thermostat. Test defrost thermostat. Replace if needed.
■Flowrator not seating properly. Check flowrator and seat or replace, if needed.
■High head pressure ■Faulty evaporator fan motor. Repair or replace.
■Shorted or grounded fan motor. Test motor windings.
■Restricted liquid line. Replace restricted part.
■Dirty air filter. Inspect filter. Clean or replace, if needed.
■Dirty indoor coil. Inspect coil. Clean, if needed.
■Not enough air across indoor coil. Speed blower. Check duct static pressure.
■Overcharge of refrigerant. Recover part of charge.
■Dirty outdoor coil. Inspect coil. Clean, if needed.
■Noncondensibles. Recover charge. Evacuate and recharge.
■Recirculation of condensing air. Remove obstruction to airflow.
■Wrong type of expansion valve. Replace valve.
■Expansion valve restricted. Replace valve.
■Oversized expansion valve. Replace valve.
■Faulty reversing valve. Replace valve or solenoid.
■Faulty defrost control. Test control. Replace if needed.
■Faulty defrost thermostat. Test defrost thermostat. Replace if needed.
Problem Cause/Test Method and/or Solution
Goodman 23 Long
Units with reciprocating compressors and non-bleed TXV’s require a Hard Start Kit.
NOTICE

SYSTEM MAINTENANCE
■Leaves and other large obstructions should be removed from
the heat pump surfaces without damaging the fin surface of
the coil.
■Routinely clean or change the indoor air filter. Should the
indoor coil become dirty, thus restricting airflow, call a
qualified service person to clean the coil surface.
■An annual inspection by a qualified person should be
performed to ensure continued high-quality performance.
ASSISTANCE OR SERVICE
If you need further assistance, you can write to the below
address with any questions or concerns:
Whirlpool®Home Cooling and Heating
14610 Breakers Drive
Jacksonville, FL 32258
Please include a daytime phone number in your correspondence.
Accessories
To order accessories, contact your Whirlpool®Home Cooling and
Heating dealer.
W
PIO-259G
©
2009. All rights reserved. ®Registered Trademark/TM Trademark of Whirlpool, U.S.A.,
Manufactured under license by Tradewinds Distributing Company, LLC., Jacksonville, Florida 8/09
Printed in U.S.A.
This manual suits for next models
5
Table of contents
Other Whirlpool Heat Pump manuals
Popular Heat Pump manuals by other brands

Viessmann
Viessmann VITOCAL 242-G Installation and service instructions

Ephoca
Ephoca HPAC 2.0 installation manual

Danfoss
Danfoss DHP-A installation instructions

Argo
Argo AQUA UNIT AUAH installation instructions

Bryant
Bryant 542D060 Installation, operation and maintenance instructions

York
York Geysir user manual

Mitsubishi Electric
Mitsubishi Electric Ecodan PUHZ-W50VHA-BS Service manual

Airwell
Airwell Monobloc R32 Installation and owner's manual

HIdRos
HIdRos WDH Series Technical manual

Sakura
Sakura SXAO-110HAS Installation and service manual

Friedrich
Friedrich WallMaster WCT08 Installation and operation manual

Nibe
Nibe VVM 310 Installer manual