manuals.online logo
Brands
  1. Home
  2. •
  3. Brands
  4. •
  5. Whirlpool
  6. •
  7. Range
  8. •
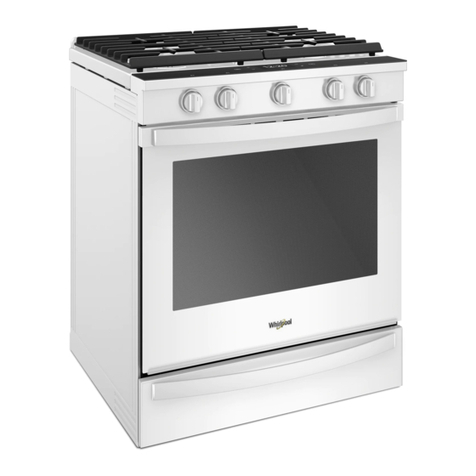
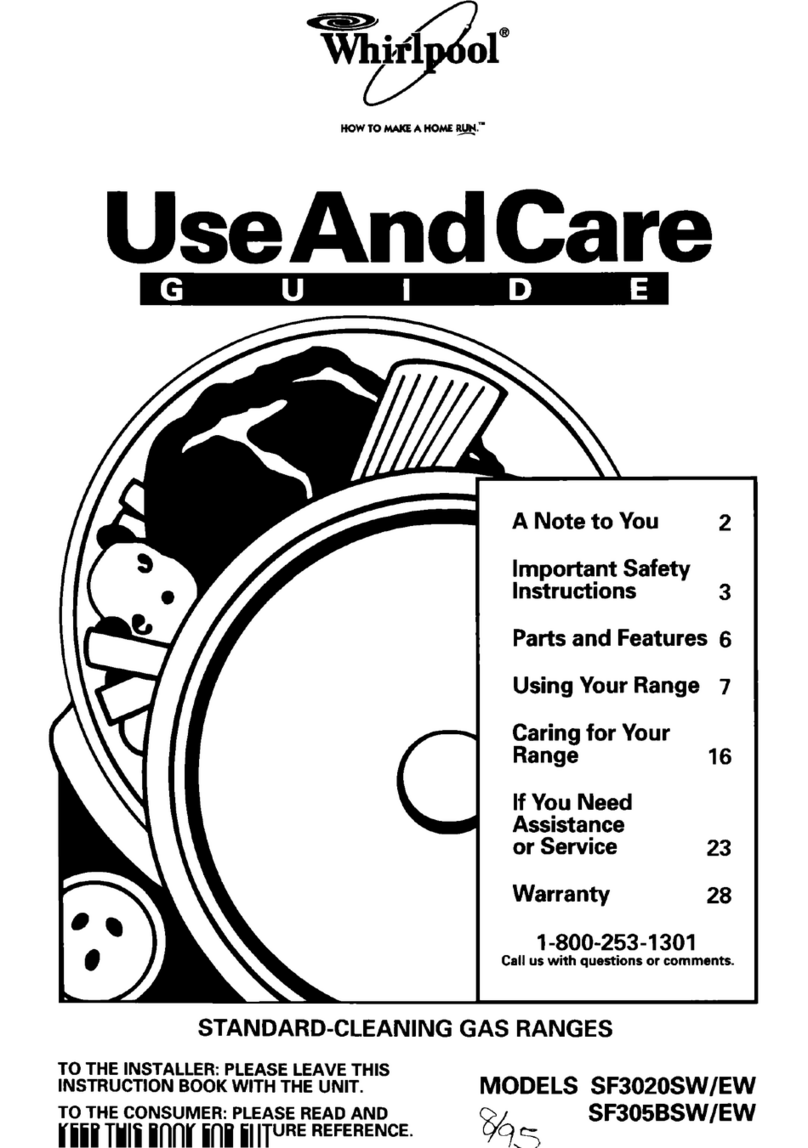
  9. Whirlpool SE960PEYN1 User manual

Whirlpool SE960PEYN1 User manual

This manual suits for next models

6

Other Whirlpool Range manuals

Whirlpool WFG550S0HB User manual

Whirlpool

Whirlpool WFG550S0HB User manual

Whirlpool RF360BXW User manual

Whirlpool

Whirlpool RF360BXW User manual

Whirlpool WEG750H0HB0 User manual

Whirlpool

Whirlpool WEG750H0HB0 User manual

Whirlpool AER5522VAS0 User manual

Whirlpool

Whirlpool AER5522VAS0 User manual

Whirlpool SF378PEW User manual

Whirlpool

Whirlpool SF378PEW User manual

Whirlpool W10430949B User manual

Whirlpool

Whirlpool W10430949B User manual

Whirlpool WGG555SOBS User manual

Whirlpool

Whirlpool WGG555SOBS User manual

Whirlpool RF385PXY User manual

Whirlpool

Whirlpool RF385PXY User manual

Whirlpool RF362LXTB User manual

Whirlpool

Whirlpool RF362LXTB User manual

Whirlpool GR673LXS User manual

Whirlpool

Whirlpool GR673LXS User manual

Whirlpool RF368LXKQ0 User manual

Whirlpool

Whirlpool RF368LXKQ0 User manual

Whirlpool WEG515S0FV User manual

Whirlpool

Whirlpool WEG515S0FV User manual

Whirlpool SF314PSY User manual

Whirlpool

Whirlpool SF314PSY User manual

Whirlpool SF387LEGN1 User manual

Whirlpool

Whirlpool SF387LEGN1 User manual

Whirlpool W10204316B User manual

Whirlpool

Whirlpool W10204316B User manual

Whirlpool RF387PXW User manual

Whirlpool

Whirlpool RF387PXW User manual

Whirlpool SF365BEXN0 User manual

Whirlpool

Whirlpool SF365BEXN0 User manual

Whirlpool RJE-953PP User manual

Whirlpool

Whirlpool RJE-953PP User manual

Whirlpool W10200946A User manual

Whirlpool

Whirlpool W10200946A User manual

Whirlpool SF316PES User manual

Whirlpool

Whirlpool SF316PES User manual

Whirlpool W10173324B User manual

Whirlpool

Whirlpool W10173324B User manual

Whirlpool 9761079 User manual

Whirlpool

Whirlpool 9761079 User manual

Whirlpool Range User manual

Whirlpool

Whirlpool Range User manual

Whirlpool RF377PXY User manual

Whirlpool

Whirlpool RF377PXY User manual

Popular Range manuals by other brands

Maytag MGR5875QDW - 30 Inch Gas Range Use and care guide

Maytag

Maytag MGR5875QDW - 30 Inch Gas Range Use and care guide

Frigidaire FFGF3024SS use & care

Frigidaire

Frigidaire FFGF3024SS use & care

Capital Precision Series GCR484W Specifications

Capital

Capital Precision Series GCR484W Specifications

Officine Gullo GGS8P Installation and use instruction

Officine Gullo

Officine Gullo GGS8P Installation and use instruction

LG LSD4913 Series owner's manual

LG

LG LSD4913 Series owner's manual

Kenmore 4101 - Elite 30 in. Slide-In Electric Range installation instructions

Kenmore

Kenmore 4101 - Elite 30 in. Slide-In Electric Range installation instructions

Moffat Blue Seal Evolution G576 Technical data sheet

Moffat

Moffat Blue Seal Evolution G576 Technical data sheet

CornuFé C1NF user guide

CornuFé

CornuFé C1NF user guide

GE JGS650SEFSS Dimensions and installation information

GE

GE JGS650SEFSS Dimensions and installation information

LG LDG3015ST Manual De Propietario

LG

LG LDG3015ST Manual De Propietario

Samsung FCQ321HTUW Service manual

Samsung

Samsung FCQ321HTUW Service manual

Kenmore 790.45712 Use & care guide

Kenmore

Kenmore 790.45712 Use & care guide

Wolf CHR CHSSR owner's manual

Wolf

Wolf CHR CHSSR owner's manual

Smeg Built-in Microwave Oven Instructions for the user

Smeg

Smeg Built-in Microwave Oven Instructions for the user

Zanussi ZCG054G user manual

Zanussi

Zanussi ZCG054G user manual

GE JCSS630 quick start guide

GE

GE JCSS630 quick start guide

Samsung NX58M9960P series installation manual

Samsung

Samsung NX58M9960P series installation manual

Hotpoint RB524R Use and care & installation instructions

Hotpoint

Hotpoint RB524R Use and care & installation instructions

manuals.online logo
manuals.online logoBrands
  • About & Mission
  • Contact us
  • Privacy Policy
  • Terms and Conditions

Copyright 2025 Manuals.Online. All Rights Reserved.

-I
T&+1 01
4a
Use& Care’Guide
30” SELF-CLEANINGGASRANGE
WITHUPPEROVEN
Contents
Appliance Registration
Care and Cleaning 14-2; Oven Timer 9
Preheating 10, 1I
Clock 9 Roasting, Roasting Guide 12
Control Panels 14 Self-Cleaning Operation 18, 19
Features 6 Shelves 8, 16
Installation 5 Thermostat Adjustment 22
Leveling 5 Vent Duct 9
Lift-Up Cooktop 16 Problem Solver 23
Minute Timer 9 Repair Service 24,25
Mode1 and Serial Numbers 2 Safety Instructions 2-s
Oven 8 Surface Cooking 7
Air Adjustment 21 Burners 15,20
Baking, Baking Guide IO, 11 Burner Grates 15,20
Broiler Pan and Rack 16,20 Control Settings 7
Broiling, Broiling Guide 13 Cookware Tips 7
Continuous Cleaning 14 Drip Pans 15,20
Control Settings 8 Flame Size 7
Door Removal 16 Lighting Instructions 7
Light; Bulb Replacement 8, 17 Warranty Back Cover
Oven Bottom Removal 17
Thank you for buying a Whirlpool
appliance. Pleasecomplete and mail the
Owner Registration Card provided with
this product.
Then complete the form
below. Have this information ready if you
need service or call with a question.
l
Copy model and serial numbers from plate
(located as shown) and purchase date from
sales slip.
l
Keep this book, the Cooking Guide and
sales slip together in ahandy place.
Model Number
Serial Number
I
FORYOURSAFETY
Ifyousmellgas:
1.Openwindows.
2. Don’ttouch
electricalswitches.*
3. Extinguishany
openflame.
4.
Immediatelycall
yourgassupplier.
*Don’t turn electric
switches on or off because
sparks may ignite the gas.
PurchaseDate
Service Company Phone Number
You are responsible for:
l
Installing and leveling the range on a floor
strong enough to support its weight, and
where it is protected from the elements.
(See the installation instructions.)
l
Making sure the range is not used by
anyone unable to operate it properly.
l
Properly maintaining the range.
l
Usmg the range only for jobs expected ot a
home range.
l
Making sure the range is secured by
properly installed anti-tip bracket, with
rear leveling 1eg.spositioned under bracket.
FORYOURSAFETY
Donotstoreor use
gasolineor other
flammablevapors
andliquids inthe
vicinity ofthis or any
otherappliance.
2
IMPORTANT
SAFETY
INSTRUCTIONS
Read all instructions
before using this
appliance.
IMPORTANT
SAFETY NOTICE
WARNING:
Gas fuels and their use in
appliances can cause
minor
exposures
to benzene,
formaldehyde, carbon monoxide
and soot, primarily from
incomplete combustion.
Significant exposure to these
substancescan causecancer or
reproductive harm. Properly
adjusted burners with a blue,
rather than a yellow flame, will
minimize incomplete
combustion. Venting with a
hood or an open window will
further minimize exposure.
When You Get Your Range
l
Have the installer show you
the location of the range gas
cut-off valve and how to shut
it off if necessary.
l
Have your range installed
and properly grounded by a
qualified installer, in
accordance with the Installation
Instructions. Any adjustment
and service should be performed
only by qualified gasrange
installers or service technicians.
l
Plug your cooking center into
a X20-volt grounded outlet only.
Do not removethe round
grounding prong from the plug.
If in doubt about the grounding of
the home electrical system, it is
your personal responsibility and
obligation to havean ungrounded
outlet replaced with a properly-
grounded three-prong outlet in
accordance with the National
Electrical Code. Do not
use an
extensioncord with this appliance.
W-G-AH
cooking
centers can -
tip and injury
could result.
To prevent
accidental
tipping of the
cooking center,
attach it to
the floor by
installing the
ANTI-TIP bracket supplied. To
check
if the
bracket is installed
and engagedproperly, removethe
drawer and inspectthe rear leveling
legs. Make sure they fit securely
into the slots on the bracket.
If you pull the cooking center out
from the wall for any reason,make
sure the rear legsare returned to
their positions in the bracket when
you push the cooking center back.
l
Be sure all packing materials
are removed from the cooking
center before operating it, to
prevent fire or smoke damage
should the packing material ignite.
l
Be sure your cooking center is
correctly adjusted by a qualified
service technician or installer
for the type of gas (Natural or
LP) on which it is to be used.
Your cooking center can be
converted for
use on
either type of
gas. SeeInstallation Instructions.
l
After prolonged use of the
lower oven, high floor
temperatures may result and
many floor coverings will not
withstand this kind of use.
Never install the cooking center
over vinyl tile or linoleum that
cannot withstand such type of
use.
Never install it directly over
interior kitchen carpeting.
Using Your Cooking Center
l
Don’t leavechildren alone or
unattended where a cooking
center is hot or in operation.
They could be seriously burned.
l
Don’t allow anyone to climb,
stand or hang on the door or
cooktop. They
could
damagethe
cooking center and eventip it over
causing severepersonal injury.
l
CAUTION: ITEMS OF
INTEREST TO CHILDREN
SHOULD NOT BE STORED
IN CABINETS ABOVE A
COOKING CENTER OR ON
THE COOKTOP-CHILDREN
CLIMBING ON THE COOKING
CENTER TO REACH ITEMS
COULD BE SERIOUSLY
INJURED.
l
Let burner grates and other
surfaces cool before touching
them or leaving them where
children can reach them.
l
Never wear loose fitting or
hanging garments while using
the appliance. Flammable
material could be ignited if
brought in contact with flame or
hot ovensurfacesand may cause
severeburns.
l
Never use your appliance for
warming or heating the room.
Prolonged useof the cooking
center without adequate
ventilation can be hazardous.
3
l
Do not use water on grease
fires. Never pick up a flaming
pan. Turn off burner, then
smother flaming pan by covering
pan completely with well fitting
lid, cookie sheetor flat tray.
Flaming greaseoutside apan can
be put out by covering with baking
sodaor, if available, a multi-
purpose dry chemical or foam
fire extinguisher.
l
Do not store flammable
materials in an oven, near the
cooktop, or in storage drawer.
l
Do not let cooking grease
or other flammable materials
accumulate in or near the
cooking center.
l
When cooking pork, follow
the directions
exactly and always
cook the
meat to an internal
temperature of at least 170°F.
This assuresthat, in the remote
possibility that trichina may be
presentin the meat,it will be killed
and meat will be safeto eat.
Surface Cooking
l
Always use the LITE position
when igniting top burners and
make
sure
theburners haveignited
l
Never leavesurface burners
unattended at HI flame
settings. Boilover
causes
smoking and greasy spillovers
that
may
catch on fire.
l
Adjust top burner flame size
so it does not extend beyond the
edge of the cooking utensil.
Excessiveflame is hazardous.
-.
IMPORTANT SAFETY INSTRUCTIONS
(continued)
Read all instructions before using this appliance.
l
Use only dry pot holders-
moist or damp pot holders on hot
surfacesmay result in burns from
steam. Do not let pot holders
come near open flames when
lifting utensils. Do not usea towel
or other bulky cloth in place of a
pot holder.
l
To minimize the possibility
of burns, ignition of flammable
materials and spillage, turn the
cookware handles toward the side
or back of the cooking center
without extending over adjacent
burners.
l
Always turn surface burner to
OFF before removing utensil.
l
Carefully watch foods being
fried at HI flame setting.
l
Never block the vents (air
openings) of the cooking center.
They provide the air inlet and
outlet which is necessaryfor the
cooking center to operateproperly
with correct combustion.
l
Do not use a wok on the
cooking surface if the wok has a
rougd metal ring which is
placed over the burner grate to
support the wok. This ring acts
asa heat trap which may damage
the burner grate and burner head.
Also, it may causethe burner to
work improperly. This may cause
a carbon monoxide level above
that allowed by current standards,
resulting in a health hazard.
l
Foods for frying should be as
dry as possible. Frost on frozen
foods or moisture on fresh foods
can causehot fat to bubble up and
over sidesof pan.
l
Use least possible amount of
fat for effective shallow or deep-
fat frying. Filling the pan too full
of fat can causespillovers when
food is added.
l
If a combination of oils or
fats will be used in frying, stir
together before heating, or asfats
melt slowly.
l
Always heat fat slowly, and
watch asit heats.
l
Use deep fat thermometer
whenever possible to prevent
overheating fat beyond the
smoking point.
l
Use proper pan size-Avoid
pansthat are unstable or easily
tipped. Select utensils having flat
bottoms large enough to properly
contain food avoiding boilovers
and spillovers, and large enough
to cover burner grate. This will
both savecleaning and prevent
hazardous accumulations of food,
sinceheavyspatteringor spillovers
left on cooking center can ignite.
Use pans with handles that can be
easily grasped and remain cool.
l
Use only glass cookware that
is recommended for useon gas
burners.
l
Keep all plastics away from
top burners.
l
To avoid the possibility of a
burn, always be certain that the
controls for all burners are at
OFF position and all grates are
cool before attempting to remove
a grate.
l
When flaming foods under
the hood, turn the fan off. The
fan, if operating, may spread
the flame.
l
If cooking center is located
near a window, do not uselong
curtains which could blow over
the top burners and create a fire
hazard.
l
If you smell gas, turn off the
gasto the cooking center and call
a qualified service technician.
Never usean open flame to locate
a leak.
4
Baking, Broiling and
Roasting
l
Do not use oven for a storage
area.
l
Stand away from the cooking
center when opening the door of
a hot oven, The hot air or steam
which escapescan cause burns
to hands, face and/or eyes.
l
Don’t heat unopened food
containers in the oven. Pressure
could build up and the container
could burst causing an injury.
l
Don’t use aluminum foil
anywhere in the oven except as
described in this book. Misuse
could result in a fire hazard or
damageto the cooking center.
l
Use only glass cookware that
is recommended for usein gas
ovens.
l
When using cooking or
roasting bags in oven, follow
the manufacturer’s directions.
l
Always remove broiler pan
from the oven as soon asyou
finish broiling. Grease left in the
pan can catch fire if oven is used
without removing the greasefrom
the broiler pan.
l
When broiling, if meat is too
close to the flame, the fat may
ignite. Trim excessfat to prevent
excessiveflare-ups.
l
Make sure broiler pan is in
place correctly to reduce the
possibility of grease fires.
l
If you should have a grease
fire in the broiler pan, turn off
oven, and keep ovendoor closed
to contain fire until it burns out.
Self-Cleaning Oven
l
Do not clean the door gasket.
The door gasket is essential for a
good seal. Be careful not to rub,
damage or move it.
l
Do not use oven cleaners. No
commercial oven cleaner or oven
liner protective coating of any
kind should be used in or around
any part of the oven.
l
Remove the broiler pan and
other cookware
before self-
cleaning the oven.
Cleaning Your
Cooking Center
l
Clean only parts listed in this
Use and Care Book.
l
Keep cooking center clean
and free of accumulations of
grease or spillovers which may
ignite.
If YouNeedService
l
Read “The Problem Solver”
on page 23 of this book.
l
Don’t attempt to repair
or replace any part of your
cooking center unless it is
specifically recommended in
this book.
All other servicing
should be referred to a qualified
technician.
Installing the
Cooking Center
Your cooking center, like somany
other household items, is heavy and
can settle into soft floor coverings
suchascushioned vinyl or carpeting.
When moving the cooking center
on this type of flooring, usecare.
Do
not install
the cooking center
over kitchen carpeting unless you
place an insulating pad or sheetof
l/4-inch-thick plywood between
the cooking center and carpeting.
When thefloor covering ends at
thefront of the cooking center, the
areathat the cooking center will
rest on should bebuilt up with
plywood or similar material to the
samelevel or higher than the floor
covering. This will allow the
cooking center to be moved for
cleaning or servicing.
Leveling the
Cooking Center
Your cooking center must be level
in order to produce proper cooking
and baking results. After it is in its
final location, place a level
horizontally on an oven shelf and
check the levelness front to back
and side to side.
Leveling legs are located on each
corner of the baseof the cooking
center. Removethe bottom drawer
and you can level the cooking
center on an uneven floor.
To remove drawer, pull drawer
out all the way, tilt up the front
and take it out. To replace drawer,
insert glides at back of drawer
beyond stop on cooking center
glides. Lift drawer if necessary to
insert easily. Let front of drawer
down, then push in to close.
Both of the rear leveling legswill
engagethe ANTI-TIP bracket (allow
for someside to side adjustment).
Allow a minimum clearance of l/8”
between the cooking center and the
leveling legsto permit installation
into the ANTI-TIP bracket.
SAVETHESE
INSTRUCTIONS
5
Featuresof Your Cooking Center
1. Door Handle. Lift with fingertips
andpull to open door.
2. Model and Serial Numbers.
Located in burner box under cooktop.
3. Oven Temp Control for Upper
Oven.
4. Digital Clock with 60-Minute
Timer or Analog Clock with 60-
Minute Timer.
5. Automatic Oven Timer for
Lower Oven.
6. Oven Set Control for Lower
Oven.
7. Oven Temp Control for Lower
Oven.
8. Cleaning Light for Lower Oven.
9. Locked Light for Lower Oven.
10. Cooktop Light.
ll. Cooktop Light Switch.
12. Oven Light Switch. Lets you
turn upper and lower interior oven
lights on and off.
13. Surface Burners, Grates and
Chrome Drip Pans.
14. Oven Vents.
15. Lift-Up Cooktop.
16. Surface Burner Controls.
17. Self-Clean Latch Lever.
18. Oven Shelves.
19. Oven Shelf Supports.
20. Oven Interior Lights.
21. Removable Oven Bottom.
22. Removable Oven Door.
23. Broiler Pan and Rack.
24. Storage Drawer.
25. Anti-Tip Bracket.
(SeeInstallation Instructions.)
Surface Cooking
Automatic Ignition
Your surface burners are lighted
by electric ignition, eliminating the
need for standing pilot lights with
constantly burning flames.
In caseof a power outage, you can
light the surface burners on your
range with a match. Hold alighted
match to the burner, then turn the
knob to the LITE position. Use
extreme caution when lighting
burners this way.
Surface burners in use when an
electrical power failure occurs will
continue to operate normally.
Surface Burner Controls
Knobs that turn the surface burners
on and off are located on the lower
control panel and are marked asto
which burners they control.
ToLight a Surface Burner
Push the control knob in and turn
it to LITE. You will hear alittle
clicking noise-the sound of the
electric spark igniting the burner.
After the burner ignites, turn the
knob to adjust the flame size.
l
Check to be sure the burner you
turned on is the one you want to use.
l
Do not operate aburner for an
extended period of time without
cookware on the grate. The finish
on the grate may chip without
cookware to absorb the heat.
l
Be sure the burners and grates are
cool before you place your hand, a
potholder, cleaning cloths or other
materials on them.
How to SelectFlame Size
The flame size on agasburner
should match the cookware you
are using.
NEVER LET THE FLAME
EXTEND UP THE SIDES OF
THE COOKWARE. Any flame
larger than the bottom of the
cookware is wastedand only serves
to heat the handles.
When using aluminum or
aluminum-clad stainless steel
pots and pans, adjust the flame so
the circle it makesis about l/2 inch
smaller than the bottom of the
cookware.
When boiling, usethis sameflame
size-l/2 inch smaller than the
bottom of the cookware-no matter
what the cookware is madeof. Foods
cook just asquickly at a gentle boil
asthey do at afurious rolling boil.
A high boil createssteamand cooks
awaymoisture, flavor and nutrition.
Avoid it except for the few cooking
processeswhich needavigorous boil.
When frying or warming foods
in stainless steel, cast iron or
enamelware, keepthe flame down
lower-to about l/2 the diameter
of the pan.
When frying in glass or ceramic
cookware, lowertheflameevenmore.
Cooktop Light
A full-width fluorescent light in the
backsplash illuminates the cooktop.
Pressand momentarily hold the
SURFACE LIGHT switch under
the upper control panel to turn
the light on and off.
Top-of-Range Cookware
Aluminum: Medium-weight
cookwareis recommendedbecauseit
heatsquickly andevenly. Most foods
brown evenly in an aluminum skillet.
Minerals in food andwater will stain
but will not harm aluminum. A
quick scour with a soap-filled wool
pad after each usekeeps aluminum
cookware looking shiny new. Use
saucepanswith tight-fitting lids for
cooking with minimum amounts
of water.
Cast Iron: If heated slowly, most
skillets will give satisfactory results.
Enamelware: Under some
conditions, the enamel of some
cookwaremaymelt. Follow cookware
manufacturer’s recommendations
for cooking methods.
Glass: There are two types of glass
cookware-those for oven useonly
and those for top-of-range cooking
(saucepans, coffee and teapots).
Glass conducts heat very slowly.
Heatproof Glass Ceramic: Can
be used for either surface or oven
cooking. It conducts heat very
slowly and cools very slowly.
Check cookware manufacturer’s
directions to be sure it can be used
on gasranges.
Stainless Steel: This metal alone
haspoor heating properties, and is
usually combined with copper,
aluminum or other metals for
improved heat distribution.
Combination metal skillets usually
work satisfactorily if they are
used with medium heat asthe
manufacturer recommends.
7
Using Your Ovens
Automatic Ignition
The oven burners and broil
burner on your range are lighted
by electric ignition. The ovens
and broiler cannot be operated
in the event of a power failure.
To light the upper oven burner,
turn the OVEN TEMP knob to the
desired temperature. To light the
lower oven burner, turn the OVEN
SET knob to the desired oven
operation and the OVEN TEMP
knob to the desired temperature.
The burner should ignite within
60 seconds.
CAUTION: DO NOT ATTEMPI
TO OPERATE THE ELECTRIC
IGNITION OVEN DURING AN
ELECTRICAL POWER FAILURE.
Resumption of electrical power
when the oven controls are in any
position other than OFF will result
in automatic ignition of the oven or
broiler burner and could cause
severeburns if, at the time, you
were attempting to light the burner
with amatch.
A burner in use when an electrical
power failure occurs will continue
to operate normally.
Before Using Your Ovens
Be sure you understand how to
setthe controls properly. Practice
removing and replacing the shelves
while the oven is cool. Readthe
information on the following pages,
and keepthis book handy.
Oven Controls
Controls on the upper control
panel are marked OVEN SET
and OVEN TEMP.
The OVEN SET control, for the
lower oven, hassettingsfor BARE,
BROIL, TIMED BARE, CLEAN
andOFF. When you turn the knob to
the desiredsetting, the proper burner
is activated for that operation.
BAKE-Use this setting for all
normal oven operations-for
example, for cooking roastsor
casseroles. Only the bottom oven
burner operatesduring baking.
BROIL-Use this setting for
broiling. Only the top (broil)
burner will operate.
TIMED BAKE-Use this setting
to turn the oven on and off at
specified times when you want
cooking to start and stop. See
Automatic Oven Timer on the
next page.
CLEAN-Use this setting for the
self-cleaning function only.
OFF-Shuts off power to the oven
controls. Oven will not operate.
The OVEN SET and OVEN TEMP
controls should be turned to OFF
whenever the oven is not in use.
Upper Oven
The OVEN TEMP control
for each oven maintains the
temperature you setfor normal
oven operation.
For normal oven operation, turn
the knob to the desired temperature
which is marked in 25” increments.
It will normally take30 to 60 seconds
before the flame comes on.
After the oven reachesthe selected
temperature, the oven burner cycles
-off completely, then on with a
full flame-to keep the oven
temperature controlled.
Oven Lights
The lights in both ovens come on
automatically when the lower oven
door is opened. The light in the
upper oven doesnot come on
automatically when the upper door
is opened. Use the switch under the
upper control panel to turn the
lights on and off.
Oven Shelves
Upper Oven Lower Oven
The shelves are designed with stop-
locks sowhen placed correctly on
the shelf supports, they will stop
before coming completely out of
the oven and will not tilt when you
are removing food from them or
placing food on them.
When placing cookware on a shelf,
pull the shelf out to the “stop”
position. Place the cookware on
the shelf, then slide the shelf back
into the oven. This will eliminate
reaching into the hot oven.
To remove a shelf from the oven,
pull it out to the stop position, lift
up on front and pull out.
Shelf Positions
The lower oven hasfive shelf
supports-A (bottom), B, C, D
and E (top). Lower-oven shelf
positions for cooking are suggested
on Baking and Roasting pages.
8
Oven Vents
The lower oven is vented through a
duct at the center rear of the range,
and the upper oven vent is just above
the upper oven door (see page 6).
Do not block the openings of these
ducts when cooking in the oven - it
is important that the flow of hot air
from the oven and fresh air to the
oven burners be uninterrupted.
l
Vent openings and nearby
surfaces may become hot. Do not
touch them.
l
Handles of pots and pans on the
cooktop may become hot if left too
close to the vent.
l
Do not leave plastic items on the
cooktop - they may melt if left too
closeto the vent.
Oven Moisture
As your oven heats up, the
temperature change of the air in
the oven may cause water
droplets to form on the door
glass. To prevent this, open the
oven door for the first minute
of oven heat-up to let the moist
air out.
Automatic Oven Timer and Clock
Clock
Your range will have one of the
clocks illustrated here. Just follow
these instructions to set the clock.
Three-Stem Clock
(Automatic)
To set the 60-minute timer, just turn
the knob in the center of the clock to
the left (do not press in on the knob).
To bum off the buzzer, turn the knob
back to “off’. To set the time of day,
push in the knob in the center of the
clock and turn to the right. Then
release the knob and continue turning
until the timer is in the “off’ position.
The knobs at the right are used to
turn the oven on and off
automatically.
Digital Clock with
60-Minute Timer
The Minute Timer is the large dial to
the left of the digital clock. Use it to
time all your precise cooking
operations. The Minute Timer knob
also changes the digital clock.
To set the Minute Timer, turn the
center knob clockwise, without
pushing in, until the pointer reaches
the number of minutes you want to
time (up to 60).
At the end of the set time, a buzzer
sounds to tell you time is up. Turn
the knob, without pushing in, until
the pointer reaches “Off’ and the
buzzer stops.
To set the Clock, push in the center
knob of the Minute Timer and turn
the knob in either direction to set the
digital clock numerals to the correct
time. (After setting the clock, let the
knob out and turn the Minute Timer
pointer to “Off ‘.)
Automatic Oven Timer:
(Lower Oven)
“START”: Push in and turn the Start
knob to the time you want the oven
to turn itself on.
NOTE: If you want the oven to start
cooking immediately, do not set the
Start time.
“STOP”: Push in and turn the Stop
knob to the time you want the oven
to turn itself off.
NOTE: There must be at least a half-
hour difference from the Start time
to the Stop time for the automatic
control to work. Be sure the electric
clock is set to the correct time of
day, as this controls the automatic
timing.
Set the Selector Control to the “Time
Bake” setting.
Set the Temperature Control to the
desired cooking temperature.
Now the oven will automatically
turn itself on at the Start time you
set, cook at the temperature you
selected and turn itself off at the stop
time you set.
After you take the food out of the
oven, be sure to turn the Temperature
Selector Control to “Off ‘.
Baking
How to SetYour Range
for Baking
1. Position the shelf or shelves in
the oven.
2. Close oven door. Turn OVEN
SET knob to BAKE or TIME BAKE
and OVEN TEMP knob to desired
temperature. Preheat oven for at
least 15minutes if preheating is
necessary.
3. Place food in oven on center
of shelf. Allow at least 2 inches
between edgeof bakeware and oven
wall or adjacent cookware.
If cooking on two shelves at the
sametime, place shelves about 4
inches apart and staggerfood on
them.
4. Check food for donenessat
minimum time on recipe. Cook
longer if necessary. Switch off
heat and remove food.
Preheating
Preheating is very important when
using temperatures below 225°F.
andwhen baking foods such as
biscuits, cookies, cakesandother
pastries.
Preheating is not necessarywhen
roasting or for long-time cooking of
whole meals.
Shelf Positions
Most baking is done on the second
shelf position (B) from the bottom.
When baking three or four items,
usetwo shelves positioned on the
second and fourth setsof supports
(B & D) from bottom of oven.
Bake angel food cakeson first shelf
position (A) from bottom of oven.
Baking Tips
l
Follow atestedrecipe and
measurethe ingredients carefully.
If you areusing apackagemix,
follow label directions.
l
If moisture is noticeable on the
front oftheovenor on theblack glass
door when first turning on the oven,
leavethe oven door ajar for afew
minutes or until the oven is warm.
l
Do not open the ovendoor during
abaking operation-heat will belost
andthe baking time might needto
beextended. This could causepoor
baking results. If you must open the
door, open it partially-only 3or 4
inches-and close it asquickly as
possible.
l
Do not disturb the heatcirculation
in theoven with the useof aluminum
foil. If foil is used, place asmall
sheetof it, about 10by 12inches at
the most, on alower shelf several
inches below the food. Do not place
foil on theoven bottom.
Common Baking Problems
and PossibleSolutions
PIES
Burning around edges
l
Oven too full; avoidovercrowding.
l
Edgesof crust too thin.
l
Incorrect baking temperature.
Bottom crust soggy and unbaked
l
Allow crust and/or filling tocool
sufficiently before filling pie shell.
l
Filling maybetoo thin orjuicy.
l
Filling allowed to standin pie shell
beforebaking. (Fill pie shells and
bakeimmediately.)
l
Ingredients andproper measuring
affect the quality of the crust. Usea
testedrecipe and good technique.
Make surethere areno tiny holes or
tearsin abottom crust. “Patching”
apie crust could causesoaking.
Pie filling runs over
l
Topandbottom crust not well
sealedtogether.
l
Edgesof pie crust not built up
high enough.
l
Toomuch filling.
l
Check sizeof pie plate.
Pastry is tough; crust not flaky
l
Toomuch handling.
l
Fattoo soft or cut in too fine.
Roll dough lightly andhandle as
little aspossible.
CAKES
Cake rises higher on one side
l
Batter spreadunevenly in pan.
l
Oven shelvesnot level.
l
Using warped pans.
l
Incorrect pan size.
Cakes cracking on top
l
Oven temperature too high.
l
Batter too thick, follow recipe
or exactpackagedirections.
l
Check for proper shelf position.
l
Check pan sizecalled for in recipe.
l
Improper mixing of cake.
Cake falls
l
Toomuch shortening, sugaror
liquid.
l
Check leavening agent, baking
powder or baking sodato assure
freshness. Make ahabit to note
expiration datesof packaged
ingredients.
l
Cakenot bakedlong enough or
atincorrect temperature.
l
If adding oil to acakemix, make
certain the oil is the type and
amount specified.
Crust is hard
l
Check temperature.
l
Check shelf position.
Cake has soggy layer or streaks
at bottom
l
Undermixing ingredients.
l
Shortening too soft for proper
creaming.
l
Toomuch liquid.
COOKIES & BISCUITS
Doughy center; heavy crust on
surface
l
Check temperature.
l
Check shelf position.
l
Follow baking instructions
carefully asgiven in reliable recipe
or on convenience food package.
l
Flat cookie sheetswill give more
evenbaking results. Don’t overcrowd
foods on abaking sheet.
l
Convenience foodsusedbeyond
their expiration date.
Browning more noticeable on
one side
l
Oven door not closed properly,
check gasketseal.
l
Check shelf position.
10