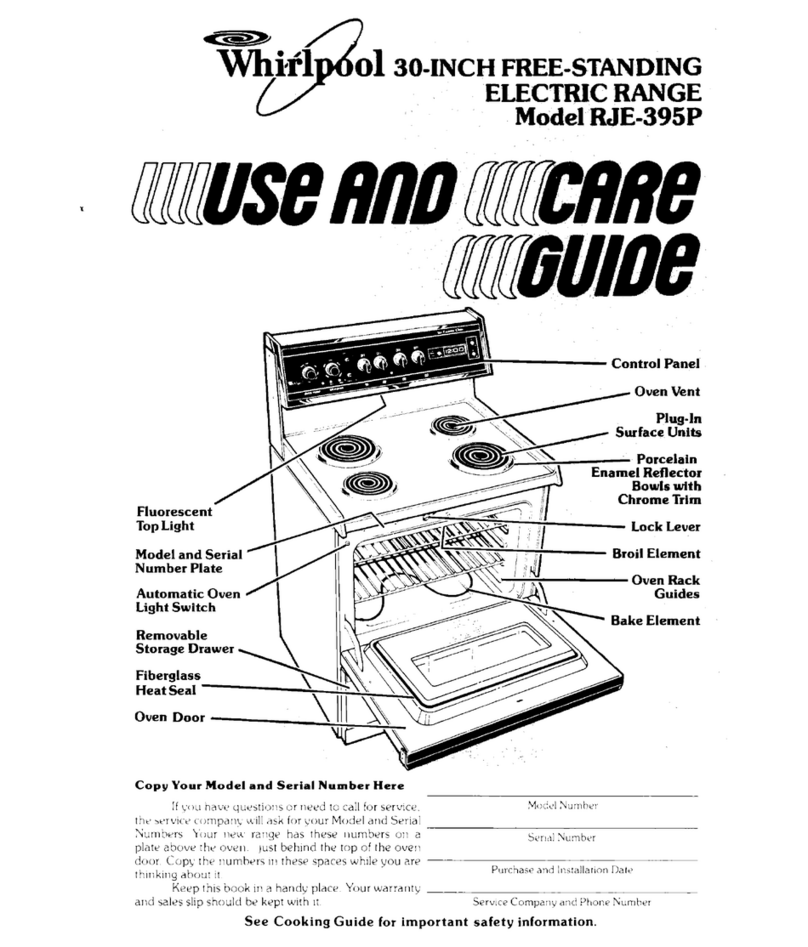
Whirlpool 9782475A User manual

ELECTRIC RANGES
Use & Care Guide
CUISINIÈRES
ÉLECTRIQUES
Guide d’utilisation
et d’entretien
Table of Contents/Table des matières .................. 2
9782475A

2
TABLE OF CONTENTS
RANGE SAFETY .............................................................................3
The Anti-Tip Bracket ....................................................................3
COOKTOP USE ..............................................................................6
Cooktop Controls.........................................................................6
Coil Elements and Burner Bowls .................................................6
Lift-up Cooktop............................................................................7
Home Canning .............................................................................7
Cookware .....................................................................................7
ELECTRONIC OVEN CONTROL ...................................................8
Display..........................................................................................8
Clock ............................................................................................8
Using the Minute Timer................................................................8
Oven Temperature Control ..........................................................8
OVEN USE.......................................................................................9
Aluminum Foil...............................................................................9
Positioning Racks and Bakeware ................................................9
Bakeware......................................................................................9
Oven Vents.................................................................................10
Oven Light ..................................................................................10
Bake............................................................................................10
Broil ............................................................................................11
Control Panel Glass ...................................................................11
Oven Light ..................................................................................12
Appliance Outlets.......................................................................12
Oven Door ..................................................................................12
Storage Drawer ..........................................................................12
Sweep-Thru Base ......................................................................12
General Cleaning........................................................................13
TROUBLESHOOTING ..................................................................14
TABLE DES MATIÈRES
SÉCURITÉ DE LA CUISINIÈRE ...................................................15
La bride antibasculement...........................................................15
UTILISATION DE LA TABLE DE CUISSON................................18
Commandes de la table de cuisson ..........................................18
Éléments en spirale et cuvettes des brûleurs............................18
Table de cuisson relevable.........................................................19
Préparation de conserves à la maison.......................................19
Ustensiles de cuisson ................................................................19
COMMANDE ÉLECTRONIQUE DU FOUR.................................20
Affichage.....................................................................................20
Horloge .......................................................................................20
Utilisation de la minuterie...........................................................20
Commande de la température du four ......................................20
UTILISATION DU FOUR...............................................................21
Papier d’aluminium.....................................................................21
Positionnement des grilles et des ustensiles de cuisson ..........21
Ustensiles de cuisson ................................................................22
Évents du four ............................................................................22
Lumière du four ..........................................................................22
Cuisson au four ..........................................................................23
Cuisson au gril............................................................................23
Vitre du tableau de commande..................................................24
Lampe du four............................................................................24
Prises pour appareils ménagers ................................................24
Porte du four...............................................................................25
Tiroir de remisage.......................................................................25
Base balayable ...........................................................................25
Nettoyage général ......................................................................25
DÉPANNAGE.................................................................................27

3
RANGE SAFETY
The Anti-Tip Bracket
The range will not tip during normal use. However, the range can tip if you apply too much force or weight to the open door without the
anti-tip bracket fastened down properly.
You can be killed or seriously injured if you don't
immediately follow instructions.
You can be killed or seriously injured if you don't
follow instructions.
All safety messages will tell you what the potential hazard is, tell you how to reduce the chance of injury, and tell you
what can happen if the instructions are not followed.
Your safety and the safety of others are very important.
We have provided many important safety messages in this manual and on your appliance. Always read and obey all
safety messages.
This is the safety alert symbol.
This symbol alerts you to potential hazards that can kill or hurt you and others.
All safety messages will follow the safety alert symbol and either the word “DANGER” or
“WARNING.” These words mean:
Tip Over Hazard
A child or adult can tip the range and be killed.
Connect anti-tip bracket to rear range foot.
Reconnect the anti-tip bracket, if the range is moved.
See the installation instructions for details.
Failure to follow these instructions can result in death or serious burns to children
and adults.
WARNING
Anti-Tip Bracket
Making sure the anti-tip bracket is installed:
•Slide range forward.
•Look for the anti-tip bracket securely attached to floor.
•Slide range back so rear range foot is under anti-tip bracket.
Range Foot

4
WARNING: To reduce the risk of fire, electrical
shock, injury to persons, or damage when using the
range, follow basic precautions, including the
following:
■WARNING: TO REDUCE THE RISK OF
TIPPING OF THE RANGE, THE RANGE MUST BE
SECURED BY PROPERLY INSTALLED ANTI-TIP
DEVICES. TO CHECK IF THE DEVICES ARE
INSTALLED PROPERLY, SLIDE RANGE FORWARD,
LOOK FOR ANTI-TIP BRACKET SECURELY
ATTACHED TO FLOOR, AND SLIDE RANGE BACK
SO REAR RANGE FOOT IS UNDER ANTI-TIP
BRACKET.
■CAUTION: Do not store items of interest to
children in cabinets above a range or on the back-
guard of a range –children climbing on the range to
reach items could be seriously injured.
■Proper Installation –Be sure the range is properly
installed and grounded by a qualified technician.
■Never Use the Range for Warming or Heating the
Room.
■Do Not Leave Children Alone –Children should not
be left alone or unattended in area where the range
is in use. They should never be allowed to sit or
stand on any part of the range.
■Wear Proper Apparel –Loose-fitting or hanging
garments should never be worn while using the
range.
■User Servicing –Do not repair or replace any part of
the range unless specifically recommended in the
manual. All other servicing should be referred to a
qualified technician.
■Storage in or on the Range –Flammable materials
should not be stored in an oven or near surface
units.
■Do Not Use Water on Grease Fires –Smother fire or
flame or use dry chemical or foam-type extinguisher.
■Use Only Dry Potholders –Moist or damp
potholders on hot surfaces may result in burns from
steam. Do not let potholder touch hot heating
elements. Do not use a towel or other bulky cloth.
■DO NOT TOUCH SURFACE UNITS OR AREAS
NEAR UNITS –Surface units may be hot even
though they are dark in color. Areas near surface
units may become hot enough to cause burns.
During and after use, do not touch, or let clothing or
other flammable materials contact surface units or
areas near units until they have had sufficient time
to cool. Among those areas are the cooktop and
surfaces facing the cooktop.
IMPORTANT SAFETY INSTRUCTIONS
■Use Proper Pan Size –The range is equipped with
one or more surface units of different size. Select
utensils having flat bottoms large enough to cover
the surface unit heating element. The use of under-
sized utensils will expose a portion of the heating
element to direct contact and may result in ignition
of clothing. Proper relationship of utensil to burner
will also improve efficiency.
■Never Leave Surface Units Unattended at High Heat
Settings –Boilover causes smoking and greasy
spillovers that may ignite.
■Make Sure Reflector Pans or Drip Bowls Are in
Place –Absence of these pans or bowls during
cooking may subject wiring or components under-
neath to damage.
■Protective Liners –Do not use aluminum foil to line
surface unit drip bowls or oven bottoms, except as
suggested in the manual. Improper installation of
these liners may result in a risk of electric shock, or
fire.
■Glazed Cooking Utensils –Only certain types of
glass, glass/ceramic, ceramic, earthenware, or other
glazed utensils are suitable for range-top service
without breaking due to the sudden change in
temperature.
■Utensil Handles Should Be Turned Inward and Not
Extend Over Adjacent Surface Units –To reduce the
risk of burns, ignition of flammable materials, and
spillage due to unintentional contact with the utensil,
the handle of a utensil should be positioned so that
it is turned inward, and does not extend over
adjacent surface units.
■Do Not Soak Removable Heating Elements –
Heating elements should never be immersed in
water.
■Do Not Cook on Broken Cooktop –If cooktop
should break, cleaning solutions and spillovers may
penetrate the broken cooktop and create a risk of
electric shock. Contact a qualified technician
immediately.
■Clean Cooktop With Caution –If a wet sponge or
cloth is used to wipe spills on a hot cooking area,
be careful to avoid steam burn. Some cleaners can
produce noxious fumes if applied to a hot surface.
■Use Care When Opening Door –Let hot air or
steam escape before removing or replacing food.
■Do Not Heat Unopened Food Containers –Build-up
of pressure may cause container to burst and result
in injury.
SAVE THESE INSTRUCTIONS

5
■Keep Oven Vent Ducts Unobstructed.
■Placement of Oven Racks –Always place oven
racks in desired location while oven is cool. If rack
must be moved while oven is hot, do not let
potholder contact hot heating element in oven.
■DO NOT TOUCH HEATING ELEMENTS OR
INTERIOR SURFACES OF OVEN –Heating
elements may be hot even though they are dark in
color. Interior surfaces of an oven become hot
enough to cause burns. During and after use, do
not touch, or let clothing or other flammable
materials contact heating elements or interior
surfaces of oven until they have had sufficient time
to cool. Other surfaces of the appliance may
become hot enough to cause burns –among these
surfaces are oven vent openings and surfaces near
these openings, oven doors, and windows of oven
doors.
IMPORTANT SAFETY INSTRUCTIONS
SAVE THESE INSTRUCTIONS
For self-cleaning ranges –
■Do Not Clean Door Gasket –The door gasket is
essential for a good seal. Care should be taken not
to rub, damage, or move the gasket.
■Do Not Use Oven Cleaners –No commercial oven
cleaner or oven liner protective coating of any kind
should be used in or around any part of the oven.
■Clean Only Parts Listed in Manual.
■Before Self-Cleaning the Oven –Remove broiler pan
and other utensils.
For units with ventilating hood –
■Clean Ventilating Hoods Frequently –Grease should
not be allowed to accumulate on hood or filter.
■When flaming foods under the hood, turn the fan on.

6
COOKTOP USE
Cooktop Controls
The control knobs can be set anywhere between HI and LO. Push
in and turn to setting. On some models, the surface cooking area
locator shows which element is turned on. Use the following
chart as a guide when setting heat levels.
Coil Elements and Burner Bowls
(on some models)
Coil elements should be level for optimal cooking results. Burner
bowls, when clean, reflect heat back to the cookware. They also
help catch spills.
Cookware should not extend more than 1 in. (2.5 cm) over the
coil element. If cookware is uneven or too large, it can produce
excess heat causing the burner bowl to change color. For more
information, see the “General Cleaning”section.
Before removing or replacing coil elements and burner bowls,
make sure they are cool and the control knobs are in the Off
position.
To Remove:
1. Push in the edge of coil element toward the receptacle. Then
lift it just enough to clear the burner bowl.
2. Pull the coil element straight away from the receptacle.
3. Lift out the burner bowl.
To Replace:
1. Line up openings in the burner bowl with the coil element
receptacle.
2. Holding the coil element as level as possible, carefully push
coil element terminal into the receptacle.
3. When the terminal is pushed into the receptacle as far as it
will go, push down the edge of the coil element opposite the
receptacle.
SETTING RECOMMENDED USE
HI ■Start food cooking.
■Bring liquid to a boil.
6-8
[MED- HI]
■Hold a rapid boil.
■Quickly brown or sear food.
5
[MED]
■Maintain a slow boil.
■Fry or sautéfoods.
■Cook soups, sauces and gravies.
2-4
[MED- LO]
■Stew or steam food.
■Simmer.
LO ■Keep food warm.
■Melt chocolate or butter.
WARNING
Fire Hazard
Turn off all controls when done cooking.
Failure to do so can result in death or fire.
REMEMBER: When range is in use or (on some
models) during the Self-Cleaning cycle, the entire
cooktop area may become hot.

7
Lift-up Cooktop
(on some models)
The lift-up cooktop provides easy access for cleaning beneath.
Do not drop the cooktop. Damage could occur to the finish and
the cooktop frame. For more information, see the “General
Cleaning”section.
To Lift:
Lift the cooktop by both front corners until the supports lock into
place.
To Replace:
1. Lift the cooktop from both sides while pressing the support
rods back to unlock them.
2. Slowly lower the cooktop into place.
Home Canning
When canning for long periods, alternate the use of surface
cooking areas, elements or surface burners between batches.
This allows time for the most recently used areas to cool.
■Center the canner on the grate or largest surface cooking
area or element. Canners should not extend more than 1 in.
(2.5 cm) outside the cooking area.
■Do not place canner on two surface cooking areas, elements
or surface burners at the same time.
■On ceramic glass models, use only flat-bottomed canners.
■On coil element models, the installation of a Canning Unit Kit
is recommended. If a Canning Unit Kit is not installed, the life
of the coil element will be shortened.
■For more information, contact your local agricultural
department. Companies that manufacture home canning
products can also offer assistance.
Cookware
IMPORTANT: Never leave empty cookware on a hot surface
cooking area, element or surface burner.
Ideal cookware should have a flat bottom, straight sides, a well-
fitting lid and the material should be of medium-to-heavy
thickness.
Rough finishes may scratch the cooktop. Aluminum and copper
may be used as a core or base in cookware. However, when used
as a base they can leave permanent marks on the cooktop or
grates.
Cookware material is a factor in how quickly and evenly heat is
transferred, which affects cooking results. A nonstick finish has
the same characteristics as its base material. For example,
aluminum cookware with a nonstick finish will take on the
properties of aluminum.
Use the following chart as a guide for cookware material
characteristics.
COOKWARE CHARACTERISTICS
Aluminum ■Heats quickly and evenly.
■Suitable for all types of cooking.
■Medium or heavy thickness is best for
most cooking tasks.
Cast iron ■Heats slowly and evenly.
■Good for browning and frying.
■Maintains heat for slow cooking.
Ceramic or
Ceramic glass
■Follow manufacturer’s instructions.
■Heats slowly, but unevenly.
■Ideal results on low to medium heat
settings.
Copper ■Heats very quickly and evenly.
Earthenware ■Follow manufacturer’s instructions.
■Use on low heat settings.
Porcelain
enamel-on-
steel or cast
iron
■See stainless steel or cast iron.
Stainless steel ■Heats quickly, but unevenly.
■A core or base of aluminum or copper
on stainless steel provides even
heating.

8
ELECTRONIC
OVEN CONTROL
Display
When the range is first plugged in, or after a power interruption,
the display will flash “12:00”until the CLOCK pad (button) is
pressed.
When the oven is in use, the display shows preheat time and the
temperature and oven setting.
When the oven is not in use, the display shows the time of day.
When using the TIMER, for settings of 1 to 59 minutes, the
display will count down in seconds. For settings 1 hour or more,
the display will count down hours and minutes.
When using COOK TIME, the display will show hours and
minutes.
Clock
Setting the Clock
1. Press the CLOCK pad (button).
2. Press the up or down pad (button) until the correct time
shows on the display.
3. Each tap of the up or down pad(s) or button(s) will change the
displayed time by 1 minute. If a button is held, the displayed
time will change in 10-minute increments. The Set Clock
mode automatically exits to the clock display mode
60 seconds after the last data change.
NOTE: When the range is first plugged in, or after a power
interruption, the display will flash “12:00”until the CLOCK
pad (button) is pressed.
Using the Minute Timer
The minute timer does not start or stop the oven. It works like a
regular minute timer independent of the oven to time anything
you like. The minute timer can be set in 1-minute increments up
to 12 hours.
To use the Minute Timer:
1. Press the TIMER pad (button).
2. Press the up or down pad (button) to set the TIMER. The
timer will automatically start 5 seconds after the time is
entered. The “TIMER Indicator”will be lit to indicate that the
minute timer is being displayed. When time remaining is less
than one minute, 1 beep will sound and the display will count
down the seconds remaining.
To return to time of day:
1. Press the CLOCK pad (button) to return to the time of day.
The time will be displayed for 5 seconds and then return to
the timer display.
2. At the end of the timer cycle, 4 beeps will sound and “End”
will be displayed until a pad (button) is pressed.
To cancel Minute Timer:
Press TIMER twice or press and hold the down pad (button) until
0:00 is reached. The time of day display will return in 5 seconds.
Oven Temperature Control
IMPORTANT: Do not use a thermometer to measure oven
temperature because opening the oven door and element or
burner cycling may give incorrect readings.
The oven provides accurate temperatures; however, it may cook
faster or slower than your previous oven, so the temperature
calibration can be adjusted. It can be changed in Fahrenheit or
Celsius.
A minus sign means the oven will be cooler by the displayed
amount. No sign means the oven will be warmer by the displayed
amount. Use the following chart as a guide.
1. Electronic Display
1
ADJUSTMENT °F
(ADJUSTMENT °C) COOKS FOOD
5°to 10°F (3°to 6°C) ...a little more
15°to 20°F (9°to 12°C) ...moderately more
25°to 35°F (15°to 21°C) ...much more
-5°to -10°F (-3°to -6°C) ...a little less
-15°to -20°F (-9°to -12°C) ...moderately less
-25°to -35°F (-15°to -21°C) ...much less

9
OVEN USE
Odors and smoke are normal when the oven is used the first few
times, or when it is heavily soiled.
IMPORTANT: The health of some birds is extremely sensitive to
the fumes given off. Exposure to the fumes may result in death to
certain birds. Always move birds to another closed and well
ventilated room.
Aluminum Foil
IMPORTANT: Do not line the oven bottom with any type of foil,
liners or cookware because permanent damage will occur to the
oven bottom finish.
■Do not cover entire rack with foil because air must be able to
move freely for best cooking results.
■To catch spills, place foil on rack below dish. Make sure foil is
at least 1 in. (2.5 cm) larger than the dish and that it is turned
up at the edges.
Positioning Racks and Bakeware
IMPORTANT: Never place food or bakeware directly on the oven
door or bottom. Permanent damage will occur to the porcelain
finish.
RACKS
NOTES:
■Position racks before turning the oven on.
■Do not move racks with bakeware on them.
■Make sure racks are level.
To move a rack, pull it out to the stop position, raise the front
edge, then lift out. Use the following illustration and chart as a
guide.
BAKEWARE
To cook food evenly, hot air must be able to circulate. Allow 2 in.
(5 cm) of space around bakeware and oven walls. Use the
following chart as a guide.
Bakeware
The bakeware material affects cooking results. Follow
manufacturer’s recommendations and use the bakeware size
recommended in the recipe. Use the following chart as a guide.
FOOD RACK POSITION
Frozen pies, large roasts, turkeys,
angel food cakes 1 or 2
Bundt cakes, most quick breads,
yeast breads, casseroles, meats 2
Cookies, biscuits, muffins, cakes,
nonfrozen pies 2 or 3
1
2
3
4
5
NUMBER OF
PAN(S) POSITION ON RACK
1 Center of rack.
2 Side by side or slightly staggered.
3 or 4 Opposite corners on each rack. Make sure
that no bakeware piece is directly over
another.
BAKEWARE/
RESULTS RECOMMENDATIONS
Light colored
aluminum
■Light golden
crusts
■Even browning
■Use temperature and time
recommended in recipe.
Dark aluminum
and other
bakeware with
dark, dull and/or
nonstick finish
■Brown, crisp
crusts
■May need to reduce baking
temperatures 25°F (15°C).
■Use suggested baking time.
■For pies, breads and casseroles, use
temperature recommended in
recipe.
■Place rack in center of oven.
Insulated cookie
sheets or baking
pans
■Little or no
bottom
browning
■Place in the bottom third of oven.
■May need to increase baking time.
Stainless steel
■Light, golden
crusts
■Uneven
browning
■May need to increase baking time.
Stoneware
■Crisp crusts
■Follow manufacturer’s instructions.
Ovenproof
glassware,
ceramic glass or
ceramic
■Brown, crisp
crusts
■May need to reduce baking
temperatures 25°F (15°C).

10
Oven Vents
The oven vents should not be blocked or covered because they
allow the release of hot air and moisture from the oven. Blocking
and covering the vents will cause poor air circulation, affecting
cooking and cleaning results. Never set plastics, paper or other
items that could melt or burn near the oven vents. Some
condensation may occur; however, this will not affect cooking
performance.
Oven Light
(on some models)
The oven light is turned on by the switch located on the control
console. The oven does not need to be on for the light to come
on.
Bake
The oven automatically regulates the heat levels and both the top
and bottom elements cycle on and off accordingly during preheat
and bake to maintain a precise temperature range for optimal
cooking results.
To Bake or Roast:
Before baking and roasting, position the racks according to the
“Positioning Racks and Bakeware”section. When roasting, it is
not necessary to wait for the oven to preheat before putting food
in, unless recommended in the recipe.
1. Press BAKE.
Press the TEMP “up”or “down”arrow pads (buttons) to enter
a temperature other than 350°F (175°C). Press the “up”or
“down”pads (buttons) to raise or lower the temperature in
5°F/5°C increments.
2. Press START.
A preheat time will count down, and “PrE”will appear on the
display. The oven control automatically sets preheating times
based on the oven temperature you select.
When the actual oven temperature is reached, the set
temperature will replace “PrE”on the display.
When the set temperature is reached, if on, one tone will
sound.
3. Press OFF when finished cooking.
The temperature can be changed any time after pressing START.
Preheating
Preheat temperatures are affected by varying factors such as
room temperature and peak energy usage times. It is normal for
the temperature showing on the display and the actual oven
temperature to differ.
Waiting an additional 10 minutes after the preheat conditioning
time ends to put food in the oven is suggested when baking
foods with leavening ingredients, such as yeast, baking powder,
baking soda and eggs.
1. Oven vent coil element
cooktop models
1. Oven door vent
1
1

11
Broil
The top element operates at full power when heating.
Use this setting for normal broiling and top browning with the
door open in the Broil Stop position.
■Use only the broiler pan and grid provided with the appliance.
It is designed to drain juices and help prevent spatter and
smoke.
■For proper draining, do not cover the grid with foil. The
bottom of the pan may be lined with aluminum foil for easier
cleaning.
■Trim excess fat to reduce spattering. Slit the remaining fat on
the edges to prevent curling.
■Pull out oven rack to stop position before turning or removing
food. Use tongs to turn food to avoid the loss of juices. Very
thin cuts of fish, poultry or meat may not need to be turned.
■After broiling, remove the pan from the oven when removing
the food. Drippings will bake on the pan if left in the heated
oven, making cleaning more difficult.
To Broil:
Before broiling, position the rack according to the Broiling Chart.
Position food on the grid in the broiler pan, then place it in the
center of the oven rack with the longest side parallel to the door.
It is not necessary to preheat the oven before putting food in,
unless recommended in the recipe.
Leave the door partly open when you use the oven to broil. This
allows the oven to stay at the proper temperature.
1. Press BROIL.
2. Press START.
The set oven temperature will appear on the display until the
oven is turned off.
3. Press OFF when finished cooking.
To Vari Broil:
Changing the temperature when custom broiling allows more
precise control when cooking. The lower the temperature, the
slower the cooking. Thicker cuts and unevenly shaped pieces of
meat, fish and poultry may cook better at lower broiling
temperatures.
1. Press BROIL.
Press the TEMP “up”or “down”arrow pads (buttons) to enter
a temperature other than 500°F (260°C). The broil range can
be set between 300°F (150°C) and 525°F (275°C).
2. Press START.
The set oven temperature will appear on the oven display
until the oven is turned off.
3. Press OFF when finished cooking.
BROILING CHART
For best results, place food 3 in. (7 cm) or more from the broil
element. Times are guidelines only and may need to be adjusted
for individual foods and tastes. Recommended rack positions are
numbered from the bottom (1) to the top (4). Do not use position
5. For diagram, see the “Positioning Racks and Bakeware”
section.
Control Panel Glass
(on some models)
The control panel glass can be removed for easier cleaning. Do
not clean the electronics behind the glass because damage can
occur.
To Remove:
1. Remove control knobs by pulling straight out.
2. Release clips.
3. Remove glass by pulling slightly up and forward.
FOOD RACK
POSITION
COOK TIME
minutes
SIDE 1 SIDE 2
Chicken
bone-in pieces
boneless breasts 3
417-20
11-16 17-20
11-16
Fish
Fillets ¹₄- ¹₂ in.
(.6-1.25 cm) thick
Steaks ³₄- 1 in.
(2-2.5 cm) thick
4
4
8-10
16-18
4-5
8-9
Frankfurters 45-73-4
Ground meat patties*
³₄ in. (2 cm) thick
well done 4 13-14 7-8
Ham slice, precooked
¹₂ in. (1.25 cm) thick 4 8-10 4-5
Lamb chops
1 in. (2.5 cm) thick 4 14-17 8-9
Pork chops
1 in. (2.5 cm) thick 4 20-22 10-11
Steak
1 in. (2.5 cm) thick
medium rare
medium
well done
4
4
4
14-15
15-16
18-19
7-8
8-9
9-10
*Place up to 9 patties, equally spaced, on broiler grid.

12
Oven Light
(on some models)
The oven light is a standard 40-watt appliance bulb. It will come
on when the oven door is open. It will not work during the Self-
Cleaning cycle. On some models, when the oven door is closed,
press OVEN LIGHT to turn it on or off.
Before replacing, make sure the oven and cooktop are cool and
the control knobs are off.
To replace:
1. Unplug range or disconnect power.
2. Turn the glass bulb cover in the back of the oven
counterclockwise to remove.
3. Turn bulb counterclockwise to remove from socket.
4. Replace bulb and bulb cover by turning clockwise.
5. Plug in range or reconnect power.
Appliance Outlets
(on some models)
The 120v appliance outlets located on the control console may
be used to run portable appliances placed on countertops beside
the range.
The outlets operate independently and are not affected by range
control settings.
NOTE: Do not place appliances on the cooktop. Damage to the
appliance could result if the cooktop is hot.
Appliance Outlet Circuit Breakers:
The circuit breakers for the appliance outlets on your range are
located under the cover on top of the control console. They are
rated for 12 amps.
Lift the cover by lifting the front edge at both ends.
On models equipped with a fluorescent cooktop light, remove the
fluorescent tube to gain access to the circuit breakers.
Oven Door
For normal range use, it is not suggested to remove the oven
door. However, if removal is necessary, make sure the oven is off
and cool. Then, follow these instructions. The oven door is heavy.
To Remove:
1. Fully open the oven door.
2. Unscrew clips with a #2 square or Phillips screwdriver.
3. Close oven door to the stop position (open about 4 in.
[10 cm]).
4. Lift door slightly and pull out and back until hinges come out
to the catch position.
5. Push door down and pull straight out to remove door
completely.
To Replace:
1. Hold oven door by the handle and place the top of the door
under the cooktop overhang.
2. Use front of leg to apply pressure to slide hinges into the slots
as far as possible.
3. Use side of leg to apply pressure to the bottom of the door
front.
4. Lift door slightly. Apply pressure and push until the hinges
have gone in fully.
5. Fully open the door.
6. Tighten clips with a #2 square or Phillips screwdriver.
Storage Drawer
The storage drawer can be removed. Before removing, make sure
drawer is cool and empty.
To Remove:
1. Pull drawer straight out to the first stop.
2. Lift up the back of the drawer and pull out.
To Replace:
1. Fit the ends of the drawer rails into the guides in the cavity.
2. Slide the drawer closed.
Sweep-Thru Base
When the storage drawer is removed, the sweep-thru base
makes cleaning easier and provides access to the leveling legs.
1. Sweep-thru base
4"
4" (10 cm)
1

13
General Cleaning
IMPORTANT: Before cleaning, make sure all controls are off and
the oven and cooktop are cool. Always follow label instructions
on cleaning products.
Soap, water and a soft cloth or sponge are suggested first unless
otherwise noted.
EXTERIOR PORCELAIN ENAMEL SURFACES
(on some models)
Food spills containing acids, such as vinegar and tomato, should
be cleaned as soon as the entire appliance is cool. These spills
may affect the finish.
■Glass cleaner, mild liquid cleaner or nonabrasive scrubbing
pad:
Gently clean around the model and serial number plate
because scrubbing may remove numbers.
COOKTOP CONTROLS
Do not use steel wool, abrasive cleansers or oven cleaner.
Do not soak knobs.
When replacing knobs, make sure knobs are in the OFF position.
On some models, do not remove seals under knobs.
■Soap and water or dishwasher:
Pull knobs straight away from control panel to remove.
CONTROL PANEL
Do not use abrasive cleaners, steel wool pads, gritty washcloths
or some paper towels. Damage may occur.
■Glass cleaner and soft cloth or sponge:
Apply glass cleaner to soft cloth or sponge, not directly on
panel.
COIL ELEMENTS (on some models)
Do not clean or immerse in water. Soil will burn off when hot.
For more information, see “Coil Elements and Burner Bowls”.
■Damp cloth:
Make sure control knobs are off and elements are cool.
BURNER BOWLS (on some models)
■Solution of ¹₂ cup (125 mL) ammonia to 1 gal. (3.75 L) water:
Soak for 20 minutes, then scrub with stainless steel wool
pad.
■Oven cleaner:
Follow product label instructions.
■Mildly abrasive cleanser:
Scrub with wet scouring pad.
Porcelain enamel only, not chrome
■Dishwasher
SURFACE UNDER COOKTOP (on some models)
Do not remove the cooktop to avoid product damage.
For more information, see “Lift-up Cooktop”section.
■Steel-wool pad
OVEN DOOR EXTERIOR
■Glass cleaner and paper towels or nonabrasive plastic
scrubbing pad:
Apply glass cleaner to soft cloth or sponge, not directly on
panel.
OVEN CAVITY
Do not use oven cleaners.
Food spills should be cleaned when oven cools. At high
temperatures, foods react with porcelain and staining, etching,
pitting or faint white spots can result.
■Self-Cleaning cycle:
See “Self-Cleaning Cycle”first.
OVEN RACKS AND ROASTING RACKS
■Self-Cleaning cycle:
See “Self-Cleaning Cycle”first. Remove racks or they will
discolor and become harder to slide. If this happens, a light
coating of vegetable oil applied to the rack guides will help
them slide.
■Steel-wool pad
BROILER PAN AND GRID
Do not clean in the Self-Cleaning cycle.
■Mildly abrasive cleanser:
Scrub with wet scouring pad.
■Solution of ¹₂ cup (125 mL) ammonia to 1 gal. (3.75 L) water:
Soak for 20 minutes, then scrub with scouring or steel wool
pad.
■Oven cleaner:
Follow product label instructions.
Porcelain enamel only, not chrome
■Dishwasher
STORAGE DRAWER ( on some models)
Make sure drawer is cool and empty before cleaning.
For more information, see “Storage Drawer”section.
■Mild detergent

14
TROUBLESHOOTING
Try the solutions suggested here first in order to avoid the cost of
an unnecessary service call.
Nothing will operate
■Is the power supply cord unplugged? Plug into a grounded
outlet.
■Has a household fuse been blown or has the circuit
breaker been tripped? Replace the fuse or reset the circuit.
Cooktop will not operate
■Is the control knob set correctly? Push in knob before
turning to a setting.
Excessive heat around cookware on cooktop
■Is the cookware the proper size? Use cookware about the
same size as the surface cooking area, element or surface
burner. Cookware should not extend more than 1 in. (2.5 cm)
outside the cooking area.
Cooktop cooking results not what expected
■Is the proper cookware being used? See “Cookware”
section.
■Is the control knob set to the proper heat level? See
“Cooktop Controls”section.
■Is the appliance level? Level the appliance. See the
Installation Instructions.
Oven will not operate
■Is the electronic oven control set correctly? See
“Electronic Oven Control”section.
Oven temperature too high or too low
■Does the oven temperature calibration need adjustment?
See “Oven Temperature Control”section.
■On slide-in models, does the cooling fan run during Bake,
Broil or Clean? It is normal for the fan to automatically run
when the oven is in use. This helps cool the electronic
control.
Display shows messages
■Is the display showing “PF”?There has been a power
failure. Clear the display. See “Display(s)”section. On some
models, reset the clock, if needed. See “Clock”section.
■Is the display showing a letter followed by a number?
Depending on your model, press OFF/CANCEL, OFF or
CANCEL/OFF to clear the display. See “Display(s)”section. If
it reappears, call for service. See “Assistance or Service”
section.
Oven cooking results not what expected
■Is the appliance level? Level the appliance. See the
Installation Instructions.
■Is the proper temperature set? Double-check the recipe in
a reliable cookbook.
■Is the proper oven temperature calibration set? See “Oven
Temperature Control”section.
■Was the oven preheated? See “Bake”section.
■Is the proper bakeware being used? See “Bakeware”
section.
■Are the racks positioned properly? See “Positioning Racks
and Bakeware”section.
■Is there proper air circulation around bakeware? See
“Positioning Racks and Bakeware”section.
■Is the batter evenly distributed in the pan? Check to make
sure batter is level in the pan.
■Is the proper length of time being used? Adjust cooking
time.
■Has the oven door been opened while cooking? Oven
peeking releases oven heat and can result in longer cooking
times.
■Are baked items too brown on the bottom? Move rack to
higher position in the oven.
■Are pie crust edges browning early? Use aluminum foil to
cover the edge of the crust.

15
SÉCURITÉDE LA CUISINIÈRE
La bride antibasculement
Dans les conditions de service normales, la cuisinière ne bascule pas. Elle peut cependant basculer si une force ou un poids excessif
est appliquésur la porte ouverte alors que la bride antibasculement n’est pas convenablement fixée.
Risque possible de décès ou de blessure grave si
Risque possible de décès ou de blessure grave
si vous ne suivez pas les instructions.
Tous les messages de sécurité vous diront quel est le danger potentiel et vous disent comment réduire le risque de
qui peut se produire en cas de non-respect des instructions.
Votre sécurité et celle des autres est très importante.
Nous donnons de nombreux messages de sécurité importants dans ce manuel et sur votre appareil ménager.
Ce symbole d’alerte de sécurité vous signale les dangers potentiels de décès et de blessures graves
Tous les messages de sécurité suivront le symbole d’alerte de sécurité et le mot “DANGER” ou
“AVERTISSEMENT”. Ces mots signifient :
DANGER
AVERTISSEMENT
Assurez-vous de toujours lire tous les messages de sécurité et de vous y conformer.
à vous et à d’autres.
Voici le symbole d’alerte de sécurité.
vous ne suivez pas immédiatement les instructions.
blessure et ce
Risque de basculement
Un enfant ou une personne adulte peut faire basculer la cuisinière ce qui peut causer
un décès.
Joindre la bride antibasculement au pied arrière de la cuisinière.
Joindre de nouveau la bride antibasculement si la cuisinière est déplacée.
Voir détails dans les instructions d'installation.
Le non-respect de ces instructions peut causer un décès ou des brûlures graves aux
enfants et aux adultes.
AVERTISSEMENT
La bride antibasculement
Assurez-vous qu'une bride antibasculement est installée :
•Glisser la cuisinière vers l'avant.
•Vérifier que la bride antibasculement est bien fixée au plancher.
•Glisser de nouveau la cuisinière vers l'arrière de sorte que le pied est sous la bride
antibasculement.
Le pied de la cuisinière

16
CONSERVEZ CES INSTRUCTIONS
AVERTISSEMENT : Pour réduire le risque
d’incendie, de choc électrique, de blessures ou de
dommages lors de l’utilisation de la cuisinière, il
convient d’observer certaines précautions élémentaires
dont les suivantes :
■AVERTISSEMENT : POUR MINIMISER LE
RISQUE DE BASCULEMENT DE LA CUISINIÈRE,
ELLE DOIT ÊTRE BIEN IMMOBILISÉE PAR DES
DISPOSITIFS ANTIBASCULEMENT CORRECTE-
MENT INSTALLÉS. POUR VÉRIFIER SI LES
DISPOSITIFS SONT CORRECTEMENT
INSTALLÉS, GLISSER LA CUISINIÈRE VERS
L’AVANT ET VÉRIFIER SI LA BRIDE ANTIBAS-
CULEMENT EST BIEN FIXÉE AU PLANCHER, ET
GLISSER LA CUISINIÈRE VERS L’ARRIÈRE POUR
QUE LE PIED ARRIÈRE DE LA CUISINIÈRE SOIT
SOUS LA BRIDE ANTIBASCULEMENT.
■MISE EN GARDE : Ne pas remiser dans des
armoires au-dessus de la cuisinière ou sur le
dosseret d’une cuisinière, des objets que des enfants
pourraient vouloir atteindre. Les enfants pourraient
se brûler ou se blesser en grimpant sur la cuisinière.
■Installation appropriée –S’assurer que la cuisinière
est correctement installée et reliée àla terre par un
technicien qualifié.
■Ne jamais utiliser la cuisinière pour réchauffer ou
chauffer la pièce.
■Ne pas laisser les enfants seuls –Les enfants ne
doivent pas être laissés seuls ou sans surveillance
dans la pièce oùla cuisinière est en service. Ne
jamais laisser les enfants s’asseoir ou se tenir sur
une partie quelconque de la cuisinière.
■Porter des vêtements appropriés –Des vêtements
amples ou détachés ne doivent jamais être portés
pendant l’utilisation de la cuisinière.
■Entretien par l’utilisateur –Ne pas réparer ni
remplacer toute pièce de la cuisinière si ce n’est pas
spécifiquement recommandédans le manuel. Toute
autre opération d’entretien ou de réparation doit être
confiée àun technicien qualifié.
■Remisage dans ou sur la cuisinière –Des matériaux
inflammables ne doivent pas être remisés dans un
four ou près des éléments de surface.
■Ne pas utiliser d’eau pour éteindre un feu de graisse
–Étouffer le feu ou les flammes ou utiliser un
extincteur àproduits chimiques secs, ou un
extincteur àmousse.
■N’utiliser que des mitaines sèches de four –Des
mitaines de four mouillées ou humides sur des
surfaces chaudes peuvent provoquer des brûlures
provenant de la vapeur. Ne pas laisser les mitaines de
four toucher les éléments chauffants. Ne pas utiliser
une serviette ou un tissu épais.
IMPORTANTES INSTRUCTIONS DE SÉCURITÉ
■NE PAS TOUCHER LES ÉLÉMENTS DE SURFACE
OU L’ESPACE PRÈS DES ÉLÉMENTS –Les
éléments de surface peuvent être chauds même
lorsqu’ils ont une teinte foncée. Les endroits près des
éléments de surface peuvent devenir assez chauds
pour causer des brûlures. Pendant et après
l’utilisation, ne pas toucher les éléments chauffants et
ne pas laisser les vêtements ou autres matériaux
inflammables entrer en contact avec ces éléments de
surface ou les endroits près des éléments, avant
qu’ils soient suffisamment refroidis. Ces endroits
comprennent la table de cuisson et les surfaces près
de la table de la cuisson.
■Utiliser des ustensiles de dimension appropriée –La
cuisinière est munie d’un ou de plusieurs éléments
chauffants de différentes grandeurs. Choisir les
ustensiles qui ont un fond plat assez grand pour
couvrir l’élément chauffant de la surface de cuisson.
L’utilisation d’ustensiles trop petits exposera une
partie de l’élément chauffant, ce qui peut provoquer
l’inflammation des vêtements. L’utilisation d’un
récipient de dimension correcte améliore aussi
l’efficacitéde la cuisson.
■Ne jamais laisser les éléments de la table de cuisson
sans surveillance alors qu’ils chauffent àla puissance
maximale. Il pourrait en résulter une ébullition qui
cause de la fumée et des renversements de corps
gras qui peuvent s’enflammer.
■S’assurer que les cuvettes réfléchissantes ou les bols
de renversement sont en place –L’absence de ces
cuvettes ou bols au cours de la cuisson peut causer
des dommages aux fils ou aux composants en
dessous des éléments.
■Garnissages protecteurs –Ne pas recouvrir les
cuvettes ou le fond du four de papier d’aluminium
sauf tel que suggérédans le manuel. L’installation
incorrecte de papier d’aluminium ou d’autre matériau
peut causer un risque de choc électrique ou
d’incendie.
■Ustensiles de cuisson vitrifiés –Seulement certains
types d’ustensiles de verre, vitrocéramique,
céramique, faïence ou autres surfaces vitrifiées
conviennent pour le service sur une table de cuisson,
sans bris attribuables aux changements soudains de
température.
■Les poignées des ustensiles doivent être tournées
vers l’intérieur et non vers le dessus des éléments
adjacents –Pour réduire le risque de brûlures,
d’inflammation de produits inflammables et de
renversements dus àl’entrechoquement non
intentionnel des ustensiles, la poignée d’un ustensile
doit être positionnée de sorte qu’elle est tournée vers
l’intérieur et non au-dessus des éléments de surface
adjacents.

17
CONSERVEZ CES INSTRUCTIONS
■Ne pas tremper les éléments de chauffage amovibles
–Les éléments de chauffage ne doivent jamais être
immergés dans l’eau.
■Ne pas faire cuire sur une table de cuisson
endommagée –Si la table de cuisson est brisée, les
solutions de nettoyage et les renversements peuvent
pénétrer dans la table de cuisson brisée et créer un
risque d’un choc électrique. Contacter immédiate-
ment un technicien qualifié.
■Nettoyer la table de cuisson avec prudence –Si une
éponge ou un chiffon mouilléest utilisépour essuyer
les renversements sur une surface de cuisson
chaude, éviter les brûlures causées par la vapeur
chaude. Certains nettoyants peuvent produire des
émanations désagréables lorsqu’ils sont utilisés sur
une surface chaude.
■Exercer une grande prudence lors de l’ouverture de
la porte –Laisser l’air chaud ou la vapeur s’échapper
avant d’enlever ou de replacer un plat.
■Ne pas faire chauffer des contenants fermés –
L’accumulation de pression peut causer une
explosion du contenant et des blessures.
■Ne jamais obstruer les ouvertures des évents.
■Positionnement des grilles du four –Toujours placer
les grilles du four en position désirée pendant que le
four est froid. Si la grille doit être déplacée pendant
que le four est chaud, ne pas laisser les mitaines de
four toucher l’élément chaud du four.
■NE PAS TOUCHER LES ÉLÉMENTS CHAUFFANTS
OU LES SURFACES INTÉRIEURES DU FOUR –
Les éléments chauffants peuvent être chauds même
s’ils ont une teinte foncée. Les surfaces intérieures
d’un four deviennent assez chaudes pour causer des
brûlures. Pendant et après l’utilisation, ne pas
IMPORTANTES INSTRUCTIONS DE SÉCURITÉ
toucher ou laisser des vêtements ou autres matériaux
inflammables venir en contact avec les éléments
chauds ou les surfaces intérieures chaudes du four
avant qu’ils aient eu assez de temps pour refroidir.
D’autres surfaces de l’appareil peuvent devenir assez
chaudes pour causer des brûlures. Ces surfaces
comprennent les ouvertures de l’évent du four et les
surfaces près de ces ouvertures, les portes du four,
et les hublots des portes du four.
Pour les cuisinières avec programme
d’autonettoyage –
■Ne pas nettoyer le joint de la porte –Le joint de la
porte est essentiel pour l’étanchéité. Veiller àne pas
frotter, endommager ou déplacer le joint.
■Ne pas utiliser des produits commerciaux de
nettoyage du four –On ne doit pas utiliser un produit
commercial de nettoyage de four ou un enduit de
protection des surfaces internes du four quel qu’en
soit le type, sur les surfaces du four ou les surfaces
voisines.
■Nettoyer uniquement les pièces indiquées dans le
manuel.
■Avant d’exécuter le programme d’autonettoyage du
four –Ôter la lèchefrite et son plat et les autres
ustensiles.
Pour les appareils avec hotte de ventilation –
■Nettoyer les hottes de ventilation fréquemment –
La graisse ne doit pas s’accumuler sur la hotte ou le
filtre.
■Lorsque vous flambez des aliments sous la hotte,
mettre le ventilateur en marche.

18
UTILISATION DE LA TABLE DE CUISSON
Commandes de la table de cuisson
Les boutons de commande peuvent être réglés àn'importe
quelle position entre HI et LO. Pousser et tourner le bouton au
réglage. Sur certains modèles, l'indicateur de zone de cuisson à
la surface indique quel élément est allumé. Utiliser le tableau
suivant comme guide lors du réglage des niveaux de chaleur.
Éléments en spirale et cuvettes des
brûleurs
(sur certains modèles)
Les éléments en spirale devraient être àniveau pour une cuisson
idéale. Les cuvettes de brûleurs lorsqu’elles sont propres
réfléchissent la chaleur sur l’ustensile de cuisson. Elles aident
également àcontenir les renversements.
Les ustensiles de cuisson ne devraient pas dépasser l’élément en
spirale de plus de 1 po (2,5 cm). Si l’ustensile de cuisson est de
forme irrégulière ou trop gros, il peut produire une chaleur
excessive causant la décoloration des cuvettes des brûleurs.
Pour plus de renseignements, voir la section “Nettoyage
général”.
Avant d’enlever ou de réinstaller les éléments en spirale et les
cuvettes de brûleurs, s’assurer qu’ils sont froids et que les
boutons de commande sont en position d’arrêt.
Enlèvement :
1. Pousser le bord de l’élément en spirale vers la prise. Puis le
soulever juste assez pour éviter la cuvette du brûleur.
2. Tirer l’élément tout droit hors de la prise.
3. Soulever la cuvette du brûleur.
Réinstallation :
1. Aligner les ouvertures de la cuvette du brûleur avec la prise
de l’élément.
2. Tenir l’élément le plus possible au niveau, et pousser
doucement la fiche de l’élément dans la prise.
3. Lorsque la fiche de l’élément est enfoncée jusqu’au fond,
appuyer sur les rebords de l’élément àl’opposéde la prise.
RÉGLAGE UTILISATION RECOMMANDÉE
HI ■Pour commencer la cuisson des
aliments.
■Pour porter un liquide à
ébullition.
6-8
[MED- HI]
■Pour maintenir une ébullition
rapide.
■Pour brunir ou saisir rapidement
les aliments.
5
[MED]
■Pour maintenir une ébullition
lente.
■Pour faire frire ou sauter les
aliments.
■Pour cuire les soupes et les
sauces.
2-4
[MED- LO]
■Pour faire mijoter ou étuver les
aliments.
■Pour faire mijoter lentement.
LO ■Pour garder les aliments au
chaud.
■Pour faire fondre le chocolat ou
le beurre.
AVERTISSEMENT
Risque d'incendie
Fermer tous les réglages lorsque la cuisson est
terminée.
Le non-respect de cette instruction peut causer
un décès ou un incendie.
N’OUBLIEZ PAS : Quand l’appareil est utiliséou (sur
certains modèles) durant le programme d’autonetto-
yage, toute la surface de la table de cuisson peut
devenir chaude.

19
Table de cuisson relevable
(sur certains modèles)
La table de cuisson relevable permet d’accéder facilement en-
dessous pour le nettoyage. Ne pas l’echapper ce qui risque
d’endommager le fini et le châssis de la table de cuisson. Pour
plus de renseignements, voir la section “Nettoyage général”.
Pour soulever :
Soulever le devant de la table de cuisson aux deux coins avant
jusqu’à ce que les tiges d'appui se bloquent en place.
Pour réinstaller :
1. Soulever la table de cuisson par les deux côtés tout en
appuyant sur les tiges d'appui vers l’arrière pour les
débloquer.
2. Abaisser lentement la table de cuisson en place.
Préparation de conserves àla maison
Lors de la préparation de conserves pendant de longues
périodes, alterner l’utilisation des surfaces de cuisson, des
éléments ou des brûleurs de surface entre les quantités
préparées. Cette alternance permet aux dernières surfaces
utilisées de refroidir.
■Centrer l’autoclave sur la grille ou la plus grande surface de
cuisson ou sur le plus grand élément. L’autoclave ne doit pas
dépasser plus de 1 po (2,5 cm) hors de la surface de cuisson.
■Ne pas placer l’autoclave sur deux surfaces de cuisson, deux
éléments ou deux brûleurs de surface àla fois.
■Sur les modèles àvitrocéramique, n’utiliser que des
autoclaves àfond plat.
■Sur les modèles àéléments en spirale, l’installation d’un
nécessaire de préparation de conserves est recommandé. La
non-installation risque de raccourcir la vie utile de l’élément
en spirale.
■Pour plus de renseignements, communiquez avec votre
service local d'agriculture. Les compagnies qui fabriquent
des produits pour la préparation de conserves peuvent aussi
offrir de l’aide.
Ustensiles de cuisson
IMPORTANT : Ne jamais laisser un ustensile de cuisson vide sur
la surface d’une table de cuisson, d’un élément ou d’un brûleur
de surface chauds.
Les ustensiles de cuisson idéals doivent avoir un fond plat, des
parois droites, un couvercle qui ferme bien et le matériau doit être
d’épaisseur moyenne àforte.
Les surfaces rudes peuvent égratigner la table de cuisson.
L'aluminium et le cuivre peuvent être employés comme fond ou
base dans un ustensile de cuisson. Cependant, utilisés comme
base, ils peuvent laisser des marques permanentes sur la table
de cuisson ou les grilles.
Le matériau d’un ustensile de cuisson affecte la rapiditéet
l’uniformitéde la transmission de la chaleur, et contribue aux
résultats de cuisson. Un fini antiadhésif a les mêmes
caractéristiques que son matériau de base. Par exemple, un
ustensile de cuisson en aluminium avec un fini antiadhésif aura
les propriétés de l’aluminium.
Utiliser le tableau suivant comme guide pour les caractéristiques
du matériau d’ustensile de cuisson.
USTENSILE CARACTÉRISTIQUES
Aluminium ■Chauffe rapidement et uniformément.
■Convient àtous les genres de
cuisson.
■L’épaisseur moyenne ou forte
convient le mieux pour la plupart des
tâches de cuisson.
Fonte ■Chauffe lentement et uniformément.
■Convient pour le brunissage et la
friture.
■Maintient la chaleur pour une cuisson
lente.
Céramique ou
vitrocéramique
■Suivre les instructions du fabricant.
■Chauffe lentement mais inégalement.
■Les meilleurs résultats sont obtenus
sur les réglages de chaleur basse à
moyenne.
Cuivre ■Chauffe très rapidement et
également.
Marmite en
terre cuite
■Suivre les instructions du fabricant.
■Utiliser des réglages de température
basse.
Acier émailléen
porcelaine ou
fonte émaillée
■Voir acier inoxydable ou fonte.
Acier
inoxydable
■Chauffe rapidement, mais
inégalement.
■Un fond ou une base d’aluminium ou
de cuivre sur l’acier inoxydable
procure un chauffage égal.

20
COMMANDE ÉLECTRONIQUE DU FOUR
Affichage
Lorsqu'on branche la cuisinière pour la première fois, ou après
une panne de courant, “12:00”clignotera sur l'affichage jusqu'à
ce que la touche (le bouton) CLOCK soit enfoncée.
Lorsqu'on utilise le four, l'affichage indique la durée de
préchauffage, la température et le réglage du four.
Lorsque le four n'est pas en marche, l'affichage indique l'heure
du jour.
Lors de l'utilisation de la MINUTERIE, pour des réglages de 1 à
59 minutes, l'afficheur compte àrebours en secondes. Pour les
réglages de 1 heure ou plus, l'afficheur compte àrebours en
heures et minutes.
Lors de l'utilisation de COOK TIME (durée de cuisson), l'afficheur
indique les heures et les minutes.
Horloge
Réglage de l'horloge
1. Appuyer sur la touche (bouton) CLOCK (horloge).
2. Appuyer sur la touche (bouton) “vers le haut”ou “vers le bas”
jusqu'àce que l'heure exacte apparaisse sur l'afficheur.
3. Chaque fois que l'on appuie sur la ou les touche(s) ou
bouton(s), ceci modifiera l'heure affichée de 1 minute. Si l'on
maintient un bouton enfoncé, l'heure affichée sera modifiée
par tranches de 10 minutes. Le mode Réglage de l'horloge
passe automatiquement au mode d'affichage de l'heure
60 secondes après le dernier changement de données.
REMARQUE : Lorsqu'on branche la cuisinière pour la première
fois, ou après une panne de courant, “12:00”clignotera sur
l'affichage jusqu'àce que la touche (le bouton) CLOCK soit
enfoncée.
Utilisation de la minuterie
La minuterie ne met pas en marche et n'arrête pas le four. Elle
fonctionne comme une minuterie ordinaire indépendamment du
four pour minuter ce que vous souhaitez. La minuterie peut être
réglée par tranches de 1 minute jusqu'à12 heures.
Pour utiliser la minuterie :
1. Appuyer sur la touche (bouton) TIMER (minuterie).
2. Appuyer sur la touche (bouton) “vers le haut”ou “vers le bas”
pour régler la MINUTERIE. La minuterie se mettra en marche
automatiquement 5 secondes après que l'heure soit entrée.
Le “témoin TIMER”s'allumera pour indiquer que la minuterie
est affichée. Lorsqu'il restera moins de 1 minute, un bip
retentira et l'affichage indiquera le compte àrebours des
secondes restantes.
Pour retourner àl'heure du jour :
1. Appuyer sur la touche (bouton) CLOCK pour retourner à
l'heure du jour. L'heure sera affichée pendant 5 secondes
puis retournera àl'affichage de la minuterie.
2. Àla fin du programme de minuterie, 4 bips retentiront et
“End”(fin) sera affichéjusqu'àce qu'une touche (bouton) soit
enfoncée.
Pour annuler la minuterie :
Appuyer deux fois sur TIMER ou appuyer et maintenir la touche
(bouton) “vers le bas”enfoncée jusqu'àce que 0:00 apparaisse.
L'affichage de l'heure du jour sera rétabli dans les 5 secondes.
Commande de la température du four
IMPORTANT : Ne pas utiliser un thermomètre pour mesurer la
température du four car l'ouverture de la porte du four et le
fonctionnement par intermittence de l'élément ou du brûleur
peuvent donner des mesures incorrectes.
Le four fournit des températures précises; toutefois, il peut cuire
plus rapidement ou plus lentement que votre ancien four, de
sorte que le calibrage de la température peut être ajusté. Il peut
être changéen degrés Fahrenheit ou Celsius.
Un signe moins signifie que le four sera plus froid du nombre de
degrés affiché. Aucun signe signifie que le four sera plus chaud
du nombre de degrés affiché. Se servir du tableau suivant
comme guide.
1. Electronic Display
1
AJUSTEMENT EN °F
(AJUSTEMENT EN °C) CUIT LES ALIMENTS
5°à10°F (3°à6°C) ...un peu plus
15°à20°F (9°à12°C) ...modérément plus
25°à35°F (15°à21°C) ...beaucoup plus
-5°à-10°F (-3°à-6°C) ...un peu moins
-15°à-20°F (-9°à-12°C) ...modérément moins
-25°à-35°F (-15°à-21°C) ...beaucoup moins
Table of contents
Languages:
Other Whirlpool Stove manuals
Popular Stove manuals by other brands

Woodstock Soapstone
Woodstock Soapstone Cottage Franklin 207 owner's manual

Vogelzang International
Vogelzang International Lit'l Sweetie BX22EL owner's manual

Savoie
Savoie 174 08 02 Technical manual

Enviro
Enviro EF-119 owner's manual

Dovre
Dovre 425 GA Installation instructions and operating manual

Monaco
Monaco 134 06 02 Technical manual

EdilKamin
EdilKamin Extra Series Installation, use and maintenance

Dimplex
Dimplex EOS-2006 Practical user's guide

USSC
USSC 1864 owner's manual

Crown Royal Stoves
Crown Royal Stoves RS7200 owner's manual

Heartland Appliances
Heartland Appliances Oval 1902 Installation and operating instructions

Hi-Flame
Hi-Flame HF-717UA Installation and operation instructions