manuals.online logo
Brands
  1. Home
  2. •
  3. Brands
  4. •
  5. Whirlpool
  6. •
  7. Washer
  8. •
  9. Whirlpool CAM2762KQ User manual

Whirlpool CAM2762KQ User manual

Other Whirlpool Washer manuals
Whirlpool LSR6334LQ1 User manual

Whirlpool

Whirlpool LSR6334LQ1 User manual

Whirlpool AWM05801 User manual

Whirlpool

Whirlpool AWM05801 User manual

Whirlpool FSCR12433 User manual

Whirlpool

Whirlpool FSCR12433 User manual

Whirlpool 3XLA87W72AN0 User manual

Whirlpool

Whirlpool 3XLA87W72AN0 User manual

Whirlpool 8539782 User manual

Whirlpool

Whirlpool 8539782 User manual

Whirlpool W10722908B User manual

Whirlpool

Whirlpool W10722908B User manual

Whirlpool Cabrio WTW5700AC Assembly instructions

Whirlpool

Whirlpool Cabrio WTW5700AC Assembly instructions

Whirlpool W10150593A User manual

Whirlpool

Whirlpool W10150593A User manual

Whirlpool Inglis IAS5000RQ2 User manual

Whirlpool

Whirlpool Inglis IAS5000RQ2 User manual

Whirlpool WTW8200Y Series Parts list manual

Whirlpool

Whirlpool WTW8200Y Series Parts list manual

Whirlpool WFW86HEBW2 User manual

Whirlpool

Whirlpool WFW86HEBW2 User manual

Whirlpool LCE4332P User instructions

Whirlpool

Whirlpool LCE4332P User instructions

Whirlpool 3366875 User manual

Whirlpool

Whirlpool 3366875 User manual

Whirlpool Duet WFW9470WW User manual

Whirlpool

Whirlpool Duet WFW9470WW User manual

Whirlpool XW29000V User manual

Whirlpool

Whirlpool XW29000V User manual

Whirlpool LXR9445JQ0 User manual

Whirlpool

Whirlpool LXR9445JQ0 User manual

Whirlpool AUTOMATIC WASHER W10314723 User manual

Whirlpool

Whirlpool AUTOMATIC WASHER W10314723 User manual

Whirlpool cabrio W10560173B User manual

Whirlpool

Whirlpool cabrio W10560173B User manual

Whirlpool Cabrio,- WED7300X User manual

Whirlpool

Whirlpool Cabrio,- WED7300X User manual

Whirlpool LA6700XK User manual

Whirlpool

Whirlpool LA6700XK User manual

Whirlpool WFW87HEDW User manual

Whirlpool

Whirlpool WFW87HEDW User manual

Whirlpool WASHER User manual

Whirlpool

Whirlpool WASHER User manual

Whirlpool WRBSB 6249 W EU User manual

Whirlpool

Whirlpool WRBSB 6249 W EU User manual

Whirlpool WTW5790SQ2 User manual

Whirlpool

Whirlpool WTW5790SQ2 User manual

Popular Washer manuals by other brands

Zanussi ZWF 14080 W user manual

Zanussi

Zanussi ZWF 14080 W user manual

Zanussi FV 825 N Instruction booklet

Zanussi

Zanussi FV 825 N Instruction booklet

LG WM8000HVA Specifications

LG

LG WM8000HVA Specifications

Zanussi TJ 1284 H instruction manual

Zanussi

Zanussi TJ 1284 H instruction manual

AEG KO-LAVAMAT 74740 User information

AEG

AEG KO-LAVAMAT 74740 User information

Beko WSRE7512PRA user manual

Beko

Beko WSRE7512PRA user manual

Miele PW 6207 operating instructions

Miele

Miele PW 6207 operating instructions

GE GE Profile WWSE3160AAA Specifications

GE

GE GE Profile WWSE3160AAA Specifications

Bush WMNB712EB instruction manual

Bush

Bush WMNB712EB instruction manual

ALLIANCE UW60AV Information manual

ALLIANCE

ALLIANCE UW60AV Information manual

Bosch WAN280H3 User manual and installation instructions

Bosch

Bosch WAN280H3 User manual and installation instructions

Maytag MAT15MNAW installation instructions

Maytag

Maytag MAT15MNAW installation instructions

LG T2109VSAL owner's manual

LG

LG T2109VSAL owner's manual

Indesit IWC 61481 Instructions for use

Indesit

Indesit IWC 61481 Instructions for use

Electrolux EWF12843 user manual

Electrolux

Electrolux EWF12843 user manual

Indesit WIN 70 Instructions for use

Indesit

Indesit WIN 70 Instructions for use

Bosch WGB25400BY User manual and installation instructions

Bosch

Bosch WGB25400BY User manual and installation instructions

Coltene SciCan HYDRIM C61W G4 Operator's manual

Coltene

Coltene SciCan HYDRIM C61W G4 Operator's manual

manuals.online logo
manuals.online logoBrands
  • About & Mission
  • Contact us
  • Privacy Policy
  • Terms and Conditions

Copyright 2025 Manuals.Online. All Rights Reserved.

1
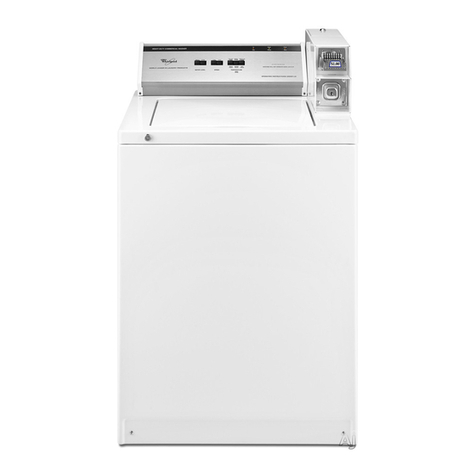
WHIRLPOOL CAM2762KQ WASHER
INSTALLATION INSTRUCTIONS
FOR DEBITEK SLIM READER
Remove the two screws on either side of the machine backsplash
(Fig. 1) and raise the backsplash to gain access to the wiring har-
ness. The access cover on the meter housing should also be re-
moved.
Fig. 1
Locate the two mounting screws for the
machine timer inside the meter housing (Fig.
2). Loosen the screws. They do not need to
be completely removed. Lift up on the timer
assembly and remove it from the meter
housing. It may be necessary to remove the
two harness plugs on the back of the timer in
order to accomplish this step. Press in on the
clips on either side of the timer plugs to
release them and carefully detach them from
the timer.
Fig. 2
Fig. 3
Locate the beige jumper wire attached to the
bottom plug (Fig. 3). The end of this wire may be
taped to the harness. If the wire is not already
connected to the upper plug (black), the terminal
on this wire must be installed in the upper plug in
order for the machine to operate.
2
Fig. 4
Looking at the rear of the upper plug, the
connector on the beige jumper should be
inserted into the empty slot located in the
second position from the left on the top row.
This position should have a black wire with
a white stripe directly below it. (Fig. 4)
Once this has been completed, replace the
timer and secure the mounting screws. Make
certain that the feature connection harness
from the bottom plug is not pinched under-
neath the timer assembly and is easily
accessible from the access opening in the
meter housing.
Locate the power transformer included
with the kit and secure it inside the
backsplash using the self-adhesive velcro
provided. Then connect the two-pin, white
Molex connector on the reader harness to
the matching power connector on the
machine (Fig.5). This connector is located
in the main wiring harness inside the
backsplash and may be taped. It will be
necessary to remove the dummy plug on
the end of the connector prior to attaching
the reader harness.
Fig. 6
Attach the 110-volt connections on the Debitek
transformer to the reader harness. These are the two
large connectors on the transformer on the ends of the
thickest wire. Corresponding attachment points on the
reader harness have a yellow and black wire on one
and a single white wire on the other. The connections
are not polarized and may be connected to either wire
on the transformer.
Attach the remaining two wires on the transformer to
the red and black wires with matching connectors on
the reader harness . Again, polarity does not matter.
Fig. 5
3
Route the loose ends of the reader
harness through the hole in the
side of the backsplash area into the
meter housing and attach the
machine’s feature connector plug
(Fig.7) to the appropriate connec-
tor on the harness.
Fig. 7
Pull the end of the reader cable with the black Molex
connector through the coin slide opening (Fig. 8) and
plug it into the mating connector on the back of the
card reader. Then mount the card reader in the coin
slide opening using the supplied coin slide bolt.
Fig. 8
Secure all wiring with the supplied wire ties, ensuring that no part of the harness can interfere with the
rotating arm on the side of the timer assembly. Verify that all connections are correct according to the
included installation drawing. Close and secure the backsplash.
The unit can now be programmed and tested.After starting the machine should be allowed to complete
one full cycle and stop on its own to ensure that there are no issues with wiring or reader programming.