White 535 Operating instructions


You
are
now
the
owner
of
a
new
zigzag
sewing
machine,
the
most
versatile
machine of
its
type
you
can
possess.
Buttonholes,
Inonogramming
darning,
overcasting
and
creative
embroidery
are
done
with
ease
and
speed.
To
aid
you
in
obtaining
the
greatest
performance
from
your
machine
this
book
on
its
care
and
use
has
been
written
for
you.
Read
the
instruc
tions
carefully
as
a
thorough
understanding
will
reward
you
with many
hours
of
trouble-free
creative
sewing.
Time-saving
attachments
such
as
rufflers,
binders,
edgestitchers
and
cording
feet,
to
complement
the
accessories
furnished
are
available
from
your
dealer.
White
Sewing
Machine
Company
11750
Berea
Road
Cleveland.
Ohio
44111
White
Consolidated
Industries,
Ltd.
1470
Birchinount
Road
Scarborough,
Ontario,
Canada
.
:

INDEX
Pages
Accessores.23
How
to
Use
24
Hemmers
25
Seam
Gauge
or
Cloth
Guide
26
Quilting
Guide
26
Attachments
34
Adjustable
Cord
and
Zipper
Foot
40
Attachment
Foot
35
Binder
37
Edgestitcher
35
Hemmers 38-39
Ruffler
42
Blind
Stitching
18-19
Bobbin
Placing
in
Shuttle
7
Threading
Winding
5
Buttonholes
16
Buttons
Sew-On
22
Charts
Needle-Thread-Fabric-stitching
4
Pages
Stitch
Length
9
Trouble
30-31-32
Darning
and
Mending
11
Em
bra
ide
ry
Creative
Hoop
15
Features
and
Parts
(Front
View)
2
(Back View)
3
Installation-Head
in
Cabinet
48
Head
in
Portable
Case
46
Maintenance
and
Care
27
Cleaning
and
Oiling
the
Shuttle
“28
Needle
Setting
6
Pressure
and
Feeding
of
Fabric
11
Thin
and
Light
weight
Fabrics
11
Reverse
Sewing
9
Sewing
Preparatian
12
Sewing
Tips
4445
Straight
Stitching
13
Tension
Adjustment
10
Threading-Upper
8
k

2
1.
Thread
Take-up
Lever
2.
Pressure
Release.
(Darning)
3.
Arm
Thread
Guides.
4..
Pattern’s
Plate
5.
Pattern
Selection
Lever.
6.
Zigzag
Stitch
Width
Lock.
7.
Zigzag
Stitch
Width
Dial.
8.
Stitch
Width
Control
Knob
9.
Buttonhole
Control
Lever.
10.
Bobbin
Winder.
11.
F-land
Wheel
12.
Clutch
13.
Stitch
Length
Control.
14.
Bobbin
Winding
Tension
15.
Push
Button
Reverse.
16.
Drop
Feed
Buttons.
17.
Needle
Plate
18.
Presser
Foot
19.
Cover
Plate
20.
Presser
Foot
Thumb
Screw
21.
Needle
Clamp
22.
Thread
Bar
and
Guide
23.
Tension
Regulator.
24.
Sew
Lite
Switch
FEATURES
AND
PARTS
(Front
View)
Fig.
I

3
25.
Presser
Bar
Lifter
26.
Thread
Cutter
27.
Feed
Dog
28.
Read
Ringe
Mounting
Roles
29.
Spool
Pins
30.
Randle
FEATURES
AND
PARTS
(Back
View)
1.

NEEDLE-THREAD-FABRIC-STITCHING
GUIDE
‘-
----
Fabric
Needle
No.
Machine
Silk
Stitches
Cotton
Mercerized
or
Per
Inch
Thread
Thread
Nylon
Extremely
heavy
6
10
tarpaulin,
sacking,
4
to
to
Heavy
Duty
canvas,
duck,
etc.
8
30
Heavy upholstery
8
30
fabric,
ticking,
3
(18)
to
to
Heavy
Duty
denim,
leatheretfe
10
40
Medium
heavy
drapery
10
40
fcbrc,
velveteen,
2
(16) to
to
Heavy
Duty
suiting,
felt,
terry,
etc.
12
60
Medium
broadcloth,
12
60
percale,
gingham,
linen,
1
(14)
to to
50
A
chintz,
taffeta,
sheer
14
80
wool,
shantung,
etc.
14
80
Sheer
voile,
lawn,
dimity,
crepe,
to
to
50
A
handkerchief
linen,
0
(11)
16
100
plastic
film,
etc.
(Plastic
film)
8
to
10
Very
sheer
chiffon,
16
100
batiste,
lace,
organdy,
00
to
to
50
A
ninon,
net,
marquisett,
etc.
20
150

Disengage
hand
wheel
(5,
Fig.
3),
from
the
stitching
toward
you
or
counter
clockwise.
Place
a
spool
of thread
on
one
of
the
spool
pins.
guide
on
arm
and
down through
tension
disc(9,
Fig.
mechanism
by
turning
clutch
(6,
Fig.3)
Lead
thread
through
the
upper
thread
5,)at
base of
machine.
Run
end
of
threcid
through
a
hole
in
bobbin
edge
(left
flange
and
from
inside
out)
and
place
bobbin
on
spindle
of
bobbin
winder
(7,
Fig.
4,)
fitting
the
notch
bobbin
over
small
pin
on
spindle.
Push
bobbin
winder
against
hand
wheel.
Hold
thread
end
loosely
and
start
machine
slowly.
Bobbin
will
stop
winding
when
it
is
filled.
Turn
clutch
away
from
you
until
sewing
mechanism
is
again
engaged
so
that
needle
moves
when
you
turn
the hand
wheel.
Break
off
loose
thread
end
used
to
start
the
winding
and
thread
bobbin
as
stated
on
Page
6.
Fig,
3
Fig.
4
5
WINDING
THE
BOBBIN
‘I.—
Fig.
5
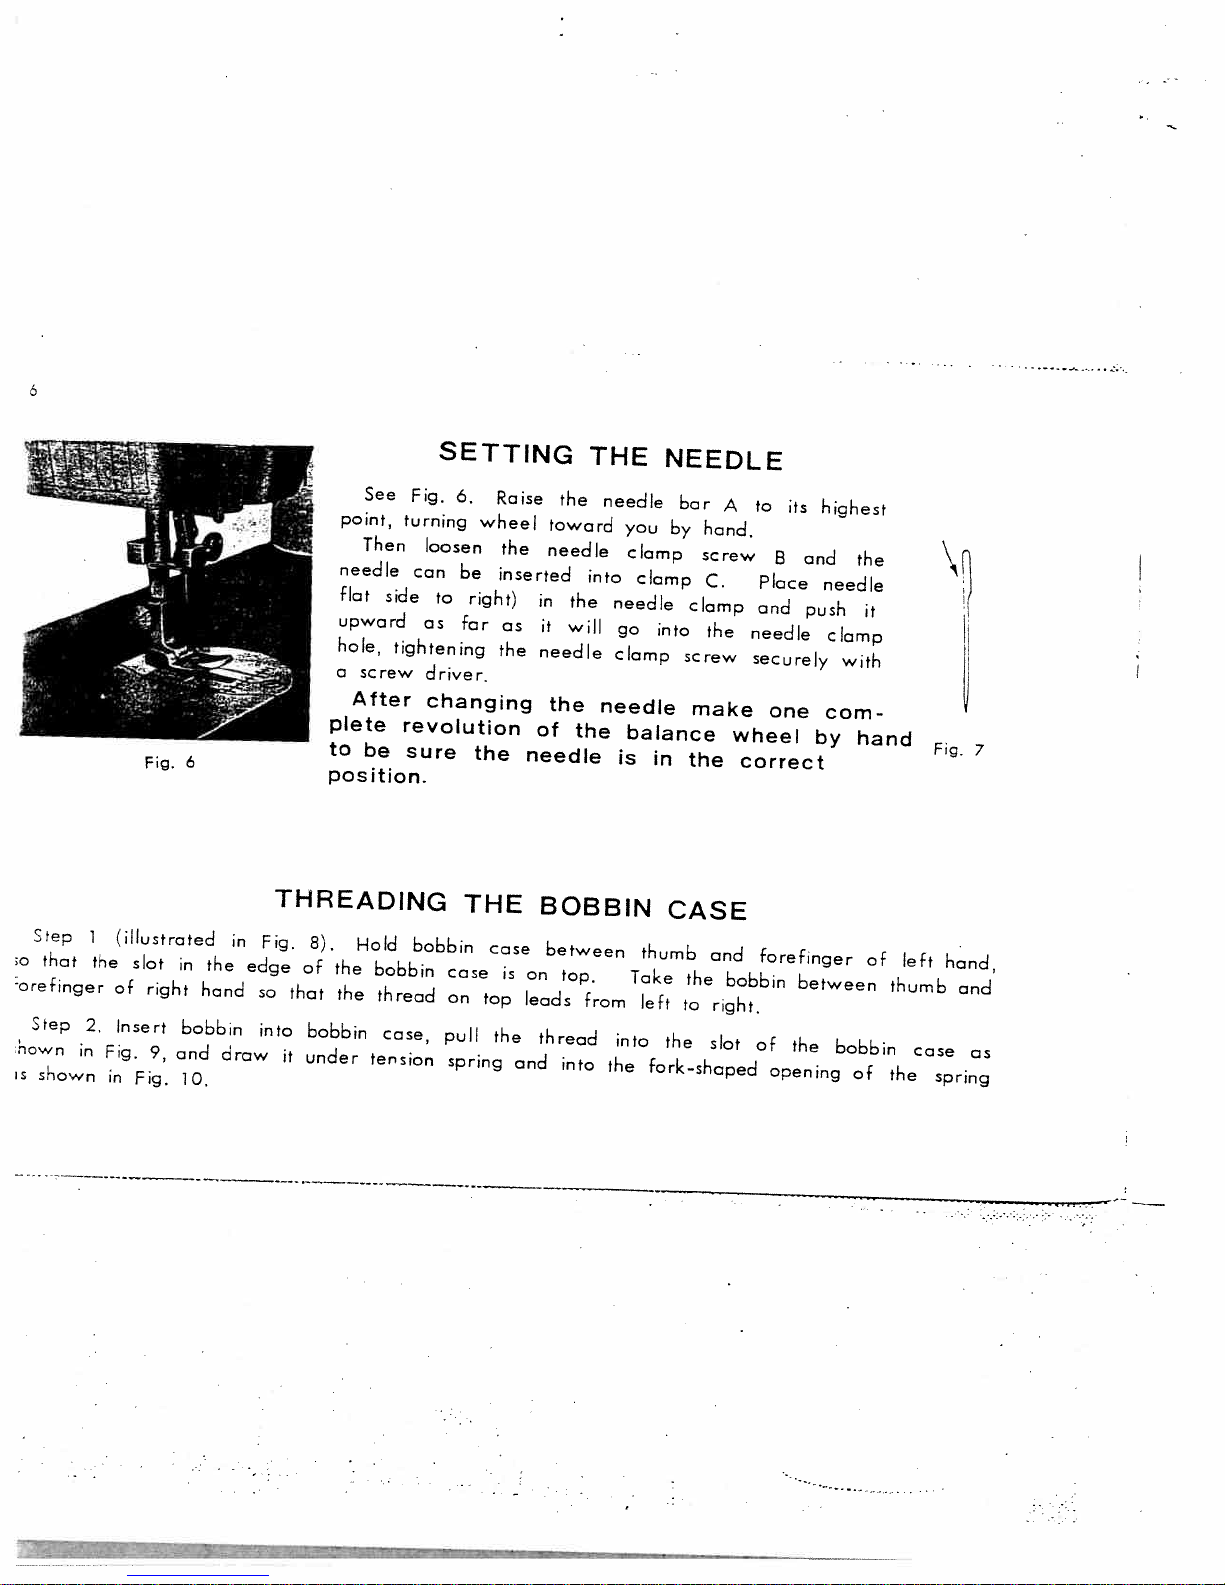
SETTING
THE
NEEDLE
See
Fig.
6.
Raise
the
needle
bar
A
to
its
highest
point,
turning
wheel
toward
you
by
hand.
Then
loosen the
needle
clamp screw
B
and the
needle
can
be
inserted
into
clamp
C.
Place
needle
flat
side
to
right)
in
the
needle
clamp
and
push
it
upward
as
far
as
it
will
go
into
the
needle
clamp
hole,
tightening
the
needle
clamp
screw securely
with
a
screw
driver.
After
changing
the
needle
make
one
com
plete
revolution
of
the
balance
wheel
by
hand
Fig.
7
to be
sure
the
needle
is
in
the
correct
Fig.
6
position.
THREADING
THE
BOBBIN
CASE
Step
1
(illustrated
in
Fig.
8).
old
bobbin
case
between
thumb
and
forefinger
of
left
hand,
;o
that
the
slot
in
the
edge
of
the
bobbin
case
is
on
top.
Take
the
bobbin
between
thumb
and
orefinger
of
right
hand
so
that
the
thread
on
top
leads
from left
to
right.
Step
2.
Insert
bobbin
into
bobbin
case,
pull
the
thread
into
the
slot
of
the
bobbin
case
as
hown
in
Fig.
9,
and
draw
it
under
tension
spring
and
into
the
fork-shaped
opening
of
the
spring
is
shown
in
Fig.
10.
-----.---.--
--
.--
--.-.---.-

7
PLACING
BOBBIN
CASE
IN
SHUTTLE
Raise
needle
bar
to
highest
position,
and
slide
cover
plate
to
the
left.
(See
19,
Fig.
1)
Hold
the
bobbin
case
latch,
(D,
Fig.
11)
between
the
thumb
and
forefinger
of
the
left
hand,
with
at
least
three
inches
of
thread
running
from
the
top
of
the
bobbin
case
to
the
right. Insert
and
center
the
bobbin
case
on
the
stud
of
the
shuttle
body,
(C).
Be
sure
the
bobbin
case
finger,
(E),
is
opposite
the
shuttle
race
notch
(A)
Press
the
bobbin
case
(B)
into
the
shuttle as
far
as
possible
until
latch
catches
on
the
center
post
of
the
shuttle.
THEN
release
the
bobbin
case
latch,
(D).
Press
bobbin
case
again
after
latch
has
been
released
to
make
sure
the
bobbin
case
is
ocked securely
in
place.
Close the
cover
plate.
TENSION
Fig.
B
Fig.
9
Fig.
10
A
C
Fig.
11
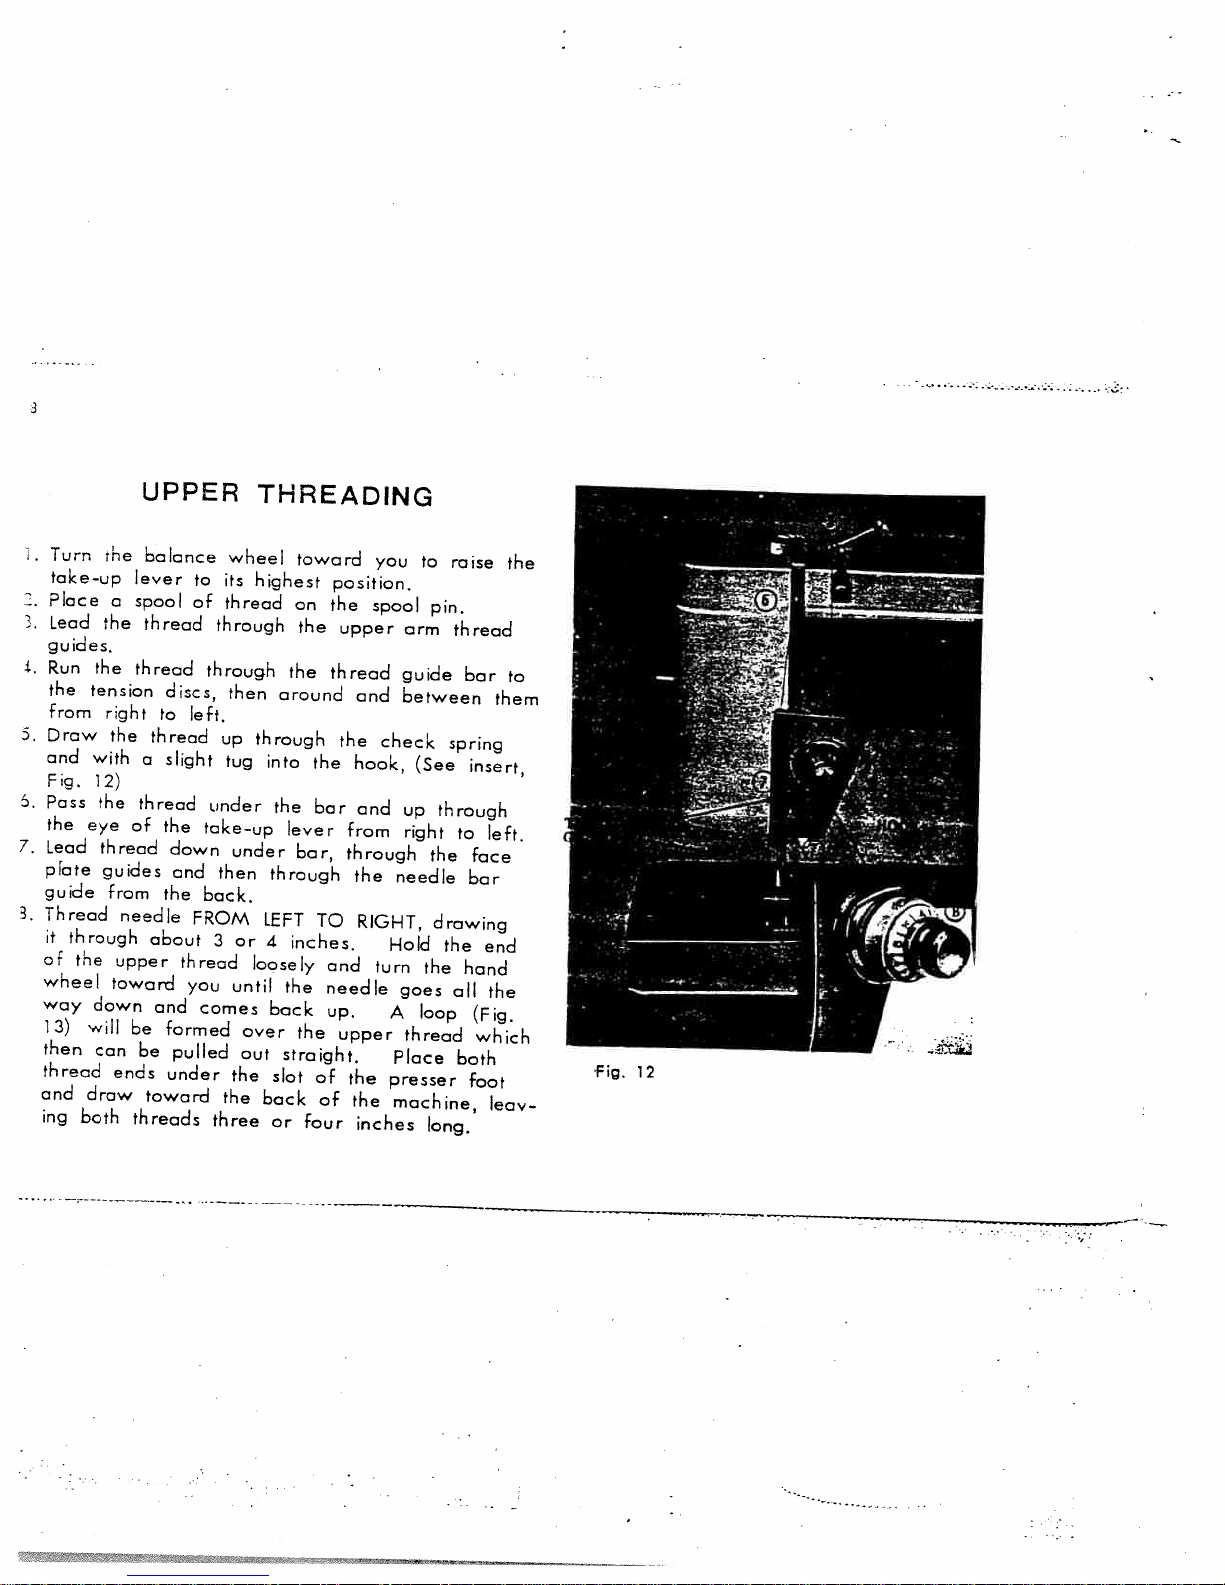
UPPER
THREADING
Turn
the
balance
wheel
toward
you
to
raise
the
take-up
lever
to
its
highest
position.
Place
a
spool
of
thread
on
the
spool
pin.
3,
Lead
the
thread
through
the
upper
arm
thread
g
u
e
s.
3.
Run
the
thread
through
the
thread
guide
bar
to
the
tension
discs,
then
around
and
between
them
from right
to
left.
3.
Draw
the
thread
up
through
the
check
spring
and
with
a
slight
tug into
the
hook,
(See
insert,
Fig.
12)
6.
Pass
the
thread under
the
bar
and
up
through
the
eye
of
the
take-up
lever
from
right
to
left.
7.
Lead
thread
down
under
bar,
through
the
face
plate
guides
and then
through
the
needle
bar
guide
from
the
back.
3.
Thread needle
FROM
LEFT
TO
RIGHT,
drawing
it
through
about
3
or
4
inches.
Hold
the end
of
the
upper thread
loosely
and
turn the
hand
wheel
toward
you
until
the
needle
goes
all the
way
down and
comes
bock
up.
A
loop (Fig.
13)
will
be
formed
over
the
upper
thread
which
then
can
be
pulled
out
straight.
Place
both
thread
ends
under
the
slot
of
the
presser
foot
and
draw
toward
the
bock
of
the
machine,
leav
ing
both
threads
three
or
four
inches
long.
fig.
12
Table of contents
Other White Sewing Machine manuals


