ADSL Loop Extender Installation Manual Page 7
This publication may not be reproduced in whole or in part without the express written permission of Widearea.
Tel:+8628-84207501 +8628-84207506
Three-core power cord without plug: used for DC48V power input, no polarity.
Three-core power cord with plug: used for AC110-240V power input.
Power output: 155V power output cable which is already connected to the terminal in wiring
box by factory.
Protection ground: Black protection ground wire should be connected to the protection
ground terminals.
○
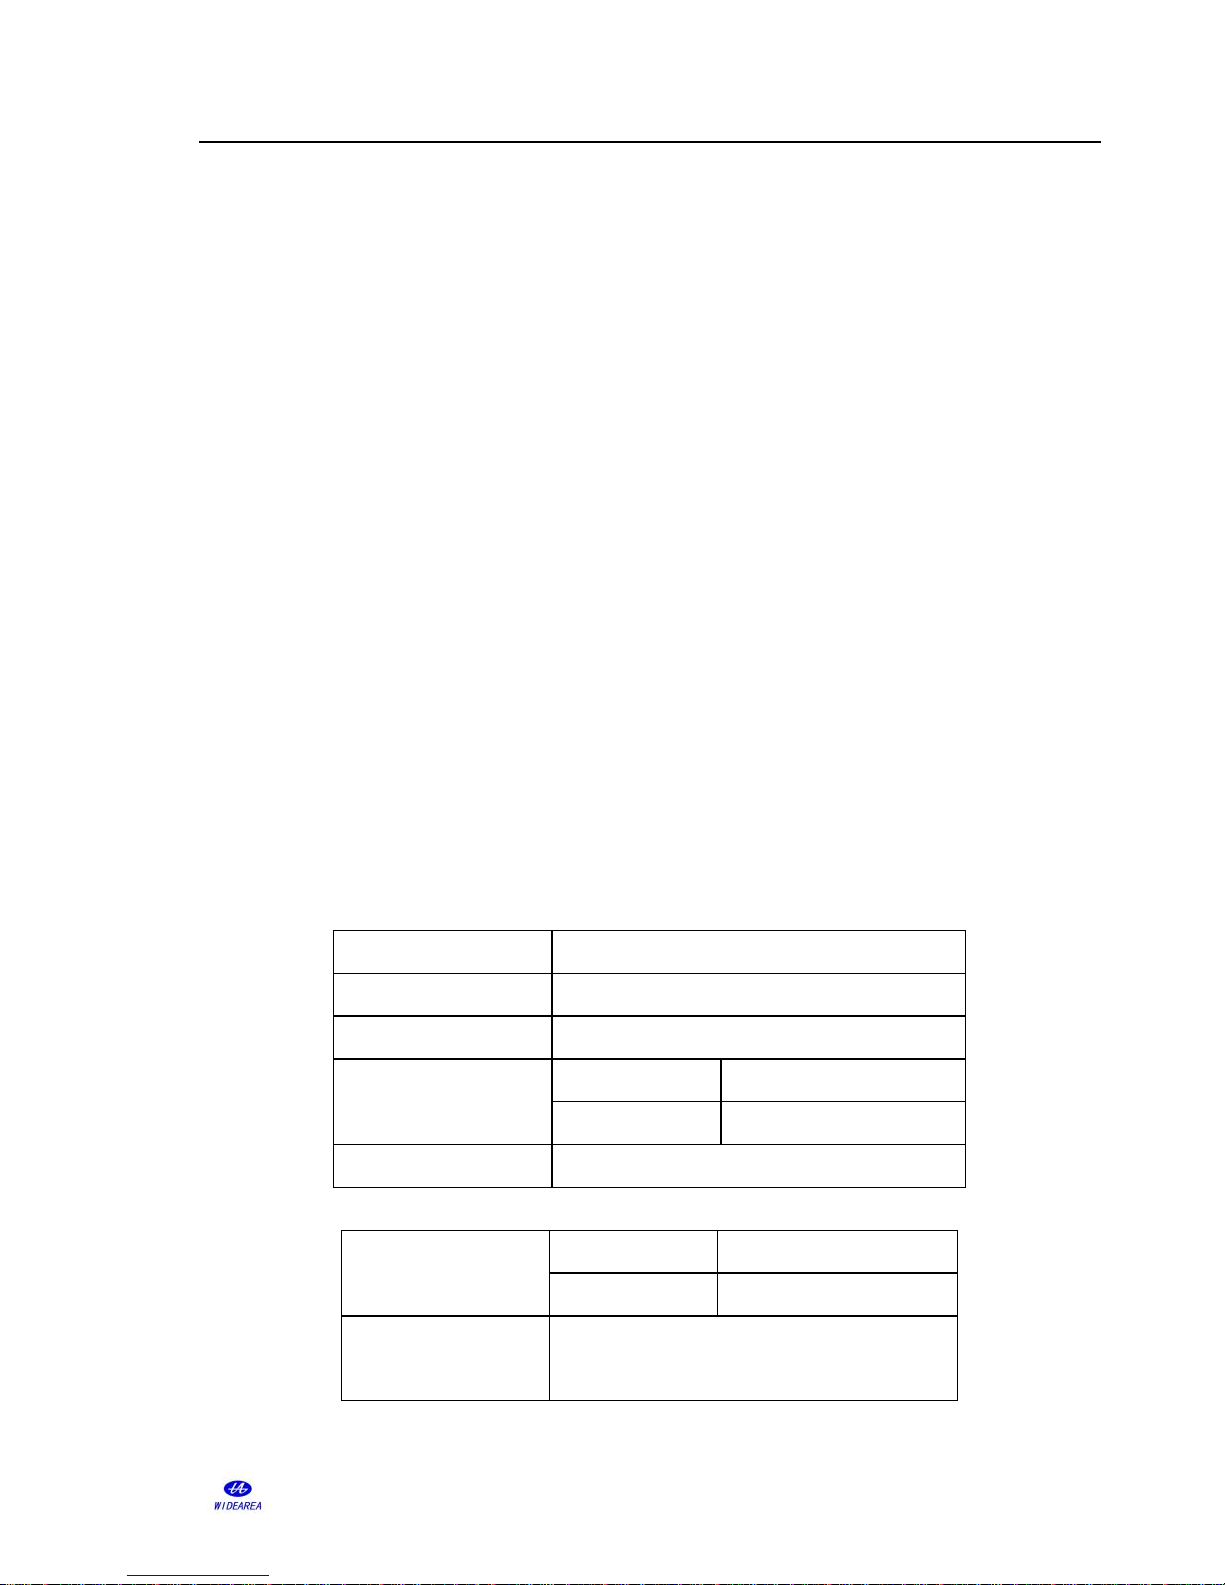
1Connect the power supply tail(L3)
There is an additional copper pair which power the ADSL Loop Extender. Now, the supply
voltage from wiring box will go through an additional copper pair and into the ADSL Loop
Extender directly. The detail way is as follows:
The Power Supply is installed in the cabinet, and the power supply cable connect with a
separate copper twist pair, at the placement of ADSL Loop Extender, the ADSL Loop
Extender’blue/white lines connect with the same copper wire pair. For one thing, the cable
pair must be free of DC type faults. All shorts, grounds, cross, battery-crosses, and open
cable pairs must be identified and repaired.
②Ground
Connect the Power Supply equipment’s ground to CO’s grounding terminal directly.
③Connect power cord
The supplied accessories include power cord for AC 110V、AC220V or DC 48V. Connect
it to the AC 110V、AC220V or DC 48V power source with good connection. To easy the
installation, DC power source connection is no polarized.
After power supply is connected, the power indicator should be solid on. Flashing indicator
indicates short circuits or over-current alarm condition.
Attention: ADSL Loop Extender’s Power Supply should NOT be turned on until the