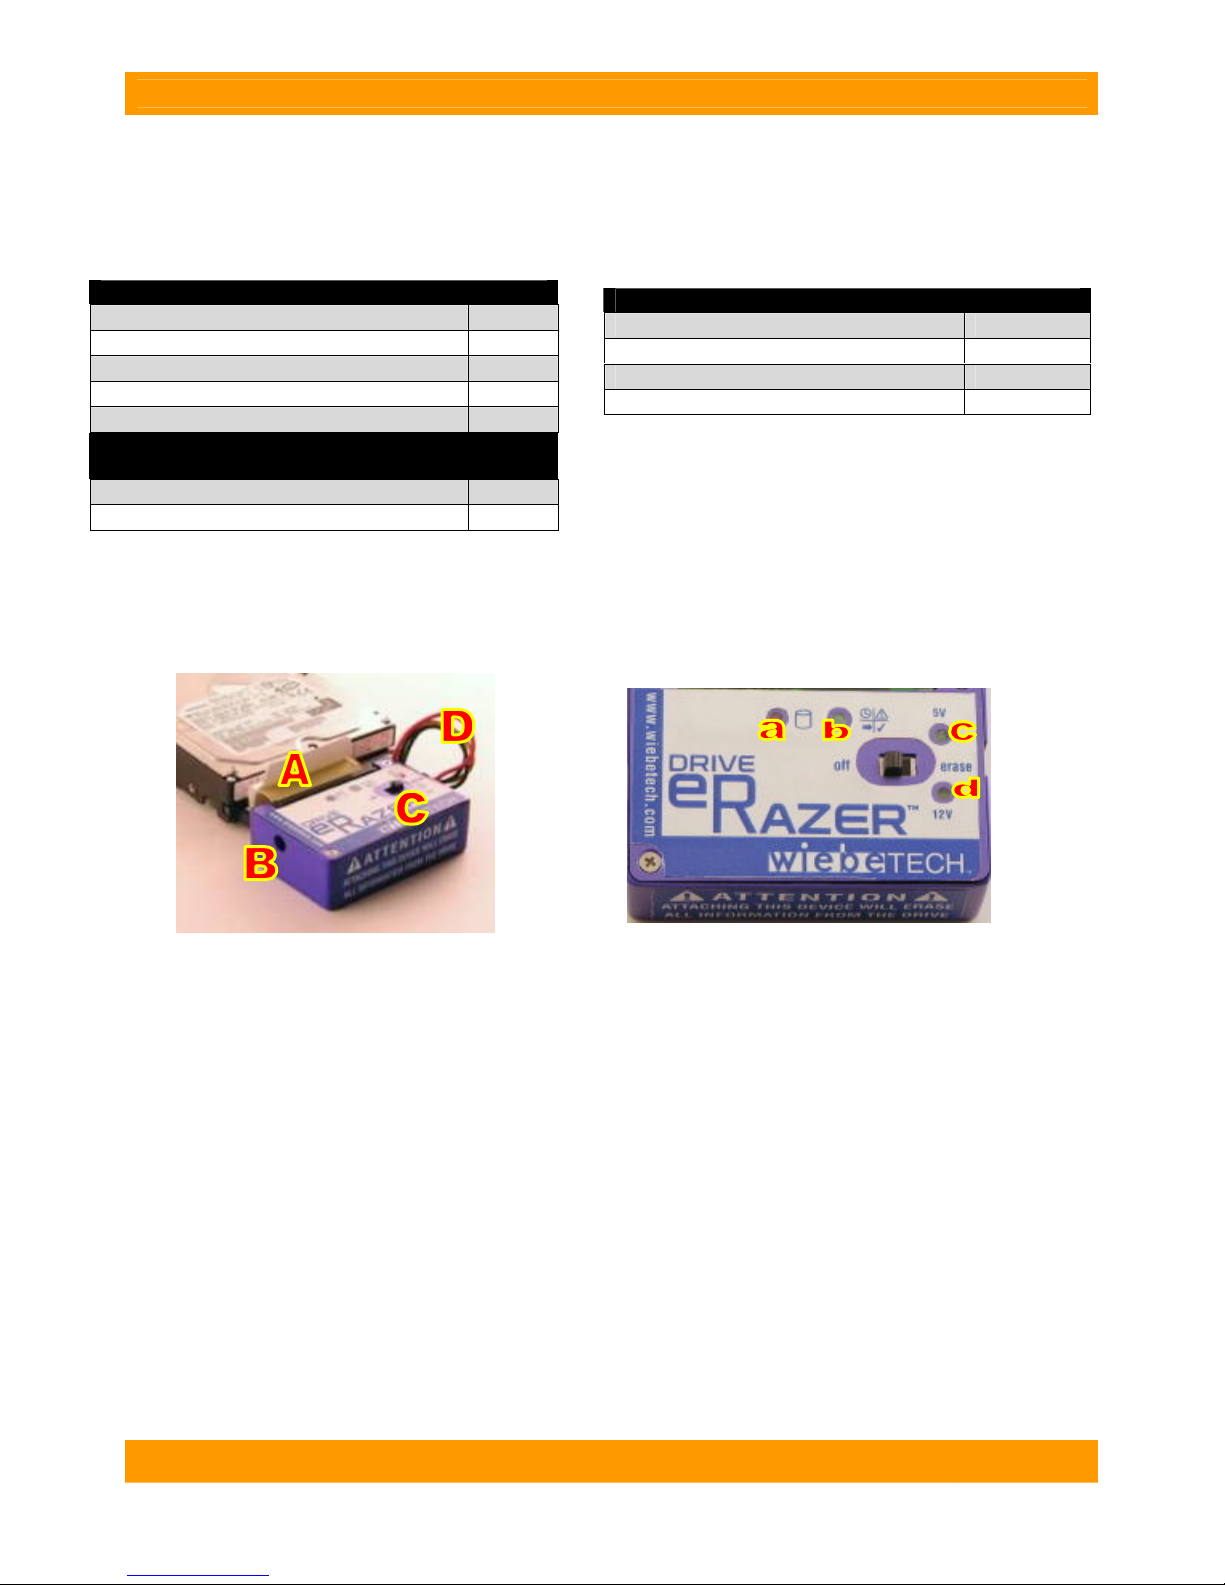
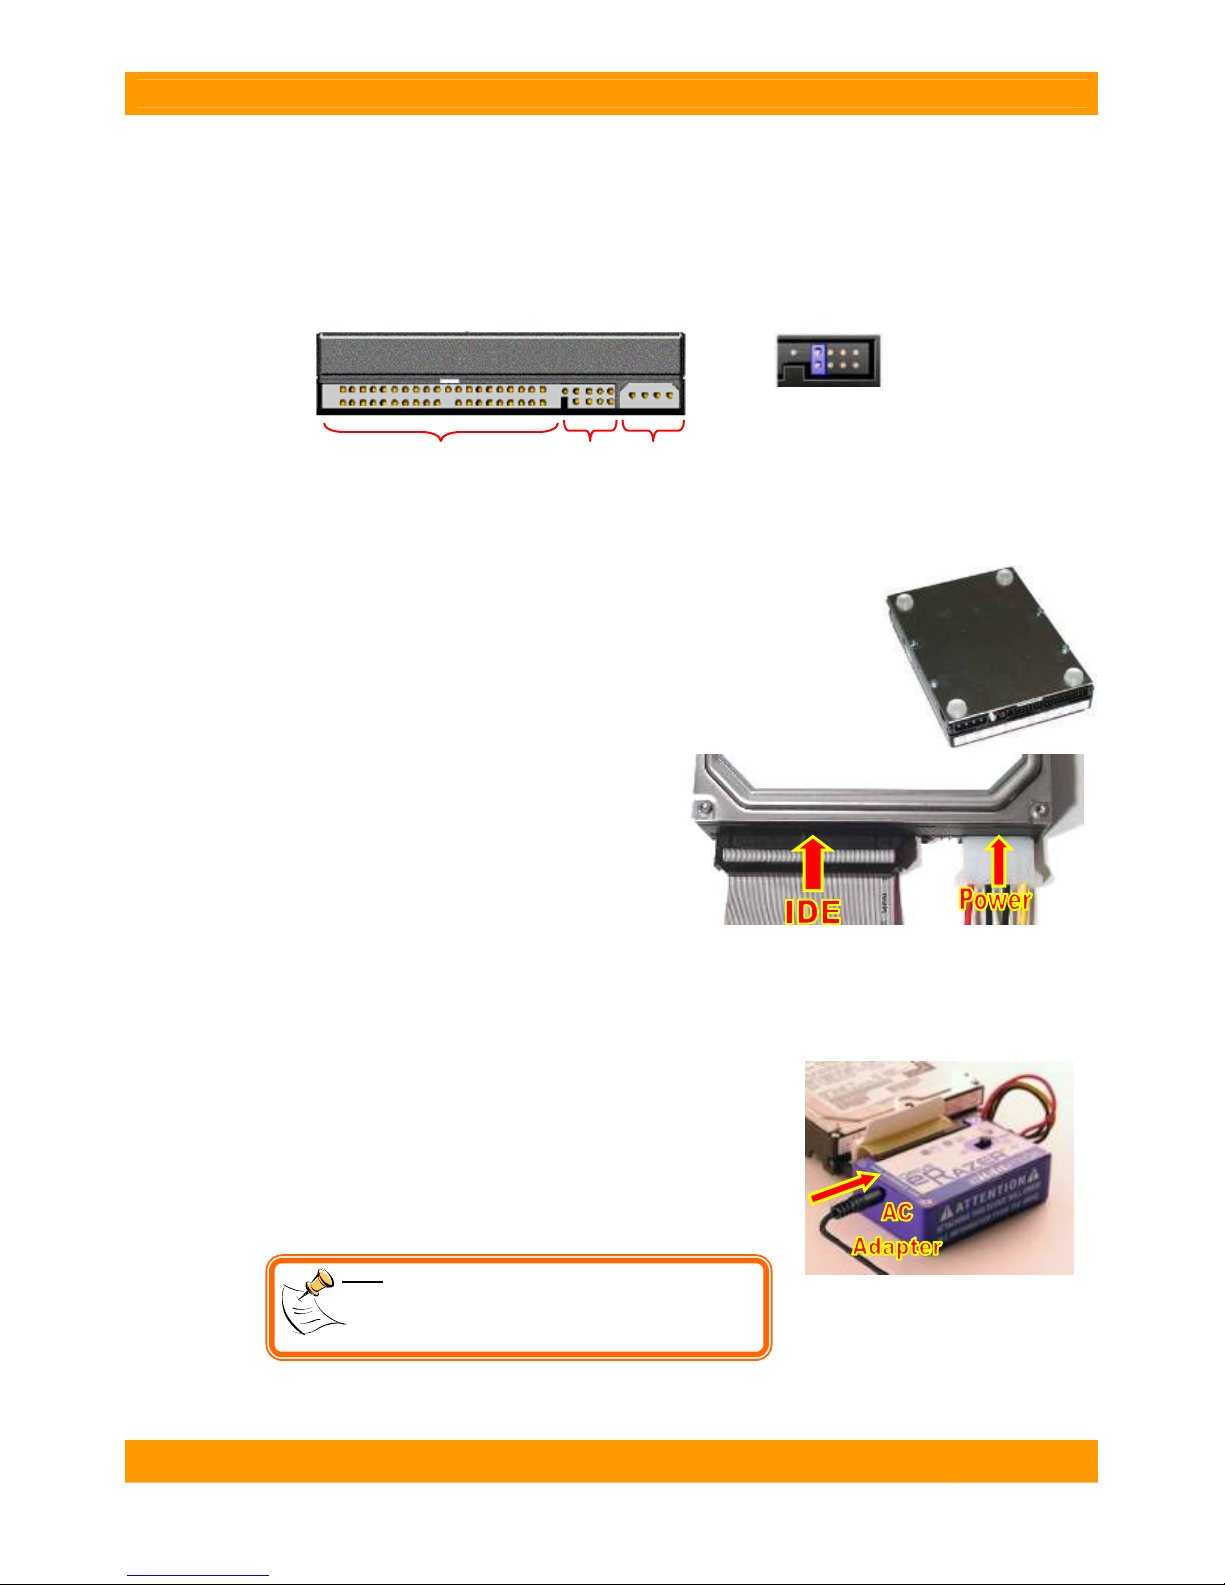
WiebeTech
D r i v e e R a z e r ™ U s e r M a n u a l ( A 9 - 0 0 0 - 0 0 0 8 R E V 1 . 0 ) - 3 -
1.3.2 Timer
Next, the status LED acts as a timer, counting down the remaining minutes before the erase is complete.
It will start to blink in a rhythmic, repeating pattern that represents four digits. Each digit is shown as a
succession of 1 to 10 blinks, indicating the digits 0-9. Simply subtract one from the number of blinks to
get the correct digit. For example, the pattern [1 blink, 2 blinks, 3 blinks, 8 blinks] represents [0, 1, 2, 7],
or 127 minutes. This pattern will repeat over and over, gradually counting down the time until the erase
process is complete.
1.3.3 Error Indicator
If Drive eRazer™ encounters any problems during the erase process, the status LED will act as an error
indicator. It will indicate what error occurred by a repeating number of fast blinks (quicker than the
countdown blinks). The chart below shows what error is indicated by a specific number of blinks.
Number of
Blinks Reported Error
3
HPA ERROR - An HPA (Host Protected Area) has been detected on the hard
drive, and cannot be removed. The HPA should be removed manually and the
hard drive tried again with the Drive eRazer.
4
DCO ERROR - A DCO (Device Configuration Overlay) has been detected on the
hard drive and cannot be removed. The DCO should be removed manually and the
hard drive tried again with the Drive eRazer.
5
SECURE ERASE NOT SUPPORTED - The hard drive connected to the Drive
eRazer was produced before Secure Erase was standard on all hard drives. The
drive will need to be erased using Single Pass mode instead.
6
VERIFY ERROR - The erasure process completed successfully, but during
erasure verification an error was encountered. This typically indicates a problem
with the hard drive itself. The erasing process should be attempted again. If the
same error occurs, a defective drive is the most likely culprit.
7
MIN LBA ERROR - The drive is too small to be used with the Drive eRazer. This
error applies to disks smaller then 5 Megabytes. Usually, this error will only occur if
a drive is defective.
8 HDD TIMED OUT - The Drive eRazer sent a command to the hard drive, but no
response was received. Typically indicates a defective drive.
9 WRITE ERROR - The Drive eRazer sent a write command to the hard drive, and
the drive returned a write error. Typically indicates a defective drive.
10
SECURE ERASE TIME NOT SUPPORTED - This indicates that the Drive eRazer
is erasing the drive using the Secure Erase method, but does not know how long
the process will take. Once the erasure process is complete the status light will be
solid green, as normal.
11
NO HDD PRESENT - This error message is typically given if the drive was
removed from the Drive eRazer during an erasure process. If the drive is still
attached, this can often indicate a defective hard drive.
12
PASSWORD ALREADY ENABLED - The hard drive connected to the Drive
eRazer was interrupted during a Secure Erase with a non-Drive eRazer device and
will need to be unlocked by that device before it can be used with Drive eRazer.
13
PASSWORD DISABLED - If the previous erase process is interrupted your drive
will be locked for use. Attach the drive to the DRZR until you encounter the 13
blink error code. This means the password is reset and your drive is now
unlocked. Cycle power on the Drive eRazer, then either try to erase in Secure
Erase mode again or switch to Single Pass mode.
1.3.4 Completion Indicator
At the end of the erasing process, Drive eRazer will show a solid light on the status LED to show that it
has finished erasing the drive. At this point it is safe to turn off the Drive eRazer and disconnect the drive.