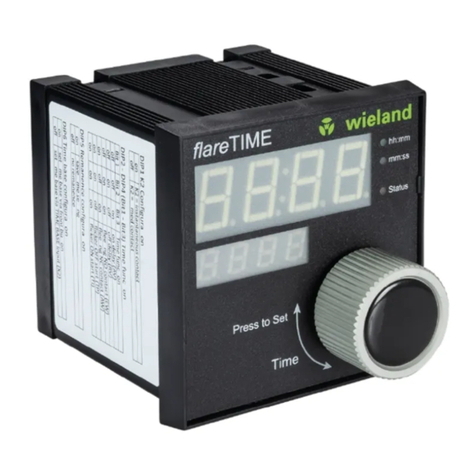
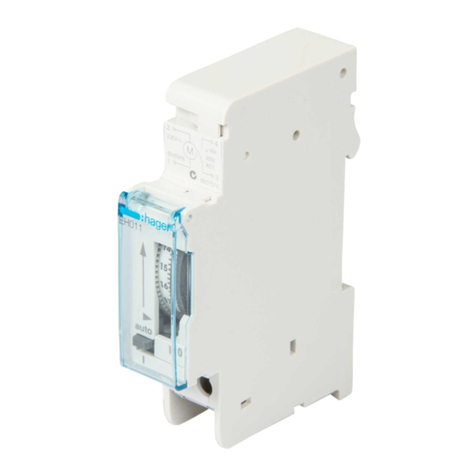
Wieland Flare Time M4-1 User manual

Bedienungsanleitung (Original)
flare TIME M4-1/M4-2 81.020.0000.0 / 81.020.0001.0
flare TIME M8-1/M8-2 81.020.0002.0 / 81.020.0003.0
Multifunktions-Zeitrelais
Wieland Electric GmbH
Brennerstraße 10-14
96052 Bamberg
Tel.: +49 (951) 9324-0
Fax: +49 (951) 9324-198
Internet: www.wieland-electric.com
Doc. # BA000825 - 03/2016 (Rev. E) flare TIME M4-1/M4-2/M8-1/M8-2 DE
HINW E IS
Personal, welches dieses Gerät installiert, programmiert, in Betrieb nimmt oder wartet, muss
diese Anleitung gelesen und verstanden haben.
WARNUNG
•
Das Personal muss gründlich mit allen Warnungen, Hinweisen und Maßnahmen gemäß
dieser Betriebsanleitung vertraut sein.
•Ggf. erforderliche Schutzmaßnahmen und Schutzeinrichtungen müssen den gültigen
Vorschriften entsprechen.
•Beschädigte Produkte dürfen weder installiert noch in Betrieb genommen werden. Im Falle
eines Defekts senden Sie das Gerät zurück an Wieland Electric.
•Nur in spannungsfreiem Zustand anschließen oder trennen!
•Das Gerät darf nicht geöffnet werden.
•Führen Sie keine Fremdobjekte in das Gerät ein!
•Halten Sie das Gerät von Wasser und Feuer fern!
1Bedien- und Funktionselemente
flare T
IME M8
-
1
8 Funktionen / B1
flare TIME M8
-
2
8 Funktionen / B1
flare TIME M4
-
1
4 Funktionen
flare TIME M4
-
2
4 Funktionen
1–Schalter Zeitbasis, 2–Etikett Anwender, 3–Schalter Zeitfaktor, 4–LED OUT (orange),
5–LED Betrieb (grün), 6–Schalter Betriebsart/Funktion, 7–Schalter INST/TIME (R2)
2Abmessungen und Verdrahtung
Verdrahtungshinweise
•Verwenden Sie für den Anschluss an die
Klemmen Volldraht (max. 2,5 mm2) oder
Aderendhülsen mit Isolierungen. Damit
nach dem Anschluss an die Klemmen die
Spannungsfestigkeit erhalten bleibt. Füh-
ren Sie nicht mehr als 8 mm des abisolier-
ten Leiters in die Klemme ein.
•Schrauben-Anzugsdrehmoment: 0,49 Nm
3Schaltfunktionen
Hinweise
•Die Versorgungsspannung (Kontakte A1-A2) muss anliegen, um Schaltfunktionen aktivieren
zu können. Bei den flare TIME M4-1 und flare TIME M4-2 löst die Versorgungsspannung
an A1-A2 den Zeitablauf direkt aus.
•Eine zusätzliche Spannung zwischen B1 und A2 aktiviert den Zeitablauf bei den Modellen
flare TIME M8-1 und flare TIME M8-2
•In Arbeitsstellung der Relais leuchtet die orange LED (4) stetig.
•Schalten Sie die Modulversorgung (Kontakte A1/A2) ab, bevor Sie eine andere Zeitfunktion
über Schalter (6) wählen. Nach erneutem Zuschalten der Versorgungsspannung steht die
eingestellte Funktion zur Verfügung.
•Ändern Sie den Zeitfaktor (3) oder die Zeitbasis (1) im Betrieb, wird der Zeitablauf (ggf. mit
Verzögerung) unterbrochen und die Schaltfunktion mit der neuen Ablaufzeit weitergeführt.
Erläuterungen zu den Schaltfunktionen:
Beim Modell flare TIME M4-1 und 2 gibt es keinen Starteingang B1. Die Funktion des Zeitrelais
wird aktiviert, wenn die Spannungsversorgung (A1-A2) eingeschaltet wird.
A
–
Einschaltverzögerung
Der Starteingang B1 wird während der
Funktion des Zeitrelais ignoriert.
B
–
Taktge
ber mit Pausenbeginn
Der Starteingang B1 wird während der
Funktion des Zeitrelais ignoriert.
C
–
Einschaltwischer
und
Rückfallverzögerung
Der Starteingang B1 arbeitet nur, wenn das
Zeitrelais an Spannung liegt.
B2
–
Taktgeber mit Pulsbeginn
Der Starteingang B1 wird während der
Funktion des Zeitrelais ignoriert.
D
–
Rückfallverzögerung
Der Starteingang B1 arbeitet nur, wenn das
Zeitrelais an Spannung liegt.
E
–
Einschaltwischer
Der Starteingang B1 arbeitet nur, wenn das
Zeitrelais an Spannung liegt.
G
–
Ansprech
-
und Rückfallverzögerung
Der Starteingang B1 arbeitet nur, wenn das
Zeitrelais an Spannung liegt.
J
–
Impulsausgabe (ansprechverzögert)
Der Starteingang B1 arbeitet nur, wenn das
Zeitrelais an Spannung liegt.
4Technische Daten
Eingangskreis
EingangskreisEingangskreis
Eingangskreis
Bemessungsspannung A1-A2; B1-A2 24…240
V AC/DC
Eingangsspannungsbereich 20,4…264 V AC/DC
Eingangsfrequenz 50/60 Hz
Bemessungsleistung 240 V AC M4-1/M8-1
M4-2/M8-2
4,5 VA
6.6 VA
Bemessungsleistung 24 V DC M4-1/M8-1
M4-2/M8-2
1,1 W
1,2 W
Rückfallwert der Eingangsspannung 10 % der Nennspannung
Versorgungsspannungs-Ausschaltzeit
(Rücksetzen durch Aus- und Wiederanschalten)
min. 0,1 s
Spannungseingang H-Pegel
L-Pegel
20,4 bis 264 V AC/DC
0 bis 2,4 V AC/DC
Eingangsimpulsdauer an B1 min. 100 ms
Isolationswiderstand A1-A2-B1 / Kontakte min. 100 M
Ω
bei 500 V DC
Isolationsprüfspannung zwischen Ein- und
Ausgang
2000 V AC (50/60 Hz, 1 min)
Zeitkreis
ZeitkreisZeitkreis
Zeitkreis
Betriebsarten M4-1/M4-2
M8-1/M8-2
4 // A, B2, E, J siehe Diagramme
8 // A, B, C, B2, D, E, J, G
Betriebsart Relais 2 INIT
TIME
synchron zur Versorgungsspannung
zeitgesteuerter Relaisausgang
Zeitbereiche
0,1s, 1s, 10s, 1min, 10min, 1h, 10h, 100h
Einstellung im Zeitbereich
Maximal 12 × Zeitbereich (0 bis 12)
1
)
Wiederholgenauigkeit
max. ±1% des Skalenendwerts
Einstellungsfehler
max. ±10 % des Skalenendwerts ± 0,05 s
Mindest-Eingangssignalweite
50 ms (Starteingang)
Spannungseinfluss
max. ±0,5 % des Skalenendwerts
Temperatureinfluss
max. ±2 % des Skalenendwerts
Ausgangskreis
AusgangskreisAusgangskreis
Ausgangskreis
2
)
Kontaktbestückung M4-1/M8-1
M4-2/M8-2
ein Wechsler
zwei Wechsler
Bemessungsbetriebsspannung
24…240
V AC/DC
Restwelligkeit ≤20 % (Gleichspannungsversorgung)
Schaltausgang (Kontaktausgang) 5 A bei 250 V AC (ohmsche Last, cos φ= 1)
5 A bei 24 V DC (ohmsche Last)
Mindestlast Schaltausgang 10 mA bei 5 V DC (P-Stufe, Referenzwert)
Ausgangsschaltvermögen Siehe Diagramm unten, "Lastgrenzkurve"
Lebensdauer
min. 100.000 Schaltspiele
(5 A bei 250 V AC,
ohmsche Last, 360 Schaltspiele/h)
Sonstige Daten
Sonstige DatenSonstige Daten
Sonstige Daten
Einbauabmessungen siehe Bild
Einbaulage beliebig
Umgebungstemperatur (Betrieb) −20 bis 55 °C (ohne Eisbildung)
Lagertemperatur −40 bis 70 °C (ohne Eisbildung)
Luftfeuchtigkeit (Betrieb) 25…85 %
Schutzart IP20
Zulassung cURus, LR
Lastgrenzkurve als Funktion der
Umgebungstemperatur und des
Anreihabstands bei horizontaler
Montage.
Testmethode: Versorgungsspannung
240 V AC, Installationsabstand zwi-
schen den Timern 0,5, 10 und 50 mm
TMAX: Maximale Temperatur der
Betriebsumgebung gemäß
Spezifikationen
1) Die Genauigkeit ist im Bereich zwischen „9“ und „12“ am größten, stellen Sie dem entspre-
chend den Zeitbereich (1) ein. Vermeiden Sie wegen der Ungenauigkeit Einstellungen zwi-
schen „0“ und „1“.
Die Stellung „0“ ist eine spezielle Einstellung: Bei „0“ können unmittelbar Sequenzprüfungen
vorgenommen werden, die Ausgänge reagieren wie Sofortkontakte.
2) Wenn der Schalter INST/TIME (Typen M4-2/M8-2) auf INST eingestellt wird, fungiert das
Relais R2 als Sofortkontakt und schaltet synchron mit der Spannungsversorgung ein und aus.

Operating instructions (Translation)
flare TIME M4-1/M4-2 81.020.0000.0 / 81.020.0001.0
flare TIME M8-1/M8-2 81.020.0002.0 / 81.020.0003.0
Multi-mode, multi-range timer
Wieland Electric GmbH
Brennerstraße 10-14
96052 Bamberg
Tel.: +49 (951) 9324-0
Fax: +49 (951) 9324-198
Internet: www.wieland-electric.com
Doc. # BA000825 - 03/2016 (Rev. E) flare TIME M4-1/M4-2/M8-1/M8-2 EN
NOTICE
Personnel which installs, programs, operates or maintains this device must have read and
understand these instructions.
WARNING
•
The personnel must be thoroughly familiar with all warnings, notes and procedures de-
scribed in these operating instructions.
•Where necessary, safety precautions and safety devices must comply with the applicable
regulations.
•Damaged products must neither be installed nor put into operation. In case of a defect,
please return the device to Wieland Electric.
•Connect or disconnect only when de-energized!
•The device may not be opened.
•Do not introduce any objects into the unit!
•Keep away from fire and water!
1Controls and functional elements
flare TIME M8
-
1
8 functions / B1
flare TIME M8
-
2
8 functions / B1
flare TIME M4
-
1
4 functions
flare TIME M4
-
2
4 functions
1–Timebase selector, 2–user label, 3–time setting selector, 4–LED OUT (orange),
5–LED Power (green), 6–operating mode selector, 7–INST/TIME (R2) selector
2Dimensions and wiring
Wiring notices
•Use solid wire (2.5 mm2max.) or ferrules
with insulative sleeves to connect to the
terminals.
To maintain the withstand voltage after
connecting the terminals, insert no more
than 8 mm of exposed conductor into the
terminal
•Recommended screw tightening torque:
0,49 Nm
3Switching functions
Notices
•The supply voltage (contacts A1-A2) must be present in order to be able to activate switch-
ing functions. For the flare TIME M4-1 and flare TIME M4-2, closing the contacts A1-A2
initiates the timing action directly.
•Contact B1 activates the timing action for the flare TIME M8-1 and M8-2 models.
•In the operating position of the relay the orange LED lights constantly. (2)
•Turn off the power supply of the module (contacts A1/A2) before you select another time
function
•If you change the time factor or the time basis during operation, the timing action – with
delay if applicable – is interrupted and the switching function continues with the new elapse
time.
Switching functions explained:
For model flare TIME M4-1 and 2 there is no input B1. The function of the timing relay is
activated when the power (A1-A2) is turned on.
A
–
ON delay
Input B1/A2 is ignored while the timer is in
operation.
B
–
Flicker OFF start
Input B1/A2 is ignored while the timer is in
operation.
C
–
Single shot and OFF delay
Input B1/A2 is valid while the timer is in
operation.
B2
–
Flicker ON start
Input B1/A2 is ignored while the timer is in
operation.
D
–
OFF delay
Input B1/A2 is valid while the timer is in
operation.
E
–
Single shot
Input B1/A2 is valid while the timer is in
operation.
G
–
ON/OFF delay
Input B1/A2 is valid while the timer is in
operation.
J
–
ON delayed single shot, fixed time
Input B1/A2 is valid while the timer is in
operation.
4Technical Data
Input circuit
Input circuitInput circuit
Input circuit
Rated voltage A1-A2; B1-A2 24…240
V AC/DC
Voltage range 20.4…264 V AC/DC
Input frequency 50/60 Hz
Power consumption 240 V AC M4-1/M8-1
M4-2/M8-2
4.5 VA
6.6 VA
Power consumption 24V DC M4-1/M8-1
M4-2/M8-2
1.1 W
1.2 W
Reset voltage 10 % of rated voltage
Power OFF time for resetting by power off-on min. 0.1 s
Voltage input H level
L level
20.4 to 264 V AC/DC
0 to 2.4 V AC/DC
Input signal duration at B1 min. 100 ms
Insulation resistance A1-A2-B1 / contacts min. 100 M
Ω
at 500 V DC
Dielectric strength between input circuit and
output terminal
2000 V AC (50/60 Hz, for 1 min)
Timer circuit
Timer circuitTimer circuit
Timer circuit
Operating modes M4-1/M4-2
M8-1/M8-2
4 // A, B2, E, J (see switching functions)
8 // A, B, C, B2, D, E, J, G
Operating mode relay 2 INIT
TIME
synchronous to supply voltage
time controlled output
Time ranges
0.1s, 1s, 10s, 1min, 10min, 1h, 10h, 100h
Time range setting
max. 12 × time range (0 to 12)
3
)
Accuracy of operating time
max. ±1% of full scale
Setting error
max. ±10 % of full scale ± 0.05 s
Minimum input signal width
50 ms (start input)
Influence of voltage
max. ±0.5 % of full scale
Influence of temperature
max. ±2 % of full scale
Output circuit
Output circuitOutput circuit
Output circuit
4
44
4
Contacts M4-1/M8-1
M4-2/M8-2
one changeover contact
two changeover contacts
Rated operating voltage
24…240
V AC/DC
DC ripple ≤20 %
Contact load (contact output) 5 A at 250 V AC (ohmic load, cos φ= 1)
5 A at 24 V DC (ohmic load)
Contact output minimum load 10 mA at 5 V DC (P level, reference value)
Output switching capacity see diagram "Load limiting curve" below
Life cycle min. 100.000 operations (5 A at 250 V AC,
ohmic load, 360 operations/h)
General data
General dataGeneral data
General data
Installation dimensions see figure
Installation orientation any
Ambient operating temperature −20 to 55 °C (no icing)
Storage temperature −40 to 70 °C (no icing)
Operating humidity 25…85 %
IP rating IP20
Approval
cURus
,
LR
Load limiting curve as relation
between ambient operating tempera-
ture and installation pitch when
installing horizontally.
Testing method: Supply voltage 240 V
AC, installation pitch between timers
0.5, 10 and 50 mm
TMAX: Maximum ambient operating
temperature according to specifica-
tions
3) The accuracy is greatest between ‘9’ and ‘12’, please adjust the time setting selector (1)
accordingly. Avoid settings between ‘0’ and ‘1’ due to the inaccuracy.
Setting ‘0’ has a special meaning: With setting ‘0’, sequence checks can immediately be
performed. The outputs then behave as instantaneous contacts.
4) If the INST/TIME switch (models M4-2/M8-2) is set to INST, relay R2 will operate as instanta-
neous contact and will turn on and off synchronously to the power supply.
This manual suits for next models
3
Table of contents
Languages:
Other Wieland Timer manuals
