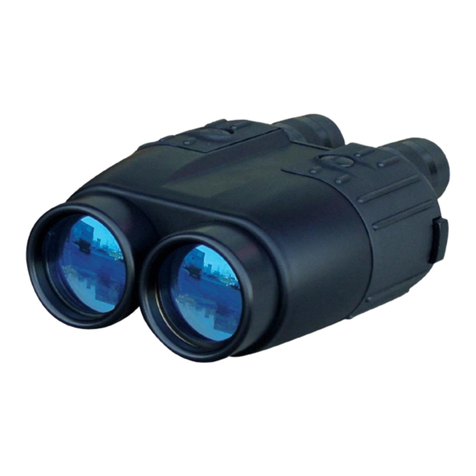
WildGuarder OWLER1 User manual

1
WildGuarder OWLER1
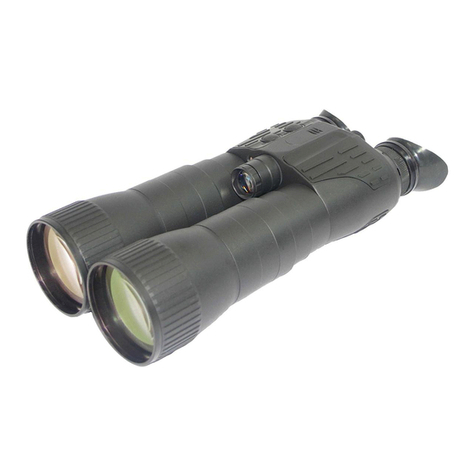
Night Vision Binoculars
Congratulations on your purchase of high quality night vision device. Use this device to view surrounding in
low light condition even in complete darkness. You can even take picture and video using the device which
can be saved to a Micro SD card. This device can be used in daytime as well. Use the supplied USB cable to
download images to computer.
User’s Manual

2
Night Vision Overview
Specification
Power Supply
A. AA battery
1. Please install batteries into to device before usage
2. Open the battery cover on the back of device.
3. Insert 8pcs 1.5V AA batteries into the battery
4. Close the battery cover
Optical Performance
Optical Zoom
20X
Digital Zoom
4X
Angle of View
From 1.8°to 68°
Objective Aperture
30mm
Exit Pupil Distance
12.53mm
F# for Objective Lens
F=1.6
View in the dark
500m
Imager
Size
1/2.7
Resolution
4608x2592
Light System
Luminance
5W
IR Wavelength
850nm
Power
Working Voltage
4V-6V
Power Supply
8*AA
Interface
Output
USB
HDMI Supporting
HDMI
Storage
Micro SD card
Displayer
Screen Resolution
854 X 480
Size
210mm(Length) 161mm(width) 63mm(Height)
Weight
0.9KG
Certificates
CE, FCC, ROHS, Patent protected

3
(Left AA Battery Compartment) (Left AA Battery Compartment)
Note: 1. Do not mix different brand batteries
2. Do not mix old and new batteries
3. Do not mix batteries with different voltage
B. External Power
1. 5V Power bank can feed this device via supplied USB cable.
2. And user can charge rechargeable AA battery via USB cable.
Inserting Memory Card
1. Please prepare a Micro SD card C10 in advance
2. Open the card slot cover, Micro SD card slot will be seen.
3. Insert the card into the slot in a right way. Chip side faces up
4. Format the Micro SD card to improve the battery life and shutter speed.
5. To remove the card from device, press its edge, it will pop out, then remove it
Optical Magnification and Digital Zoom

4

5
(Optical Magnification)
Original Clear Object→→→→ Bigger Object
(4X)
(Digital Zoom in)
Display Information

6
Button Function list
Menu Function List
Menu
Function
Default Setting
Language
OSD language
English
Image Resolution
Image resolution options:
8MP
Burst Number
Image quantity per shooting
1 Photo
Video Length
To choose how long video is needed
10s
Sound Record
Sound record can be ON or OFF
ON
Date/Time setting
Input date/time manually
NONE
Date/Time Stamp
Data/time info will be shown on
picture/video or not
ON
Date Format
D/M/Y, M/D/Y, Y/M/D Format
M/D/Y
Display Brightness
There are three levels to choose
Middle
Lamp AUTO OFF
The lamp will be off within 3min,
5min, or 10min, or it will not off auto.
OFF
AUTO OFF
This device will be off within 3min,
5min, or 10min, or it will not off auto.
3min
Card cycle
Micro SD card can be loop-record
ON
Card Format
Quick format this memory card
NONE
Default Setup
Setup can be back to factory default
NONE
Version
User can check firmware version
information
NONE
Buttons
Function
Turn ON/OFF video when keeping pressing
When press in a short time, the display brightness will be switched.
MENU
Back to menu or enter menu
MODE
Picture mode, Video mode or Review mode
ZOOM
Zoom function is cycled within this button
IR
IR Lamp brightness is cycled within this button
SHOT
In image mode, shot to get one picture; in video mode, press it and
start/stop video recording
▲
Check sub-menu, and check picture/video when in review mode
▼
Check sub-menu, and check picture/video when in review mode
OK
When set up sub-menu, press OK button to confirm

7
Basic Operation
1. Turn on and turn off
Keep pressing the power button ( ) for 3s to turn ON/OFF the device.
2. Changing the mode
This night vision has three different modes: image mode, video mode and playback mode. Press the MODE
button to switch.
Image Mode: to take picture
Video Mode: to record video
Playback Mode: to review the record files
3. Taking picture
a) Turn on the device, the default mode is not photo one, if no, press the MODE button and switch to
Photo mode
b) The lens focal length is adjustable, the longer focal length is, the more far the view is. What is more,
the clarity can be amended by hands.
c) Zooming
Keep the pressing button to zoom in or out the image, the value of magnification level appears on
display
d) Take a till photo
View your subject on LCD screen
Press the SHOT button to take a photo
4. Recording Video
a) Turn on the device, press the MODE button to switch to video mode
b) The focal of lens length is selectable, the longer focal length is, the more far the view is. What is
more, the clarity is adjustable by hands.
c) Zooming
Keep the pressing button to zoom in or out the image, the value of magnification level appears on
display
d) Start to record video
View your subject on LCD screen
Press the SHOT button to start recording, the record duration will be shown on display
e) Press the SHOT button to stop recording to finish video recording

8
Download Files to Computer
A. Using a card reader
1. Eject the Micro SD card from the device and insert it into a card reader, then connect the card reader to
a computer.
2. Open (my computer) and double-click the removable disk iron who represents the memory card.
3. Copy images from the card to computer.
B. Connecting the device to PC via USB cable
1. Turn on the night vision; connect it to a computer with USB cable.
2. When connecting to the computer, MSDC will appear on the display
3. Open (my computer) a removable Disk will occur in drive list, Double-click the icon to check the
contents.
4. Copy the photos from the card to computer.
Trouble Shooting
A. Unite do not turn on
Solution:
1. Reinstall all batteries. Making sure of the correct polarity (+-) orientation
2. Replace all with new batteries
3. Clean the battery compartment, especially the contact points.
B. Observed image is too bright
Solution: If you are using IR light, press the IR to choose the suitable IR brightness.
There are 4 levels, OFF, level 1, level 2 and level 3. They are cycled in IR mode
C. Observed image is too dark
Solution: If light environment is dark, please press IR button to turn on IR light, there are 4 levels, OFF,
level 1, level 2 and level 3. They are cycled in IR mode. Please choose the suitable IR level
D. Image is blurry
Solution: 1. re-focus by adjusting the lens part (FAR-NEAR) to when object outlook occurs, and then adjust

9
the lens part (Clarity Adjustment)
2. Check the condition of the lens surface and color display, please clean them if necessary.
3. In low light conditions, activate the IR lamp
Technical Maintenance
Technical maintenance should be done at least twice a year, includes the following steps
1. Clean the outside metal and plastic surfaces from dust, dirt and moisture, wipe the lens and glass with
a soft lint free cloth
2. Clean the battery compartment’s electric contact points using an oil-free solvent
3. Inspect the Glass and lens and gently blow off any dust and sand, or clean them with a soft and clean
cloth.
4. Keep device far away from humid environment
Customer Contact:
Email: support@wildguarder.com
Website: www.wildguarder.com
COPYRIGHT© 2020 WILDGUARDER OUTDOORS
Table of contents
