WilTec 61055 User manual

Operation Manual
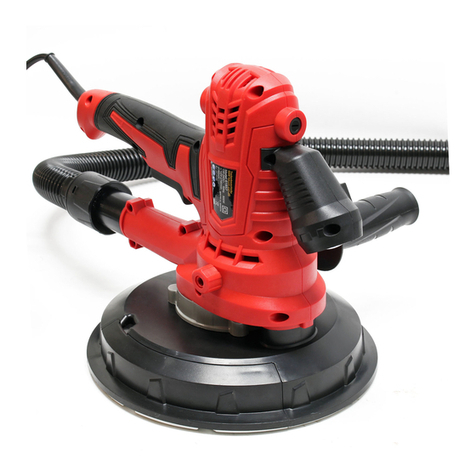
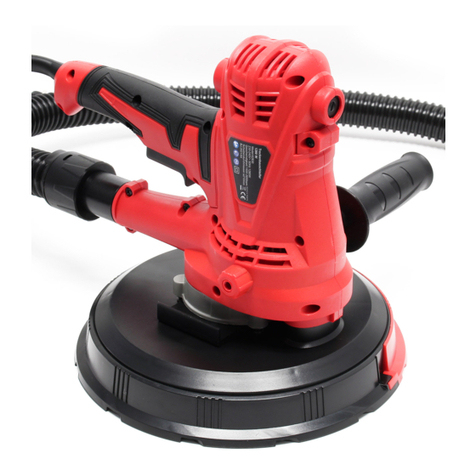
Drywall Sander for Ceilings and Walls
61055
Illustration similar, may vary depending on model
Read and follow the operating instructions and safety information before using for the first time.
Technical changes reserved!
Due to further developments, illustrations, functioning steps and technical data can differ insignificantly.
Updating the documentation
If you have suggestions for improvement or have found any irregularities, please contact us.

© by WilTec Wildanger Technik GmbH Item 61055 Page 2
http://www.WilTec.de
http://www.aoyue.eu 10 2021-1
http://www.teichtip.de
The information contained in this document may alter at any time without previous notice. It is prohibited
to copy or spread any parts of this document in any way without prior written allowance. All rights re-
served.
The WilTec Wildanger Technik GmbH cannot be held accountable for any possible mistakes in this
operating manual, nor in the diagrams and figures shown.
Even though, the WilTec Wildanger Technik GmbH has undergone biggest possible efforts to ensure
that the operating manual is complete, faultless and up to date, mistakes cannot be entirely avoided.
If you should find a mistake or wish to make a suggestion for improvement, we look forward to hearing
from you.
Send an e-mail to:
or use our contact form:
https://www.wiltec.de/contacts/
The most recent version of this manual in various languages can be found in our online shop via:
https://www.wiltec.de/docsearch
Our postal address is:
WilTec Wildanger Technik GmbH
Königsbenden 12
52249 Eschweiler
Germany
Do you wish to pick goods up? Our pick-up address is:
WilTec Wildanger Technik GmbH
Königsbenden 28
52249 Eschweiler
Germany
To shorten the waiting time and allow for a rapid on-site transaction, we ask you to call us previously or
placing your order via the webshop.
E-mail: service@wiltec.info
Tel:+49 2403 55592-0
Fax: +49 2403 55592-15
To return orders for exchange, repair or for other purposes, please use the following address. Attention!
To allow for a smooth execution of your complaint or return, it is important to contact our customer
service team before returning the goods.
Returns Department
WilTec Wildanger Technik GmbH
Königsbenden 28
52249 Eschweiler
E-mail: [email protected]o
Tel:+49 2403 55592-0
Fax: +49 2403 55592-15

© by WilTec Wildanger Technik GmbH Item 61055 Page 3
http://www.WilTec.de
http://www.aoyue.eu 10 2021-1
http://www.teichtip.de
Introduction
Thank you for purchasing this quality product. To minimize the risk of injury we urge that our clients
take some basic safety precautions when using this device. Please read the operation instruc-
tions carefully and make sure you have understood its content.
Keep these operation instructions safe.
Safety precautions and warnings
Read all safety information and instructions to reduce the risk of injury.
Make sure, when working with electrical tools, that safety glasses are worn.
Make sure to wear a protective dust mask! While working with wood or other materials,
harmful dust particles can be formed. Material containing must not to be sanded or worked
on!
Make sure to wear ear protectors against the loud noises! The effect of loud noise can
cause hearing damage.
General safety guidelines
Warning: Read all of the safety guidelines and instructions. Failure to comply with the safety
guidelines or instructions can result in electrical shock, fire, and/or serious injury. The term used in the
safety guidelines “power tool” is referring to a mains operated power tool (with cable) and a battery-
operated power tool (without cable).
Safety rules for drywall sander
•Use an approved respirator for dust and mist. Ventilate work area and/or use a dust collec-
tor. Continued and prolonged exposure to high concentrations of airborne dust may affect the
respiratory system function.
•Maintain firm footing and balance. Use appropriate scaffolding. Do not overreach.
•Sanding of lead-based paint is not recommended. Lead-based paint should only be removed
by a professional.
•Sanding drywall could lead to a build-up of static electricity inside the tool. For your safety,
the drywall sander is grounded.
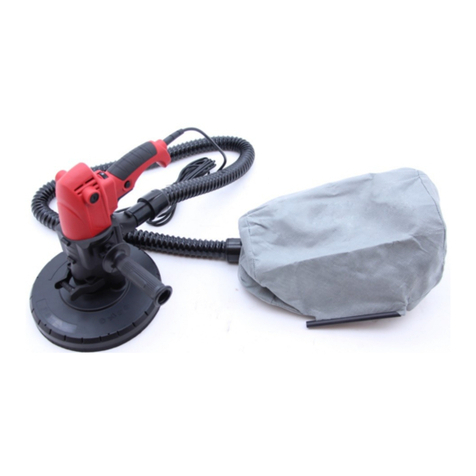
•The sander is connected with a dust bag and could absorb dust by its self-absorption system,
without connection with a vacuum cleaner.

© by WilTec Wildanger Technik GmbH Item 61055 Page 4
http://www.WilTec.de
http://www.aoyue.eu 10 2021-1
http://www.teichtip.de
Technical specifications
Voltage (V)
230
Power (W)
710
Frequency (㎐)
50
Speed (r⁄min)
round grinding discs
1000–2100
triangular grinding discs
2800–5600
Grinding disc diameter (㎜)
225
Triangular grinding disc: edge length (㎝)
28.5
Length of telescopic handle (㎝)
ca. 150–175
Net weight (㎏)
7,3
Protection class
II
Protection degree
IP20
Illustrations
№
Name
№
Name
1
Speed adjuster
3
Foldable part
2
Motor
4
On/off switch

© by WilTec Wildanger Technik GmbH Item 61055 Page 5
http://www.WilTec.de
http://www.aoyue.eu 10 2021-1
http://www.teichtip.de
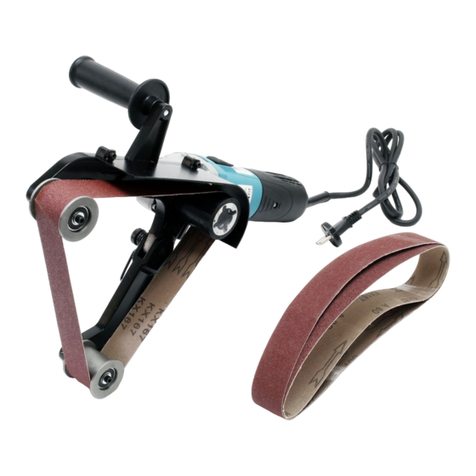
Sander with trinangular sanding disc attached
Operating instructions
Preliminary notes
The drywall sander is designed for sanding walls and ceilings made of drywall or plaster. The sander
provides a superior finish, and is faster than conventional finishing methods for both new construction
and renovation work. Please clean-up both sander and dust bag regularly.
Work area
•Keep your work area tidy and well-lit. Untidy work areas or bad lighting invite to injury.
•Only work with power tools in non-explosion hazard areas (without presence of flammable liquid,
gas, or dust). Power tools create sparks that can ignite dust or vapours.
•Keep children and other persons away during the use of the power tool. The slightest distraction
can lead to a loss of control of the machine.
•The plug of the power tool must fit properly into the socket. The plug must not be modified in
any way. Do not use an adapter plug together with earthed power tools. Non-modified plugs
and a proper socket connection reduce the risk of an electrical shock.
•Avoid bodily contact with earthed surfaces, such as pipes, heaters, ovens, and refrigerators.
There is a higher risk of electrical shock when the body is earthed.
•Keep the machine away from rain or wet. Intrusion of water into the power tool increases the
risk of an electrical shock.
•Do not use the cable to carry or hang the power tool, or to pull the plug out of the socket. Keep
the cable away from heat, oil, sharp edges, or objects with moving parts. Damaged or entangled
cables increase the risk of an electrical shock.
•When working with a power tool outdoors, only use extension cords designed for outdoors. The
use of an extension cord designed for outdoor use reduces the risk of electrical shock.
•If the use of the power tool in a damp area is unavoidable, use a residual current device to
reduce the risk of an electrical shock.

© by WilTec Wildanger Technik GmbH Item 61055 Page 6
http://www.WilTec.de
http://www.aoyue.eu 10 2021-1
http://www.teichtip.de
Personal safety
•Fully concentrate on what you are doing and use caution while working with a power tool. Do
not use a power tool if being tired or under the influence of alcohol, drugs, or medicine. The
slightest distraction or inattention can result in serious injury.
•Wear personal protective equipment and always protective goggles. Wearing personal protec-
tive equipment, such as a dust mask, slip-resistant footwear, protective helmet, or ear protection
(depending on the form or use of the power tool) reduces the risk of injury.
•Avoid an unintentional starting up. Make sure that the power tool is turned off before it is plugged
into a power source and/or before a battery is attached or before it is carried or picked up. With
your finger being on the “on” switch while you carry the power tool or with the machine being
plugged in while the switch is in the “on” position, serious injury or accidents can result.
•Remove the adjustment tool or wrench before turning on the power tool. A tool or wrench at a
rotating component of a device can cause serious injury.
•Do not bend too far over. Make sure to have a secure stance and to be able to maintain balance.
As a result, it will be easier to control the power tool in unexpected situations.
•Wear proper clothing. Do not wear wide clothing or jewellery. Keep hair, clothing, and gloves
away from moving parts. Loose clothing, jewellery, or long hair could get caught by the moving
parts.
•If a dust extractor or receptor can be attached, make sure that such a device is attached and
used properly. Use of a dust extractor can reduce the dangers of dust particles.
Careful handling while using power tools
•Do not overload the machine. Use the correct tool for the job. Work better and safer with the
correct power tool and within the power capacity range.
•Do not use a power tool whose power switch is defective. A power tool that can no longer be
turned on or off is dangerous and must be repaired.
•Pull the plug out of the outlet and/or remove the battery before making adjustments to the ma-
chine settings, changing parts, or storing the machine. These extra measures will help prevent
any unexpected starting of the power tool.
•Keep unneeded power tools out of the reach of children. Do not allow the power tool to be used
by a stranger or by persons who have not read this instruction manual. Power tools are danger-
ous when they are used by inexperienced persons.
•Take care of your power tool. Check to make sure that moving parts are functioning properly
and not locking or jamming, if parts are broken or damaged in such a way that the mode of
operation of the power tool is affected. Have damaged parts repaired before using the machine.
Many accidents are caused by poorly maintained power tools.
•Keep cutting edges sharp and clean. Properly maintained cutting tools with sharp cutting edges
are less prone to jamming or locking and are easier to handle.
•Use the power tool, its accessory parts, and replacement parts in accordance with these in-
structions. Consider the working conditions and the task at hand. Using a power tool for a pur-
pose other than its intended use can lead to dangerous situations.
Service
Only have the power tool repaired by qualified persons and only with the original replacement parts in
order to ensure that the safety of the machine is maintained.
Warnings!
•While working with this tool, the dust generated can be dangerous to your health. While working
with a sander, always wear eye protection and a dust mask. Do not work with material containing
asbestos, which is known to cause cancer.
•Special caution must be taken while sanding material containing lead:
◦All persons working with the machine or entering the workspace must wear a special mask
for protection from lead colours and steam.


© by WilTec Wildanger Technik GmbH Item 61055 Page 7
http://www.WilTec.de
http://www.aoyue.eu 10 2021-1
http://www.teichtip.de
◦Children and pregnant women are not allowed to enter the workspace.
◦At the workspace, it is not allowed to eat, drink, or smoke.
◦Contact with or inhaling of the sanded dust (e.g., lead-based coating material) can cause
damage to health of users. Always wear properly sized personal protection equipment such
as a dust mask and use a dust bag while sanding.
•The power cable must be kept away from the moving parts of the machine.
•Wear protection goggles, especially while sanding above your head.
Abrasive disc selection
The drywall sander is shipped with 6 pieces of sanding paper (80/100/120/150/180/240 grit). This abra-
sive is suitable for most applications. Abrasive discs of 120 grit and 240 grit are available for situations
requiring a smoother finish.
Installation
Before repair or replacement of electric tool parts or accessories, be sure to pull out the plug from
the socket.
Sandpaper selection
According to the material and the grinding effect, select the appropriate sandpaper:
Material
Use
Grit
Pigment
Removal of pigments
40
Paint
Removal of remaining paint
60
Filling agent
Grinding bottom pigment (such as finishing
bottom)
80
Interstitial material
Brush paint, grinding residues
Drop-shaped or convex pigment residues
Flat bottom material for painting
100
120
180
Replacing sanding paper
Before installing the new sanding paper, you first need to clear dirt sticking to the grinding wheel by use
of a brush. The grinding surface adhesive disc has a layer of cloth so it can quickly and easily be in-
stalled. The surface grinding sandpaper is pressed into the adhesive disc.
Do not use the sander without a proper abrasive pad installed to prevent severe damage to the work.

© by WilTec Wildanger Technik GmbH Item 61055 Page 8
http://www.WilTec.de
http://www.aoyue.eu 10 2021-1
http://www.teichtip.de
Replacing the rigid disc
The output shaft is inserted into the adhesive disc centre with a six-angle wrench in a clockwise rotation.
The hands holding the adhesive grinding disc, the grinding disc can be removed from the adhesive.
Speed adjustment
•The grinding disk rotation speed can be adjusted according to different conditions and grinding
quality requirements.
•The drywall sander is equipped with a variable speed control. The speed is adjusted by turning
the control knob. The control knob is labelled from “min” to “max” with “min” being the slowest
speed (approx. 1000 r⁄min) and “max” being the fastest speed (approx. 2100 r⁄min).
•Use the higher speed settings for fast stock removal; use the lower speed setting to reduce
removal rate for more precise control
Angle grinding
In order to do side grinding work, assemble with the delta pad.
Carbon brush replacement
The accessories include an original set of carbon brush. When the carbon brush has reached its wear
limit, replace with the new one. Using a cross-tip screwdriver, unscrew the brush cover counter-clock-
wise, remove the original carbon brush, put a new carbon brush to the brush holder and re-screw the
brush cover.

© by WilTec Wildanger Technik GmbH Item 61055 Page 9
http://www.WilTec.de
http://www.aoyue.eu 10 2021-1
http://www.teichtip.de
Starting and stopping the drywall sander
Make sure that the power circuit voltage is the same as shown on the specification plate on the sander,
and that the sander switch is OFF. Connect Sander to the power circuit. The drywall sander is equipped
with a rocker switch. The top end of the switch button is labelled OFF, and the bottom end of the button
is labelled ON. To start the sander, push the bottom end of the switch button (ON), to stop the sander,
push the top end of the switch button (OFF).
Sanding drywall
•The drywall sander has a unique articulating sanding head: the abrasive pad, to conform to the
work surface.
•This enables the operator to sand the top, middle and bottom of a wall or ceiling joint.
•When sanding a tall wall or ceiling, please use a ladder for help.
•The sanding pad is able to adjust the height by itself when it meets an uneven wall.
•CAUTION: Wear a respirator approved for dust and mist.
1. Turn the drywall sander switch ON.
2. Position the drywall sander lightly against the work surface (apply just enough pressure to align
the sanding head with the work surface).
3. Apply additional pressure to engage the abrasive pad to the work surface: while moving the
Sander in an overlapping pattern to smooth the drywall compound down to a “feather-edge.”
4. Keep the sander in constant motion while the abrasive pad is in contact with the work surface.
Use a steady sweeping motion. Stopping the sander (on the work), or moving it erratically can
cause unesthetic swirl marks and unevenness in the work surface.
•NOTE: Do not allow rotating abrasive pad to contact sharp protrusions. Contact with protruding
objects (nails, screws, electrical boxes, etc,), can severely damage the abrasive pad.
Maintenance
•Keep tools clean. Always clean up debris and dust. Often add lubricating oil and grease (re-
ducer, bearing) to keep the tool flexible in operation.
•Always check the power cable, the plug and the switches so that the tools remain in good con-
dition. Power tools produced by the company underlie a strict quality inspection. If the machine
still fails, please never repair the machine by yourself without authorization of the customer
service department.

© by WilTec Wildanger Technik GmbH Item 61055 Page 10
http://www.WilTec.de
http://www.aoyue.eu 10 2021-1
http://www.teichtip.de
Disposal regulations
EU guidelines regarding the disposal of scrap electric appliances (WEEE, 2012/19/EU) were imple-
mented in the law related to electrical and electronic equipment and appliances.
All WilTec electric devices that fall under the WEEE regulations are labelled with the crossed-out
wheeled waste bin logo. This logo indicates that this electric equipment must not be disposed with the
domestic waste.
The company WilTec Technik GmbH has been registered in the German registry EAR under the WEEE-
registration number DE45283704.
Disposal of used electrical and electronic appliances
(intended for use in the countries of the European Un-
ion and other European countries with a separate col-
lection system for these appliances).
The logo on the article or on its packaging points out
that this article must not be treated as normal house-
hold waste but must be disposed to a recycling collec-
tion point for electronic and electrical waste equipment.
By contributing to the correct disposal of this article you
protect the environment and the health of your fellow
men. Environment and health are threatened by inap-
propriate disposal.
Material recycling helps reduce the consumption of raw materials.
Additional information on recycling this article can be provided by your local community, municipal waste
disposal facilities or the store where you purchased the article.
Address:
WilTec Wildanger Technik GmbH
Königsbenden 12 / 28
D-52249 Eschweiler
Important notice:
The reprint or reproduction, even of excerpts, and any commercial use, even in part, of this instruction
manual require the written permission of WilTec Wildanger Technik GmbH.
Other manuals for 61055
2
Other WilTec Sander manuals

WilTec
WilTec 62548 User manual

WilTec
WilTec 62422 User manual

WilTec
WilTec 62542 User manual

WilTec
WilTec 61966 User manual

WilTec
WilTec 61117 User manual

WilTec
WilTec XPOtool 62830 User manual

WilTec
WilTec 62883 User manual

WilTec
WilTec 61055 User manual

WilTec
WilTec 61054 User manual

WilTec
WilTec 61857 User manual
Popular Sander manuals by other brands

Parkside
Parkside XQ 600 - MANUAL 2 Operation and safety notes

Metabo
Metabo 601559000 Original instructions

Global
Global G3492 Operating Instructions, Parts List, Warranty, & Warranty Repair Center

Ryobi
Ryobi R18ROS Original instructions

Parkside
Parkside PMFS 200 C3 Translation of the original instructions

Parkside
Parkside PDS 290 A1 Operation and safety notes