manuals.online logo
Brands
  1. Home
  2. •
  3. Brands
  4. •
  5. WilTec
  6. •
  7. Tiller
  8. •
  9. WilTec 51707 User manual

WilTec 51707 User manual

Other manuals for 51707

1

Other WilTec Tiller manuals

WilTec 51707 User manual

WilTec

WilTec 51707 User manual

WilTec 62419 User manual

WilTec

WilTec 62419 User manual

Popular Tiller manuals by other brands

WIL-RICH 2500 Operator's manual

WIL-RICH

WIL-RICH 2500 Operator's manual

MTD 410R parts list

MTD

MTD 410R parts list

Viking HB 685 instruction manual

Viking

Viking HB 685 instruction manual

SMASH TLG415 instruction manual

SMASH

SMASH TLG415 instruction manual

FarmBoy FB-IC-209P user manual

FarmBoy

FarmBoy FB-IC-209P user manual

Craftsman 247.29931 Operator's manual

Craftsman

Craftsman 247.29931 Operator's manual

MTD FRT Series Operator's manual

MTD

MTD FRT Series Operator's manual

Craftsman 917.298353 owner's manual

Craftsman

Craftsman 917.298353 owner's manual

Troy-Bilt Colt FT Operator's manual

Troy-Bilt

Troy-Bilt Colt FT Operator's manual

MTD OHV Series Original operating instructions

MTD

MTD OHV Series Original operating instructions

YAT YT5601-01 Assembly, Use, Maintenance Manual

YAT

YAT YT5601-01 Assembly, Use, Maintenance Manual

Craftsman 917.296010 owner's manual

Craftsman

Craftsman 917.296010 owner's manual

Scheppach MTP560 Translation from the original instruction manual

Scheppach

Scheppach MTP560 Translation from the original instruction manual

GARDEN WAY 12194 owner's manual

GARDEN WAY

GARDEN WAY 12194 owner's manual

Classen STAND-AER SA-25 Operator's manual and parts list

Classen

Classen STAND-AER SA-25 Operator's manual and parts list

Altrad ATIKA BH 1400 N Original instructions, safety instructions, spare parts

Altrad

Altrad ATIKA BH 1400 N Original instructions, safety instructions, spare parts

DR PILOT 2 Safety & Operating Instructions

DR

DR PILOT 2 Safety & Operating Instructions

AL-KO TL 1820 Instructions for use

AL-KO

AL-KO TL 1820 Instructions for use

manuals.online logo
manuals.online logoBrands
  • About & Mission
  • Contact us
  • Privacy Policy
  • Terms and Conditions

Copyright 2025 Manuals.Online. All Rights Reserved.

Operation Manual
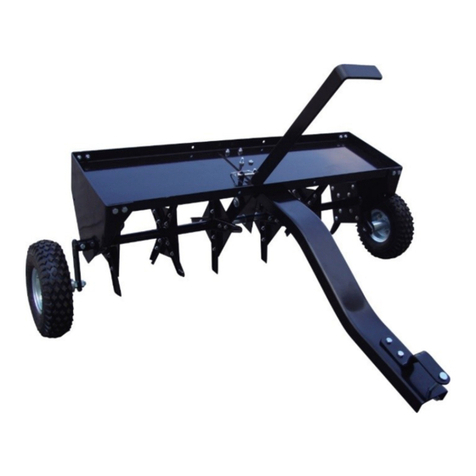
40” Lawn Aerator
51707



 




 

!!"#$"

%!!"#$
"
"""

&'
(
'
'))))
'
')))
*'
!!"#$
+,-.
/..01%
#
"2*"'
!!"#$
+,.3
/..01%
#
"

%'(
'401.056///1.5
78'401.056///1.-/
8  
8 


!!"#$
+,.3
/..01%
%'[email protected]
'401.056///1.5
78'401.056///1.-/
9!!"#$ /-:5: ;.
'))!
'))  5-.5.--
'))
Introduction
"< To ini ize the risk of injury we urge that our cli-
ents take so e basic safety precautions when using this device. Please read the operation in-
structions carefully and ake sure you have understood its content.
+
Notes on safe operation
=

CAUTION: VEHICLE BRAKES AND STABILITY CAN BE AFFECTED BY THE ADDITION OF AC-
CESSORIES OR ATTACHMENTS AND ALTER THE DRIVING CHARACTERISTICS.

- 7>
<
. 
6 ?"

0 " 

/ 
@ +
: 8AB

3 "
;*

1 ?"
-5                       


-- 
-. 7
9!!"#$ /-:5: ;6
'))!
'))  5-.5.--
'))
Scope of delivery
Main parts
№ Na e № Na e
1; 7C
2C& 8!AD.B
3&;AD.B 9!$AD6B
4$ 10 CAD.B
5C 26 &CAD.B
68
9!!"#$ /-:5: ;0
'))!
'))  5-.5.--
'))
Mounting material
№ Na e Qty. № Na e Qty.
A&EFD0G:)-@F . KH"/)-@F ..
B&IFD-G1)-@F 6 M!J3 -.
C&/)-@FD-G6)-@F @ P!J.5 0
D&/)-@FD:)3F 3 Q&IF 3
E&/)-@FD-F 3 R&-@-F -
FH" - S&5:1F -
G - TH"?IF 6
HC - U&.6@F -
I$8EF . V#" -
JH"EF . W&.:@F -
9!!"#$ /-:5: ;/
'))!
'))  5-.5.--
'))
Asse bly instructions
Recommended tools for assembly
.D:)-@F)EF)KF
-D>=
-D>
L
ATTENTION: THE TIPS OF THE AERATOR BLADES ARE SHARP!
BE CAREFUL WHEN INSTALLING AND USING THE LAWN AERATOR.
Step 1: Fasten the wheel holder to the axle shaft
-        "      
      8    ?    
            
87
IFD-G1)-@F 8 (4) 
IF8"(2).Do not tighten fir ly.
.?8 (A) 8
 /)-@FD-G6)-@F (1) 8 
"
8A&B /)-@F8"
(3)Do not tighten screws.
Step 2: Mount the short side of the axle shaft.
M8
*
"
-&A"B
.&A"B
6.6@FAB
0J.5
9!!"#$ /-:5: ;@
'))!
'))  5-.5.--
'))
Step 3: Mount the long side of the axle shaft
M
8*
" IMPORT-
ANT: M""
 
8A NB
-&5:1F
.J.5
6C
0J.5
/-@-F
@A"B
:&
3.:@F
1J.5
Step 4: Fasten the end plates and the wheel holder
&              
8
(A).?8
J.5 (5) 
    ?      
        7    
"      8      IFD-G1)-@F
8IF"Tighten
the connection fir ly.     

-&
.!
6&IFD-G1)-@F
0H"IF
/7:)3F
9!!"#$ /-:5: ;:
'))!
'))  5-.5.--
'))
Step 5: Attach the wheel asse bly
EFD0G:)-@F8
EF8EFD0G:)-@F
88
                
EFD0G:)-@F8"
 EF "

Make sure that the wheels can
turn freely after assembly.
-!
.$8EFD0G:)-@F
6$8EF
0H"EF
Step 6: Mounting the coupling rod and hook
"
 /)-@FD-F  8      /)-@F 8
"?8

Tighten the connections tightly.
-C
.$8/)-@FD-F
6H"/)-@F
0C"
/
9!!"#$ /-:5: ;3
'))!
'))  5-.5.--
'))
Step 7: Fastening the coupling rod to the support



AB7
AB
 /)-@FD-G6)-@F IF
  /)-@F8"7
/)-@FD-F/)-@F8"
7
AB/)-@FD-G6)-@F8
 IF  /)-@F8"
Tighten all connections.
-$8/)-@FD-G6)-@F
.$8/)-@FD-F
6H"/)-@F
0IF
Step 8: Fasten the centre support
;              

                  
/)-@FD:)3FAB&
/)-@FD-FJ3
  /)-@F 8"  Do not tighten
fir ly.
-$8/)-@FD-F
.H"/)-@F
6C
0&J3
9!!"#$ /-:5: ;1
'))!
'))  5-.5.--
'))
Step 9: Attach the top co part ent
7                
/)-@FD:)3F8J3/)-@F8
A.B

Do not tighten screws co pletely.
-$8/)-@FD:)3F
.H"/)-@F
6&J3
Step 10: Attach the lifting handle
;
 
              
/)-@FD-G6)-@F /)-@F"
      . (A).     
             /)-@FD-G6)-@F
8      /)-@F  8"
Tighten the connections firmly.
-$8/)-@FD-G6)-@F
.H"/)-@F
6&
9!!"#$ /-:5: ;-5
'))!
'))  5-.5.--
'))