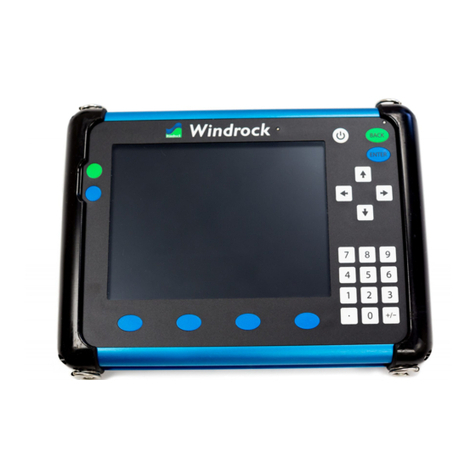
Windrock Spotlight A3910 User manual

Engine Spotlight Monitoring System:
Spotlight Controller
Engine Spotlight PUC Module
USER MANUAL

2
Doc No. A3940_UM Rev 1.0
Legal Notices
Copyright ©2018 Windrock Incorporated. All rights reserved.
No part of this manual may be reproduced or transmitted in any form or by any mean without the
written permission from Windrock Incorporated.
Software and Firmware License Notice
Your license agreement with Windrock Incorporated authorizes the number of copies which can
be made and the computer systems on which they may be used. Any unauthorized duplication or
use of Windrock software or firmware in whole or in part, in print, or in any other storage and
retrieval system, is forbidden.
Disclaimer
The manual is provided for informational purposes. Windrock Incorporated makes no warranty
of any kind with regard to this material, including, but not limited to, the implied warranties of
merchantability and fitness for a particular purpose. Windrock Incorporated shall not be liable
for errors, omissions, or inconsistencies which may be contained herein or for incidental or
consequential damages in connection with the furnishing, performance, or use of this material.
Information in this document is subject to change without notice and does not represent a
commitment on the part of Windrock Incorporated. Any software described in this document is
furnished under a license agreement or nondisclosure agreement. The software may be used or
copied only in accordance with the terms of the agreement.
Important Safety Notices
When used in accordance with the instructions in this manual and the associated control
drawings, Windrock Spotlight is approved for use in Class 1 Division 2 and unclassified areas.
Failure to follow this manual may result in an explosion hazard when used in hazardous
locations or improper operation.
The examples and diagrams in this manual are included for illustrative purposes. Because of the
many variables and requirements associated with any particular installation, Windrock Inc.
cannot assume responsibility or liability for actual use based upon examples and diagrams.
For any questions, problems, or service for any Windrock products, including Windrock
Spotlight, visit the Windrock web site at www.windrock.com. Inquiries may also be directed to
Windrock, Inc
1832 Midpark Drive, Suite 102
Knoxville, TN 37921
www.windrock.com

3
Doc No. A3940_UM Rev 1.0
Table of Contents
1A3910 Spotlight Controller 5
1.1 Connections 5
1.2 Operation 6
2Spotlight Peripheral Universal Connection (PUC) Module 7
2.1 Features 7
2.2 Connections 7
2.3 Operation 7
3Included Accessories 7
3.1 General 7
3.2 External Accelerometers 7
3.3 Magnetic Pickup Sensor 8
3.4 Controller WiFi Antennas 8
3.5 Spotlight Trunk Cable 9
3.6 Spotlight Magnetic Pickup Cable 9
3.7 Spotlight Armored Accelerometer Cable 9
3.8 Worm Drive Clamp Kits 9
3.9 Base Plate with 1/4-20 Stud and Adhesive 10
3.10 Accelerometer Isolation Pads with 1/4-28 Stud and Adhesive 10
4Optional Accessories 10
4.1 General 10
4.2 Spotlight Armored Accelerometer Extension Cable 10
4.3 Spotlight Controller Diagnostic Tool 10
4.4 Spotlight Mag Pickup (MPU) Extension Cable 10
4.5 T-Adapter Connector 11
4.6 Magnet 11
4.7 Portable Analyzer 11
4.8 Shaft Encoder 11
4.9 A3934 Spotlight Shaft Encoder Cable 11
4.10 Strobe (Timing) Light 11
5System Installation 11
5.1 General 11
5.2 Hazardous Locations 11
5.3 Installation Overview 13

4
Doc No. A3940_UM Rev 1.0
5.4 Magnetic Pickup Mounting 17
5.5 Controller Mounting 18
5.6 Power Requirements 18
5.7 Gateway Mounting 19
5.8 PUC Mounting 20
5.9 Shaft Encoder 20
5.10 Environment 20
6Maintenance and Cleaning 21
7Appendix. 21
7.1 CD-A3910-01 Controller Specification 21
7.2 CD-A3940-01 PUC Module Specification 21
7.3 Controller Mounting Options 21
7.4 PUC Module Mounting Options 21
PRESSURE WASH WARNING. Use of harsh cleaning chemicals, solvents, and degreasers may impare the
functionality of the system. When pressure washing, be cautious on length of time and intensity of spray on all
parts of the system, including sensors and cabling. If parts of a Spotlight system were removed in order to
perform cleaning and/or maintenance, contact Windrock Product Support at 865-330-1100 and ask for
Spotlight Installation Support to verify operation.
IMPORTANT: POWER REQUIREMENTS. If voltage and power requirements are not
met, system integrity will be compromised. Review power requirements and
warnings as laid forth in this document. For additional details, refer to the Spotlight
Datasheet.

5
Doc No. A3940_UM Rev 1.0
1A3910 Spotlight Controller
THE A3910 IS FOR USE WITHIN A WINDROCK SPOTLIGHT SYSTEM ONLY.
LE A3910 DOIT ÊTRE UTILISÉ DANS UN SYSTÈME WINDROCK SPOTLIGHT
UNIQUEMENT.
THE A3910 CONTAINS NO USER SERVICEABLE COMPONENTS. ANY ATTEMPT
TO MODIFY THIS DEVICE, USE FOR OTHER THAN ITS INTENDED PURPOSE, OR
SUBSTITUTION OF COMPONENTS MAY DAMAGE THIS DEVICE LEADING TO
UNRELIABLE OPERATION AND DECREASED PROTECTION FOR THE DEVICE
BEING MONITORED.
LE A3910 NE CONTIENT AUCUNS RÉPARABLE. TOUTE TENTATIVE DE
MODIFIER CE DISPOSITIF, UTILISER D'AUTRE QUE SA DESTINATION, OU
LA SUBSTITUTION DE COMPOSANTS PEUT ENDOMMAGER CET
APPAREIL MENANT À UNE OPÉRATION PEU FIABLE ET A DIMINUÉ LA PROTECTION DU DISPOSITIF SURVEILLÉ.
1.1 Connections
Connections marked with in this manual or on the product are incendive and possible explosion hazards when installed in
a hazardous environment. Other connections are non-incendive when installed in accordance with this manual, the associated
control drawings in the appendix, the National Electrical Code and/or Canadian Electrical Code, and the authority having
jurisdiction. Consult the control drawing for proper and safe connection to field devices.
PWR - Power is applied via the integral power cable. NOTE: EQUIPMENT SHALL BE POWERED BY AN APPROVED SELV LPS
POWER SOURCE.Power connection and mounting requirements are both detailed in Section 5, System Installation.
PUC 1, PUC 2, PUC 3, PUC 4 – Non-incendive 8-pin output to PUC Modules. Four connectors are provided on the Controller
unit, one for each PUC Module. PUCs are connected using Spotlight Trunk Cables. Connection to any other equipment or
using any other cables other than those specified by Windrock may compromise system integrity.
TDC Input – Non-incendive 3-pin input for TDC. In order for the Windrock Spotlight system to operate properly, an accurate
TDC signal is required. Use ONLY magnetic pickup sensors with entity parameters as described in control drawings. The
magnetic pickup generates a signal as it crosses an artifact (pin or hole) in a spinning steel disk such as the flywheel. The
Spotlight Magnetic Pickup Cable connects from TDC Input of this Controller to the magnetic pickup sensor.
Multiple Controller Note: The Spotlight system is capable of monitoring more than sixteen (16) accelerometers
per engine. Use a T-Adapter to connect a Spotlight Magnetic Pickup Cable to separate controllers using MPU
Extension cable (sold separately).
For further information regarding magnetic pickup sensors, see Section 3.3, Magnetic Pickup Sensor.
TDC Output – This 3-pin connector outputs a non-incendive TDC signal that allows a Windrock Portable Analyzer system to
monitor Spotlight.
WARNING – EXPLOSION HAZARD – DO NOT DISCONNECT EQUIPMENT UNLESS POWER HAS BEEN
SWITCHED OFF OR THE AREA IS KNOWN TO BE NON-HAZARDOUS.
ADVERTISSEMENT – RIAQUE D’EXPLOSION – AVANT DE DECONNECTOR L’EQUIPMENT, COUPER LE
COURENT OU S’ASSURER QUE L’EMPLACEMENT EST DESIGNE NON DANGEREUX.
WARNING: EXPLOSION HAZARD. Input voltage must not exceed Vmax of any associated device
connected to sensor inputs on A3940.
ADVERTISSEMENT – RIAQUE D’EXPLOSION – TENSION D'ENTRÉE NE DOIT PAS DÉPASSER VMAX DE
N'IMPORTE QUEL DISPOSITIF ASSOCIÉ AUX ENTRÉES CAPTEUR A3940.
Figure 1-1. A3910 Controller

6
Doc No. A3940_UM Rev 1.0
•Portable Analyzer Measurements. Connecting TDC Output to a Windrock Shaft Encoder enables convenient
monitoring using a Windrock Portable Analyzer (Shaft Encoder and Portable Analyzer sold separately). A Spotlight
Shaft Encoder Cable (sold separately) is used to connect from TDC output to the TDC connection on a Shaft Encoder.
CAUTION: BUFFERED OUTPUTS HAVE A COMMON GROUND WITH THE REST OF THE WINDROCK SPOTLIGHT
SYSTEM. USE OF A PORTABLE MONITOR SUCH AS WINDROCK’S 6420 IS RECOMMENDED. CONNECTING THE
BUFFERED OUTPUT GROUND TO EQUIPMENT AT A DIFFERENT POTENTIAL WILL RESULT IN IMPROPER
OPERATION.
ADVERTISSEMENT –SORTIES DE TAMPONNÉ ONT
UN TERRAIN D'ENTENTE AVEC LE RESTE DU
SYSTÈME WINDROCK SPOTLIGHT. UTILISATION
D'UN MONITEUR PORTABLE COMME DE
WINDROCK 6420 EST RECOMMANDÉ. BRANCHER
LA SORTIE TAMPONNÉE AU SOL À L'ÉQUIPEMENT
À UN POTENTIEL DIFFÉRENT SE TRADUIRA PAR UN
FONCTIONNEMENT INCORRECT.
WiFi - The Windrock Spotlight Controller has two RP-SMA
connectors located on the top of the unit for connection
to WiFi antennas. The standard Spotlight Controller
includes two WiFi antennas.
1.2 Operation
The Controller does not have a local display. Under normal operation, no configuration is needed.
There is one method provided for local status indication. If a Spotlight Controller Diagnostic Tool was included with your
system, it may be used for troubleshooting purposes. Connect the Diagnostic Tool to any available Spotlight Trunk Cable on the
system. During the periodic controller polling, LEDs on the tool will light up to indicate activity. Refer to Table 1-3 below for
specific pattern identification
PUC ACTIVITY PATTERN
MEANING
Slow clockwise rotation of LEDs
sampling in progress
Brief clockwise rotation
no error, just delay between samples
Ping pong between outer LEDs
NO TDC SIGNAL. (Note: this display will persist until the next polling
interval even after TDC is restored. Polling interval is initially set to 5
minutes during commissioning; it will be changed by Windrock
Product Support remotely once the system is brought up.)
Ping pong between inner LEDs
not connected to WiFi
Table 1-3, Diagnostic Tool Status Indication Patterns
For installation sequence, refer to Section 5, System Installation.
WARNING: If the Controller is not operating properly, then unit must be returned to Windrock for repair
service. Contact your sales representative or Windrock directly.
AVERTISSEMENT : Si le contrôleur ne fonctionne pas correctement, puis doit être renvoyé à Windrock des
réparations. Contactez votre représentant commercial ou Windrock directement.
Figure 1-2 Controller Connections - Top

7
Doc No. A3940_UM Rev 1.0
2Spotlight Peripheral Universal Connection (PUC) Module
2.1 Features
•Multiple mounting options (bolt-down, or epoxy)
•Four (4) external accelerometer cables
2.2 Connections
Note: All connections to the Spotlight PUC Modules are non-incendive.
Controller connection – Non-incendive 8-pin output to Controller shown in Figure 2-2. Connect using
Spotlight Trunk Cable. Connection to any other equipment or using any other cables other
than those specified by Windrock may compromise system integrity.
Accelerometer Connections (x4) – Non-incendive 2-pin input used to connect to accelerometer
cables. Connection to any other equipment or using any other cables other than those specified by Windrock may
compromise system integrity.
For further information, see Spotlight Datasheet.
2.3 Operation
Under normal and proper operation, the PUC Module is used by the
Controller to gather sensor readings.
It is not necessary to interact with the A3940 locally as its operation can
be observed within the Windrock Enterprise software.
For installation sequence, refer to Section 5, System Installation.
WARNING: If A3940 is not operating properly, then unit must
be returned to Windrock for repair service. Contact your sales
representative or Windrock directly.
AVERTISSEMENT : Si A3940 ne fonctionne pas correctement,
puis doit être renvoyé à Windrock des réparations. Contactez
votre représentant commercial ou Windrock directement.
3Included Accessories
3.1 General
Spotlight systems have ONLY been approved for use using the accessories listed in Section 3 and Section 4.
NOTE: THE SAFETY OF ANY SYSTEM INCORPORATING THE EQUIPMENT IS THE RESPONSIBILITY OF THE INSTALLER
OF THE SYSTEM.
IF THE EQUIPMENT IS USED IN A MANNER NOT SPECIFIED BY THE MANUFACTURER, THE PROTECTION PROVIDED
BY THE EQUIPMENT MAY BE IMPAIRED.
3.2 External Accelerometers
Each PUC Module connects to four (4) industrial accelerometers that employ a shear sensing geometry with a ceramic sensing
element. This ceramic sensing element provides excellent resolution and durability in noisy environments, and is designed to
supply low-frequency and high-frequency measurements. Shear sensing geometry is preferred because of the inherent
insensitivity to adverse environmental influences, such as case or base strain and thermal transients.
Dynamic expectations are application-specific and refer to the frequency range of measurement and the anticipated amplitudes
of vibration. After careful review of the machinery to be monitored, minimum and maximum measurement frequency range
along with proper output range may be established. The minimum measurement frequency is normally related to any sub-
Figure 2-1, A3940 PUC Module
TO
CONTROLLER
Figure 2-2, A3940 Controller Connection

8
Doc No. A3940_UM Rev 1.0
harmonics of running speed or any lower frequencies where vibration data is to be collected. The maximum measurement
frequency of interest is determined by the maximum number of harmonics of an event like running speed, bearing frequencies,
or gear mesh impacting. This measurement frequency range should be well within the specified frequency range of the sensor.
The sensor measurement range (output) can be found by determining the maximum peak vibration amplitude that will be
measured. Allow overhead in case the vibration is a little higher than expected. The accelerometers should be torqued to 3ft-lbs
when installed.
Amplitude range refers to the anticipated levels of vibration to be measured. These values are related to the alarm levels set for
the machine. By carefully evaluating the idiosyncrasies of the machinery, the predictive maintenance engineer can estimate the
minimum expected vibration levels and ensure that the electrical noise floor of the accelerometer is less than those levels.
3.3 Magnetic Pickup Sensor
The system is designed to accept inputs from Windrock-approved magnetic pickup sensors.Magnetic pickups are sold
separately. Other magnetic pickup brands may be used as well. Please contact Windrock for questions regarding magnetic
pickup compatibility.
Further information regarding magnetic pickup sensors:
At the heart of a VRS/Magnetic pickup is a permanent target that creates a magnetic field. An output is generated by changing
the strength of this field, which is caused by the approach and passing of a ferrous metal target near the sensing area. The
target is typically either a magnet, a hole in a ferrous metal disk, or a protrusion such as a bolt. The amplitude and waveform of
the sensor output is affected by the speed of the sensed device and the shape of the target.
Proper TDC detection is the most important factor when measuring the performance of reciprocating machines, so a reliable
TDC signal is essential. The sensor must be rigidly held within close proximity from the target. The mount must not move as
the machine vibrates, and should not be located where routine maintenance is likely to move it. The target does not have to be
located at TDC, as a fixed offset may be applied in software. It is essential that only one target be “seen” per revolution of the
machine.
The output signal should have a magnitude of approximately 2V peak-to-peak. In order to achieve this output, Windrock
recommends epoxying a small 1/4” target diameter magnet into the target area. It may be necessary to move the sensor closer
or farther from the target. Slow speed machines need closer and larger targets than high speed machines.
With an A6400 Portable Analyzer and A6420 Shaft Encoder, you can verify the offset of the target from TDC and enter this into
the geometry setup in the Windrock MD software. TDC should be marked on the flywheel sufficient for the timing light to
illuminate when the machine is running. TDC offset may be advanced or retarded in software to correct any discrepancies.
COMPATIBLE MAG PICKUPS
Windrock Part Num.
OEM
OEM p/n
Thread
Thread Length
Notes
A3012-10-00
Dynalco
M231
5/8-18 UNF-2A
4”
Intrinsically safe; CSA Approved
A3012-00-00
Honeywell
A3042A
5/8-18 UNF-2A
1.4”
Intrinsically safe
NOT SOLD BY WRI
Honeywell
3090A35
5/8-20 UNF-2A
4.8”
Intrinsically safe
Incorrect connector pin polarity will cause installation problems, however
polarity can be changed in the setup. Refer to Table 3-1, Spotlight Mag Pickup
Compatibility List for Spotlight-tested compatible mag pickups. For installation
sequence, refer to Section 5, System Installation.
3.4 Controller WiFi Antennas
The Controller uses two WiFi antennas as shown in Figure 3-2. Antennas are
installed after the unit is mounted. Refer to Section 5, System Installation.
Table 3-1, Spotlight Mag Pickup Compatibility List
Figure 3-2, Controller with WiFi Antennas

9
Doc No. A3940_UM Rev 1.0
3.5 Spotlight Trunk Cable
The Controller connects to each PUC Module using the Spotlight Trunk Cable. This circular 8-position cable has male and
female ends. This allows for connecting multiple cables together if a longer length of cable is required for installation. Contact
your Windrock representative to purchase additional Spotlight Trunk Cables.
3.6 Spotlight Magnetic Pickup Cable
The Spotlight Magnetic Pickup Cable connects on one end to the magnetic pickup. On the opposite end, the 3-position
connector can either connect directly to the TDC IN of the Controller, or to a Spotlight MPU Extension Cable, or a T-Adapter to
split the signal to multiple Controllers (Section 4.6).
3.7 Spotlight Armored Accelerometer Cable
Each accelerometer Controller connects to each PUC Module using the Spotlight Armored Accelerometer Cable. This circular 2-
position cable has two female ends, one bayonet and one threaded. The bayonet end connects to a PUC Module and the
threaded end screws onto an accelerometer. Contact your Windrock representative to purchase additional cables.
3.8 Worm Drive Clamp Kits
Worm drive clamps are included with new systems to aid installers in routing cabling in order to meet local codes and proper
wiring methods. Refer to Section 5, System Installation for further details.
EXTERNAL WIFI
The A3910 controller is designed to permit use of an external WiFi antenna, connected to the controller ANT2 jack, if
needed to improve connectivity with the A3930 gateway. Such an antenna must be designed for use with 2.4 GHz
frequency (compatible with IEEE 802.11 b/g standards); the cable must terminate in an RP-SMA connector to mate with
the ANT2 jack. In the United States, if a directional WiFi antenna with gain higher than 6 dBi is used with the controller,
FCC regulations require that the transmit power of the controller be reduced by 1 dB for every 3 db that the directional
gain of the antenna exceeds 6 dBi. This rule applies only if the equipment is used for fixed, point-to-point operation;
greater power reduction may be required when directional WiFi antennas are used in other circumstances. The operator
of the equipment, or if the equipment is professionally installed, the installer, is responsible for ensuring that this power
reduction is implemented and that the system is used exclusively for fixed, point-to-point operations. (Reference: Title
47, Code of Federal Regulations, part 15.247.) In general, it is the responsibility of the installer and operator,
respectively, to ensure that legal requirements for installation and operation are followed.Contact Windrock for
information on how to reduce controller transmitter power.
WIRE MARKERS
Spotlight Trunk Cable Wire markers were included loose with the system. During installation, it is recommended to attach
wire markers to cables that correspond to the PUC numbers on the controller (ie. PUC1 Controller cables should be
marked with a “1”, etc.). Clip wire markers on at both ends of each trunk cable. If using more than one trunk cable per
PUC, repeat the same wire marker on the extension as well. This way, it will simplify troubleshooting as well as installation
when routing cables around equipment.
WIRE MARKERS
Wire markers are installed onto Spotlight Armored Accelerometer Cables at the factory. Markers on these cables will have
a letter and a number at each end. Marker numbers indicate corresponding Controller PUC channel number (ie. “1” for
PUC1, “2” for PUC2, etc.). Marker letter corresponds to one of the four local PUC channels, “A” through “D”. Refer to the
Engine Spotlight information sheet included with your system for further details. If an Accelerometer extension cable was
included with the order, mark the cable you are extending in the same fashion. By marking all cables this way, it will
simplify troubleshooting as well as installation when routing cables around equipment.

10
Doc No. A3940_UM Rev 1.0
3.9 Base Plate with 1/4-20 Stud and Adhesive
Engine PUCs are typically mounted using Base Plate 1/4-20 Studs. Controllers can be mounted using these as well. Loctite 330
is used to affix the plates to the Engine. Refer to Section 5, System Installation for further details.
3.10 Accelerometer Isolation Pads with 1/4-28 Stud and Adhesive
Isolation Pads are included with each system and are used to fasten the accelerometer to the Engine. Pads have a rough side
and a smooth side. The rough side is used to affix the pad to the engine (using Loctite 330, 1/4-28 studs, or a recommended
combination of both). The smooth side should be used for threading and mounting an accelerometer. Refer to Section 5,
System Installation for further details.
4Optional Accessories
4.1 General
Spotlight systems have ONLY been approved for use using the accessories listed in Section 3and Section 4.
Items listed in Section 4 are not standard and therefore must be purchased separately. If interested, contact Windrock Sales for
a quote.
NOTE: THE SAFETY OF ANY SYSTEM INCORPORATING THE EQUIPMENT IS THE RESPONSIBILITY OF THE INSTALLER
OF THE SYSTEM.
IF THE EQUIPMENT IS USED IN A MANNER NOT SPECIFIED BY THE MANUFACTURER, THE PROTECTION PROVIDED
BY THE EQUIPMENT MAY BE IMPAIRED.
4.2 Spotlight Armored Accelerometer Extension Cable
Optional Spotlight Armored Accelerometer Extension Cables allow for a longer length between each PUC Module and
accelerometer than using the standard accel cable by itself. This circular 2-position cable has male and female ends. Extension
cables do not come pre-marked. See the Wire Marker note in Section 3.7 for information.
Do not exceed entity parameter limits shown on the control drawing when using extension cables. If necessary, contact
Windrock Product Support for further information.
4.3 Spotlight Controller Diagnostic Tool
To assist with the installation and troubleshooting of the Spotlight system, use the Spotlight Controller Diagnostic Tool. This
tool connects to a Controller using any Spotlight Trunk Cable.
Under normal and proper operation, the PUC Module is used by the Controller to gather sensor readings. Periodically, the
controller unit collects and records data from connected sensors.
PUCs do not have local status indicators for sensors or power. Therefore, during the periodic controller polling, users do not
have a visual indication of activity. The Diagnostic Tool contains four (4) LEDs that turn on in a specific pattern to give an
installer feedback on system status. A single LED is also provided for power.
Refer to Section 2.3 for more information.
4.4 Spotlight Mag Pickup (MPU) Extension Cable
The Spotlight MPU Extension Cable is a 3 position cable with male and female ends. The cable is used in two possible ways:
1) Controller expansion: The MPU Extension Cable connects from the T-Adapter to the TDC IN of the Controller.
See Section 5, Installation Overview for details. In addition, multiple MPU Extension Cables can be connected
together to accommodate larger cable runs.
2) Magnetic Pickup Cable expansion: The MPU Extension Cable extends the reach of the A3932 MPU Cable to the
Spotlight Controller.

11
Doc No. A3940_UM Rev 1.0
4.5 T-Adapter Connector
The T-Adapter Connector is used to split the MPU signal between two (or more) Controllers.
4.6 Magnet
A small diameter magnet can be used as a target for the Magnetic Pickup Sensor as described in previous Section 3.3 as well as
Section 5, System Installation.
4.7 Portable Analyzer
Windrock’s Portable Analyzer is used to collect sensor point data for diagnostic analysis and performance measurements. Using
a Portable Analyzer in combination with a Spotlight system expands the potential analysis of the machine for preventative
maintenance.
4.8 Shaft Encoder
Windrock’s Shaft Encoder is used to provide the TDC phasing signal to Portable Analyzer. The Encoder generates a pulse per
revolution (PPR) signal for tracking crankshaft motion. Spotlight Controllers connect to the Shaft Encoder to allow the Portable
Analyzer to reference machine TDC.
4.9 A3934 Spotlight Shaft Encoder Cable
The Spotlight Shaft Encoder cable is used in conjunction with the A6420 Shaft Encoder. The Windrock part number for this
cable is A3934-CBL-0-3.
4.10 Strobe (Timing) Light
Windrock’s Strobe (Timing) Light is used to correct for phase angle from TDC measurements.
5System Installation
5.1 General
NOTE: THE SAFETY OF ANY SYSTEM INCORPORATING THE EQUIPMENT IS THE RESPONSIBILITY OF THE
ASSEMBLER OF THE SYSTEM.
IF THE EQUIPMENT IS USED IN A MANNER NOT SPECIFIED BY THE MANUFACTURER, THE PROTECTION PROVIDED
BY THE EQUIPMENT MAY BE IMPAIRED.
NOTICE – Review this section of the manual prior to installation. For questions regarding installation, contact
your Windrock salesperson or Windrock Customer Support.
ADVERTISSEMENT – Cette section du manuel est uniquement à des fins de référence. Contacter votre vendeur
Windrock ou Windrock service clientèle pour toute question concernant l'installation.
5.2 Hazardous Locations
THIS EQUIPMENT IS SUITABLE FOR USE IN CLASS 1, DIVISION 2, GROUPS A-D OR NON-HAZARDOUS LOCATIONS
ONLY.
WARNING – EXPLOSION HAZARD – DO NOT DISCONNECT EQUIPMENT UNLESS POWER HAS BEEN
SWITCHED OFF OR THE AREA IS KNOWN TO BE NON-HAZARDOUS.
ADVERTISSEMENT – RIAQUE D’EXPLOSION – AVANT DE DECONNECTOR L’EQUIPMENT, COUPER LE
COURENT OU S’ASSURER QUE L’EMPLACEMENT EST DESIGNE NON DANGEREUX.

12
Doc No. A3940_UM Rev 1.0
SUBSTITUTION OF COMPONENTS MAY IMPAIR SUITABILITY FOR CLASS 1, DIVISION 2
ALL WIRING MUST BE IN ACCORDANCE WITH APPROPRIATE SECTIONS OF THE NATIONAL ELECTRICAL CODE
AND/OR IN ACCORDANCE WITH THE CANADIAN ELECTRICAL CODE AND IN ACCORDANCE WITH THE AUTHORITY
HAVING JURISDICTION.
Refer to Spotlight Datasheet for details on hazardous location ratings.
Refer to the Section 7 for control drawings and entity parameters.

13
Doc No. A3940_UM Rev 1.0
5.3 Installation Overview
Tools Needed:
•cordless drill
•No. 25 drill bit
•5/8-18 UNF-2A tap
•1/4-28 flat bottom tap
•cell phone
•Infrared thermometer
•1/4” drill bit
•#10 nut driver
•10-24 tap
•Tapping fluid
•spray degreaser
•1/4 allen wrench
•7/32” drill bit
•1/4” nut driver
•1” dia. spot face tool
•tap handle
•shop towel
•Infrared thermometer
•screwdriver set (for cabinet wiring)
•Indelible marker
•pliers
Material required but not supplied in standard Spotlight kit:
•disconnecting device with marking for Gateway
•magnetic pickup sensor
•24VDC power supply
•MPU mounting bracket
•disconnecting device with marking for Controller
•#10 screws, washers, and nuts, 4EA (optional for Gateway mounting)
Figure 5-1, Single Controller Installation
Figure 5-2, Multi-Controller Installation

14
Doc No. A3940_UM Rev 1.0
Order of installation:
1) Ensure engine is both de-energized and locked out/tagged out per
facility’s standard procedures. Adhere to all safety procedures
required by the facility and acquire all necessary work permits.
2) Choose Gateway mounting location. For details, see Section 5.7.
Important: Gateway location is central to all Controllers in vicinity.
3) Drill holes at Gateway mounting location. If using aluminum
mounting bars AND wall thickness is larger than 0.125”, customer
must supply four 1/4”-20 screws longer than supplied in the
Windrock kit (1/4”-20 x 1”).
4) Assemble Gateway. Install router on DIN rail and mount feet on
bottom of enclosure. For details, see Section 5.7.
5) Mount Gateway unit. If using the aluminum mounting bars, attach
using 1/4”-20 screws, lock washers, and nuts provided with the
system. If using the plastic mounting feet, provide #10 screws
(supplied by customer).
6) Customer must provide supply voltage at desired mounting location.
For details, see Section 5.6.Ensure power is
de-energized.
7) Install disconnecting device, clearly marked
(supplied by customer).
8) Attach WiFi antenna to Gateway. Orient
direction of antenna according to Figure 5-3,
NOTE: Hold the antenna steady in
position shown while screw-mounting
the connection.Improper technique
can damage the antenna.
9) Attach both Cellular LTE antennas to DIV and ANT label on router.Orient direction of antennas according to Figure
5-3. NOTE: Hold the antenna steady in position shown while screw-mounting the connection. Improper
technique can damage the antennas.
10) Connect internal power cable to router PWR.
11) Connect Ethernet cable to router LAN.
12) Connect 24Vdc integral power cable to disconnecting device.
a. White conductor is positive.
b. Black conductor is ground return.
13) Energize Gateway unit. If necessary, see Enterprise Gateway Manual for
further details.
14) Install accelerometer with mounting pads at sensor locations.
a. Drill a hole using a 7/32” drill bit to a depth of 1/4".
b. Use the spot face tool until the surface is level and free of paint, dirt, etc.
c. Thread the hole using a ¼-28 flat bottom tap and tapping fluid.
Letter
Part
Router
Connection
A
WiFi Antenna
WiFi
B
Cellular LTE Antenna
DIV
C
Cellular LTE Antenna
ANT
D
Internal Power Cable
PWR
E
External Cellular LTE Antenna Connection (Not Typically Used)
DIV
F
External WiFi Antenna Connection (Not Typically Used)
WiFi
G
External Ethernet Connection (Not Typically Used)
LAN
H
External Cellular LTE Antenna (Not Typically Used)
ANT
I
External Power Cable
-
Figure 5-3, Gateway Connections
Figure 5-4, accelerometer with
mounting pad
Questions During Install?
If there are any questions during installation, call (865) 330-1100 and ask for Spotlight Installation Support.

15
Doc No. A3940_UM Rev 1.0
d. Assemble the accelerometer onto its pad with the brass tip of the stud going into the accelerometer and make
sure that the stainless steel pad has concentric rings facing downward away from the accelerometer, as can be
seen in figure 5-4.
e. Use a spray degreaser and towel to clean the surface. Be sure to remove any
metal shavings from drilling and tapping.
f. Use Loctite 330 to install the accelerometer to its mounting location. Apply the
adhesive to the spot faced area, and spray the stainless steel mounting pad with
the activator.
g. Screw the accelerometer assembly onto its mounting location and tighten with pliers. Figure 5-5 displays a
permanently mounted accelerometer:
h. Adhesive will cure over the next 24 hours.
15) Mount and gap magnetic pickup sensor. For details, see Section 5.4.
16) Choose Controller mounting location. For details, see Section 5.5.
17) Once location has been chosen, there are two possible methods for mounting:
a. Stud mount using adhesive – Using a similar method as the PUC mounting in Section 5.8, mount a single base
plate stud to the surface, thread the stud through a controller hole and mark the centers for the remaining studs.
Install the remaining base plate studs using Loctite 330 and activator.
b. Drill holes - If permissible, drill holes into a control cabinet (de-energize as necessary), or a mounting plate
(supplied by customer). If wall thickness is larger than 0.125”, customer must supply four 1/4”-20 screws longer
than supplied in the Windrock kit (1/4”-20 x 1”). Seal penetrations according to site best practices.
18) Customer must supply a source of SELV LPS 24VDC Power at desired controller mounting location. For details, see
Section 5.6. Ensure power is de-energized.
19) Install disconnecting device, clearly marked (supplied by customer).
20) Attach WiFi antennas to Controller.
21) Mount Controller unit using 1/4”-20 screws, lock washers, and nuts.
22) Connect integral power cable to +24Vdc disconnecting device.
a. White conductor is +24Vdc.
b. Black conductor is ground return.
23) Determine areas to mount each of the four (4) PUC modules. See Section 5.8.
a. Recommended placement is either on the side of the engine block or on the frame below the cylinders.
b. Since the maximum operating temperature of the PUC module is +85°C, it is highly recommended to determine
the best mounting location while the engine is running. This can be accomplished by using an infrared
thermometer to find a mounting point on the engine that does not exceed +85°C when running.
c. Length of armored cable run from accelerometers to PUC location must be a consideration. The included cables
are 7’ in length. However, extension cables can be purchased and used if needed.
Figure 5-5, Accelerometer
installation

16
Doc No. A3940_UM Rev 1.0
d. A 24” long ground strap is attached onto the PUC mounting bar. The ground strap includes a ring terminal for a
1/4” diameter screw. In order to effectively divert EMI that could affect system performance, the ground strap
must make solid electrical contact with the engine Earthing System. 1/4-20 screws have been provided with the
system. Use a #1 drill to a minimum depth of 1” and cut threads using a 1/4-20 tap.
24) Connect Spotlight Trunk Cables to each Controller PUC connection (four total). See CABLE ROUTING. Install Wire
markers on cables.
25) Mount the first PUC Module on engine according to the Spotlight
Engine Configuration Sheet and the mounting instructions in Section
5.8.
26) Use 1/4-20 screws and connect PUC ground strap to engine Earthing
System.
27) Connect the PUC1 Trunk Cable to this module. Clip wire marker ‘1’
onto both cable ends. See the sidebar on CABLE ROUTING.
28) Connect Spotlight Armored Accelerometer Cable with letter ‘A’ to connector labeled ‘A’ on PUC module. Connect
other cable end to accelerometer according to the Spotlight Engine Configuration Sheet.
Accelerometer (16 PLCS)
PUC (2 PLCS)
Controller
Figure 5-6, Engine Spotlight V16 installation
IMPORTANT: CABLE ROUTING
When routing cables between components,
install in a neat and workmanlike manner
according to NEC guidelines. Cables should
have proper bend radius. Do not install
cabling over excessive heat sources. Support
cables within 1ft of final connection and every
6ft throughout the cable run.
WIRE MARKERS
Wire markers are installed onto Spotlight Armored Accelerometer Cables at the factory. Markers on these cables will have
a letter and a number at each end. Marker numbers indicate corresponding Controller PUC channel number (ie. “1” for
PUC1, “2” for PUC2, etc.). Marker letter corresponds to one of the four local PUC channels, “A” through “D”. Refer to the
Engine Spotlight information sheet included with your system for further details. If an Accelerometer extension cable was
included with the order, mark the cable you are extending in the same fashion. By marking all cables this way, it will
simplify troubleshooting as well as installation when routing cables around equipment.
WIRE MARKERS
Spotlight Trunk Cable Wire markers were included loose with the system. During installation, it is recommended to attach
wire markers to cables that correspond to the PUC numbers on the controller (ie. PUC1 Controller cables should be
marked with a “1”, etc.). Clip wire markers on at both ends of each trunk cable. If using more than one trunk cable per
PUC, repeat the same wire marker on the extension as well. This way, it will simplify troubleshooting as well as installation
when routing cables around equipment.

17
Doc No. A3940_UM Rev 1.0
29) Connect Spotlight Armored Accelerometer Cable with letter ‘B’ to connector labeled ‘B’ on PUC module. Connect
other cable end to accelerometer according to the Spotlight Engine Configuration Sheet.
30) Connect Spotlight Armored Accelerometer Cable with letter ‘C’ to connector labeled ‘C’ on PUC module. Connect
other cable end to accelerometer according to the Spotlight Engine Configuration Sheet.
31) Connect Spotlight Armored Accelerometer Cable with letter ‘D’ to connector labeled ‘D’ on PUC module. Connect
other cable end to accelerometer according to the Spotlight Engine Configuration Sheet.
32) Mount the second PUC Module according to the Spotlight Engine Configuration Sheet and the mounting instructions
in Section 5.8.
33) Repeat steps 25) through 31) using the PUC2 Trunk Cables and Spotlight Armored Accelerometer Cables.Use wire
marker ‘2’ on both trunk cable ends.
34) Mount the third PUC Module according to the Spotlight Engine Configuration Sheet and the mounting instructions in
Section 5.8.
35) Repeat steps 25) through 30) using the PUC3 Trunk Cable. Use wire marker ‘3’ on both trunk cable ends.
36) Mount the fourth PUC Module according to the Spotlight Engine Configuration Sheet and the mounting instructions in
Section 5.8.
37) Repeat steps 25) through 30) using the PUC4 Trunk Cable. Use wire marker ‘4’ on both trunk cable ends.
38) The hardware for the Controller and PUC Module units are now connected.
39) For a single Controller installation, directly connect the magnetic pickup sensor cable to Controller TDC IN connection.
40) To verify entire system operation,
please call (865) 330-1100 and ask for
Spotlight Installation Support.
41) Once configured, it is not necessary to
interact with the A3940 locally as its
status and operation can be observed
within the Cloud and accessed from Windrock Enterprise and downloaded to Windrock MD.
5.4 Magnetic Pickup Mounting
When using the magnetic pickup for TDC (top dead center) triggering in reciprocating machine analysis, it is extremely
important that the pickup triggers data acquisition exactly at TDC. Errors of only 2 degrees can produce measurement errors of
up to 5% in horsepower and throughput calculations. For the magnetic pickup to operate properly with Spotlight systems,
several issues must be addressed.
•PICKUP DISTANCE FROM TARGET
Often, the magnetic pickup is placed too close to the target. When this happens, the pickup can trigger data acquisition on
scratches, nicks, or magnetic deformities in the flywheel or shaft. Usually, a gap of about 1/8 inch is sufficient.
•TARGET TYPE
Some sort of target must be placed on the flywheel or shaft to trigger the magnetic pickup. The target must be of a ferrous
material. To ensure a proper signal, a small magnet can be purchased and used. This will produce the largest magnetic
interference of any other scratch, hole, or deformity in the flywheel or shaft. Place a drop of Loctite 330 adhesive on the
magnet and spray activator at the desired mounting location. Position the magnet center at TDC of the machine.
Installers must fabricate a mounting bracket for the magnetic pickup sensor. Make a clearance hole using a 37/64” drill bit.
Use a tee-handle 5/8”-18 UNF tap coated with cutting fluid to cut threads into the hole.
Thread the magnetic pickup into the bracket with a 1/8” gap between the pickup and the magnet on the flywheel or shaft.
For very high speed machines, adhesive might not be sufficient to hold the magnet onto the flywheel. In such cases, the
recommended target is a pin. A hole in the flywheel would also be sufficient.
17 OR MORE ACCELEROMETER INSTALLATION
Multiple Controllers can be connected to the same Engine by using T-
Adapter Connector as shown in Figure 5-2. Connect the T-Adapter to
MPU Cable and split the signal to separate Controllers using two MPU
Extension Cables. Repeat steps 12) to 22) for additional Controller.

18
Doc No. A3940_UM Rev 1.0
5.5 Controller Mounting
Care must be taken when choosing the location for the Spotlight Controller. At least four main considerations must be taken
into account:
a. Location is within unobstructed line-of-sight of Gateway, ideally less than 50 feet.
b. Location is within 16ft (5m) of the magnetic pickup sensor, taking into account cable routing.
c. Location is within 32ft (10m) of the furthest engine cylinder, taking into account cable routing.
d. Do not position the Controller so that it is difficult to operate the disconnecting device.
The Spotlight Controller is intended to be mounted on the exterior of any sheet metal enclosure or flat wall surface. The
mounting hole pattern is shown in Section 7. Standard systems includes four sets of 1/4-20 X 1” screws, flat washers, split lock
washers, and hex nuts. Depending on site conditions, longer screws may be needed to complete installation. Mount
Controllers as high as practical, and within line-of-sight of the Gateway. Mounting Controllers on the side of an engine control
cabinet could be a convenient location. The omnidirectional WiFi Antennas work best in a vertical arrangement. Ensure that all
cables exiting the bottom of the Controller have sufficient slack and are within reach of their intended device. Bottom cables
include the four Spotlight Trunk Cables, one Spotlight Magnetic Pickup Cable, and integral power cable.
5.6 Power Requirements
Windrock Spotlight is designed to be powered from an approved SELV LPS 24VDC power source. Locations that do not have
24VDC available will require the addition of 24Vdc power supplies rated for the installed location. Refer to the Spotlight
Datasheet for further details.
PERMANENTLY CONNECTED EQUIPMENT must have a circuit breaker or switch included in the installation. It
must be suitably located and easily reached. It must be marked as the disconnecting device for the equipment.
It must be rated for the environment, the voltage, and the amount of power required by the entire system.
Access to disconnect devices must not be obstructed.
WARNING – EXPLOSION HAZARD. DO NOT SUPPLY WINDROCK SPOTLIGHT WITH A VOLTAGE
HIGHER THAN VMAX OF ATTACHED SENSORS. IF NON-INCENDIVE ENTITY PARAMETERS AS
LISTED IN THE A39XX CONTROL DRAWINGS AND THE ATTACHED DEVICES ARE NOT FOLLOWED,
THEN CONNECTIONS MUST BE CONSIDERED INCENDIVE.
ADVERTISSEMENT – RIAQUE D’EXPLOSION – N'ALIMENTEZ PAS WINDROCK SPOTLIGHT AVEC UNE
TENSION SUPÉRIEURE À VMAX DE CAPTEURS CI-JOINT. SI NON-INCENDIAIRE ENTITÉ
PARAMÈTRES AS FIGURANT DANS LES DESSINS DE CONTRÔLE A39XX, ET LES PÉRIPHÉRIQUES
CONNECTÉS NE SONT PAS RESPECTÉES, ALORS DES CONNEXIONS DOIVENT ÊTRE CONSIDÉRÉES
INCENDIAIRE.
WARNING – SUPPLYING WINDROCK SPOTLIGHT WITH LESS THAN 20VDC MAY RESULT IN
IMPAIRED OPERATION.
ADVERTISSEMENT –FOURNITURE WINDROCK SPOTLIGHT AVEC MOINS DE 20 VDC PEUT
PROVOQUER UN FONCTIONNEMENT AVEC FACULTÉS AFFAIBLIES.
IMPORTANT: POWER REQUIREMENTS. If voltage and power requirements are not met,
system integrity will be compromised. Review power requirements and warnings as laid
forth in this document. For additional details, refer to the Spotlight Datasheet.

19
Doc No. A3940_UM Rev 1.0
Both Controller and Gateway are supplied with integral 30’ long 22AWG power cables. It is recommended for the installer to
terminate 24Vdc into an approved junction box near equipment installation location. Conductors must be of sufficient size to
carry the amount of current required for the entire system.
5.7 Gateway Mounting
Care must be taken when choosing the location for the Spotlight Gateway. A few
considerations must be taken into account:
a. Location is within unobstructed line-of-sight of Controllers, ideally less
than 50 feet from the furthest Controller.
b. Do not position the Gateway so that it is difficult to operate the
disconnecting device.
c. Mount the Gateway such that the router indicators are easily visible
through the windowed enclosure.
d. In order to provide reliable uptime, the Gateway power supply must be
separate from all Controller power supplies.
e. Location should have a strong cell phone signal.
The Spotlight Gateway is intended to
be mounted on the exterior of any sheet
metal enclosure or flat wall surface.
Prior to mounting, some assembly is required. To prevent damage during
shipment, the router is packaged separately within the Gateway enclosure.
Mount the router onto the DIN rail and reconnect internal power cable and
ethernet cable as shown in Figure 5-3.
The Gateway can be structurally mounted in two different ways. The first way
(Option # 1, Figure 5-7) uses two slotted aluminum mounting bars that accept 10-
32 screws. Windrock recommends using this mounting method. Attach the
mounting bars to the enclosure using the flathead screws included with the
plastic mounting feet (Option # 2, Figure 5-8).
Once done, the enclosure should be mounted using the fastener stack shown in Figure 5-9.
These fasteners are included with a standard system:
•Item 1, 1/4-20 X 1” screws
•Item 2, flat washers
•Item 3, split lock washers
•Item 4, hex nuts.
Depending on site conditions, longer screws may be needed to complete installation.
Mount the Gateway such that the router indicators are easily visible through the windowed enclosure.
Gateway Mounting Option #2 can also be used to secure the Gateway Enclosure. The OEM polycarbonate enclosure includes a
plastic mounting foot kit. If this option is better suited for the installation, install each of the four feet to the enclosure using
the included flat head screws. #10 screws (not included) must then be used to fasten the enclosure to a structure.
Mounting hole dimensions are shown in Figure 5-7 and Figure 5-8 as well as the Spotlight Datasheet.
Figure 5-7, Gateway Option #1 Mounting
Figure 5-9, Option # 1 Mounting Fasteners
Figure 5-8, Gateway Option #2 Mounting

20
Doc No. A3940_UM Rev 1.0
5.8 PUC Mounting
Once a mounting location has been chosen for
Engine PUC Modules, one of two mounting methods
can be used:
1) Stud mount using adhesive
a. On both Base Plates (item 1), thread
Locknut (item 2) such that the flange is
facing outwards.
b. Use a spray degreaser and towel to clean the surface.
c. Use Loctite 330 (included with system) on a single Base Plate and adhere it to the desired mounting location using
spray activator. Allow time to cure.
d. Hold loose Base Plate in PUC mounting bar slot and insert fixed Base Plate Stud into opposite slot.
e. Mark location of loose Base Plate with indelible marker.
f. Remove PUC. Epoxy remaining loose Base Plate and allow time to cure.
g. Install PUC onto both Base Plates. Thread 1/4-20 Locknuts (item 3) and tighten in place.
2) Drill holes - If permissible, drill and tap 1/4-20 holes at the mounting location or a mounting plate (supplied by
customer). If wall thickness is larger than 0.125”, customer must supply four 1/4-20 screws longer than supplied in
the Windrock kit (1/4”-20 x 1”). If necessary, seal penetrations according to site best practices.
Refer to Section 7 for PUC Module mounting drawings.
5.9 Shaft Encoder
The Shaft Encoder is used to provide TDC phasing for the Portable Analyzer. Connect the Spotlight Shaft Encoder Cable
between TDC OUT on the Controller and TDC on the Shaft Encoder. Power the Shaft Encoder on and choose the MAG PICKUP
input. Enable the RF icon on the Shaft Encoder screen to communicate with the Portable Analyzer.
The Timing light is used with the Analyzer to determine TDC phase angle. Once machine TDC is connected to the Analyzer,
activate and point the Timing light at the TDC mark on the flywheel. Adjust the Timing light forward or backwards as necessary.
Make note and record the degrees offset indicated on the Analyzer.
5.10 Environment
This equipment has been rated for outdoor use. Refer to Spotlight Datasheet for details. Enclosures exposed to sunlight may
also be heated above the rated temperature. Supplemental cooling may be required in these environments.
Item
Description
Qty
1
1/4-20 X 1” Steel Stud with Base Plate
2
2
Serrated Flange Locknut
2
3
Locknut with External-Tooth Lock
Washer
2
Figure 5-9, Engine PUC adhesive stud mounting
Table 5-10, Engine PUC mounting hardware
Table of contents
Other Windrock Measuring Instrument manuals
Popular Measuring Instrument manuals by other brands

Agilent Technologies
Agilent Technologies ESA-L1500A Installation note

Simrad
Simrad PI32 Operator's manual

Sibata
Sibata 080150-066 Operation manual

Spirax Sarco
Spirax Sarco 2000 Series Installation and maintenance instructions

Worldcast Systems
Worldcast Systems Audemat DVB-T Monitor user manual

CHY
CHY 831 Operator's manual