manuals.online logo
Brands
  1. Home
  2. •
  3. Brands
  4. •
  5. inbody
  6. •
  7. Measuring Instrument
  8. •
  9. inbody 370 Manual

inbody 370 Manual

Installation
2. Raise the stand of the equipment carefully
until it stands upright.
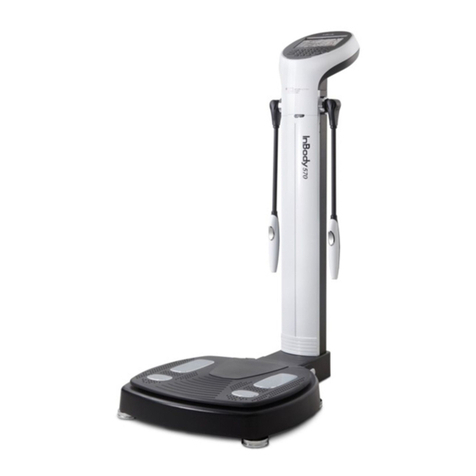
Head
Stand
Base
Hand Electrode
Foot Electrode
❶
❶InBody370
❷Adapter(DC 12V, 3.4A) 1EA
❸Power cord 1 EA
❹Install Manual 1EA
❺Hexagonal Wrench 1EA
❻Joint Screw 1EA
Contents of the Box
5. Plug the power adapter cable into the InBody370.
4. If the air bubble is not in the center of the level indicator, tighten or loosen
the leveling screws(4EA) on the foot plate to adjust the level of InBody370.
InBody370 must be leveled properly for accurate weight measurement.
Leveled
Leveling Screws
Level Indicator
1. Turn on the InBody370 and keep the power on until the home screen
initializes. It will take 15 seconds. During the warming, do not touch
the base.
Measurement
<Rear view of InBody370>
Power switch
1. Open the packing box of the InBody370 and remove the packing pads.
Then take the InBody370 out of the box.
BODY COMPOSITION ANALYZER
Install Manual
DANGER
NOTECAUTION
Please keep the packaging for future events of repacking InBody370 and sending
it for servicing or otherwise transporting InBody370 elsewhere.
1. If you use the InBody370 on a carpet, static electricity may cause serious damage to the
electronic components. If the InBody370 is to be installed on a carpet, use antistatic mats
below the InBody370. Use InBody tissue to wipe feet and hands before the measurement
starts.
2. Do not wipe the base and hand electrode with cleaning liquids. If cleaning liquids enter
into InBody370, it may cause corrosion or electric shock by short circuit. For cleaning of
the InBody370, please use InBody tissue, which also has antibacterial functionality.
3.Do not dismantle InBody370. Internal parts are not for customer use and may cause
electric shock. If InBody370 is dismantled, the warranty is void, and service costs will be
charged.
BA
B
A
❷
❸
❻
❺
❹
3. Raise the stand cover to reveal the joint screw. Tighten the joint screw
connecting the upper part and footplate with a hexagonal wrench.
After the upper part of the InBody370 is secured in place, cover the
joint screw with the stand cover.
Stand cover
Joint screw
Hexagonal wrench
<Rear view of InBody370>
*Make sure the power cord is firmly plugged
into the power adapter.
*Please plug the power cord and the printer
power cord to an electrical outlet. A surge
protector is highly recommended.
Grounded
outlet
3-socket outlet
❷❸
DANGER
NOTECAUTION
Failure to connect the device to a properly grounded outlet may result in damage to
the device, inaccurate measurement and/or inappropriate operation due to possible
electrical surges.
DANGER
NOTECAUTION
Do not plug the device to a shared power source with any other electrical devices such
as a treadmill, refrigerator, air conditioning unit, microwave or RF medical diathermies
that can be affected by electromagnetic interference. It may result in inaccurate
measurements.
❷
<Printer Cable / Option>
ⓒ
2018 InBody Co., Ltd. All rights reserved. BM-ENG-81-F-181224
Proper Posture
Proper posture is essential to achieve reliable results and high reproducibility.
Do not talk or move during the InBody test.
Armpits are not closed up.
If the examinee’s
thighs are in contact
with each other, have
the examinee wear a
pair of knee-length
shorts so that the
thighs are not in contact
each other.
Straight both arms.
Gently grip the hand
electrodes so that all the
four ngers of each hand
are touching the surface
of the either hand
electrode. Touch the
circular electrode with
the thumb.
Step on the foot plate with bare feet,
ensuring that both heels are touching
the smaller foot electrode on either side
as illustrated.
Do not wear socks
during measurement.
FAQs
Q1. I do not know why error messages are shown on the LCD.
A. The InBody370 displays an error message to alert the operator of problems
and to recommend the correct action.
•Turn the InBody370 off and on again after removing the objects from
the foot plate.
•If entered subject data are beyond acceptable ranges, this error message
appears.
•A subject should wipe his/her soles and palms with wet tissue and
try again.
Q2. My touchscreen is inaccurate or not responsive.
A.•Calibrate the touchscreen under ‘Touchscreen Alignment’ in SETUP.
* Press rmly to optimize touchscreen response.
• If you cannot enter the SETUP due to touchscreen problems, please
restart the InBody. The InBody stores the last touchscreen alignment
and will automatically recall the previous touchscreen settings.
The InBody can also recognize if its touchscreen alignment is off
screen and will automatically take the user to the calibration screen
after restarting.
Q3. Where can I buy printer paper and other optional devices?
A. Please contact InBody or the local distributor.
Q4. How do I know the measurement taken is correct?

A. After taking the measurement, check the impedance at the bottom of
the results sheet printed. The impedance value must decrease in the
arrow direction.
For any problems with InBody370 or for any clinical information, contact:
InBody Co., Ltd. [HEAD OFFICE]
InBody Bldg., 625, Eonju-ro, Gangnam-gu, Seoul 06106 KOREA
TEL: +82-2-501-3939 FAX: +82-2-578-2716
Website: https://www.inbody.com E-mail: info@inbody.com
For more information on the functions of InBody370 and descriptions on the thermal results sheet items,
see the user’s manual CD included.
For purpose of improvement, specications and design are subject to change without notice.
2. Weight measurement begins.
3. Input personal information and conrm your personal prole.
4. Maintain proper posture to take the test.
5. The InBody Test begins.
6. When the test is completed, the results will be shown on screen.
DANGER
NOTECAUTION
If you are using a printer, a result sheet will be printed automatically.
Cautions before Measurement
Do not use this equipment in combination with the following electronic medical devices.
- Medical devices, such as a pacemaker.
- Electronic life support systems, such as an articial heart/lung.
- Portable electronic medical devices, such as an electrocardiograph.
Callouses on the palm or sole or particularly dry hands and feet may lead to difculties in measuring.
If this is the case, please wipe the palm and sole with an InBody Tissue before testing.

Other inbody Measuring Instrument manuals

inbody PUSH User manual

inbody

inbody PUSH User manual

inbody BPBIO210 User manual

inbody

inbody BPBIO210 User manual

inbody InBody570 User manual

inbody

inbody InBody570 User manual

inbody InBody970 User manual

inbody

inbody InBody970 User manual

inbody 230 User manual

inbody

inbody 230 User manual

inbody Dial User manual

inbody

inbody Dial User manual

inbody 720 User manual

inbody

inbody 720 User manual

inbody BSM270 User manual

inbody

inbody BSM270 User manual

inbody InBody370S User manual

inbody

inbody InBody370S User manual

inbody 970 User manual

inbody

inbody 970 User manual

inbody S10 User manual

inbody

inbody S10 User manual

inbody 720 User manual

inbody

inbody 720 User manual

inbody J30 User manual

inbody

inbody J30 User manual

inbody BSM170 User manual

inbody

inbody BSM170 User manual

inbody S10 User manual

inbody

inbody S10 User manual

inbody BSM 370 User manual

inbody

inbody BSM 370 User manual

inbody H30NWi User manual

inbody

inbody H30NWi User manual

inbody 270 User manual

inbody

inbody 270 User manual

inbody BPBIO320 User manual

inbody

inbody BPBIO320 User manual

inbody InBody270 User manual

inbody

inbody InBody270 User manual

inbody BSM 370 User manual

inbody

inbody BSM 370 User manual

Popular Measuring Instrument manuals by other brands

Sensit ULTRA-TRAC APL Quick start instructions

Sensit

Sensit ULTRA-TRAC APL Quick start instructions

YOKOGAWA WT1800 user manual

YOKOGAWA

YOKOGAWA WT1800 user manual

Niigata seiki GDG Series instruction manual

Niigata seiki

Niigata seiki GDG Series instruction manual

Sensaphone SAT4D user manual

Sensaphone

Sensaphone SAT4D user manual

Tektronix 7L5 instruction manual

Tektronix

Tektronix 7L5 instruction manual

Circutor MK-30-LCD quick start guide

Circutor

Circutor MK-30-LCD quick start guide

Underground Magnetics Mag 3 Operator's manual

Underground Magnetics

Underground Magnetics Mag 3 Operator's manual

Raycus RFL-C Series user guide

Raycus

Raycus RFL-C Series user guide

Callaway 350TL user manual

Callaway

Callaway 350TL user manual

LaserLiner ArcoMaster 40 quick start guide

LaserLiner

LaserLiner ArcoMaster 40 quick start guide

MRC CLRM-200 Operation manual

MRC

MRC CLRM-200 Operation manual

Eaton Crouse-hinds series instruction manual

Eaton

Eaton Crouse-hinds series instruction manual

REED R6001 instruction manual

REED

REED R6001 instruction manual

twintex LCR Series Operation manual

twintex

twintex LCR Series Operation manual

King Instrument 7650 Series installation instructions

King Instrument

King Instrument 7650 Series installation instructions

Apera Instruments TN400 instruction manual

Apera Instruments

Apera Instruments TN400 instruction manual

Endress+Hauser Cerabar S PMP72 operating instructions

Endress+Hauser

Endress+Hauser Cerabar S PMP72 operating instructions

reci FSC 1000 user guide

reci

reci FSC 1000 user guide

manuals.online logo
manuals.online logoBrands
  • About & Mission
  • Contact us
  • Privacy Policy
  • Terms and Conditions

Copyright 2025 Manuals.Online. All Rights Reserved.