INSTALLATION AMD OPERATING INSTRUCTIONS (continued):
C.Empty urn of wateraccumulatedduring first cycle.
D.Depress "Green" Brewswitch once again.Nearthe endofthis cycle watershould flow frombrewfunnel,when this happensdepress"RED"Power switch to
terminatecycle.
13.Locate heaterswitchatupper right rearofunitand switch tothe"UP"or "ON" position.Allow15minutes for watertoheatbefore proceeding.
14.Empty waterfromurnwhich may haveaccumulatedduringtank filling.
15.A. Ifusing3 gallontea bags simplyremovebrewfunnel and placebaginside(no wire basketisnecessaryif using Teabag).
B.If using groundTeaLeaves make surethat wire basketisin place inthebrewfunnel. Place onepaperfilterinto wire basketAddteaand replace brewfunnel.
16.WITH "RED"POWERSWITCHON, DEPRESS "GREEN"Brewswitchand allow 10to 12minutesto complete brewtime.Makesure funnel drip-out is completed
before removing brewfunnel.
17.As requireddispenseteafrom urn faucetintoteaglass with ice.
CLEANING INSTRUCTIONS:
Daily: 1.Wipe exteriorofdispenserwith a softdampcloth.
2.Wash teareservoirwithmild soap andwarmwater.Rinse thoroughly andreplace on stand.
TEA BREWER ADJUSTMENTS:
TheTeaBrewer has been factorysetto brew 3 Gallons oftea.Should it become necessarytoreadjust or adjust foramountsless than 3 Gallons followthesesteps
below,
TIMER ADJUSTMENT:
1.Unplug unit.
2.Remove 3 Phillips screwssecuringtoppanel
3.Lift offtopcoverexposing timer
4.To Brewmoreteaturn timer knobclockwise,tobrew less teaturntimerknob counterclockwise,
5.Plug unitinandcycle unit. Repeatadjustmentasnecessary until desiredvolumeisattained.
BREW VOLUME ADJUSTMENT (Adjuster Assembly):
1. Follow steps 1 -3 in timer adjustment procedure.
2. Locate Brew Volume adjustment screw on clear block in front of tank top. (30)
3. With Brew Funnel out of unit, but with um in place, plug unit in and Depress Brew Switch. CAUTION: HOT WATER MAY SPATTER
AT THE BEGINNING OF CYCLE!
4. ADJUST FLOW FROM SPRAY HEAD BY TURNING VOLUME ADJUSTMENT SCREW CLOCKWISE TO REDUCE FLOW AND
COUNTER-CLOCKWISE TO INCREASE FLOW. AT PROPER ADJUSTMENT SPRAY PATTERN WILL FALL APPROXIMATELY2
INCHES FROM TOP INSIDE OF URN WALLS.
5. PLUG UNIT IN.
6. REPLACE BREW FUNNEL, EMPTY URN AND PUSH BREW SWITCH. THE BREW VOLUME ADJUSTMENT IS CORRECT WHEN,
AT THE END OF THE BREW CYCLE DILUTION STREAM STOPS.
THE BREW FUNNEL HAS FILLED TO WITHIN 1" FROM THE TOP. BE CAREFUL NOT TO OVERFILL BREW FUNNEL.
2
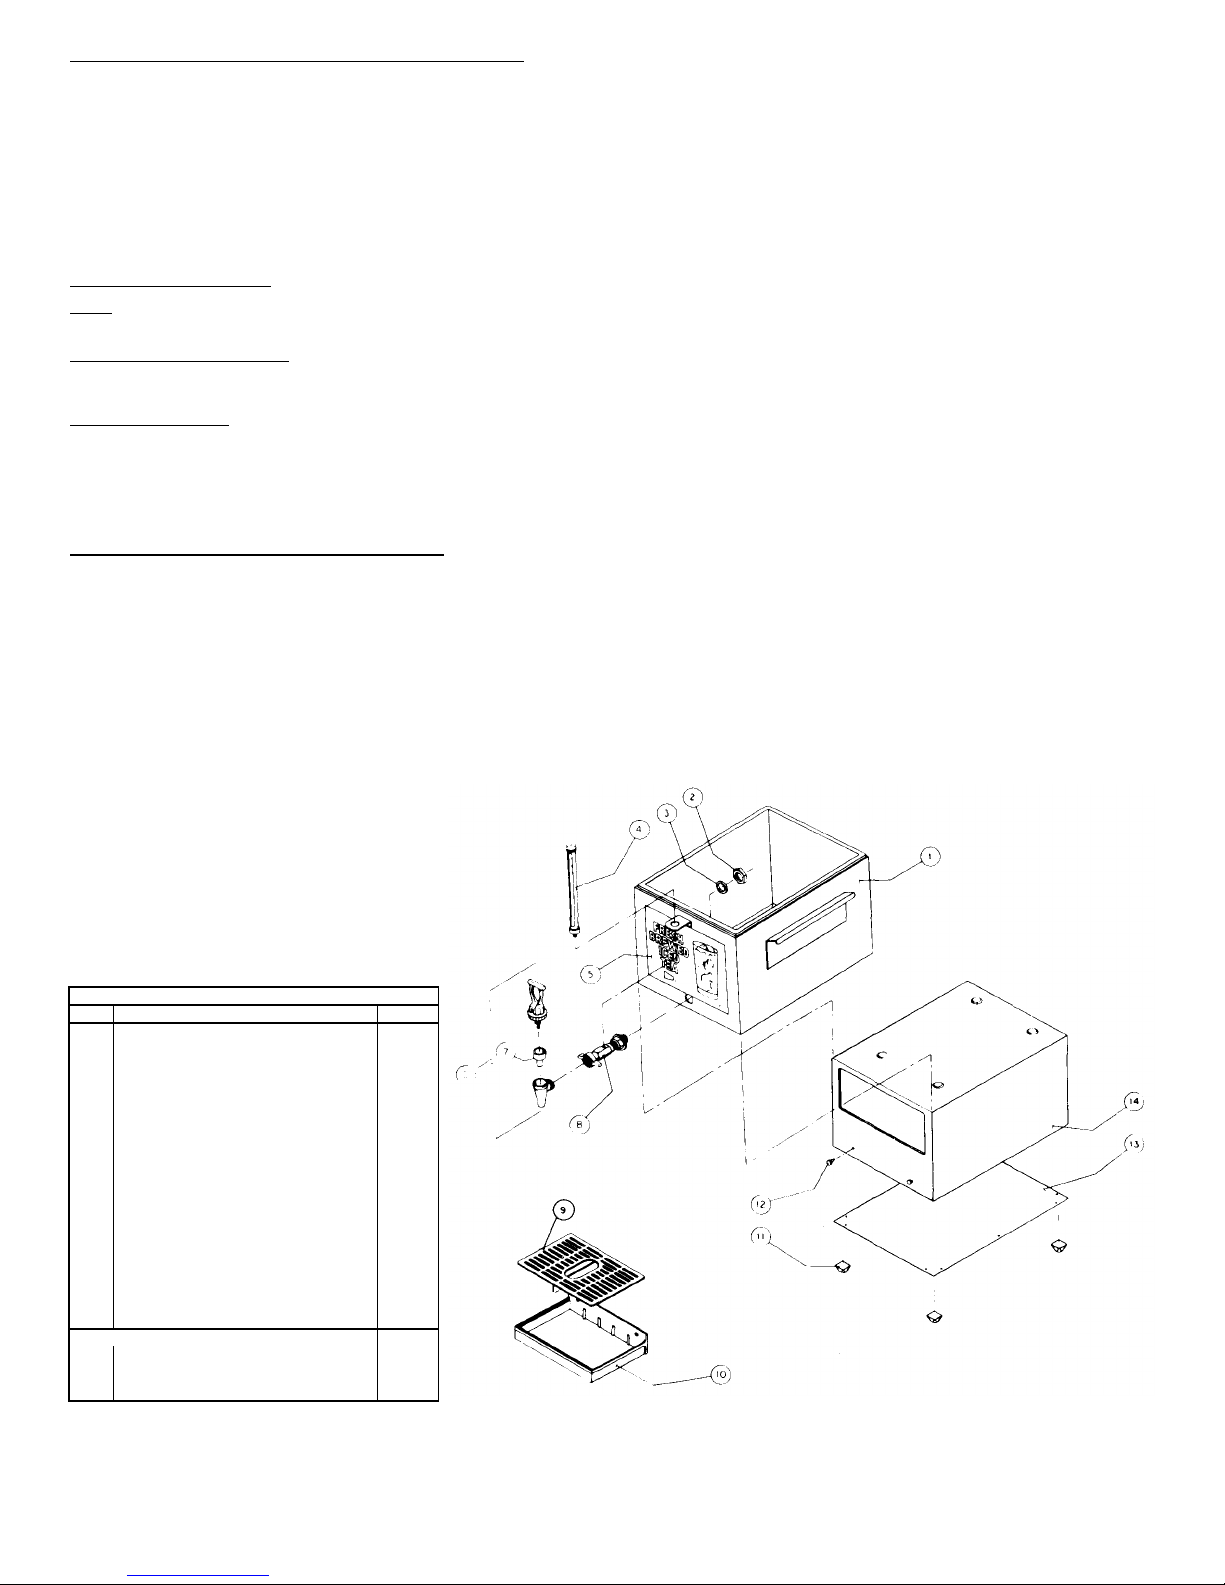
2NUT-FAUCET K105F
3WASHER-FAUCET SHANK 07229
4SIGHT GLASS ASSEMBLY 80245
5DECAL 15546
6FAUCET 80244
7SEAT CUP 80222
8FAUCET SHANK FOR SIGHT GLASS 92189
ASSEMBLY
8A FAUCET SHANK W/0 SIGHT GLASS 92192
9CUP REST 75015
10 DRIP TRAY 75060
11 FEET 10059
12 STUD-DRIPTRAY 97007
13 BASE COVER 40990
14 STAND ASSEMBLY(BSS-I) 97242
15
FAUCET GUARD
73368
5
DROP TUBE
DISC.
9TANK LID 86020
16
"0"RING
20014


