2
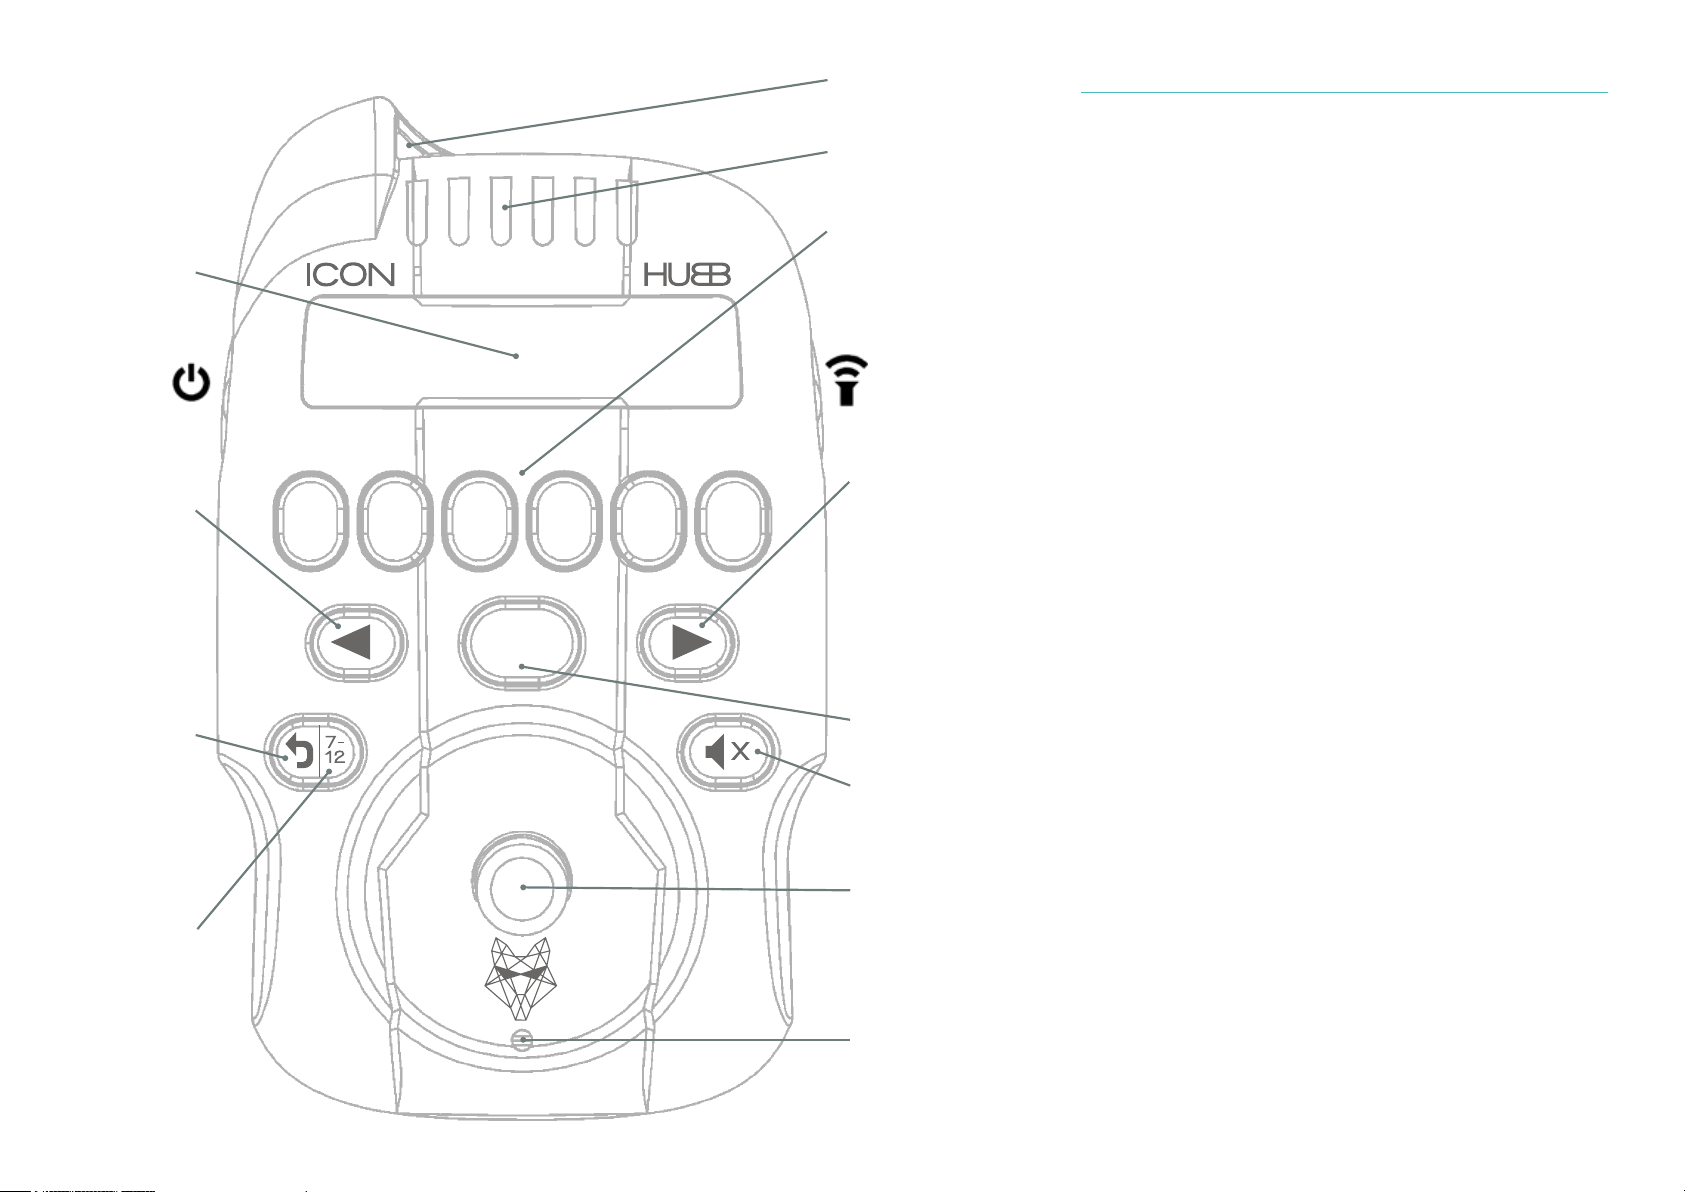
FEATURES
• LCD Display
• Built-in Torch
• Indicator / Channel LED’s
• Colours Red, Green, Blue, Magenta,
Yellow, Cyan, White
• Channels - 24 - 12 Wireless + !2 Wired
• Piezo Speaker
• Ping-Pong Electronic system to detect
when the devices are still linked, used
to ensure you are within the suitable
distance from the devices.
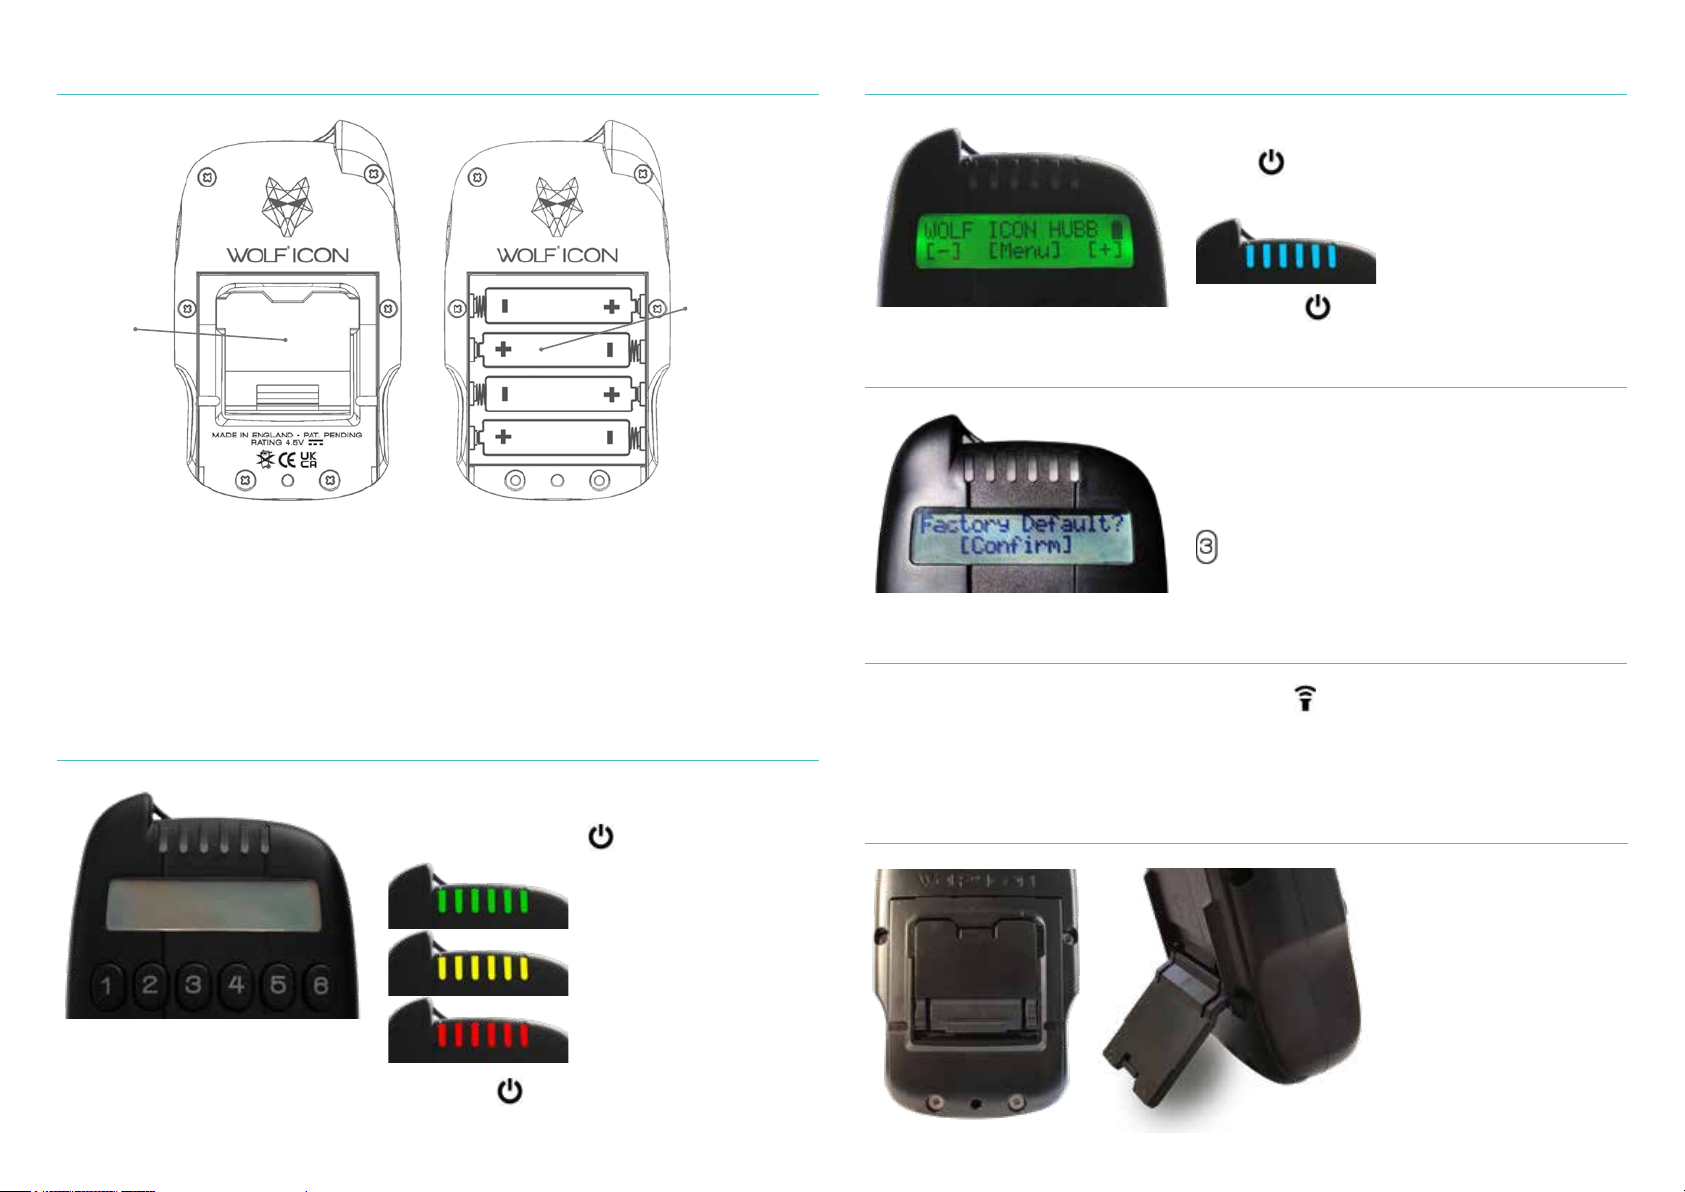
• On/Off Button
• Pairing / Saving Channels
• Volume Adjustment
• Tone Replication
• Global Mute Button
• Rumble Alert On/Off
• IQ Port Alerts received
• Fully Sealed Weatherproof Electronics
• Battery Level Indication
• Extra Long Battery Life
500 Hours (In Standby)
• Extreme Range
• Hubb Link - IQ Port Accessory Control
• EVA Case
• Built-In Flip Out Stand
• Lanyard Fixing Point
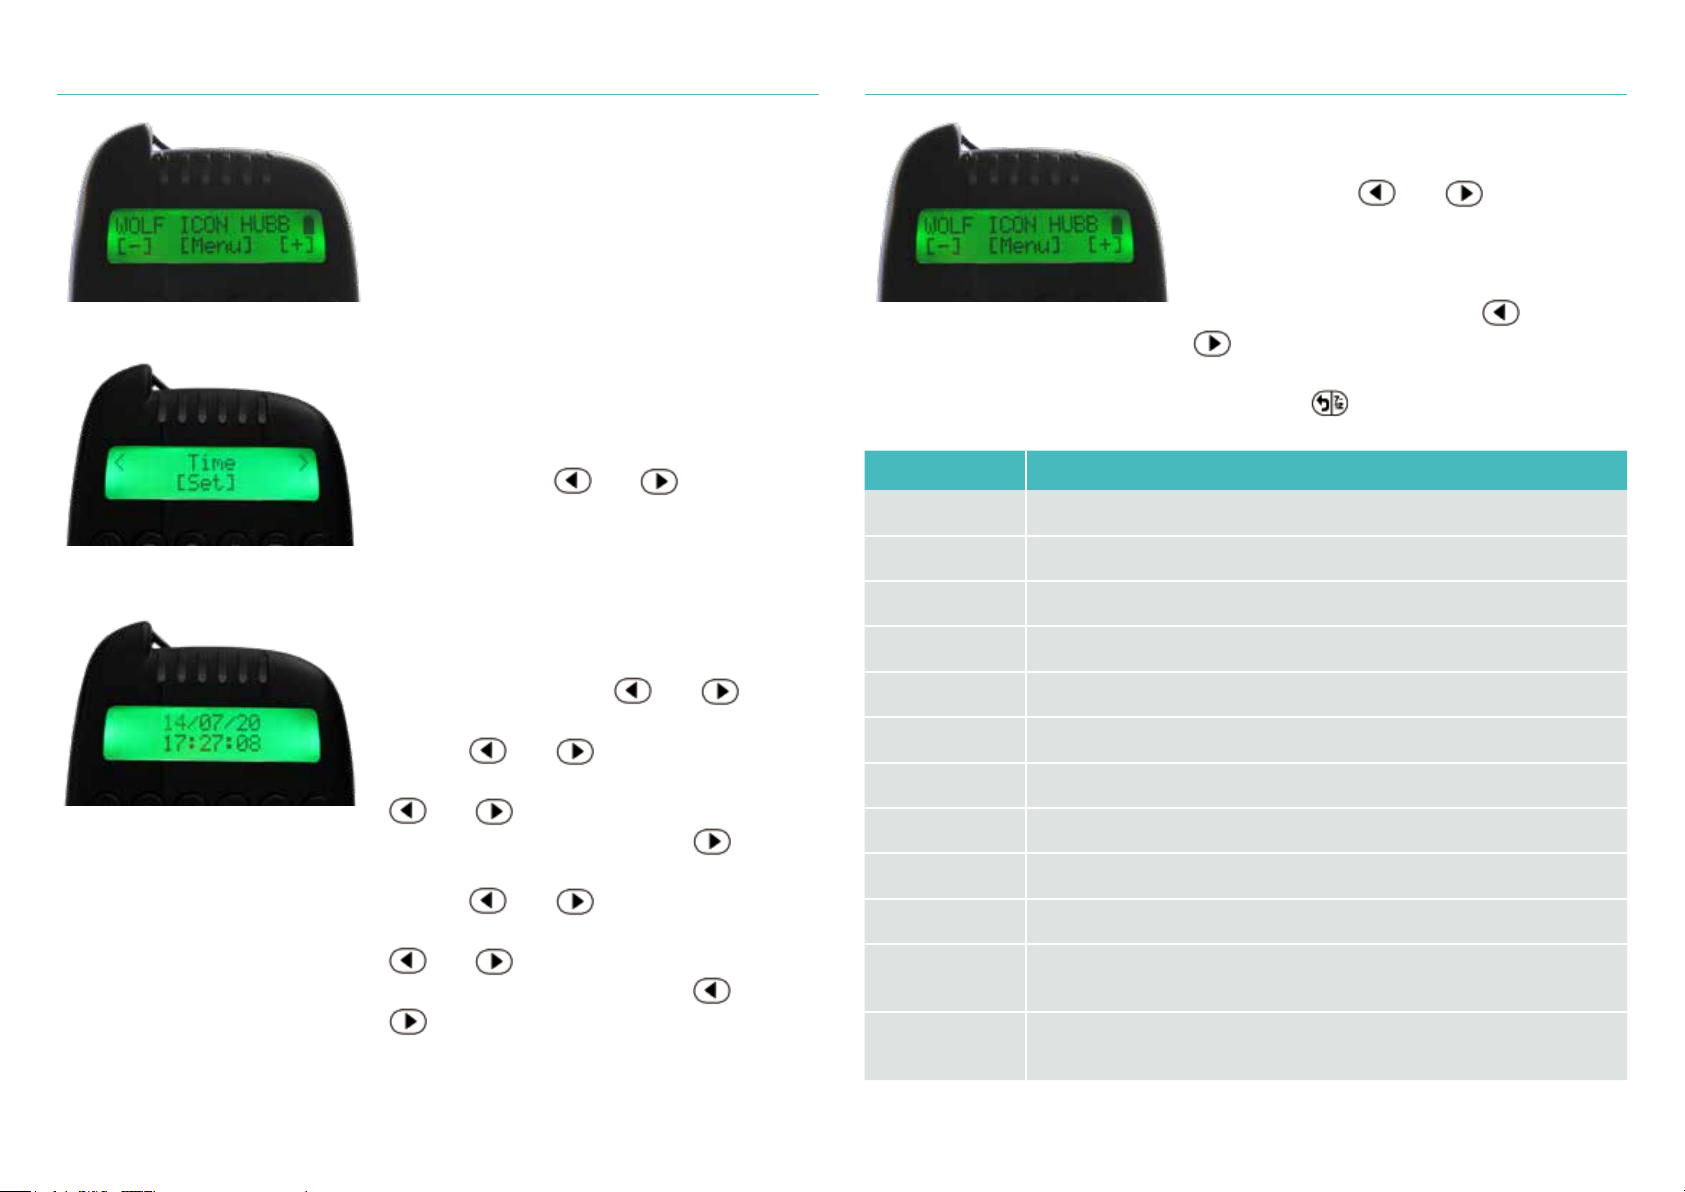
• Time / Date
• Water Resistant Case
• Event Log
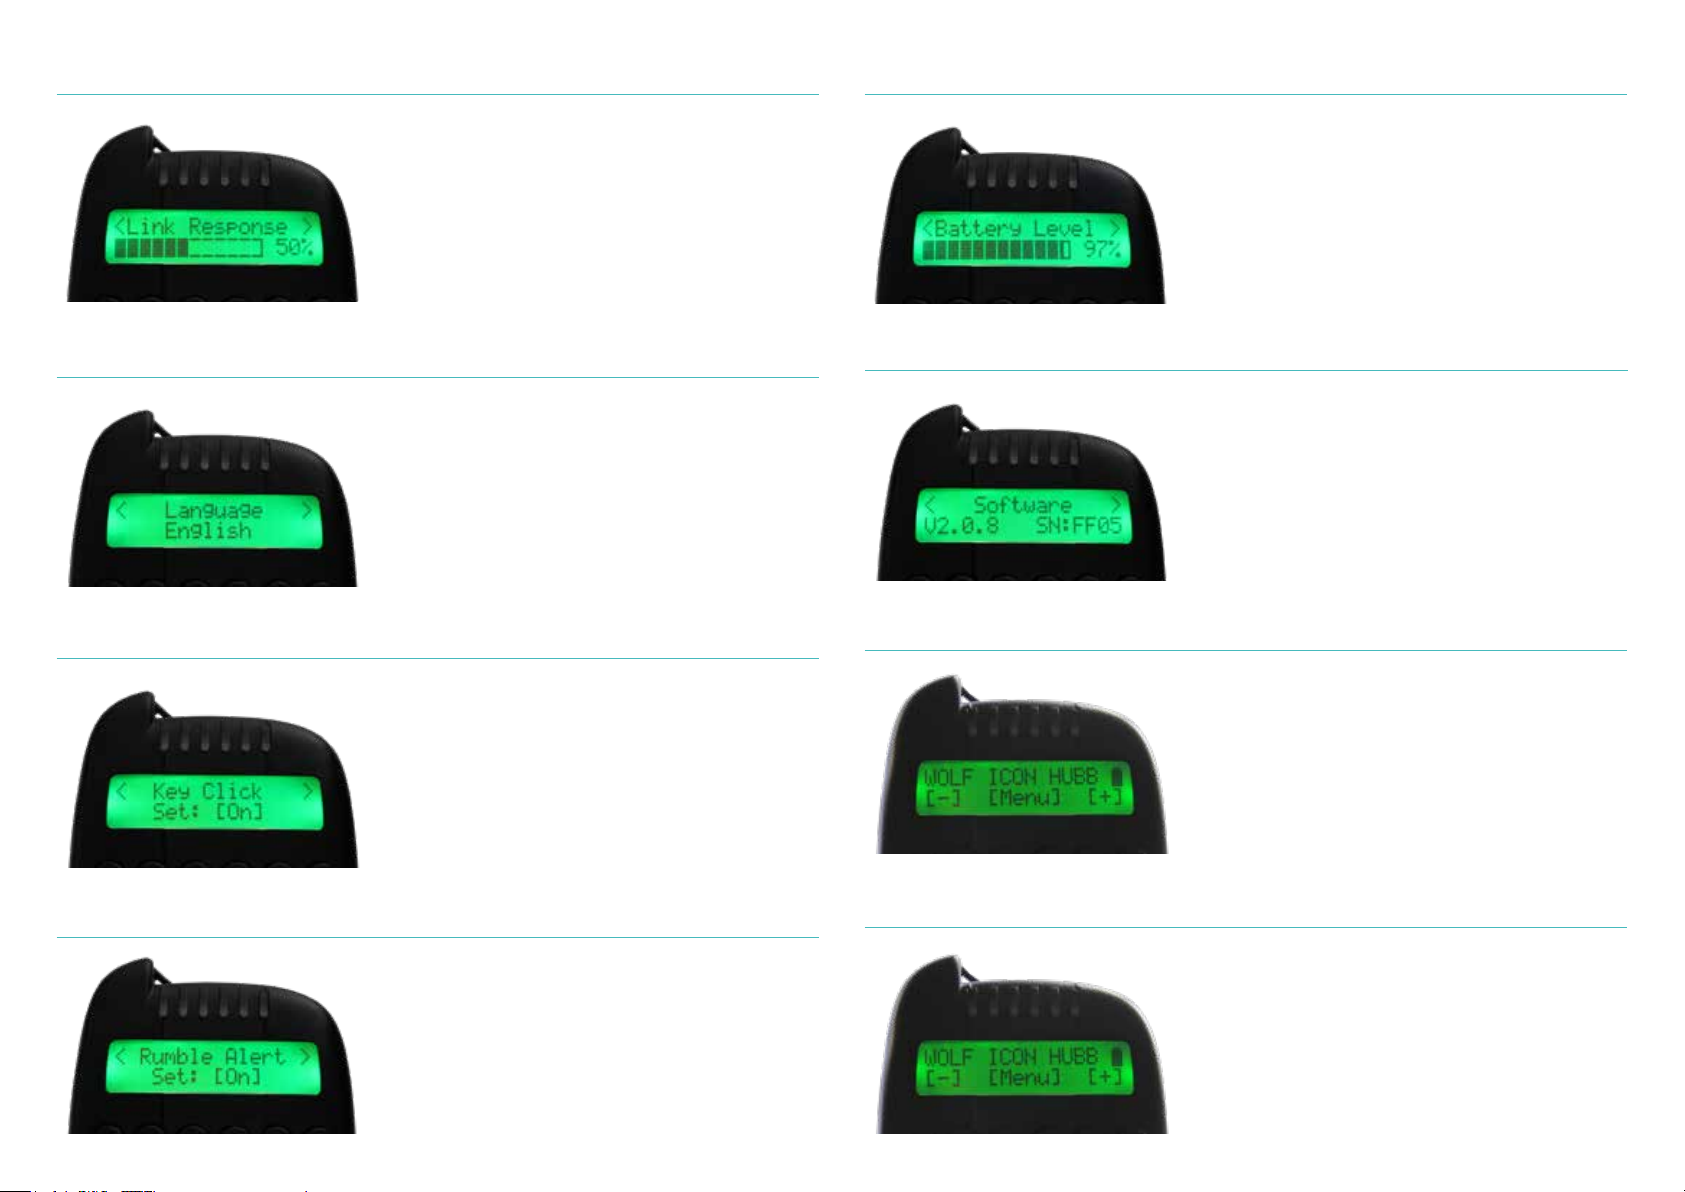
• Language Options - English, Dutch,
German, French & Italian
• Screen Time On Period - 5, 10, 20, 30
& 60 seconds
• Backlight Colours - Red, Green, Blue,
Magenta, Yellow, Cyan, White & Off
• Backlight Contrast
• Key Click On / Off
• BITE ALARM CONTROLS
• Bite LED Colours
• Bite LED Illumination Level
• Bite LED Illumination Time
• Night Light Auto / Manual Mode
• Night Light LED Colour
• Night Port Mode
• Smart Port Adjustments
• Tone Setting
• Volume Setting
• Roller Sensitivity Setting Levels -
8 Sensitivity Levels, expandable to 16 via
Hubb Link - 2mm, 6mm, 12mm, 18mm,
25mm, 35mm, 60mm, 100mm
• Additional Sensitivity Levels -
4mm, 8mm, 16mm, 20mm, 30mm, 40mm,
80mm & 300mm
• Device Battery Level Indication
• Radio Signal Strength
• Bivvy Light Link
• IQ Port On / Off
• Mute - Local Mute Replicated at Hubb
• Anti-Theft (Alert when turned off)
• Last Bite
PIR CONTROLS
• PIR LED Colour
• PIR On / Off Control
• PIR LED Mode
• PIR LED On Time
• PIR Sensitivity
• Device Battery Level Indication
• Radio Signal Strength
• Bivvy Light Link
BIVVY LIGHT CONTROLS
• Bivvy Light On / Off
• Bivvy Light Colour
• Bivvy Light Brightness
• Mode Select
• Alarm Link
• Device Battery Level Indication
• Radio Signal Strength
• Warranty 2 Years -
Register you HUBB at
www.wolfint.com/product-registration/