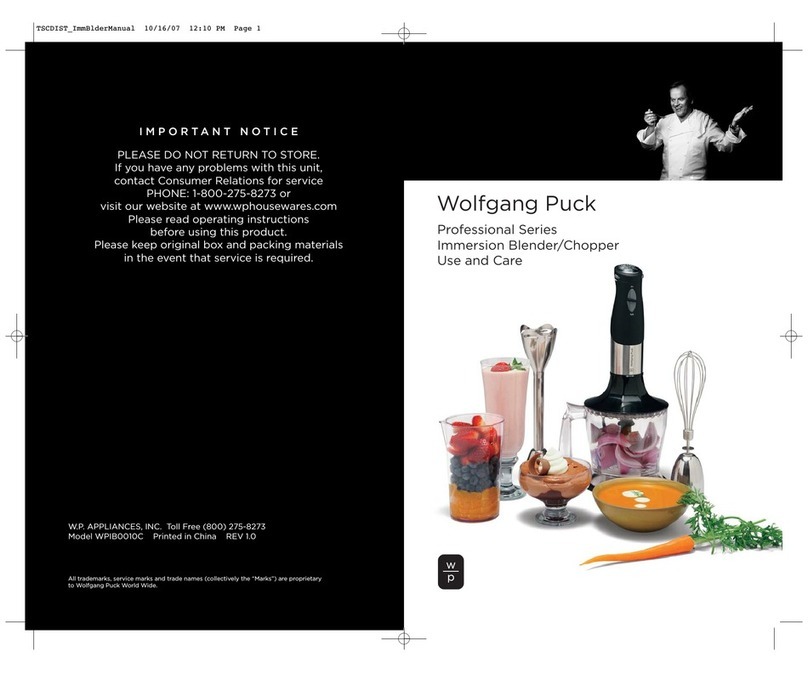
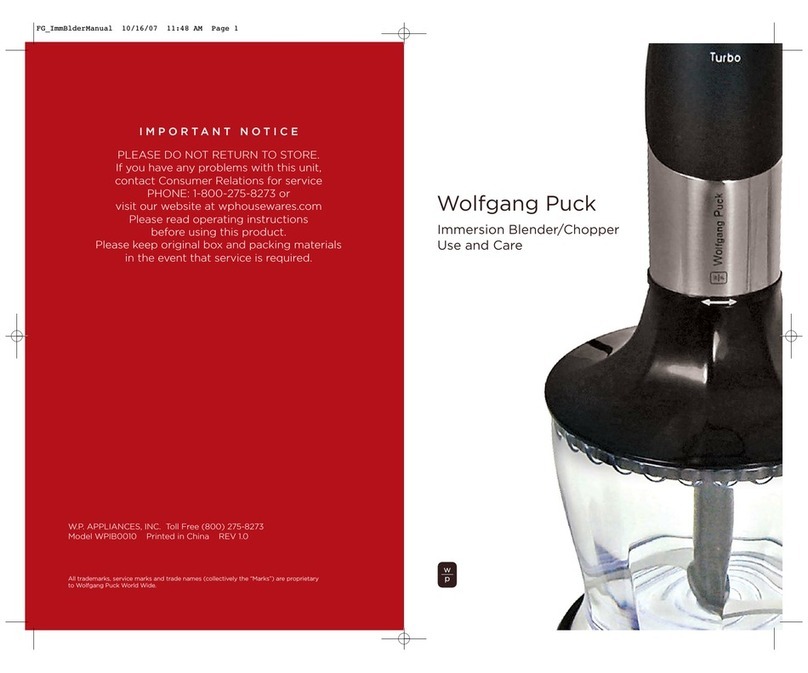
Wolfgang Puck SWPRCGIB120 Installation instructions

USE AND CARE
CORDLESS
RECHARGEABLE
IMMERSION BLENDER
Model SWPRCGIB120
Wolfgang Puck is a trademark of Wolfgang Puck Worldwide
Actual product may differ slightly from images in this manual
IMPORTANT NOTICE
Please read operating instructions before using this
product. Please keep original box and packing materials
in the event that service is required.
Model SWPRCGIB120
Synergy Housewares, LLC.
Toll-free: 866-444-4033
Hours: M-F 9:00am-5:00pm EST
Website: warranty.synergyhousewares.com
Printed in China
For questions or concerns please contact customer service at:

Before Your First Use
When using electrical appliances, basic safety precautions should always
be followed, including the following:
IMPORTANT SAFEGUARDS
SAVE THESE INSTRUCTIONS
HOUSEHOLD USE ONLY
Carefully unpack the unit and
accessories then remove all packaging
materials.
Clean your appliance according to
the Care & Cleaning section of this
manual.
The Charging Cable has a USB Type
A connector on one end and a Micro-
USB connector on the other end
(Figure 1).
Connect the USB Type A end of the
charging cable to a suitable charging
block (Figure 2) then plug the Micro-
USB connector of the cable to the
charging port on the rear of the
Immersion Blender housing located
under the silicone protective cover
marked “USB”. Plug the charging block
into a standard 120v 60 Hz outlet.
Allow the Immersion Blender to charge
for 4 hours before your first use. The
battery indicator lights will illuminate
during the charging process. When
the batter is fully charged the battery
indicator lights will turn off.
You can check the status of the battery
strength by holding the Power Button
in for 2 seconds. The lights will turn off
automatically after 10 seconds.
Electrical Requirements
Battery Voltage: 7.4 V Lithium-Ion (Li-ion) / 2000m Ah
Power: DC 7.4V 180W
Input : 5V / 1A~2A
Charging Cord: USB Type A
Always dispose battery operated products according to federal, state, and
local regulations. Contact a recycling agency in your area for recycling
locations.
USB Type A Micro-USB
1 Read all instructions.
2 To protect against risk of electrical shock, do not put the Motor
Housing, or USB cord, or USB charging adapter (charging adapter not
included), in water or other liquid.
3 Only use a charging block that fits in a standard 120V 60 Hz outlet to
charge the Immersion Blender, See page 2 for examples of charging
blocks.
4 This appliance is not intended for use by persons (including children)
with reduced physical, sensory, or mental capabilities, or lack of
experience and knowledge, unless they have been given supervision or
instructions concerning use of the appliance by a person responsible
for their safety.
5 Turn the appliance OFF before assembling or disassembling parts and
before cleaning. To unplug the charger, grasp the plug and pull from
the outlet.
6 Avoid contacting moving parts.
7 Do not operate any appliance or Charger adapter with a damaged
cord or plug or after the appliance malfunctions or is dropped or
damaged in any manner. Contact the manufacturer at 800-275-8273
for information on examination, repair, or adjustment.
8 The use of attachments not recommended or sold by the appliance
manufacturer may cause fire, electric shock, or injury.
9 Do not use the appliance outdoors.
10 Do not let cord hang over edge of table or counter while charging.
11 Do not let cord contact hot surfaces, including the stove.
12 Keep hands and utensils out of the container while blending to
prevent the possibility of severe injury to persons or damage to the
unit. A scraper may be used but must be used only when the unit is
not running.
13 Blades are sharp. Handle carefully.
14 When mixing liquids, especially hot liquids, use a tall container or make
small quantities at a time to reduce splatter, spillage, and possibility of
injury. Always start with the lowest speed setting first.
15 Do not use an extension cord. Plug charger directly into an electric
outlet.
16 Do not incinerate this appliance even if it is severely damaged. The
batteries can explode in a fire.
17 Keep hands and utensils away from the cutting blade while processing
food to reduce the risk of severe injury to persons or damage to the
appliance. A scraper may be used but only when the appliance is not
running.
18 Do not mix flammable or non-food substances to avoid damage to the
appliance or injury to yourself.
Suitable Charging Blocks
(Not Included)
Figure 1
Figure 2
1 2

In the beginning, there was
Wolfgang Puck. There were
cooks and there were kitchens
and there were people eating
food, but the world had never
seen anything like Spago—
with its California cuisine, its
casual elegance, and its chef
whose genuine warmth and
love of craft redefined the
dining experience. And they
came—from LA and from
everywhere—to experience
the future. Wolfgang Puck
shaped the modern culinary
landscape: he was the first
celebrity chef, the inventor
of fusion cuisine, the first in
farm-to-table. His work is
inspired by California living,
and an insistence on only the
freshest ingredients. From
his legendary fine dining icons, his entrepreneurial spirit has built
an empire—from dining, to catering, to products for the home—
touching the lives of millions around the globe. Today, as always,
Chef Puck is earnestly, restlessly, tirelessly at work behind the scenes
inventing what’s next. He is driven by a genuine love of his craft, a
passion for what’s possible, and its potential to change the world.
Table of Contents
Important Safeguards ................................................................. 1
Before Your First Use ................................................................. 2
About Wolfgang Puck ............................................................... 3
Know Your Immersion Blender .............................................. 5
Using Your Immersion Blender .............................................. 6
Adjusting the Angle of Your Immersion Blender .......... 7
Adjusting the Speed ................................................................... 7
Suggested Uses ............................................................................ 8
Helpful Hints ................................................................................... 8
Care & Cleaning ............................................................................ 9
Recipes ............................................................................................ 10
Limited Warranty .......................................................................22
Contact Information ........................................................... Back
3 4

Actual product may differ slightly from illustrations throughout this manual
Know Your Immersion Blender Using Your Immersion Blender
1 Before connecting either attachment, ensure that the Immersion
Blender is off (no Battery Indicator Lights are illuminated).
2 Connect the attachment of your choice (assembled Whisk or
Blending Rod) to the Motor Housing. To connect either attachment,
push attachment up until flush with the Motor Housing then
rotate in the direction of the lock symbol (right) until it stops.
If using the Whisk, ensure the Whisk is fully seated into the
Whisk Receptacle by pressing straight in until it stops before
attaching.
Warning: The Blending Rod blades are sharp, use caution during
assembly and disassembly.
3 To turn the Immersion Blender on, press and hold the Power Button
until the Battery Indicator Lights illuminate. The Battery Indicator will
show the amount of charge remaining (one light is low charge, 4 lights
are full charge). If a single light is blinking, you will need to recharge the
battery. The Immersion Blender will auto shut-off if the Start Button is
not pressed within 10 seconds.
4 Place food into the Beaker or other suitable container for mixing (bowl,
stockpot etc). For best results solid foods should be no larger than 1/2-
inch cubes. The Lid of the Beaker can be attached to the bottom of the
Beaker to aid in keeping the Beaker stable on your work surface.
5 Immerse the Blending Rod or assembled Whisk into your ingredients
then press and hold the Start Button to begin the blending process.
The motor will remain on as long as the Start Button is held in. To stop
the blending process, release the Start Button.
6 Slowly move the Blending Rod or Whisk up, down and sideways
through your ingredients. You can adjust the speed by rotating the
Speed Dial during use (see Adjusting the Speed on page 7).
Note: Never lift the Blending Rod or Whisk out of your ingredients while
the unit is running to avoid splatter.
7 To remove the attachment from the Immersion Blender, make sure the
appliance is turned off by pressing the Power Button once so that no
lights are illuminated. Then, while holding the Motor Housing, twist the
attachment in the direction of the unlock symbol (left) until it stops,
then pull off of the Motor Housing.
Note: Do not operate the motor continuously for more than one minute.
Power Button
Start Button Battery Indicator Lights
Speed Dial
Blending Rod
Motor Housing
Charging Cord
WhiskWhisk Receptacle
Beaker with Lid
Twist Release Button
(not shown - on back of Motor Housing)
5 6

Your Immersion Blender can be adjusted to three different angles for
optimum comfort during use: 180°, 135°, and 90°.
To adjust the angle, press and hold the Twist Release Button (Figure 3)
while rotating the top of the Immersion Blender Motor Housing until you
reach your desired position (Figure 4). Ensure that you hear a click and
that the Twist Release Button swivels back to the lock symbol.
Adjusting the Angle
of Your Immersion Blender
Twist
Release
Button
Figure 3 Figure 4
Figure 5
Adjusting the Speed
With the front of the Immersion
Blender facing you, turning the
Speed Dial clockwise will increase
the speed, and counterclockwise will
decrease the speed (Figure 5).
Warning:
When mixing hot liquids always
begin with the lowest speed then
gradually increase to desired setting.
Turn
Clockwise to
Increase
Speed
Turn
Counterclockwise
to Decrease
Speed
Suggested Uses
Beat cream, whip egg whites, puddings, sauces, frostings and other
airy, foamy mixtures. When using, move Blending Rod up and down
to draw air in. Use a tall, narrow container such as the Beaker for
best results when foaming milk, making cream and whipping egg
whites.
Mix and stir shakes, drinks, omelet batters, sauces and emulsions.
Use for pancake batter, gravies and dressings.
Cut, chop, and crush raw or cooked meat and hard vegetables.
Grind cooked meat for use in recipes such as casseroles or chicken
salad.
Chop, crush, and mash vegetables, and fruit for baby food, soups
and sauces.
Function Speed
Low
Medium
to High
High
Medium
to High
Helpful Hints
• The Blending Rod can be used in hot liquids. Always use care when
using in hot liquids. To avoid splashing ,insert the Blending Rod into
the Beaker or other container first, set the Speed Dial to a low speed
setting, then press and hold the Start Button for operation, slowly
raising the speed to your desired setting.
CAUTION: Do not tilt or lift the The Blending Rod out of the Beaker or
other container while the motor is running, as a serious burn or injury
can occur from food splatter.
• To puree foods, a certain amount of liquid is needed. Add cooking
liquid, broth, juice, milk, or cream, until desired consistency is reached.
• For thorough blending, move the Blending Rod up and down in mixture
until smooth. For greater efficiency, move the Blending Rod in small
outward spiraling circles while mixing.
• You will achieve better mixing results if you use deep, tall containers
such as the Beaker or a pitcher.
• For easy cleanup, rinse the Blending Rod or Whisk under running water
immediately after using.
• The Blending Rod cannot blend hard or fibrous ingredients unless they
are in less than 1/2-inch pieces, soft ones into 1/2 to 1-inch pieces.
7 8

Care & Cleaning
CAUTION: Blending Rod blades are sharp. Handle with care. Make sure
your appliance is turned off prior to removing or attaching parts, or when
cleaning.
To turn off, press the Power Button once (no Battery Indicator Lights
should be illuminated).
Do not immerse the Motor Housing, Charging Cord or Charging Block (not
included) in water or any other liquid.
To clean the Motor Housing, simply wipe with a damp cloth then dry
thoroughly.
Detach Whisk from Whisk Receptacle before cleaning. To detach hold
Receptacle and pull Whisk straight out. To reattach after cleaning, press
whisk into Receptacle until it stops.
The Whisk (removed from Whisk Receptacle), Blending Rod and Beaker
(with Lid removed) can be hand washed in warm soapy water, rinsed and
dried thoroughly. The Whisk (removed from Whisk Receptacle) and Beaker
(with Lid removed) can also be placed in the top rack of the dishwasher
for cleaning.
The Whisk Receptacle and Beaker Lid should be hand washed in warm
soapy water only.
Do not use abrasive or harsh cleaners on any part of your Immersion
Blender.
Recipes
9 10

Strawberry Milkshake
2 servings
INGREDIENTS
For the Milkshake
1 cup strawberries, halved
1/4 cup granulated sugar or to taste
4 scoops strawberry ice cream
1/3 cup half & half
For the Sweetened Whipped Cream
1 cup heavy cream
2 tablespoons sugar
METHOD
1. Place strawberries and sugar into a medium bowl and toss.
2. Cover and let strawberries macerate at room temperature for 30 minutes.
3. Transfer strawberries and any juices to a pitcher.
4. Using the Immersion Blender with Blending Rod, process to a rough puree.
5. Add ice cream and half & half to the pitcher then blend until thoroughly
combined.
6. Pour into glasses and set aside.
7. Combine whipped cream ingredients in a medium mixing bowl then whip
using the Immersion Blender with Whisk until soft peaks form.
8. Top each glass with whipped cream before serving.
Strawberry Kiwi Kooler
2 servings
INGREDIENTS
6 whole strawberries, topped
3 tablespoons granulated sugar, divided
6 kiwis, peeled
1 cup pear nectar
1 cup ice cubes
METHOD
1. Place strawberries and 1 tablespoon sugar into a pitcher.
2. Using the Immersion Blender with Blending Rod, pulse until smooth.
3. Pour strawberry puree into serving glasses.
4. Place remaining ingredients into the pitcher then pulse again until smooth.
5. Pour kiwi mixture into glasses over the strawberry puree before serving.
11 12

Citrus Slushy
2 servings
INGREDIENTS
1 cup orange juice, freshly squeezed
1/4 of an orange (optional)
1/4 cup grapefruit juice, freshly squeezed
1 tablespoon lemon juice, freshly squeezed
1 tablespoon granulated sugar
1 1/2 cups ice cubes
METHOD
1. Place all ingredients into a pitcher.
2. Using the Immersion Blender with Blending Rod, pulse until smooth.
3. For a thicker slushy, add a few more ice cubes.
4. Pour into glasses and serve immediately.
Green Goddess Dressing
Makes 1 1/4 cups
INGREDIENTS
1 garlic clove
1 packed cup of a mixture of tarragon leaves, parsley sprigs, basil leaves
1 large pasteurized egg
2 tablespoons apple cider vinegar
1 anchovy filet (about 1 teaspoon)
1 teaspoon capers
1 tablespoon granulated sugar
2 teaspoons kosher salt
1/4 teaspoon freshly cracked pepper
1 cup vegetable oil
METHOD
1. Place all ingredients into a quart-size canning jar.
2. Place Blending Rod of Immersion Blender at the bottom of the jar.
3. Blend on high speed for 10 seconds while holding the Blending Rod at the
bottom of the jar.
4. While continuing to blend, slowly lift Blending Rod up to emulsify top of
the dressing.
5. Scrape sides of the jar then blend for a few additional seconds to smooth
it out.
6. Use dressing as desired.
7. Dressing can be stored in the refrigerator for up to 3 days.
13 14

Corn Chowder
8 servings
INGREDIENTS
3 cups yellow onions, chopped
6 tablespoons unsalted butter
1/4 cup all purpose flour
1 teaspoon kosher salt
1/4 teaspoon turmeric
6 cups chicken stock
3 cups Russet potatoes, peeled and diced
5 ears of corn, kernels removed
1 tablespoon granulated sugar
2 teaspoons fresh lemon juice
1/8 teaspoon cayenne pepper
1 cup half & half
Green onions for garnish, cut diagonally
METHOD
1. Preheat an 8-quart stockpot over medium-high heat.
2. Sauté onions and butter for 5 minutes or until onions are translucent.
3. Stir in flour, salt, and turmeric then cook for an additional 3 minutes.
4. Add chicken stock, potatoes and corn then bring to a boil.
5. Reduce heat to medium-low then simmer for 15 minutes until potatoes
are tender.
6. Using the Immersion Blender with Blending Rod, start pureeing on the
lowest speed to control splashing.
7. Slowly increase speed to high then puree until smooth.
8. Add half & half then blend until combined.
9. Ladle into bowls then top with green onions before serving.
Chipotle White Bean Dip
Makes 2 cups
INGREDIENTS
1 can (15.5 oz.) white beans, drained
2 garlic cloves
1 teaspoon fresh lime zest
The juice of 1 lime
1 teaspoon Adobo all purpose seasoning
1 green onion, chopped
1 teaspoon soy sauce
1/4 can (7 oz. size) chipotles en adobo
1 teaspoon honey
2 tablespoons tomato paste
2 tablespoons vegetable oil
METHOD
1. Place all ingredients into a medium bowl.
2. Using the Immersion Blender with Blending Rod, puree for 30 seconds or
until smooth.
3. Scrape down the sides of the bowl then puree for an additional 30 seconds.
4. Use dip as desired.
5. Dip can be stored in the refrigerator for up to 2 weeks.
15 16

Green Pea Soup
6 servings
INGREDIENTS
2 tablespoons unsalted butter
1 yellow onion, peeled and quartered
1 teaspoon kosher salt or to taste
2 tablespoons all purpose flour
4 cups vegetable stock
1 tablespoon granulated sugar
2 teaspoons fresh lemon juice
1 1/2 pounds frozen peas
1/2 cup plain yogurt
Fresh pepper to taste
METHOD
1. Melt the butter in a stockpot over medium heat.
2. Add the onions and salt then cook for 5 minutes or until onions are
translucent.
3. Stir in the flour then cook for an additional 1 minute.
4. Slowly stir in the vegetable stock, being sure to scrape the bottom of the
pot.
5. Bring to a simmer then cook for 5 minutes.
6. Add the sugar, lemon juice and peas then cook for 8-10 minutes.
7. Remove from heat.
8. Using the Immersion Blender with Blending Rod, start pureeing on the
lowest speed to control splashing.
9. Slowly increase speed to high then puree until quite smooth.
10. Add yogurt and pepper then blend to incorporate.
11. Ladle into bowls and serve.
Cauliflower Mash
4 servings
INGREDIENTS
1 large head cauliflower, cut into florets
1 cup vegetable stock
1/2 cup whole milk or half & half
1/2 teaspoon lemon juice
Kosher salt to taste
Freshly cracked pepper to taste
3 tablespoons unsalted butter
METHOD
1. Combine all ingredients, except butter, in a large saucepan with a tight
fitting lid.
2. Bring to a boil over medium heat.
3. Reduce heat to a simmer, cover and cook for 15 minutes or until fork tender.
4. Remove from heat then drain away most of the liquid, reserving it.
5. Using the Immersion Blender with Blending Rod, puree cauliflower on low
speed until very smooth.
6. Blend in butter and enough reserved liquid to make the puree a soft
texture.
7. Serve immediately.
17 18

Notes Notes
19 20

Notes Limited Warranty
This warranty covers all defects in workmanship or materials in the mechanical
and electrical parts, arising under normal usage and care, in this product for
a period of 12 months from the date of purchase provided you are able to
present a valid proof-of-purchase. A valid proof-of-purchase is a receipt
specifying item, date purchased, and cost of item. A gift receipt with date
of purchase and item is also an acceptable proof-of-purchase. Product is
intended for household use only. Any commercial use voids the warranty.
This warranty covers the original retail purchaser or gift recipient. During
the applicable warranty period within normal household use, we will repair
or replace, at our discretion, any mechanical or electrical part which proves
defective, or replace unit with a comparable model.
To obtain service under the terms of this warranty, call Toll Free (866) 444-
4033.
THIS LIMITED WARRANTY COVERS UNITS PURCHASED AND USED WITHIN
THE UNITED STATES AND CANADA AND DOES NOT COVER:
• Damages from improper installation.
• Defects other than manufacturing defects.
• Damages from misuse, abuse, accident, alteration, lack of proper care and
maintenance, or incorrect current or voltage.
• Damage from service by other than an authorized dealer or service center.
This warranty gives you special legal rights and you may also have other
rights to which you are entitled which may vary from state (province) to state
(province).
Proof of purchase required to validate the warranty.
Shipping and handling charges may apply.
21 22
Table of contents
Other Wolfgang Puck Blender manuals

Wolfgang Puck
Wolfgang Puck BEBB0030 Installation instructions

Wolfgang Puck
Wolfgang Puck BBLFP050 Owner's manual

Wolfgang Puck
Wolfgang Puck BBLFP001 User manual

Wolfgang Puck
Wolfgang Puck BPB00010 Installation instructions

Wolfgang Puck
Wolfgang Puck BIBC1025 User manual

Wolfgang Puck
Wolfgang Puck WPIB0010C Installation instructions

Wolfgang Puck
Wolfgang Puck BIBC1030 Bistro collection User manual

Wolfgang Puck
Wolfgang Puck WPIB0010 Installation instructions

Wolfgang Puck
Wolfgang Puck Bistro BIBC2020 User manual

Wolfgang Puck
Wolfgang Puck BIBC1040 Bistro collection Installation instructions