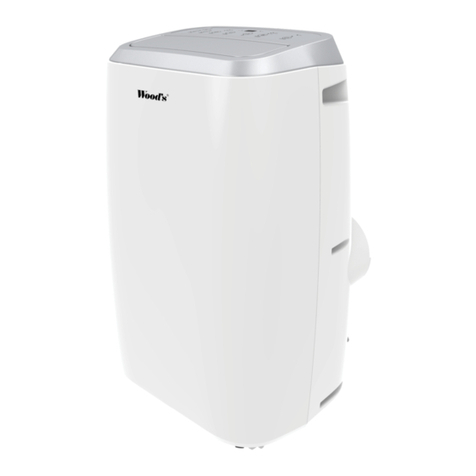
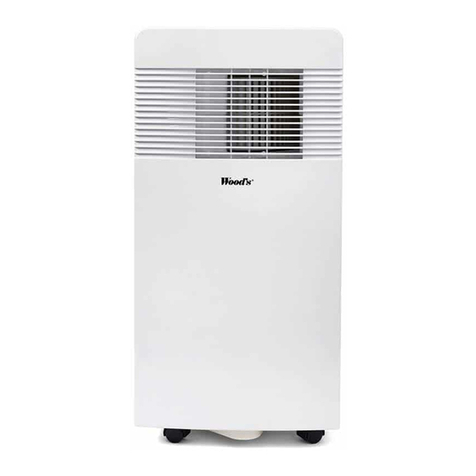
Woods Venezia User manual

Air Condition
Operating Instructions
Bruksanvisning
Guide d’instructions
Bruksanvisning
Bedienungsanleitung
Betjeningsvejledning
Gebruiksaanwijzing
Käyttöohjeet
Instrukcja obsługi
Manual de instrucciones Manual utilizare
Naudojimosi instrukcija Lietošanas instrukcija
LT LV
SE
NO
Revision date: 2/April, 2019# AC/VENEZIA
R
E
S
EE Kasutusjuhend
Portable Air-conditioner
User’s Manual
Model Venezia
Premium Air Quality

CONTENTS: PAGE NO.
Table of Contents
TABLE OF CONTENTS
OPERATING INSTRUCTIONS
English
Swedish
Norwegian
Danish
German
French
Spanish
Dutch
Polish
Romanian
Finnish
Lithuanian
Latvian
Estonian
04-11
12-19
20-27
28-35
36-43
44-51
52-59
60-67
68-75
76-83
84-91
92-99
100-107
10 8 -114

Thank you very much for choosing this model
from Wood’s. Please read this instruction
manual carefully before installing and using this
appliance. Please keep this instruction manual in a
safe place for future reference.
Visit warranty-woods.com for more information
and updated instruction manuals. You will find
information about registering your product and
regular news. Depending on the product line,
Wood’s provides different type of warranty. More
to discover online woods.se

GB
4
Operating Instructions
Flammable material. This
appliance contains R290/Propane a
flammable refrigerant.
Refer operators manual.
Read technical manual
Read operators manual.
SAFETY INFORMATION
Before the installation and use
of the appliance, carefully read
the supplied instructions. The
manufacturer is not responsible
if an incorrect installation and
use causes injuries and damages.
Always keep the instructions with
the appliance for future reference.
Children and vulnerable people
safety
WARNING
Risk of injury or permanent
disability.
This appliance can be used by
children aged 8 years and above
and persons with reduced physical,
sensory or mental capabilities or
lack of experience and knowledge
if they have been given supervision
or instruction concerning use of
the appliance in a safe way and
understand the hazards involved.
Do not let children play with the
appliance.
Children of less than 3 years should
be kept away unless continuously
supervised.
Keep all packaging away from
children.
Cleaning and user maintenance
shall not be made by children
without supervision.
General Safety
This appliance is intended to be
used in household and similar
applications such as: – basements,
crawl spaces; staff kitchen areas in
shops, offices and other working
environments. The rating plate is
located behind the water tank of
the dehumidifier.
Keep ventilation openings clear of
obstruction.
Do not use mechanical devices
or other means to accelerate the
defrosting process, other than
those recommended by the
manufacturer.
The appliance shall not be stored in
a room with continously operating
ignition sources (for example; open
flames, an operating gas appliance
or an operation electric heater. Do
not pierce or burn.
Be aware that refrigerants may
not contain an odour. Do not use
water spray and steam to clean the
appliance. Clean the appliance with
a moist soft cloth. Only use neutral
detergents. Do not use abrasive
products, abrasive cleaning pads,
solvents or metal objects.
If the supply cord is damaged,
it must be replaced by the
manufacturer, its Authorised
Service Centre or similarly qualified
persons in order to avoid a hazard.
SAFETY INSTRUCTIONS
Installation
WARNING
Only a qualified person must install
this appliance.
Remove all the packaging.
Do not install or use a damaged
appliance. The appliance shall be
installed, operated and stored in
a room with a floor area larger
than 14,4m². Obey the installation
instruction supplied with the
appliance.
Always be careful when you move
the appliance because it is heavy.
Always wear safety gloves.
Make sure the air can circulate
around the appliance.
Wait at least 4 hours before
connecting the appliance to the
power supply. This is to allow the
oil to flow back in the compressor.
Do not install the appliance close
to radiators or other heat sources.
Do not install the appliance where
there is direct sunlight.
Electrical connection
WARNING
Risk of fire and electrical shock.
The appliance must be connected
to a grounded outlet.
Make sure that the electrical
information on the rating plate
agrees with the power supply. If
not, contact an electrician.
Always use a correctly installed
shockproof socket.
Do not use multi-plug adapters
and extension cables.

GB
5
Operating Instructions
03
Make sure not to cause damage
to the electrical components (e.g.
mains plug, mains cable).
Contact the Authorised Service
Centre or an electrician to change
the electrical components.
The mains cable must stay below
the level of the mains plug.
Connect the mains plug to the
mains socket only at the end of the
installation.
Make sure that there is access
to the mains plug after the
installation.
Do not pull the mains cable to
disconnect the appliance. Always
pull at the mains plug.
Use
WARNING
Risk of injury, burns, electrical
shock or fire. Do not change the
specification of this appliance.
Be careful not to cause damage to
the refrigerant circuit. It contains
propane (R290), a natural gas with
a high level of environmental
compatibility. This gas is
flammable.
If damage occurs to the refrigerant
circuit, make sure that there are no
flames and sources of ignition in
the room. Ventilate the room.
Do not put flammable products or
items that are wet with flammable
products near or on the appliance.
Disposal
WARNING
Risk of injury.
Disconnect the appliance from the
mains supply. Cut off the mains
cable and discard it.
The refrigerant circuit of this
appliance is ozone-friendly.
Contact your municipal authority
for information on how to discard
the appliance correctly.
Do not cause damage to the part
of the cooling unit that is near the
heat exchanger.
The maximum dosage of
refrigerant is 300g.
Notes:
The air conditioning is only suitable
for indoor use, and is not suitable
for other applications.
Follow local grid interconnection
rules while installing the air
conditioning and ensure that it is
properly grounded. If you have any
question on electrical installation,
follow the instructions of the
manufacturer, and if necessary, ask
a professional electrician to install
it.
Place the machine in a flat and dry
place and keep a distance of above
50cm between the machine and
the surrounding objects or walls.
After the air conditioning is
installed, ensure that the power
plug is intact and firmly plugged
into the power outlet, and place
the power cord orderly to prevent
someone from being tripped or
pulling out the plug.
Do not put any object into the
air inlet and outlet of the air
conditioning. Keep the air inlet and
outlet free from obstructions.
When drainage pipes are installed,
ensure that the drainage pipes are
properly connected, and are not
distorted or bended.
While adjusting the upper and
lower wind-guide strips of the air
outlet, pluck it with hands gently to
avoid damaging wind-guide strips.
When moving the machine, make
sure that it is in an upright position.
The machine should stay away
from gasoline, flammable gas,
stoves and other heat sources.
Don’t disassemble, overhaul and
modify the machine arbitrarily,
otherwise it will cause a machine
malfunction or even bring harm
to persons and properties. To
avoid danger, if a machine failure
occurs, ask the manufacturer or
professionals to repair it.
Do not install and use the air
conditioning in the bathroom or
other humid environments.
Do not pull the plug to turn off the
machine.
Do not place cups or other objects
on the body to prevent water or
other liquids from spilling into the
air conditioning.
Do not use insecticide sprays or
other flammable substances near
the air conditioning.
Do not wipe or wash the air
conditioning with chemical
solvents such as gasoline and
alcohol. When you need to clean
the air conditioning, you must

GB
6
Operating Instructions
TECHNICAL DATA
disconnect the power supply, and
clean it with a half-wet soft cloth.
If the machine is really dirty, scrub
with a mild detergent.
If the supply cord is damaged,
it must be replaced by the
manufacturer, its service agent or
similarly qualified persons in order
to avoid a hazard.
The appliance shall be installed in
accordance with national wiring
regulations.
Transportation, marking and
storage for units
1. Transport of equipment
containing flammable refrigerants
Compliance with the transport
regulations
2. Marking of equipment using
signs
Compliance with local regulations
3. Disposal of equipment using
flammable refrigerants
Compliance with national
regulations
4. Storage of equipment/
appliances
The storage of equipment
should be in accordance with the
manufacturer’s instructions.
5.Storage package protection
should be constructed such
that mechanical damage to the
equipment inside the package will
not cause a leak of the refrigerant
charge. The maximum number of
pieces of equipment permitted
to be stored together will be
determined by local regulations.
GWP value of R290refrigerant is 3.
Any repairs you need, contact the
nearest authorized Service Centre
and strictly follow manufacturer’s
instruction only.
Notes:
— If any parts damage, please
contact the dealer or a designated
repair shop;
—In case of any damage, please
turn off the air switch, disconnect
the power supply, and contact the
dealer or a designated repair shop;
—In any case, the power cord shall
be firmly grounded.
—To avoid the possibility of
danger, if power cord is damaged,
please turn off the air switch and
disconnect the power supply. It
must be replaced from the dealer
or a designated repair shop
Transportation, marking and
storage for units that employ
flammable refrigerants
Transport of equipment containing
flammable refrigerants
Attention is drawn to the fact
that additional transportation
regulations may exist with respect
to equipment containing
flammable gas. The maximum
number of pieces of equipment or
the
configuration of the equipment,
permitted to be transported
together will be determined by the
applicable transport regulations.
Disposal of equipment using
flammable refrigerants
See national regulations.

GB
7
Operating Instructions
NAME OF PARTS

GB
8
Operating Instructions
04
1 POWER
2 MODE
3 TIMER
4 SPEED
5 TEMP+
6 TEMP-
7 SILENCE
On/Off switch
MODE selector
Hourly programming
Fan speed selector
Temperature selcgtor up
Temperature selctor down
SILENCE selector
Auto air flow selector
Appearance and function of control panel
Operation introduction
Appearance and function of remote control
1) Insert the power cord into an grounded AC220-240V/50Hz socket;
2) Press the POWER button to turn on the air-conditioner.

GB
9
Operating Instructions
05
Maximum cooling Minimum cooling
DB/WB (°C) 35/24 18/12
Room (Temperautr) Tr 23°C≤26°C 26°C
Mode Dehumidify Cooling
Set temperature 23°C 25°C
Before using
Note
Operation temperatur range
Check up whether the exhaust hose has
been mounted properly.
Cautions for cooling and dehumidifying
operations:
-When using functions on cooling and
dehumidifying, keep an interval of at least
3 minutes between each ON/OFF.
-Power supply meets the requirements.
-The socket is for AC use.
-Do not share one socket with other
appliances.
-Power supply is AC220-240V 50Hz
2.AUTO MODE
- According to the current room
temperature, automatically select the
mode cooling, dehumidifying or fan (see
table 1).
Table 1
3. Cooling operation
-Press the “Mode” button till the “Cool”
icon appears.
-Press the “ DOWN ”or“ UP ”button to select
a desired room temperature. (16°C-31°C)
-Press the “ WIND ” button to select wind
speed.
4.Dehumidifying operation
Press the “Mode” button till the
“Dehumidify” icon appears .
-Automatically set the selected
temperature to current room temperature
minus 2°C. (16°C-31°C)
-Automatically set the fan motor to LOW
wind speed.
5. Fan operation
-Press the “Mode” button till the “Fan” icon
appears.
-Press the “ WIND ” button to select wind
speed.
6. Timer operation
Timer ON setting:
-When the air-conditioner is OFF, press the
“Timer” button and select a desired ON
time through the temperature and time
setting buttons.
-“Preset ON Time” is displayed on the
operation panel.
-ON time can be regulated at any time in
0-24 hours.
Timer OFF setting
-When the air-conditioner ON, press
“Timer” button and select a desired OFF
time through the temperature and time
setting buttons.
-Preset OFF Time” is displayed on the
operation panel.
-OFF time can be regulated at any time in
0-24 hours.
7. SWING(air flow)
After machine turns on, press this key, the
louver will swing continuously left and
right; by pressing this button again the
movement will stop and the louver remain
in that position.
8. SILENCE CONTROL FUNCTION
- While in cooling mode, press the SILENCE
key. The machine will be turned to low
speed to reduce machine noise.
- Press the SILENCE key again can cancel
the setting.
9. Drainage
Internal Tank Water Full Alarm Function
The inner water tank in the air-conditioner
has one water level safety switches, it
controls water level. When water level
reaches an anticipated height, the water
full indicator lamp lights up. (If water pump
is damaged, when the water is full, please
remove the rubber blockage at the bottom
of unit, and all water will drain outside.)
CONTINUOUS DRAINGE
-When you plan to leave this unit unused
for a long time, please remove the rubber
blockage from the drainage hole at the
bottom of unit, and connect a drain hose
to the lower fixing clip. All the water in the
water tank will drain outside.
-You can drain the water as the above when
the unit working at the HEAT mode.
-If water pump is damaged, continuous
drainage can be used, and under this
condition, the water pump is not activated.
The unit can also work well.
-If water pump is damaged, intermittent
drainage can also be used. Under this
condition, when the water full indicator
lamp lights up, please connect a drain hose
to the lower fixing clip, then all the water in
the water tank will drain outside. The unit
can also work well.
1 Installation Explanations:
-A removal air-conditioner shall be installed
in the flat and empty place all around.
Don’t block the air outlet, and the required
distance around should be at least 30cm.
(See Fig.8)
-Should not be installed in dry cleaner.
-Socket wiring should be in accordance
with the local electric safety requirements.
Installation Explanations

GB
10
Operating Instructions
06
Temporary installation
1.Twist both ends of the exhaust hose into the square fixing
clip and the flat fixing clip.
2.Insert the square fixing clip into openings at back of the air
conditioner.
3.Put the other end of the exhaust hose to the near
windowsill.
Maintenance Explanations
Declaration:
1) Before cleaning, be sure to disconnect the unit from any
electric supply outlet;
2) Do not use gasoline or other chemicals to clean the unit;
3) Do not wash the unit directly;
4) If the conditioner is damaged, please contact the dealer or
repair shop.
PROBLEM SOLUTION
Unit does not start when pressing
on/off button
- Water full indicator lamp blinks, and water tank is full.
- Room temperature is higher than the setting temperature. (Electric heating mode)
- Room temperature is lower than the setting temperature. (Cooling mode)
Empty the water tank.
Reset the temperature
Not cool enough - The doors or windows are not closed.
- There are heat sources inside the room.)
- Exhaust air hose is not connected or blocked.
- Temperature setting is too high.
- Air inlet is blocked.
Make sure all the windows and doors are closed.
Remove the heat sources if possible
Connect or clean the exhaust air hose.
Reset the temperature
Clean the air inlet.
High noise level - The ground is not level or not flat enough
- The sound comes from the flowing of the refrigerant inside the air conditioner
Place the unit on a flat, level ground if possible
It is normal.
E0 Code - Room temperature sensor failed Replace room temperature sensor (the unit can also work without replacement.)
E3 Code - Pipe temperature sensor failed Replace pipe temperature sensor (the unit can also work without replacement.)
E2 /E4 Code - Water tank full Please empty the water tank.
If none of the above works, you should contact your nearest retailer for checking and possible
overhaul of air conditioner

GB
11
Operating Instructions
07
Specific information regarding appliances with R 290 refrigerant
gas.
•Thoroughly read all of the warnings.
•When defrosting and cleaning the aplliance, do not use any
tools other than those recommended by the manufacturing
company.
•The appliance must be placed in an area without any
continuously sources of ignition (for example: open flames, gas
or electrical appliances in operation).
•Do not puncture and do not burn.
•Appliance shall be installed, operated and stored in a room with
a floor area larger than X m2.
(X=4 for 7000Btu/h,8000Btu/h; X=7.7 for 9000Btu/h,10000Btu/h;
X=10.1 for 12000Btu/h, 14000Btu/h)
•This appliance contains Y g (see rating label back of unit ) of
R290 refrigerant gas.
•R290 is a refrigerant gas that complies with the European
directives on the environment. Do not puncture any part of the
refrigerant circuit.
•If the appliance is installed, operated or stored in a nonventilated
area, the room must be designed to prevent to the accumulation of
refrigerant leaks resulting in a risk of fire or explosion due to ignition
of the refrigerant caused by electric heaters, stoves, or other sources
of ignition.
•The appliance must be stored in such a way as to prevent mechanical
failure.
•Individuals who operate or work on the refrigerant circuit must have
the appropriate certification issued by an accredited organization
that ensures competence in handling refrigerants according to a
specific evaluation recognized by associations in the industry.
•Repairs must be performed based on the recommendation from the
manufacturing company. Maintenance and repairs that require the
assistance of other qualified personnel must be performed under
the supervision of an individual specified in the use of flammable
refrigerants.
Guarantees and service
2 year warranty against manufacturing defects. The guarantee is only
valid against presentation of the receipt. For all service and warranty
issues, you should first contact your dealer
Visit www.woods.se for more information and updated instruction
manuals. You will find information about registering your product
and regular news. Depending on the product line, Wood’s provides
different type of warranty. More to discover online woods.se and
register your product at warranty-woods.com
Venezia
Cooling capacity 5,3 (18.000 BTU)
Power consumption 1,75 W
Air flow 650m3/h
Energy class A
Sound level Low/high. 55 dB/ 65 dB
Dehumidification capacity. 33 L/24 h
Timer 24h
EER Class A
Refrigerant gas R290
Dimentionse 880x540x400
Net Weight 33kg

S
12
Bruksanvisning
Tack för att du väljer en produkt
från Wood’s sortimentet. Läs den
medföljande bruksanvisningen
noggrant innan installation
och användning av produkten.
Tillverkaren är ej ansvarig för
person- och egendomsskador
som uppstår på grund av felaktig
installation eller användning. Spara
bruksanvisningen för framtida
behov.
Besök warranty-woods.com för
mer information och uppdaterade
bruksanvisningar, information om
registrering av din produkt och
nyheter. Beroende av produktlinjen
tillhandahåller vi garantier. Mer att
upptäcka online woods.se
Brännbart ämne. Denna
maskin innehåller R290/Propan –
ett brännbart köldmedium.
Se bruksanvisning.
Läs serviceinstruktion
Läs bruksanvisning.
SÄKERHETSINFORMATION
Läs den medföljande
bruksanvisningen noggrant innan
installation och användning
av produkten. Tillverkaren är
ej ansvarig för person- och
egendomsskador som uppstår
på grund av felaktig installation
eller användning. Spara
bruksanvisningen för framtida
behov.
SÄKERHET FÖR BARN OCH
HANDIKAPPADE
VARNING!
Risk för skador och permanent
invaliditet.
Denna produkt kan användas
av barn från 8 års ålder och
uppåt och av personer med
nedsatt fysisk, sensorisk eller
mental förmåga samt personer
med bristande erfarenhet och
kunskap, om de övervakas
eller instrueras beträffande hur
produkten används på ett säkert
sätt och förstår de risker som är
förknippade med användningen.
Låt inte barn leka med produkten.
Barn under 3 år ska inte vistas
i närheten av produkten utan
ständig uppsikt.
Håll förpackningsmaterial utom
räckhåll för barn.
Rengöring och användarunderhåll
ska inte utföras av barn utan tillsyn.
ALLMÄN SÄKERHET.
Denna produkt är avsedd att
användas i hushållsliknande
tillämpningar såsom: - källare,
krypgrunder, pentryn i butiker,
på kontor och liknande
arbetsmiljöer. Produktens
märkskylt är placerad bakom
kondensvattenbehållaren. Håll
produktens ventilationsöppningar
fria från hinder.
Använd ej andra metoder för
avfrostning eller rengöring än
de som rekommenderas av
tillverkaren. Produkten ska inte
förvaras i ett rum där kontinuerligt
använda tändkällor finns (till
exempel; öppen eld, gasvärmare
eller elektriska värmare). Kylkretsen
får ej punkteras eller utsättas för
öppen låga. Köldmediet kan vara
luktlöst. Spraya inte vatten eller
ånga på produkten för att rengöra
den. Använd en fuktad mjuk
trasa vid rengöring tillsammans
med rengöringsmedel. Undvik
att använda slipande medel eller
metallföremål. Om nätsladden
är skadad måste den bytas av
tillverkaren eller, en av tillverkaren
auktoriserad verkstad eller
liknande kvalificerad person för att
unndvika framkallande av fara.
SÄKERHETSINSTRUKTIONER
INSTALLATION
VARNING!
Endast kvalificerade personer
får installera denna produkt.
Avlägsna allt förpackningsmaterial.
Installera eller använd inte en
skadad produkt. Produkten ska
installeras, användas och förvaras
i ett rum med en golvyta större
än 14,4 m2. Följ den bifogade
installationsanvisningen noga.
Iakttag alltid försiktighet om
produkten ska flyttas eftersom
den är tung. Använd alltid
skyddshandskar.
Tillse att luft kan cirkulera
runt produkten. Vänta minst 4
timmar innan produkten ansluts
till nätspänning i syfte att låta
kompressorns smörjmedel rinna
tillbaka till kompressorn. Installera

S
13
Bruksanvisning
inte produkten i närheten av
radiatorer eller andra värmekällor.
Installera inte produkten i direkt
solljus.
ELEKTRISK ANSLUTNING
VARNING!
Risk för brand och elektriska
stötar. Produkten måste anslutas
till ett jordat eluttag. Kontrollera
att märkskyltens elektriska
information överensstämmer
med nätspänningskällan. Om
så inte är fallet, kontakta en
elektriker. Använd alltid ett korrekt
installerat stötsäkert och jordat
eluttag. Använd inte grenuttag
eller förlängningssladdar. Vid
skadad anslutningssladd (t.ex.
stickpropp eller nätsladd) kontakta
en av tillverkaren auktoriserad
verkstad eller en elektriker om
en elektrisk komponent behöver
bytas. Nätsladden ska befinna
sig nedanför stickproppen efter
installation. Anslut nätsladden
sist i installationen. Tillse att
nätsladdens stickpropp är åtkomlig
efter installationen.
Dra inte i nätsladden för att koppla
loss produkten från eluttaget. Drag
alltid i stickproppen.
ANVÄNDNING
VARNING!
Risk för personskador, elektriska
stötar eller brand. Produktens
specifikation får inte ändras.
Iakttag försiktighet för att inte
skada produkten kylkrets.
Produkten innehåller propan
(R290), ett naturligt köldmedel
med låg miljöpåverkan.
Köldmediegasen är brandfarlig.
Om kylkretsen skadas tillse att
öppen låga eller andra tändkällor
inte finns i rummet. Vädra
utrymmet. Placera inte brännbara
ämnen eller föremål dränkta i
brännbara ämnen i närheten av,
eller på produkten.
AVYTTRING
VARNING!
Risk för skador.
Koppla loss produkten från
eluttaget. Klipp av nätsladden nära
produkten och kassera den.
Köldmediet i kylkretsen på denna
produkt är miljövänligt. Kontakta
de lokala myndigheterna för
information angående korrekt
avyttring av produkten. Skada inte
kylenheten närmast förångaren då
kylmedia kan läcka ut.Den maximal
mängden av kylmediet är 300 g.
Varning:
•Klimatanläggningen är endast
lämplig för inomhusbruk.
•Produkten måste anslutas till
ett jordat eluttag kontrollera
att märkskyltens elektriska
information överrensstämmer med
nätspänningskällan.
Använd alltid ett korrekt
installerat stötsäkert och jordat
eluttag. Använd inte grenuttag
eller förlängningssladdar. Vid
skadad anslutningssladd (t.ex.
stickpropp eller nätsladd) kontakta
en av tillverkaren auktoriserad
verkstad eller en elektriker om
en elektrisk komponent behöver
bytas. Nätsladden ska befinna
sig nedanför stickproppen efter
installation. Anslut nätsladden
sist i installationen. Tillse att
nätsladdens stickpropp är åtkomlig
efter installationen.
Dra inte i nätsladden för att koppla
loss produkten från eluttaget. Drag
alltid i stickproppen.
•Placera maskinen på ett plant och
torrt ställe och håll ett avstånd
på minst 50 cm mellan maskinen
och de omgivna föremålen eller
väggarna.
•Placera inga föremål i luftintaget
eller i luftutloppet. Håll luftintaget
och luftutloppet fritt från hinder.
•Vid eventuell direktavrinning, se
till att dräneringsröret är ordentligt
anslutet och inte snedställdt eller
böjt.
•När du flyttar maskinen,
kontrollera att den står i upprätt
läge.
•Produkten ska inte användas i
utrymmen där bensin, brandfarlig
gas, gasspis och andra värmekällor
finns.
•Utför inga modifieringar eller
egen service för att undvika
personskador eller produktskada.
•Installera inte använd
luftkonditioneringen i badrummet
eller andra fuktiga miljöer.
•Dra inte ur strömsladden ur
uttaget för att stänga av maskinen.
•Risk för skador och permanent
invaliditet.
•Förvaringspaketets skydd bör
konstrueras så att mekanisk
skada på utrustningen inuti
förpackningen inte orsakar läckage
av kylmedelsladdningen.
Avyttring.
• Koppla loss produkten från
eluttaget. Klipp av nätsladden nära

S
14
Bruksanvisning
08
TEKNISKA DATA
produkten och kassera den.
•Köldmediet i kylkretsen på denna
produkt är miljövänligt. Kontakta
de lokala myndigheterna för
information angående korrekt
avyttring av produkten. Skada inte
kylenheten närmast förångaren då
kylmedia kan läcka ut.
•Det maximala antalet
utrustningsdelar som lagras ihop
kommer att bestämmas enligt
lokala föreskrifter.
•Apparaten ska förvaras så att
mekanisk skada inte uppstår.
Transport, märkning och lagring
för enheter
•Transport av utrustning som
innehåller brandfarliga kylmedel
•Överensstämmelse med
transportreglerna
•Märkning av utrustning med
skyltar
•Överensstämmelse med lokala
bestämmelser
•Kassering av utrustning med
brandfarliga kylmedel
•Överensstämmelse med nationella
bestämmelser
•Förvaring av utrustning /
apparater
•Lagring av utrustning ska
överensstämma med tillverkarens
instruktioner.
•Förvaring av packad (osåld)
utrustning
•Förvaringspaketets skydd bör
konstrueras så att mekanisk
skada på utrustningen inuti
förpackningen inte orsakar läckage
av kylmedelsladdningen.
•Det maximala antalet
utrustningsdelar som lagras ihop
kommer att bestämmas enligt
lokala föreskrifter.
•Apparaten ska förvaras så att
mekanisk skada inte uppstår
•Apparaten är fylld med brandfarlig
gas R290, och den maximala
laddningen av kylmedel är 300g.
•GWP-värdet av R290refrigerant är
3.
•Vid alla service- och
garantiärenden ska du först
kontakta din återförsäljare, och följ
endast tillverkarens instruktioner.

S
15
Bruksanvisning
09
Namn på produktens delar
Efter uppackning, kontrollera om ovanstående tillbehör ingår och kontrollera deras
ändamål i installationsinledningen i den här handboken
Bakre omslag
Bakre omslag
Hjul
Framsida
Nätsladd
Beskrivning AntalProduktdel
Lukonditioneringsenhet
Utloppsslang
Slanganslutning
Fönsterkit
Slanganslutning
Fönsterkit
Fjärrkontroll
Baksida
Manöverpanel
Luintag

S
16
Bruksanvisning
10
1 AV/PÅ
2 LÄGE
3 TIMER- FUNKTIONR
4 HASTIGHET
5 TEMPERATUR +
6 TEMPERATUR -
7 SILENECE-FUNKTION
8. SWING- FUNKTION
AV/PÅ FUNKTION
Lägesväljare
TIMER set funktion
Fläkthastighet
Temperatur väljare +
Temperatur väljare -
SILENCE funktion
Auto-swing fuktion
Funktion manöverpanel
Placering och installation tillbehör
Funktion ärrkontroll
Sätt i nätsladden i ett jordat uttag AC220-240V / 50Hz
Tryck på Power för att starta maskinen
Hitta en plats där det finns strömförsörjning i närheten
Öppna fönstret och placer fönsterkittet horisontellt eller vartikalt, beroende på önstrets
utformning. Justera fönsterkittets längd och fixera med skruvarna. Stäng fönstret och
fast adapter på luftslangen som sedan fästes på fönseterkittet

S
17
Bruksanvisning
11
Maximal kylning Minsta kylning
°C 35/24 18/12
Rumstemperatur 23°C≤26°C 26°C
Läge Avfuktning Kyla
Inställd temperatur 23°C 25°C
Innan användning
Temperatur
Kontrollera om utblåsslangen är korrekt
monterad.
Varningar för kylning och avfuktning:
- Vid användning av funktioner vid kylning
och avfuktning, behåll
ett intervall på minst 3 minuter mellan
varje på / av.
- Se till att strömförsörjning uppfyller
ställda krav.
- Stickkontakten är avsedd för AC-
användning.
- Dela inte ett uttag med andra apparater.
- Strömförsörjning är AC220-240V, 50Hz
2.AUTOMATISKT LÄGE
- Enligt den aktuella rumstemperaturen
väljer du automatiskt läget: kylning,
avfuktning eller fläkt
3. Kylning (Cooling)
- Tryck på “Mode” knappen tills “Cool”
ikonen visas.
- Tryck på “DOWN” eller “UP” knappen för
att välja önskat läge
temperatur. (16°C -31°C)
- Tryck på “WIND” knappen för att välja
hastighet.
4. Avfuktning (Dehumidify)
Tryck på “Mode” knappen tills “Avfuktning”
ikonen visas.
- Ställ in den valda temperaturen
automatiskt
rumstemperatur minus 2 ° C. (16°C-31°C)
- Ställ in fläktmotorn automatiskt på LOW
vindhastighet.
5. Fläktdrift (Fan)
- Tryck på knappen “Mode” tills “Fan”
-ikonen visas.
- Tryck på “WIND” knappen för att välja
vindhastighet.
6. Timer funktion (Timer)
Timer ON inställning:
När luftkonditioneringen är AV, tryck
på “Timer” -knappen och välj önskad
ON-tid genom temperatur- och
tidsinställningsknapparna.
“Förinställd ON-tid” visas på
manöverpanelen.
ON-tiden kan regleras mellan 0-24 timmar.
Timer OFF inställning
När luftkonditioneringen är på, tryck
på “Timer” -knappen och välj önskad
OFF-tid genom temperatur- och
tidsinställningsknapparna.
“Förinställd OFF-tid” visas på
manöverpanelen.
AV-tiden kan regleras när som helst till
mellan 0-24 timmar.
7. SWING (luftflöde)
När maskinen är påslagen trycker du
på swing knappen lamellen svänger
kontinuerligt åt vänster och höger; Genom
att trycka på den här knappen igen
kommer rörelsen att sluta och lamellen
hålls kvar i den positionen.
8.SILENCE CONTROL FUNKTION
- I kylläget trycker du på SILENCE-
tangenten. Maskinen ställs in på låg
hastighet för att minska maskinbuller.
- Tryck på SILENCE knappen igen för att
avbryta inställningen.
9. VATTENAVLEDNING
Larm funktion när vattentanken är full
Den inre vattentanken i
klimatanläggningen har en
säkerhetsbrytare, den reglerar vattennivån.
När vattennivån når en förväntad
nivå, lyser vattenindikatorlampan.
(Om vattenpumpen är skadad, ta bort
gummipluggen längst ner på enheten när
vattentanken är full och allt vatten dräneras
ut)
Koppla en slang för direct vattenavledning
- Skruva bort locket och ta bort pluggen.
Koppla en slang till pipen på baksidan av
makskinen. Led den andra delen till ett
avlopp. Se till att vattnet kan rinna nedåt.
- Du kan tömma vattnet som ovan, när
enheten arbetar i HEAT-läget.
- Om vattenpumpen är skadad kan
kontinuerlig dränering användas,
och under detta förhållande är inte
vattenpumpen aktiverad.
1 Installation:
Installation:
- Maskinen ska installeras på en plan yta
och stabil yta. Blockera inte luftuttaget, och
det önskade avståndet ska vara minst 30
cm. (Se fig)
- Använd inte maskinen i badrum eller
andra våtutrymmen
- Stickkontakten ska överensstämma med
lokala elektriska säkerhetskrav.

S
18
Bruksanvisning
Temporär installation
Montera adapter till ena änden av slangen och koppla den
andra änden till baksidan av maskinen.
Sätt in fästklemmen i öppningar på baksidan av
klimatanläggningen
Sätt den andra änden av utblåsslangen till den närmaste
fönsterluckan
Underhåll:
Innan du rengör, var noga med att stänga av och koppla bort
enheten från ett eluttag.
Använd inte bensin eller andra kemikalier för att rengöra
enheten. Rengör maskinen med en mjuk trasa. Använd aldrig
någon form av kemikalier som t ex bensin eller alcohol, det
förstör ytan på produkten eller funktionen.
Rengör det smutsiga luftuttaget eller fläktblad med lätt
fuktig mjuk trasa.
Alla rengöringsmedel innehållande alcohol eller andra
liknande lösningsmedel är förbjudna för rengöring av
enheter
PROBLEM FRÅGESTÄLLNING LÖSNING
Luftkonditioneringen startar inte - Vattentanken är full?.
- Rumstemperaturen är högre än den inställda temperatur
- Rumstemperaturen är lägre än den inställda temperaturen
Töm vattentanken.
Ändra inställd temperatur
Dålig kyleffekt - - Är fönster och dörrar stängda?
- Finns det värmekällor i rummet
- Är luftintaget eller utblåset blockerade
- Temperaturinställningen är för hög.
- Luftintaget är blockerat
Stäng fönster och dörrar
Ta bort värmekällorna om möjligt
Se till att inget blockerar luftflödet.
Återställ temperatur
Rengör filterinsläppet
Hög ljudnivå - Står maskinen på ett ojämnt underlag?
- Ljudet kommer från kylmedelsflödet i luftkonditioneringen
Flytta maskinen till ett plant och stabilt underlag
Normalt
Felkod E0 - Fel på teperatursensor Kontakta din återförsäljare
Felkod E3 - Fel på rörtemperaturgivaren Kontakta din återförsäljare.
Felkod E2 /E4 - Vattentanken är full Töm vattentanken
Om inget av ovanstående fungerar bör du kontakta närmaste återförsäljare för översyn och even-

S
19
Bruksanvisning
Särskild information om apparater med R 290 köldmedium.
• Läs noggrant alla varningar.
• Använd inga andra verktyg än de som rekommenderas av
tillverkningsföretaget vid avfrostning och rengöring.
• Apparaten måste placeras i ett område utan kontinuerliga
antändningskällor (till exempel: öppna flammor, gas eller
elektriska apparater i drift).
• Punkta inte och bränn inte.
• Apparaten ska installeras, användas och lagras i ett rum med en
yta större än X m2.
(X = 4 för 7000Btu / h, 8000Btu / h; X = 7,7 för 9000Btu / h,
10000Btu / h; X = 10,1 för 12000Btu / h, 14000Btu / h)
• Denna apparat innehåller (se märkningsenhetens baksida) på
R290 köldmediumgas.
• R290 är en kylmedelsgas som överensstämmer med de
europeiska miljödirektiven.
• Om apparaten installeras, drivs eller förvaras i ett oventilerat
område måste rummet utformas för att förhindra ackumulering av
kylmedelsläckor, vilket medför risk för brand eller explosion på grund
av tändning av kylmediet orsakat av elvärmare, spisar eller andra
antändningskällor.
• Apparaten måste förvaras på ett sådant sätt att mekanisk
misslyckande förhindras.
• Personer som arbetar eller arbetar på kylkretsen måste ha lämplig
certifiering utfärdad av en ackrediterad organisation som säkerställer
kompetens vid hantering av kylmedel enligt en specifik utvärdering
som erkänts av branschorganisationer.
• Reparationer måste utföras baserat på rekommendation från
tillverkningsföretaget.
2 års garanti mot tillverkningsfel. Garantin är bara giltlig mot
uppvisande av kvitto. Vid alla service- och garantiärenden ska du
först kontakta din återförsäljare.
Besök woods.se för mer information och uppdaterade
bruksanvisningar, information om registrering av din produkt och
nyheter. Beroende av produktlinjen tillhandahåller vi garantier. Mer
att upptäcka online och registrera din produkt på warranty-woods.
com
Venezia
Kylkapacitet 18.000 BTU
Effekt 1750 W
Luftflöde 650m3/h
EER A
Ljudnivå Min / Max 55 dB/ 65 dB
Avfuktning 33 L/24 dygn
Timer
EER klass A
Refrigerant gas R290
Mått: 880x540x400
Vikt 33kg

D
20
Bedienungsanleitung
01
Vielen Dank dass Sie sich für
dieses mobile Klimagerät
der Qualitätsmarke Wood`s
entschieden haben. Bitte lesen
Sie diese Gebrauchs- und
Pflegeanleitung sorgfältig durch
bevor Sie es installieren und in
Betrieb nehmen. Bewahren Sie
dieses Manual an einem sicheren
Ort auf, damit Sie es später im Falle
einer Störung oder Service wieder
auffinden.
Um die aktuellsten Informationen
zu Ihrem Gerät zu erhalten
sowie über Tipps und Tricks zum
effizientesten Gebrauch dieser
Klimaanlage unterrichtet zu
werden, registrieren Sie bestenfalls
dieses Klimagerät unter: warranty-
woods.com
Entzündbares Material.
Dieses Gerät enthält das brennbare
Kältemittel Propan (R290).
Hinweise im
Bedienerhandbuch
Lesen Sie das technische
Handbuch
Lesen Sie das
Bedienerhandbuch
SICHERHEITSHINWEISE
Lesen Sie vor der Installation
und Nutzung des Geräts die
Bedienungsanleitung. Bei
Verletzungen oder Schäden
aufgrund einer unsachgemäßen
Installation übernimmt der
Hersteller keine Haftung. Bewahren
Sie die Anleitung zusammen mit
dem Gerät auf, damit Sie jederzeit
darin nachschlagen können.
Sicherheit von Kindern und
schutzbedürftigen Personen
WARNUNG
Gefahr von Verletzungen und
Dauerinvalidität.
Dieses Gerät kann von Kindern
ab 8 Jahren und Personen mit
eingeschränkten körperlichen,
sensorischen oder geistigen
Fähigkeiten oder mangelnden
Erfahrungen und Kenntnissen
benutzt werden, wenn sie in
der sicheren Gerätenutzung
unterwiesen wurden und die damit
verbundenen Gefahren verstehen
bzw. wenn eine entsprechende
Aufsicht erfolgt.
Kinder nicht mit dem Gerät spielen
lassen!
Kinder unter 3 Jahren sind vom
Gerät fernzuhalten, sofern sie nicht
ständig beaufsichtigt werden.
Sämtliches Verpackungsmaterial
von Kindern fernhalten.
Reinigung und Wartung dürfen
nicht von unbeaufsichtigten
Kindern durchgeführt werden.
Allgemeine Sicherheitshinweise
Dieses Gerät ist für den Einsatz
in Wohn- und Arbeitsbereichen
bestimmt (Keller, Wäsche- und
Trocknungsräume, Personalküchen
u.ä.). Das Typenschild befindet sich
hinter dem Wassertank.
Lüftungsöffnungen nicht
überdecken.
Als Abtauhilfen dürfen
ausschließlich die vom Hersteller
empfohlenen Vorrichtungen
verwendet werden.
Gerät nicht in Räumen mit
kontinuierlich arbeitenden
Zündquellen oder
offenen Flammen lagern
(Betriebsgasgeräte, elektrische
Betriebsheizungen u.ä.). Gerät nicht
durchstechen oder verbrennen.
Kältemittel können geruchlos
sein. Gerät nicht mit Wasserstrahl
oder Dampf reinigen. Gerät
mit einem feuchten, weichen
Tuch reinigen. Nur neutrale
Reinigungsmittel benutzen. Keine
Scheuermittel, Lösungsmittel oder
Metallgegenstände verwenden.
Bei einem Schaden am
Netzkabel muss der Austausch
aus Sicherheitsgründen durch
den Hersteller, ein Autorisiertes
Servicezentrum oder Fachpersonal
erfolgen.
SICHERHEITSHINWEISE
Installation
WARNUNG
Das Gerät darf nur von einer
entsprechend qualifizierten Person
angeschlossen werden.
Verpackung restlos vom Gerät
entfernen.
Ein beschädigtes Gerät darf
nicht angeschlossen werden.
Lagerung, Installation und Betrieb
des Geräts sind nur in Räumen
mit einer Mindestfläche von 14,4
m² zulässig. Die mitgelieferte
Table of contents
Languages:
Other Woods Air Conditioner manuals
Popular Air Conditioner manuals by other brands

Daikin
Daikin GPGM5 installation instructions

Daikin
Daikin FXAQ20PVE installation manual

Whirlpool
Whirlpool AMC 992 Instructions for use

Mitsubishi Electric
Mitsubishi Electric PLA-M71EA Operation manual

Mitsubishi Heavy Industries
Mitsubishi Heavy Industries FDTC40ZSXVH Service manual

Giatsu
Giatsu VIOLET UV GIA-S12VIOUV installation manual