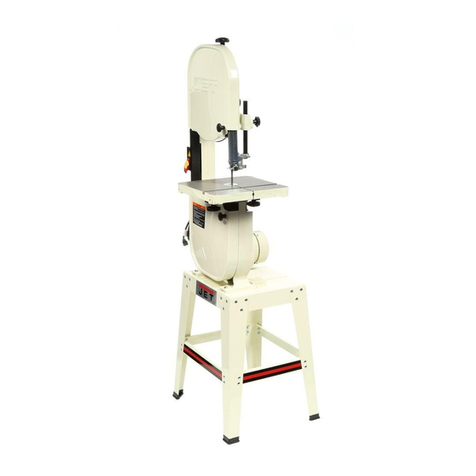
Workzone WWPBS-18 User manual

tif
-
3
j= User Manual
ALDI
aco
PORTABLE BANDSAW
WITH STAND
Original instructions

Contents
Assembly
List of contents and features be
Introduction 6
Reading and storing the user manual 6
Explanation of symbols 6
Safety 7
Scopeof use cd
Residual risks 7
Additional safety instructions for the DaANGSAW......nn-cmmnmn sO
General Working Stand Safety Warnings... om
Before using the bandsaw. 12
Checking the bandsaw and pack contents... 12
12
Fitting/ changingthe saw blade.. 12
Fitting the bandsaw to the stand 13
Adjusting the guide bar. 14
Adjusting the auxiliary handle 14
Securing the workpiece 15
Using the bandsaw 5
Mains connection 15
Switching ON / OFF 16
Speed control 16
Operating the bandsaw. 7
Adjusting the angle
scale for mitre cuts soe B

Maintenance, cleaning, storage and transport...
Maintenance
Cleaning 21
Storage .21
Transport ;21
Troubleshooting 22
Technical specifications 22
Noise/vibration information. 23
Noise emission levels 23
Recycling 24
Disposalof the packaging 24
Disposing of old appliances 24
EC Declaration of Conformity. 25

List of contents and features
1. LED light ON/ OFF switch 7. LED light
2. Speed control 8. Stand fixing holes
3. ON/ OFF switch 9. Saw blade tensioning knob
4. Saw blade 10. Carbon Brush
5. Guide bar locking screws 1. Auxiliary handle
6. Guide bar

List of contents and features
12. Drive wheel 19. Vise fixing knob
13. Saw blade guide bearing 20. Arm fixing bolts (3x)
14. Air intake 21. Washers (3x)
15. Stand arm 22. Lockingwashers (3x)
16. Angle locking knob 23. No. 4allen key
17. Angle
scale for arm 24. No. 5allen key
18. Stand Vise 25. No. 6 allen key
°
8SS oO=—00
==—

Introduction
Introduction
Reading and storing the user manual
These operating instructions form an integral part of this portable bandsaw with
stand (referred to as bandsaw or stand in the remainder of this manual). They
contain importantinstructions on safety, use and disposal of the bandsaw. Please
familiarise yourself with all operating and safety instructions before using the
bandsaw. Only use the bandsaw asdescribed and for the stated purpose. If the
bandsaw is passed on to
a
third party, please provide
all documents to the third
party together with the bandsaw. Keep the operating instructions safe for the future
reference.
Explanation of symbols
The following symbols and signal words are used in this user manual, on the
screwdriver or on the packaging.
Indicates ahazardous situation that, if not avoided, could
r,,
Nh result in death orserious injury.
Indicates ahazardous situation that, if not avoided, could
result in minor or moderate injury.
A\__NOTICE! warns of possible damage to property.
.This symbol provides you with useful additional information
lL regarding assembly or operation.
Declaration of Conformity (see chapter“EC Declaration of
Conformity”):
Products labelled with this symbol meet all
applicable provisions of the European Economic Area.
©(LU Read the user manual.
©Wear protective goggles.
Wear ear protection.
Protection class II
@Wear respiratory protection.
O
33year warranty

Introduction
Safety
Scopeof use
This bandsaw is exclusivelydesigned for private use and for hobby and DIY
projects
for the following purposes:
*For cutting wood, metal and plastic.
It must be used in accordance with the instructions and safety warningscontained
in this manual and may not be used for any other purpose. It is designed for DIY use
only and is not suitable for commercial or heavy duty use, such use may damage
your bandsaw and invalidate your warranty. Neither the manufacturer nor the
retailer can accept any responsibility for injury, loss or damagecaused by misuse
of this bandsaw of any kind. Examples of misuse are given
in the following non-
exhaustive list:
*Use of the bandsaw for any other than its intended purpose
*Non-observance of the safety warnings and instructions as well as the
assembly, operating, cleaning and maintenance instructions contained in this
manual
*Non-observance of any applicable health, safety and accident prevention
regulations concerning the use of this bandsaw
¢Use of accessories or spare parts that are not suitable for the bandsaw
¢Use of the bandsaw in modified form
*Commercial or otherwise excessive use
Anyone whooperates or services the bandsaw must be familiar with these
instructions and must be aware of possible dangers. This bandsaw may only be used
by acompetent person -in case of doubt seek training or advice from an expert.
Non-observance of the safety, assembly and operating instructions while operating
the bandsaw counts as misuse. Any applicable health and safety regulations
must be followed. Any other applicable local and national legislation must also be
followed. The bandsaw may not be modified as modifications may cause damage or
injury.
Residual risks
Aresidual risk ofinjury remains even if the bandsaw is used for its intended purpose
in accordance with thesafety, assembly and operating instructions.
Dueto the nature of the bandsaw, the following dangers may arise:
*Contact with the uncovered part of the saw blade
*Toxic dust may be produced

Introduction
General safety instructions
ye ee
Read all safety warningsand all instructions. Failure to follow the
warnings and instructions may result in electric shock, fire and/or serious
injury.
Save all warningsand instructions for future reference.
The term “power
tool" in the warnings refers to your mains-operated
(corded) power tool or battery-operated (cordless) power tool.
1) Work area safety
a) Keep work area clean and well lit. C/uttered or dark areas invite
accidents.
b) Do not operate power tools in explosive atmospheres, such as in
the presence of flammable liquids, gases or dust. Power tools create
sparks which may ignite the dust or fumes.
c) Keep children and bystanders away while operating apower tool.
Distractions can cause you to lose control.
2) Electrical safety
a) Power tool plugs must match the outlet. Never modify the plug in
any way. Donot use any adapter plugs with earthed (grounded)
power tools. Unmodified plugs and matching outlets will reduce risk of
electric shock.
b) Avoid body contact with earthed or grounded surfaces, such as
pipes, radiators, ranges and refrigerators. There isan increased risk
of electric shock if your bodyis earthed or grounded.
c) Do not expose power tools to rain or wet conditions. Water entering
apower tool will increase therisk of electric shock.
d) Do not abuse the cord. Never use the cord for carrying,pulling or
unplugging the power tool. Keep cord away from heat, oil, sharp
edges or moving parts. Damaged or entangled cords increase therisk
of electric shock.
e) When operating apower tool outdoors, use an extension cord
suitable for outdoor use. Use ofa cord suitable for outdoor use
reduces the risk of electric shock.
f) If operating apower tool in adamp location is unavoidable, use
aresidual current device (RCD) protected supply. Use of an RCD
reduces the risk of electric shock.

Introduction
3) Personal safety
a) Stay alert, watch what you are doing and use common sense when
Operating apower tool. Do not use apower tool while youare tired
or under the influence of drugs, alcohol or medication. Amoment of
inattention while operating power tools may result in serious personal
injury.
b) Use personal protective equipment. Always wear eye protection.
Protective equipment such as dust mask, non-skid safety shoes, hard
hat, or hearing protection used for appropriate conditions will reduce
personal injuries.
c) Prevent unintentional starting. Ensure the switch is in the off-
position before connecting to power source and/or battery pack,
picking upor carrying the tool. Carryingpower tools with your finger
on the switch or energising power tools that have the switch on invites
accidents.
d) Remove any adjusting key or wrench before turning the power
tool on. Awrench ora key left attached to arotating part of the power
tool may result in personal injury.
e) Do not overreach. Keep proper footing and balance at all times.
This enables better control of the power tool in unexpected situations.
f) Dress properly. Do not wear loose clothing or jewellery. Keep your
hair, clothing and gloves away from moving parts. Loose clothes,
jewellery or long hair can be caughtin moving parts.
g) If devices are provided for the connection of dust extraction and
collection facilities, ensure these are connected and properly used.
Use of dust collection can reduce dust-related hazards.
4) Power tool use and care
a) Do not force the power tool. Use the correct power tool for your
application. The correct power tool will do the job better and safer at
the rate for whichit was designed.
b) Do not use the power tool if the switch does not turn it on and off.
Any power tool that cannot be controlled with the switch is dangerous
and must be repaired.
c) Disconnect the plug from the power source and/or the battery pack
from the power tool before making any adjustments, changing
accessories, or storing power tools. Such preventive Safety measures
reduce the risk of starting the power too/ accidentally.
d) Store idle power tools out of the reach of children and do not allow
9

Introduction
persons unfamiliar with the power tool or these instructions to
operate the power tool. Power tools are dangerous in the hands of
untrained users.
e) Maintain power tools. Check for misalignment or binding of
moving parts, breakage of parts and any other condition that may
affect the power tool’s operation. If damaged, have the power tool
repaired before use. Many accidents are caused by poorly maintained
power tools.
f) Keep cutting tools sharp and clean. Properly maintained cutting tools
with sharp cutting edgesare less likely to bind and are easier to control.
g) Use the power tool, accessories and tool bits etc. in accordance
with these instructions, taking into account the working conditions
and the work to be performed. Use of the power tool for operations
different from those intended couldresult in ahazardous situation.
5) Service
a) Have your power tool serviced by aqualified repair person using
only identical replacement parts. his will ensure that the safety of
the power tool is maintained.
Additional safety instructions for the bandsaw
*Hold power tool by insulated gripping surfaces, when performing
an operation where the cutting accessory may contact hidden
wiring or its own cord. Cutting accessories contacting a"live" wire may
make exposed metal parts of the power tool "live" and could give the
operator an electric shock.
¢Remove chips and shavings only when the tool has come toa stop
and the plug has been pulled from thesocket.
©Do not attempt to decelerate the saw blade, when the bandsaw has
been switched off.
©Donot leave the bandsaw unattended. Ensure that the plug has been
pulled and the saw blade has stopped before leaving the bandsaw.
*Do not use damaged or worn saw blades. Damaged or worn blades
are more likely to break and cause personal injury.
10

Introduction
General Working Stand Safety Warnings
CEs
Read all safety warnings and all instructions provided with the working
stand and the power tool to be mounted. Failure to follow the warnings
and instructions may result in electric shock, fire and/or serious injury.
Save all warningsand instructions for future reference.
The term “power
tool" in the warnings refers to your mains-operated
(corded) power tool or battery-operated (cordless) power tool.
Disconnect the plug from the power source and/or the battery pack
from the power tool before making any adjustments or changing
accessories. Accidental starting of the power tool is acause of some
accidents.
Properly assemble the working stand before mounting the tool.
Proper assembly is important to prevent risk of collapse.
Securely fasten the power tool to the working stand before use.
Power tool shifting on the working stand can cause loss of control.
Place the working stand onasolid, flat and level surface. When the
working stand can shift or rock, the power tool or workpiece cannot be
Steadily and safely controlled.
Do not install any other electrical tools to this stand. This stand is only
for use with the supplied bandsaw.
Do not use dull or bent blades.
Always keep hands and fingers away from the blade.
"1

Before using the bandsaw
Checking the bandsaw and pack contents
°Take the bandsaw out of the packaging.
°Check that the delivery is complete(see section: “List of contents and features’).
©Check whether the bandsaw orany of its individual parts are damaged.
®|fthis is the case, do not use the bandsaw. Contact the manufacturer at the service
address specified on the warranty card.
Assembly
Fitting/ changing the saw blade
Disconnect the bandsaw from the mains before fitting or replacing the
saw blade &. Wear protective gloves!
*Open the saw blade tensioning knob
¢Feed the saw blade through the saw
blade quide bearings HED.
12

Assembly
eFeed the saw blade around the drive
wheels GDB.
©Close the saw blade tensioning knob.
Fitting the bandsaw to the stand
[A
CAUTION!
|]
Ensure the bandsaw is not connected to the mains before mounting to
the stand.
¢Disconnect the bandsaw from the mains.
¢Connect the bandsaw to the stand
arm by
placing the arm fixing
bolts washers and fixing
avers in the stand fixing holes
*Ensure all bolts are tight with the no. 5Allen key BA.
13

Assembly
Adjusting the guide bar
[A
‘caurTion!
|
Ensure the bandsaw is not connected to the mains before mounting to
the stand.
¢Open the guide bar locking screws
=s.
©The guide bar &4Mcan now be
adjusted.
*Tighten the guide bar locking screws
to fix the guide
bar in place.
*To adjust the auxiliary handle
loosen the locking nut @3@
using the
No. 6 allen key BB.
*Move the auxiliary handle to the
desired position.
¢Fix the auxiliary handle in place by
tightening the locking nut using the
No.6allen key.
14

ny
Using the bandsaw
Securing the workpiece
*Open
the vise fixing knob SEB.
*Place the workpiecein the stand vise
and push the vise tight against
the workpiece.
*Tighten the vise fixing knob to secure
the workpiece
in place.
Using the bandsaw
Mains connection
Ensure that the local mains voltage agrees with the information on the bandsaw’s
rating label. The bandsaw is designedfor use with single-phase alternating current
230-240 VAC / 50 Hz and is double-insulated.
If the work area is not close to the mains outlet, an extension cable with asufficient
conductor cross sectional area (min.1.5 mm2) must be used. The extension cable
used should beas short as possible. Always ensure that any extension cord used is
fully unwound to avoid arisk of overheating.
15

Using the bandsaw
Switching ON /OFF
|A_
WARNING!
|
During operation fine dust will be generated. Some dust is highly
inflammable and explosive. Do not smoke during operation, keep
heat sources and open flames out of the working area.
Always wear adust mask to protect yourself against hazards
resulting from fine dust.
To switch the bandsaw ON:
©Pull the On/ Off switch EB.
To switch the bandsaw OFF:
eRelease the On
/
Off switch.
Speed control
The variable speed control
facilitates stepless adjustmentof
the speed from 0.7 to 2.4 m/s. The
thumbwheel speed control is marked
with 6settings, with 1being the lowest
and 6being the highest speed.
16

Using the bandsaw
Operating the bandsaw
COL
Gripthe bandsaw with both hands when cutting.
Harmful or toxic dust may be produced when sawing.Contact
with, or inhalation of these dusts can endanger the health of the
operator or bystanders. Keepbystanders out of the area, wear an
approved dust mask or respirator suitable for the material bein
sanded and connect the bandsaw to adust extraction device. If in
doubt consult an expert.
Do not press the blade down onto the workpiece roughly or with
excessive force as this can lead to the saw head ‘kickingback'
(danger of injury).
*Position the workpiece as desired and
secure it in place using the stand vise
GE or another vise.
e
|
Additional support (roller stands, tables etc.) must be used when sawing
Z| long workpieces.
¢Position the guide bar &4ll on the
workpiece and ensure theblade is
vertically above the workpiece.
7

Using the bandsaw
©Switch the bandsaw on and allow it
to reach full speed before engaging
the cut.
¢Gripping the bandsaw with both
hands gently lower the blade into the
cut.
e
|
Applying excess pressure to thetool or twisting of the blade may cause
E
|
bevel cutting or may cause damageto the saw blade.
°Whenthe cutting is finished, turn the bandsaw off and remove the plug.
Adjusting the angle scale for mitre cuts
Always make atrial cut on a piece of waste material first, particularlyif
avery exact angleis required.
©Loosen the angle locking knob &
by turning it anti-clockwise.
18

*Turn the table to the desired position.
*Secure the angle by tighten the angle
locking knobby turning it clockwise.
The table can be angled between 0°-45°.
fale
Using the bandsaw
19

Maintenance, cleaning, storage and transport
A, WARNING!
Disconnect the bandsaw from the mains before performing any
type of maintenance or adjustments.
ZX CAUTION!
Keep the internal parts of the bandsaw dry when cleaning.
Maintenance
Payparticular attention to the mains cable. Damaged mains cables must be replaced
immediately with original replacement parts available from the manufacturer or an
authorised workshop.
lf the replacement of the supply cord is necessary, this has to be done by the
manufacturer or his agent in order to avoid asafety hazard.
Regularly check the condition of the bandsaw. Among other things, check to make
sure:
ethat the switches are not damaged,
°thatthe accessories are in proper condition,
¢that the mains cord and the plug are not damaged,
¢that the vents are unobstructed and clean. If applicable, use a soft brush to clean
them.
lf you identify any damages, you must have them repairedby aspecialist workshop
to prevent risks.
Replacing the carbon brushes
Have the carbon brushes (10) checked by acompetent person, qualified electrician
or an authorised service centre after approximately 30 hours of operation.
The carbon brushes may only be replaced by
aspecialist workshop or qualified
specialist personnel.
20
Table of contents
Other Workzone Saw manuals

Workzone
Workzone CDY190FLA2 User manual

Workzone
Workzone WZTS 1702 User manual

Workzone
Workzone WZTS 1700 User manual

Workzone
Workzone Titanium CS20V User manual

Workzone
Workzone SD1600V User manual

Workzone
Workzone M1Y-DU10-190 User manual

Workzone
Workzone 55903 User manual

Workzone
Workzone 50450 User manual

Workzone
Workzone WZTS 1701 User manual