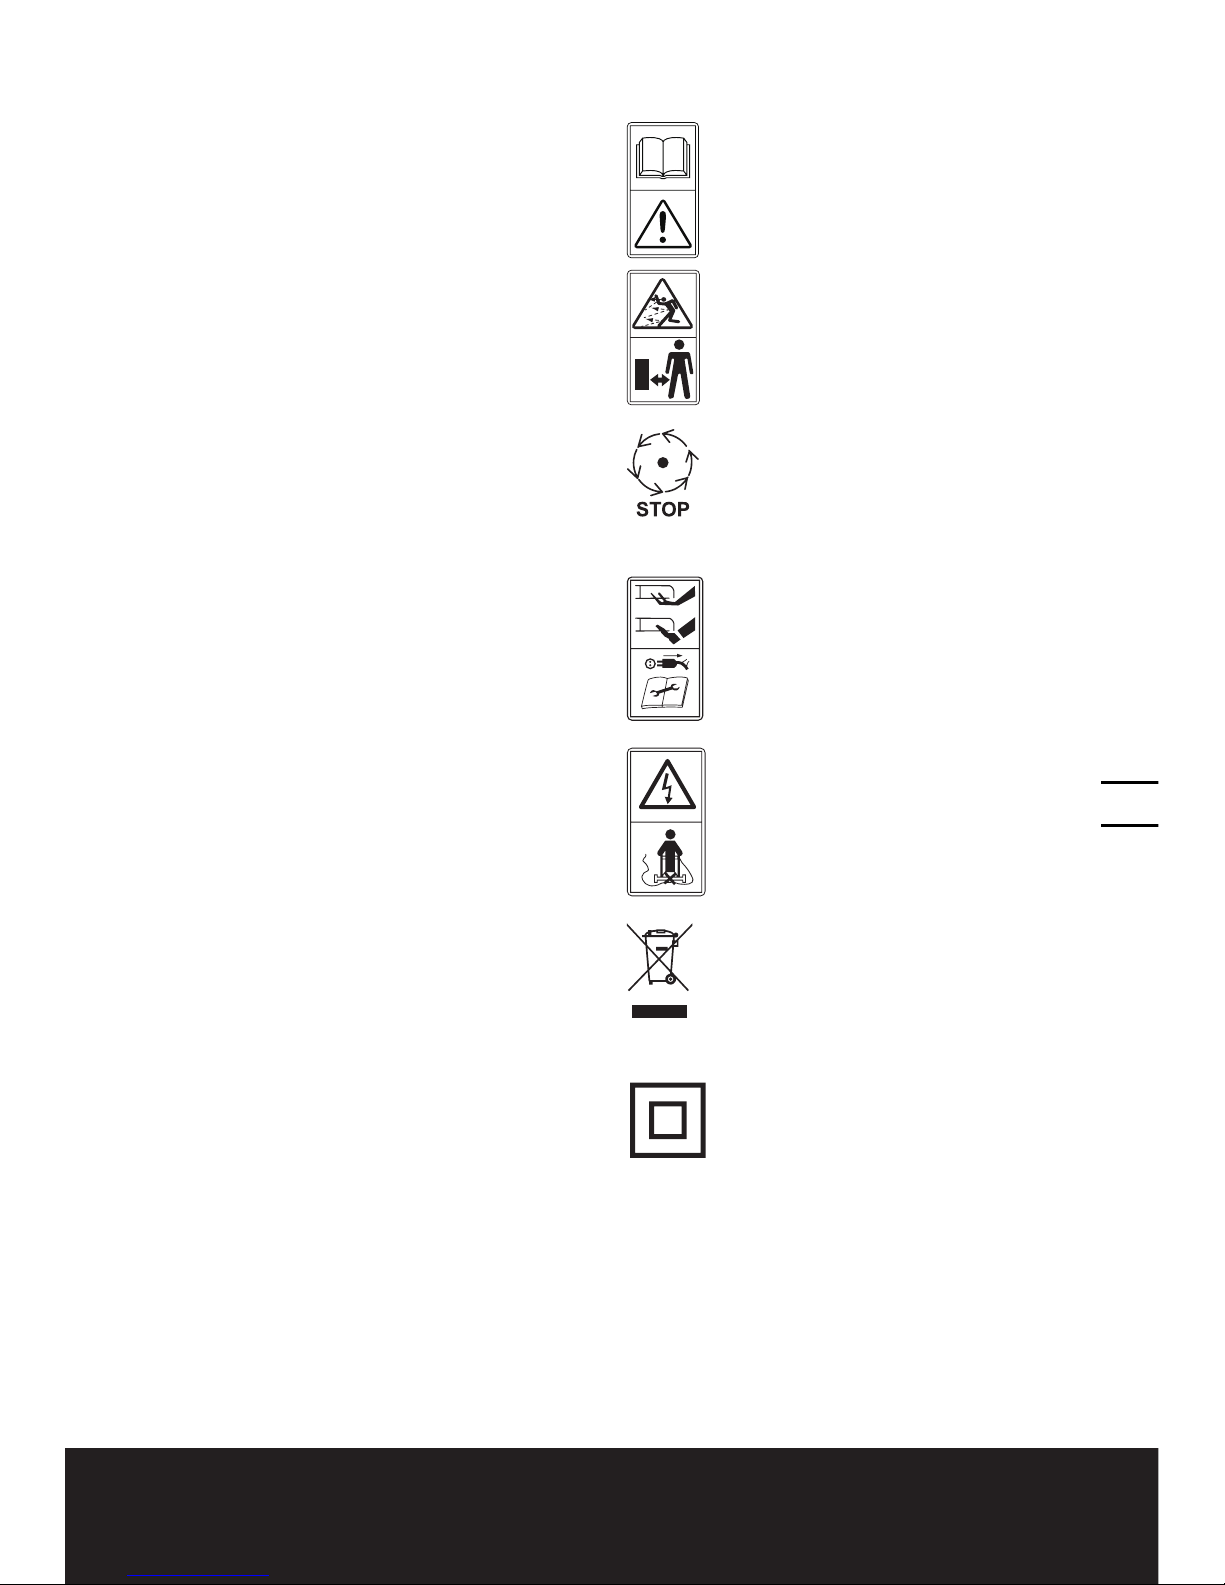
Worx WG717E User manual

SAFETY AND OPERATING MANUAL
ORIGINAL INSTRUCTIONS
Electric Lawn Mower WG717E

3
2
Electric Lawn Mower WG717E
PRODUCT SAFETY
GENERAL SAFETY
WARNINGS
WARNING! Read all safety
warnings and all instructions.
Failure to follow the warnings and instructions
may result in electric shock, fire and/or serious
injury.
Save all warnings and instructions for
future reference.
- This appliance is not intended for use by
persons (including children) with reduced
physical, sensory or mental capabilities,
or lack of experience and knowledge,
unless they have been given supervision
or instruction concerning use of the
appliance by a person responsible for
their safety.
- Children should be supervised to ensure
that they do not play with the appliance.
If the supply cord is damaged, it must be
replaced by the manufacturer, its service
agent or similarly qualified persons in
order to avoid a hazard.
IMPORTANT
READ CAREFULLY BEFORE USE
KEEP FOR FUTURE REFERENCE
Safe operating practices for electrically
powered lawnmowers
TRAINING
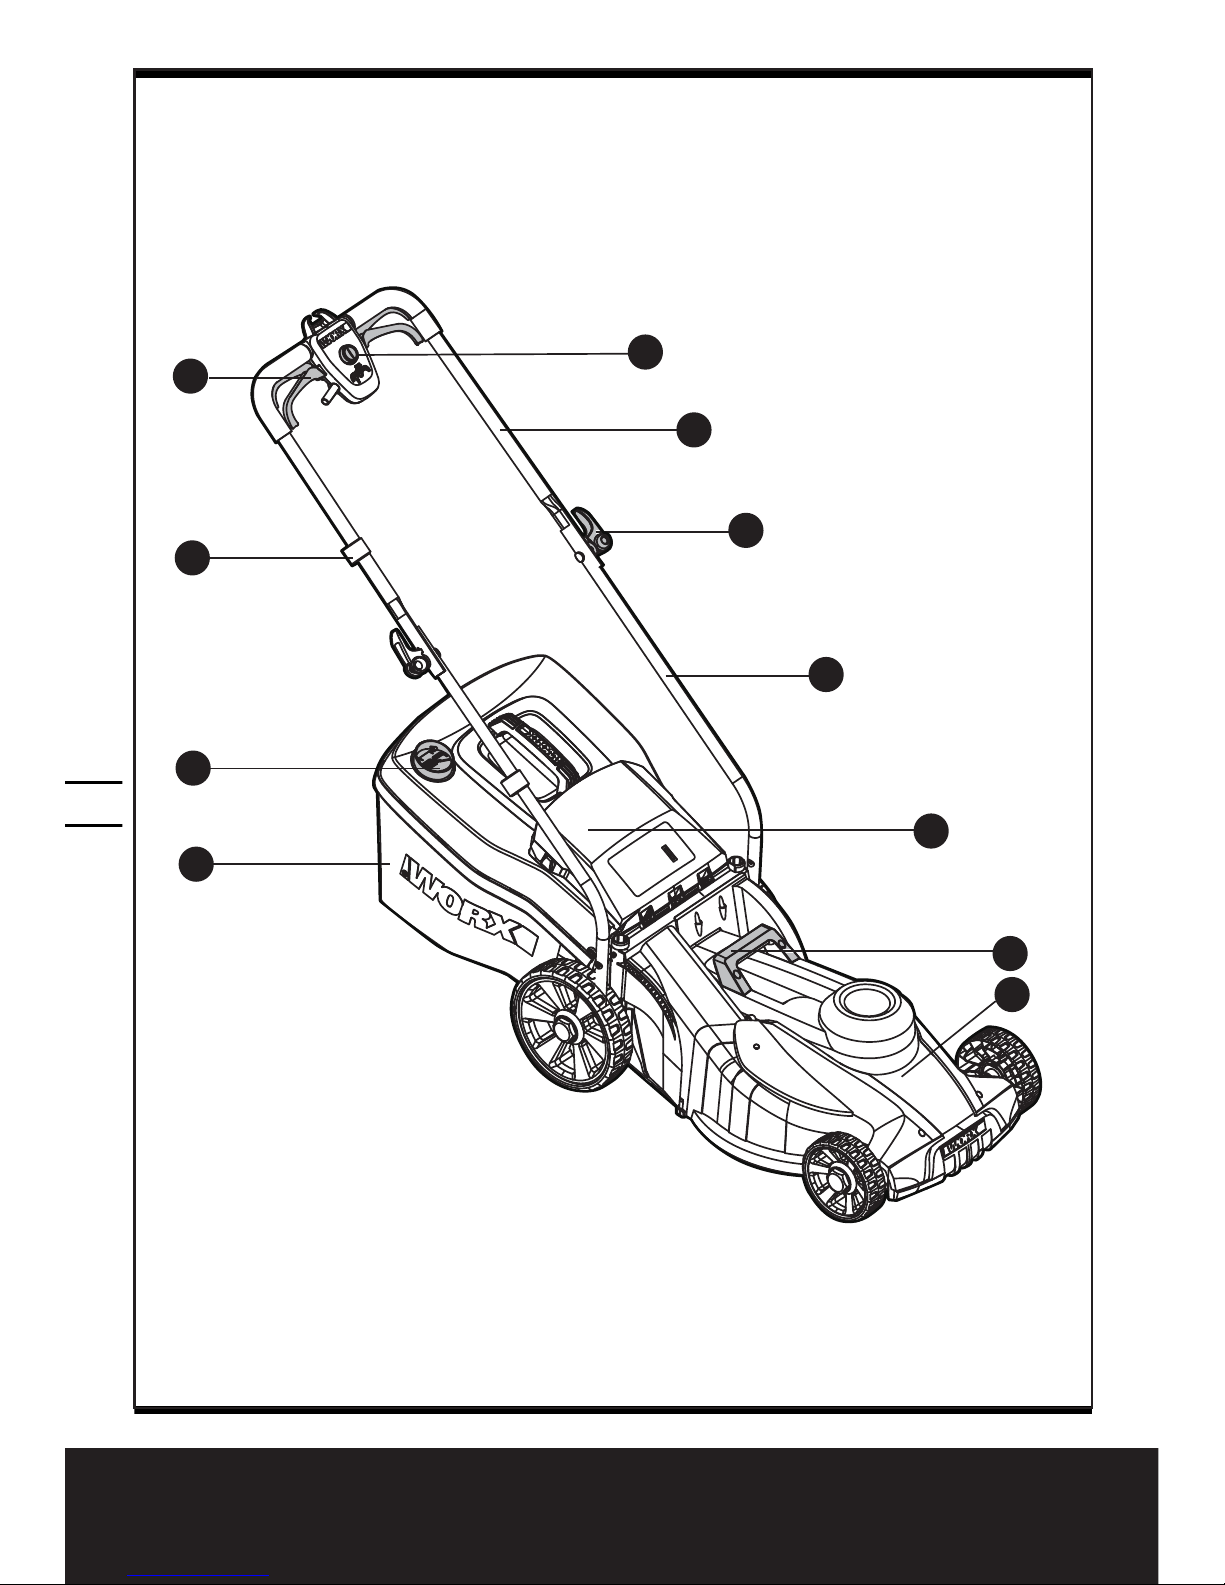
a) Read the instructions carefully. Be familiar
with the controls and the proper use of the
machine.
b) Never allow children or people unfamiliar
with these instructions to use the
lawnmower. Local regulations can restrict
the age of the operator.
c) Never operate the machine while people,
especially children, or pets are nearby.
d) Keep in mind that the operator or user
is responsible for accidents or hazards
occurring to other people or their property.
PREPARATION
1) While operate the machine, always wear
substantial footwear and long trousers. Do
not operate the equipment when barefoot
or wearing open sandals. Avoid wearing
clothing that is loose fitting or that has
hanging cords or ties.
b) Thoroughly inspect the area where the
equipment is to be used and remove
all objects which can be thrown by the
machine.
c) Before using, always visually inspect to
see that the blade, blade bolt and the
blade assembly are not worn or damaged.
Replace worn or damaged blades and
bolts in sets to preserve balance. Replace
damaged and unreadable labels.
d) Before use check the supply and extension
cord for signs of damage or aging. If
the cord becomes damaged during the
use, disconnect the cord from the supply
immediately. DO NOTTOUCHTHE CORD
BEFORE DISCONNECTINGTHE SUPPLY.
Do not use the machine if the cord is
damaged or worn.
OPERATION
a) Operate the machine only in daylight or in
good artificial light.
b) Avoid operating the machine in wet grass.
c) Always be sure of your footing on slopes.
d) Walk, never run.
e) Mow across the face of slopes, never up
and down.
f) Exercise extreme caution when changing
direction on slopes.
g) Do not mow excessively steep slopes.
h) Use extreme caution when reversing or
pulling the lawnmower towards you.
i) Stop the blade(s) if the lawnmower has to
be tilted for transportation when crossing
surfaces other than grass, and when
transporting the lawnmower to and from
the area to be mowed.
j) Never operate the lawnmower with
defective guards, or without safety
devices, for example deflectors and/or
grass catchers, in place.
k) Switch on the motor carefully according to
instructions and with feet well away from
the blade(s).
l) Do not tilt the lawnmower when switching
on the motor, except if the lawnmower
has to be tilted for starting. In this case, do
not tilt it more than absolutely necessary
and lift only the part which is away from
the operator.

3
2
Electric Lawn Mower WG717E
m) Do not start the machine when standing
in front of the discharge.
n) Do not put hands or feet near or under
rotating parts. Keep clear of the discharge
opening at all times.
o) Do not transport the lawnmower while the
power source is running.
p) Stop the machine and disconnect the plug
from the mains. Make sure that all moving
parts have come to complete stop.
- whenever you leave the machine;
- before clearing blockages or unclogging
chute;
- before checking, cleaning or working on
the lawnmower;
- after striking a foreign object. Inspect
the lawnmower for damage and make
repairs before restarting and operating the
lawnmower.
if the lawnmower starts to vibrate abnormally
(check immediately)
- inspect for damage;
- replace or repair any damaged parts;
- check for and tighten any loose parts.
MAINTENANCE AND STORAGE
a) Keep all nuts, bolts and screws tight to be
sure the machine is in safe working
condition;
b) Check the grass catcher frequently for
wear or deterioration;
c) Replace worn or damaged parts for safety.
Use only genuine replacement parts and
accessories.
d) Be careful during adjustment of the
machine to prevent entrapment of the
fingers between moving blades and fixed
parts of the machine.
e) On machines with multi blade, take care as
rotating one blade can cause other blades
to rotate.
f) Always allow the machine to cool down
before storing.
g) When servicing the blades be aware that,
even though the power source is switched
off, the blades can still be moved.
RECOMMENDATION
To connect the machine only to a supply
circuit protected by a residual current device
(RCD ) with a tripping current of not more
than 30 mA.
SYMBOLS
Read instruction handbook before
operation this machine
Keep bystanders away
Blade continues to rotate after
the machine is switched off. Wait
until all machines components
have completely stopped before
touching them.
Beware of sharp blades. Blades
continue to rotate after the motor
is switched off- Remove plug from
mains before maintenance or if
cord is damaged.
Keep the supply flexible cord away
form the blades.
Waste electrical products should
not be disposed of with household
waste. Please recycle where
facilities exist. Check with your
Local Authority or retailer for
recycling advice.
Double Insulation

5
4
Electric Lawn Mower WG717E
1
2
3
4
5
6
7
8
9
10
11

5
4
Electric Lawn Mower WG717E
1. SWITCH LEVER
2. CABLE CLIP
3. GRASS BAG FILLING INDICATOR
4. GRASS COLLECTION BAG
5. SAFETY BUTTON
6. UPPER HANDLE
7. LOCK CAM LEVER
8. LOWER HANDLE
9. SAFETY FLAP
10. CARRY HANDLE
11. MOTOR COVER
12. BLADE BOLT (See Fig. I1)
13. BLADE (See Fig. I1)
Not all the accessories illustrated or described are included in standard delivery.
TECHNICAL DATA
Type WG717E(705-719-designation of machinery, representative of Electric
lawn mower)
Rated Voltage 220-240V~50/60Hz
Rated Power 1400W
Cutting diameter 36cm
Cutting height 20-70mm
Cutting height positions 6
Grass collection capacity 40L
Protection Class /II
Machine Weight 12.9kg
NOISE DATA
A weighted sound pressure LpA: 83dB(A)
KpA: 3.0dB(A)
A weighted sound power LwA: 95dB(A)
Wear ear protection

7
6
Electric Lawn Mower WG717E
VIBRATION INFORMATION
Typical weighted vibration ah< 2.5 m/s2,
Uncertainty K=1.5m/s2
WARNING: The vibration emission value during actual use of the power tool can differ
from the declared value depending on the ways in which the tool is used dependant on the
following examples and other variations on how the tool is used:
How the tool is used and the materials being cut or drilled.
The tool being in good condition and well maintained
Using the correct accessory for the tool and ensuring it is sharp and in good condition.
The tightness of the grip on the handles and if any anti vibration accessories are used.
And the tool is being used as intended by its design and these instructions.
This tool may cause hand-arm vibration syndrome if its use is not adequately
managed
WARNING:To be accurate, an estimation of exposure level in the actual conditions of use
should also take account of all parts of the operating cycle such as the times when the tool
is switched off and when it is running idle but not actually doing the job.This may significantly
reduce the exposure level over the total working period.
Helping to minimise your vibration exposure risk.
ALWAYS use sharp chisels, drills and blades
Maintain this tool in accordance with these instructions and keep well lubricated (where appro-
priate)
If the tool is to be used regularly then invest in anti vibration accessories.
Avoid using tools in temperatures of 100C or less
Plan your work schedule to spread any high vibration tool use across a number of days
ACCESSORIES
Spanner 1
Grass collection bag 1
Handle knobs 2
Cable clips 2
We recommend that you purchase your accessories from the same store that sold you the tool.
Choose the type according to the work you intend to undertake. Refer to the accessory packaging
for further details. Store personnel can assist you and offer advice.

7
6
Electric Lawn Mower WG717E
6
7
8
A1
A2
A3
A4 A5
a
INTENDED USE
This product is intended for domestic lawn mowing.
ASSEMBLY
IMPORTANT!Before you assemble the
lawn mower, check the accessories according
above information, make sure the accessories are
completed.
1. FITTING THE HANDLE (See Fig. A1- A5)
1) Remove the screws (X 2)(a) on the both side of
deck. (See Fig. A1)
2) Insert the Lower Handle (8) into the holes on the
deck provided.( See Fig. A2)
3) Secure with the screws provided.( See Fig. A2)
4) Attach the Upper Handle (6) with the bolts and Lock
Cam Lever (7) to the Lower Handle. (See Fig. A3)
5) Tightening the two Lock Cam Levers. Check that
the handle is FULLY secured.
The cam lever pressure can be adjusted by
adjusting the Lock Cam Lever clockwise/counter-
clockwise. DO NOT OVERTIGHTEN.( See Fig. A4)
NOTE: Ensure the bolts are fully inserted through the
handles before fitting the handle knobs.
6) Attach the Cable Clips (2) provided, to the upper
and lower handle. Insert the cable into the clips
ensuring there is enough cable slack. (See Fig. A5)

9
8
Electric Lawn Mower WG717E
2. GRASS COLLECTION BAG (4) ASSEMBLY
Connect the grass box handle to the box top as shown
in Fig. B1-B4.
Step 1. Press the front of the handle briefly. (See Fig.
B2)
Step 2. Then push it forward. (See Fig. B2)
Step 3. Push down the back of the handle. (See Fig.
B2)
Step 4. Finally, clip the plastic clips over the metal
frame. (See Fig. B3)
WARNING: Don’t fit the handle in reversed
direction. Fit the handle as shown in Fig
B1.
Front Part
Back Part
1
2
3
B1
B2
B3
B4

9
8
Electric Lawn Mower WG717E
3. GRASS COLLECTION BAG FITTING (See Fig.
C1, C2, C3)
1) Switch off the mower and Unplug from the
mains—Wait for the blade to come to a complete
S T O P.
2) Pick up the Grass Collection Bag by the handle,
and position the Grass Collection Bag on the lower
hooks (a) on the mower deck (See Fig. C2).
3) Release the safety guard to lock the grass bag
into position. Ensure the Grass Collection Bag is
installed securely (See Fig. C3).
NOTE: Depress the Grass Collection Bag slightly to
ensure that it is completely installed.
4. REMOVING/EMPTYING
Hold the Grass Collection Bag, lift the Safety Flap (9)
and hold up. Remove the Grass Collection Bag.
WARNING! Always check the safety flap can
close the discharge outlet tightly before using.
Never lift the Safety Flap when the lawn mower is
being used without fitted grass bag.
a
9
1
2
C1
C2
C3

11
10
Electric Lawn Mower WG717E
OPERATION
1. STARTING AND STOPPING (See Fig. D, E)
STARTING
Connect the plug to the mains and switch ON.
The switch box is provided with a lock-off
button to prevent accidental starting.
With one hand press and hold the Safety Button (5),
with the other hand squeeze the Switch Lever (1)
towards the handle, and release the Safety Button.The
machine is now started; wait until the product is at full
speed before cutting the grass.Then use both your
hands to hold the Switch Lever to keep it running.
STOPPING
Release the switch lever.
2. HOW TO MOW
For cutting convenience, it may be best to start
mowing at a point close to the power supply and to
work your way away from the supply. Mow the lawn
at a right angle from the power supply and place the
power cable to side which has already been cut.
When this occurs stop, remove the plug from the
power supply.
Release the switch lever, Clear any obstruction, then
restart it.
If the mower cuts out again increase the height of cut
to reduce the load on the motor.
WARNING! When mowing do not allow the
motor to labor particularly in heavy conditions.
When the motor labors the speed of the motor drops
and you will hear a change in the motor sound, when
this occurs, stop mowing, release the switch lever and
raise the height of cut. Failure to do so could damage
the machine.
3. GRASS BAG FILLING INDICATOR(3) (See Fig. F)
To remind you immediately to empty when the Grass
Collection Bag is full, the mower provides an indicator
on the top of bag to show the collection status. And
you can follow as below:
Empty status: Flap float (a)
Fully status: Flap fall down (b)
1
1
2
a
b
D
E
F

11
10
Electric Lawn Mower WG717E
4. REAR DISCHARGE (See Fig. G)
The mower provides a rear discharge function, so that
you can mower without bag collection.The debris will
be discharged from the rear chute.
5. ADJUSTING THE CUTTING HEIGHT (See Fig. H)
WARNING: STOP REALEASETHE SWITH
LEVER, UNPLUGTOOL, AND WAIT FOR BLADE
TO COMETO A COMPLETE STOP .The blades
continue to rotate after the machine is switched off, a
rotating blade can cause injury.
Caution: Do not touch rotating blades.
The lawn mower can be set to 6 cutting heights
between 20mm and 70mm. For this purpose, move
the cutting height adjustment lever outwards then
adjust to the preferred position.
6. MULCHING MOWING TIPS
While mulching, your new mower is designed to cut
the grass clippings into small pieces and distribute
them back into the lawn. Under normal conditions,
the mulched grasses will biodegrade quickly to
provide nutrients to the lawn.
Please review the following recommendations for
optimum mulching performance.
1. Avoid mowing when the grass is wet from rain or
dew. Wet grass may form clumps which interfere
with the mulching action and reduce runtime. The
best time to mow grass is in the late afternoon
when the grass is dry and the newly cut area will
not be exposed to direct sunlight.
2. For best mulching performance, set the cutting
height to remove about one third of the grass
blade length, ideally no more than 38mm at
one time. If the lawn is overgrown, it may be
necessary to increase the cut height to reduce the
pushing effort and prevent overloading the motor.
For extremely heavy mulching, it is advisable
to first cut at a high cut height setting, and then
re-cut to the final cut height. Otherwise, make
narrower cuts and mow slowly.
3. For best performance, keep the mower housing
free of built-up grass. From time to time turn
off mower and wait for the blade to come to a
complete stop. Using an object such as a stick,
wipe out any accumulation of grass in the blade
area. Be careful of the sharp edges of the blade.
Clean often in wet, new grass, and always after
every use.
4. Certain types of grass or grass conditions may
require that an area be mulched a second time
to fully disperse the grass throughout the lawn.
G
H

13
12
Electric Lawn Mower WG717E
If cutting a second time, it is advisable to cut
perpendicular (across) the first cut pattern. DO
NOT CHANGE CUT PATTERN IN ANY WAYTHAT
WOULD CAUSE MOWING DOWN A HILL.
5. Change your cutting pattern from week to week.
This will help prevent matting and graining of the
lawn.
MAINTENANCE
WARNING: Stop the mower and unplug the
tool before performing any maintenance.
NOTE:To ensure long and reliable service, perform
the following maintenance procedures regularly.
Check for obvious defects such as a loose, dislodged
or a damaged blade, loose fittings and hardware,
and worn or damaged components. Check that
the covers and guards are all undamaged and are
correctly attached to mower. Carry out any necessary
maintenance or repairs before operating mower. If
the mower should happen to fail despite regular
maintenance, please call our customer helpline for
advice.
BLADE (13) MAINTENANCE (See Fig. I1, I2)
WARNING! Never carry out any assembly
operations or adjustments with the power
connected to the mower. Always ensure that the
power button is in the off position and that the power
plug is disconnected from the supply.
Always handle the blade with care-sharp edges could
cause injury use gloves.
Follow these procedures to remove and replace the
blade.You will need garden gloves (not provided) and
a spanner wrench to remove the blade. Hold the Blade
and unscrew the Blade Bolt (12) anticlockwise using a
spanner wrench. Remove Blade and attach a new one
to the blade bolt.
Ensure that the blade is properly positioned as seen
in Fig. I1, then firmly tighten the bolt. Do not over
tighten.
Renew your metal blade after 50hrs mowing or
2 years, whichever is the sooner-regardless of
condition.
If the blade is cracked or damaged replace it
with a new one.
13
12
I1
I2

13
12
Electric Lawn Mower WG717E
STORAGE: (See Fig. J)
Stop the mower and unplug the tool.
Clean the exterior of the machine thoroughly using
a soft brush and cloth. Do not use water, solvents or
polishes. Remove all grass and debris, especially from
the ventilation slots.
Turn the machine on its side and clean the blade area.
If grass cuttings are compacted in the blade area,
remove with a wooden or plastic implement.
Store the machine in a dry place. Do not place other
objects on top of the machine.
To aid storage, release the handle cam lever, and
rotate or fold the upper handle.
You could carry the mover by Carry Handle (10).
Ensure cables are not stuck or entangled when folding
or unfolding upper handles. do not drop the handles.
J

15
14
Electric Lawn Mower WG717E
TROUBLE SHOOTING
Symptom Possible Cause Remedy
Machine fails to operate Power turned off
Mains socket faulty
Extension cable damaged
Fuse faulty/blown
Mower in long grass
Turn power on
Use another socket
Inspect cable, replace if
damaged
Replace fuse
Increase height of cut and tilt
mower
Machine functions
intermittently
Extension cable damaged
Machines internal wiring
damaged
Inspect cable, replace if
damaged
Contact Service Agent
Machine leaves ragged
Finish or motor labours
Height of cut too low
Cutting blade blunt
Underside of machine badly
clogged
Blade fitted upside down
Increase height of cut (see “
ADJUSTINGTHE CUTTING
HEIGHT ”)
Replace blade
(see “Blade Maintenance”)
Clean machine
(see “Storage”)
Refit blade correctly
(see “Blade Maintenance”)
Cutting blade not rotating
while machine switched on
Cutting blade obstructed
Blade nut/bolt loose
Clear obstruction
Tighten blade nut/bolt
Excessive vibration/noise Blade nut/bolt loose
Cutting blade damaged
Tighten blade nut/bolt
Replace blade
ENVIRONMENTAL PROTECTION
Waste electrical products should not be disposed of with household waste. Please recycle
where facilities exist. Check with your Local Authority or retailer for recycling advice.

15
14
Electric Lawn Mower WG717E
PLUG REPLACEMENT
(ONLY FOR REWIRABLE
PLUG OF UK & IRELAND)
If you need to replace the fitted plug then
follow the instructions below.
IMPORTANT
The wires in the mains lead are colored in
accordance with the following code:
Blue = Neutral
Brown = Live
As the colors of the wires in the electrical cord
of this appliance may not correspond with the
colored markings identifying the terminals
in your plug, proceed as follows.The wire
which is colored blue must be connected to
the terminal which is marked with N.The wire
which is colored brown must be connected to
the terminal which is marked with L.
WARNING! Never connect live or
neutral wires to the earth terminal of the
plug. Only fit an approved 13ABS1363/A plug
and the correct rated fuse.
NOTE: If a moulded plug is fitted and has to
be removed take great care in disposing of the
plug and severed cable, it must be destroyed
to prevent engaging into a socket.
Connect
Blue to N
(neutral)
Outer sleeve
firmly clamped
Cable grip
Brown L (live)
13 Amp fuse approved
to BS1362
DECLARATION OF
CONFORMITY
We,
Positec PowerTools (Europe) Ltd,
PO Box 6242, Newbury, RG14 9LT, UK
Declare that the product
Description WORX Electrical Lawn Mower
Type WG717E(705-719-designation of
machinery, representative of Electric
lawn mower)
Function cutting grass
Complies with the following Directives,
2006/42/EC, 2014/30/EU, 2011/65/EU,
2000/14/EC amended by 2005/88/EC
2000/14/EC amended by 2005/88/EC:
- Conformity Assessment Procedure as per
Annex VI.
- Measured Sound Power Level 93.4dB(A)
- Declared Guaranteed Sound Power Level
95dB(A)
The notified body involved
Name: Intertek Testing & Certification Ltd
(notified body 0359)
Address: Davy Avenue, Knowlhill, Milton
Keynes, MK5 8NL
Standards conform to,
EN 60335-1, EN 60335-2-77, EN 62233,
EN ISO 3744, EN 55014-1, EN 55014-2,
EN 61000-3-2, EN 61000-3-3
The person authorized to compile the
technical file,
Name: Russell Nicholson
Address: Positec Power Tools (Europe)
Ltd, PO Box 6242, Newbury, RG14 9LT, UK
Suzhou 2016/05/31
Allen Ding
Deputy Chief Engineer,Testing & Certification

Copyright © 2016, Positec. All Rights Reserved.
AR01171701
www.worx.com
Other manuals for WG717E
1
Table of contents
Other Worx Lawn Mower manuals

Worx
Worx WG784E Installation manual

Worx
Worx WG730E Operation instructions

Worx
Worx Landroid WR150E User manual

Worx
Worx LANDROID WG792E User manual

Worx
Worx Landroid WG795E User manual

Worx
Worx Landroid WR101SI User manual

Worx
Worx WG773E User manual

Worx
Worx Landroid User manual

Worx
Worx WG724E Installation manual

Worx
Worx WP733E Operation instructions

Worx
Worx Landroid Operating instructions

Worx
Worx WG744E User manual

Worx
Worx Landroid Series Specification sheet

Worx
Worx Landroid User manual

Worx
Worx WG779E Installation manual

Worx
Worx Landroid WR153E User manual

Worx
Worx WG788 User manual

Worx
Worx WR165E User manual

Worx
Worx LANDROID WR210 User manual

Worx
Worx WG789E User manual