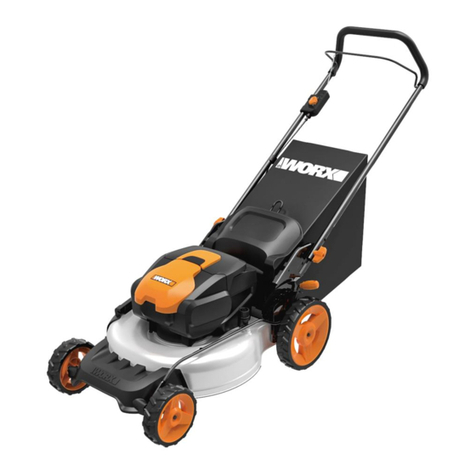
Worx WG713E User manual

WG713E
Electric lawn mower
Электрическая газонокосилка
EN
RU
P07
P15

5
7
6
10
11
12
13
14
2
3
4
1
8
9
15

2
1
B1
A1 A2
A4
A3
A5

1
2
C1
C2
B3
B4
D
B2
2
1

F1
K2
F2
H2
H1
E
1 — 20mm
2 — 30mm
3 — 40mm
4 — 50mm
5 — 60mm
6 — 70mm
7 — 80mm
6
7
2
5
4
3
21
K2
G
1
a
b
0%
100%
1
2
1
2

M2-1
M2-2
M2-3
19
18
M1-1
M1-2
M1-3
L
I
K1
J
O2
K2

7
Electric lawn mower EN
GENERAL SAFETY WARNINGS
WARNING Read all
safety warnings and
all instructions. Failure to
follow the warnings and
instructions may result in
electric shock, fire and/or
serious injury.
Carefully read the
instructions for the safe
operation of the machine.
Save all warnings and
instructions for future
reference.
- This appliance is not
intended for use by persons
(including children) with
reduced physical, sensory
or mental capabilities,
or lack of experience
and knowledge, unless
they have been given
supervision or instruction
concerning use of the
appliance by a person
responsible for their safety.
- Children should be
supervised to ensure that
they do not play with the
appliance.
- If the supply cord is
damaged, it must
be replaced by the
manufacturer, its service
agent or similarly qualified
persons in order to avoid a
hazard.
ADDITIONAL SAFETY RULES
FOR LAWN MOWER
Training
a) Read the instructions
carefully. Be familiar with
the controls and the proper
use of the equipment;
b) Never allow children or
people unfamiliar with
these instructions to use
the lawn mower. Local
regulations can restrict the
age of the operator;
c) Never mow while people,
especially children, or pets
are nearby;
d) Keep in mind that the
operator or user is
responsible for accidents
or hazards occurring to
other people or their
property
Preparation
a) While mowing, always
wear substantial footwear
and long trousers. Do not
operate the equipment
when barefoot or wearing
open sandals;
b) thoroughly inspect the
area where the equipment
is to be used and remove
all objects which can be
thrown by the machine;
c) Before using, always
visually inspect to see that
the blades, blade bolts
and cutter assembly are
not worn or damaged.
Replace worn or damaged
blades and bolts in sets to

8
Electric lawn mower EN
preserve balance;
d) on multi-bladed machines,
take care as rotating one
blade can cause other
blades to rotate.
Operation
a) mow only in daylight or in
good artificial light;
b) avoid operating the
equipment in wet grass,
where feasible;
c) always be sure of your
footing on slopes;
d) walk, never run;
e) for wheeled rotary
machines, mow across the
face of slopes, never up
and down;
f) exercise extreme caution
when changing direction on
slopes;
g) do not mow excessively
steep slopes;
h) use extreme caution when
reversing or pulling the
lawn mower towards you;
i) stop the blade(s) if the
lawn mower has to be
tilted for transportation
when crossing surfaces
other than grass, and when
transporting the lawn
mower to and from the
area to be mowed;
j) never operate the lawn
mower with defective
guards, or without safety
devices, for example
deflectors and/or grass
catchers, in place;
k) switch on the motor
carefully according to
instructions and with
feet well away from the
blade(s);
l) do not tilt the lawn mower
when switching on the
motor, except if the lawn
mower has to be tilted for
starting In this case, do not
tilt it more than absolutely
necessary and lift only the
part which is away from the
operator;
m)do not put hands or feet
near or under rotating
parts. Keep clear of the
discharge opening at all
times;
n) never pick up or carry a
lawn mower while the
motor is running;
o) not to touch the blades
before disconnecting the
plug and the blades have
come to a complete stop;
p) Stop the motor and
disconnect the plug from
the mains:
- whenever you leave the
machine;
- before clearing a blockage;
- before checking, cleaning
or working on the lawn
mower;
- after striking a foreign
object, Inspect the lawn
mower for damage and
make repairs as necessary;
- if the lawn mower starts to
vibrate abnormally (check
immediately);

9
Electric lawn mower EN
Maintenance and storage
a) keep all nuts, bolts and
screws tight to be sure
the equipment is in safe
working condition;
b) check the grass catcher
frequently for wear or
deterioration;
c) replace worn or damaged
parts for safety;
d) ensure that only
replacrment cutting means
of the right type are used;
WARNING:
- Not to use the lawn mower
if the cords are damaged or
worn.
- Not to connect a damaged
cord to the supply or touch
a damaged cord before it
is disconnected from the
supply. A damaged cord
can lead to contact with live
parts.
- Not to touch the blades
before the machine is
disconnected from the
supply and the blades have
come to a complete stop.
- To keep extension cords
away from the blades.The
blades can cause damage
to the cords and lead to
contact with live parts.
- To disconnect the supply
(i.e, pulling the plug from
the socket)
- whenever leaving the
machine unattended,
- before clearing a blockage,
- before checking, cleaning or
working on the machine,
- after striking a foreign
object,
- Whenever the machine
starts vibrating abnormally.
- To carefully read the
instructions for the safe
operation of the machine;
- Recommendations:
- To connect the machine
only to a supply circuit
protected by a residual
current device (RCD ) with a
tripping current of not more
than 30 mA.
SYMBOLS
Read instruction handbook
before operation this machine
Keep bystanders away.
Beware of sharp blades.
Blades continue to rotate
after the motor is switched
off- Remove plug from mains
before maintenance or if cord is
damaged.

10
Electric lawn mower EN
Keep the supply flexible cord
away from the blades.
1. SWITCH LEVER
2. HOOK
3. SAFETY KEY
4. CABLE CLIP
5. UPPER HANDLE
6. LOWER HANDLE
7. MOTOR COVER
8. CUTTING HEIGHT ADJUSTMENT KNOB
9. CARRY HANDLE
10. HANDLE KNOB, LOWER
11. SAFETY FLAP
12. GRASS COLLECTION BAG
13. GRASS BAG INDICATOR
14. BAG HANDLE
15. HANDLE KNOB, UPPER
16. BLADE BOLT (SEE FIG. K1)
17. BLADE (SEE FIG. K1)
*Not all the accessories illustrated or de-
scribed are included in standard delivery.
TECHNICAL DATA
Type WG713E (7 - designation of machinery,
representative of Lawn Mower)
WG713E
Rated voltage 220V-50HZ
No load speed 3800/min
Cutting diameter 34cm
Cutting height 25-75mm
Cutting height positions 6
Front wheel diameter 140mm
Rear wheel diameter 160mm
Grass collection
capacity 30L
Machine Weight 10.5kg
ACCESSORIES
WG713E
Grass collection bag 1
Cable clips 2
Handle knobs 4
Shims 4
We recommend that you purchase your accessories
listed in the above list from the same store that sold
you the lawnmower. Use good quality accessories
marked with a well-known brand name. Refer to
the accessory packaging for further details. Store
personnel can assist you and offer advice.
OPERATION INSTRUCTION
NOTE: : Read instruction handbook
before operation this machine.
Intended Use
This product is intended for domestic lawn
mowing.
ASSEMBLY AND OPERATION
ACTION FIGURE
ASSEMBLY
Assembling the handle bar
NOTE: Choose one of the two
holes in the lower handle for
desired handle’s height.
See Fig. A1,
A2, A3, A4

11
Electric lawn mower EN
Assembling grass collection bag See Fig. B1,
B2, B3, B4
Fitting grass collection bag to
the lawn mower
NOTE: Depress the grass
collection bag slightly to ensure
that it is completely installed.
See Fig. C1,
C2
OPERATION
Starting & stopping
STARTING
Connect the male plug into the
power wire. Press the safety key
first, then press the switch lever to
start.
NOTE: In case of unstable
connection, put the power wire
onto the hook.
STOPPING
Release the switch lever.
See Fig. D
Adjusting the cutting height
WARNING!
Stop, release
witch lever and wait until the
motor stops before adjusting
height.The blades continue
to rotate after the machine is
switched off, a rotating blade
can cause injury. Do not touch
rotating blades.
See Fig. E
Grass bag filling indicator
Empty status: flap floats (a)
Fully status: flap falls down (b)
See Fig. F1
Removing/emptying grass
collection bag
WARNING! Always check
the safety flap close the
discharge outlet before using.
Never lift the safety flap when
the lawn mower is being used
without fitted grass collection
bag.
See Fig. F2
Rear discharge See Fig. G
STORAGE See Fig. H1,
H2
MOWING TIPS
NOTE: ALWAYS INSPECT AREA WHERE
MOWER IS TO BE USED AND REMOVE
ALL STONES, STICKS, WIRE, METAL
AND OTHER DEBRIS WHICH MIGHT BE
THROWN BY THE ROTATING BLADE.
1. Mow across the face of slopes, never
up-and-down. Exercise extreme caution
when changing direction on slopes.
Do not mow excessively steep slopes.
Always maintain good footing.
2. Release switch lever to turn mower “OFF”
when crossing any graveled area (stones
can be thrown by the blade).
3. Set mower at highest cutting height when
mowing in rough ground or in tall weeds.
Removing too much grass at one time
can cause circuit breaker to trip, which
stops mower.
4. If a grass bag is used during the fast
growing season, the grass may tend to
clog up at the discharge opening. Release
switch lever to turn mower “OFF” and
remove the safety key. Remove the grass
bag and shake the grass down to the back
end of the bag. Also clean out any grass
or debris which may be packed around
the discharge opening. Replace the grass
collection bag.
5. If mower should start to vibrate
abnormally, release switch lever to turn
mower “OFF” and remove safety key.
Check immediately for cause. Vibration
is a warning of trouble. Do not operate
mower until a service check has been
made.
6. ALWAYS RELEASE SWITCH LEVER TO
TURN MOWER “OFF” AND REMOVE
SAFETY KEY WHEN LEAVING IT
UNATTENDED EVEN FOR A SHORT
PERIOD OF TIME.

12
Electric lawn mower EN
MAINTENANCE
WARNING: Stop the mower and
remove the safety key before
removing the grass bag.
NOTE: To ensure long and reliable service,
perform the following maintenance
procedures regularly. Check for obvious
defects such as a loose, dislodged or a
damaged blade, loose fittings, and worn
or damaged components. Check that the
covers and guards are all undamaged and
are correctly attached to mower. Carry out
any necessary maintenance or repairs before
operating mower. If the mower should
happen to fail despite regular maintenance,
please call our customer helpline for advice.
BLADE SHARPENING
KEEP BLADE SHARP FOR BEST MOWER
PERFORMANCE.
WEAR PROPER EYE PROTECTION WHILE
REMOVING, SHARPENING, AND INSTALLING
BLADE. ENSURETHAT SAFETY KEY IS
REMOVED.
Sharpening the blade twice during a mowing
season is usually sufficient under normal
circumstances. Sand causes the blade to dull
quickly. If your lawn has sandy soil, more
frequent sharpening may be required.
REPLACE BENT OR DAMAGED BLADE
IMMEDIATELY.
WHEN SHARPENING THE BLADE:
1. Make sure blade remains balanced.
2. Sharpen blade at the original cutting angle.
3. Sharpen cutting edges on both ends of
blade, removing equal amounts of material
from both ends.
NOTE: 1. Be sure the mower is turned off and
remove the key.
2. Place the mower in stand up storage mode.
TO SHARPEN BLADE IN A VISE (SEE Fig. I)
1. Be sure the switch lever is released,
the blade has stopped and the safety key
removed before removing the blade.
2. Remove blade from mower. See
instructions for removing and attaching
blade.
3. Secure blade M-1 in a vise M-2.
4. Wear safety glasses and be careful not to
cut yourself.
5. Carefully file the cutting edges of the blade
with a fine tooth file M-3 or sharpening stone.
6. Check balance of blade. See instructions for
blade balancing.
7. Replace blade on mower and tighten
securely. Refer to instructions below.
BLADE BALANCING (SEE Fig. J)
Check balance of blade by placing center
hole in blade N-1 over a nail or screwdriver
shank N-2, clamped horizontally in a vise N-3.
If either end of the blade rotates downward,
file that end. Blade is properly balanced when
neither end drops.
BLADE MAINTENANCE (See Fig. K1, K2)
Renew your metal blade after 50 hours
mowing or 2 years, whichever is the sooner-
regardless of condition.
Follow these procedures to remove and
replace the blade.You will need garden gloves
(not provided) and a spanner wrench (not
provided) to remove the blade. Hold the blade
(16) and unscrew the blade bolt (15) counter-
clockwise using a spanner wrench, and then
remove blade.
To re-assemble, position the blade (16) with
the cutting edges towards the ground.Then
securely tighten the blade bolt (15).
STORAGE (See Fig. H1, H2)
Stop the mower and always remove the
safety key. Clean the exterior of the machine
thoroughly using a soft brush and cloth. Do
not use water, solvents or polishes. Remove
all grass and debris, especially from the
ventilation slots.
Turn the machine on its side and clean the
blade area. If grass cuttings are compacted
in the blade area, remove with a wooden or
plastic implement.
Store the machine in a dry place. Do not place
other objects on top of the machine.
To aid storage, release the handle knob, and
fold the upper handle as shown in Fig. H1

13
Electric lawn mower EN
TROUBLESHOOTING
Problem Solution
1. Mower doesn’t run
when switch lever is
activated.
A. Check to make sure safety key has been installed and is fully
seated and that button on switch housing is being completely
pushed.
B. Release Switch Lever to turn mower off. Remove safety key,
turn mower over and check that blade is free to turn. If not free,
return to an authorized servicer. Blade should turn freely.
2. Motor stops while
mowing.
A. Release Bail handle to turn mower off. Remove safety key, turn
mower over and check that blade is free to turn. If not free, return to
an authorized servicer. Blade should turn freely.
B. Raise cutting height of wheels to highest position and start
mower.
C. Has battery been fully charged? Plug in charger and wait for green
light to come on.
D. Avoid overloading the mower. Slow down the cutting pace by
pushing mower slower or raise the cut height. Or both.
3. Mower runs but
cutting performance is
unsatisfactory, or does
not cut entire lawn.
A. Release Switch Lever to turn mower off. Remove safety key.
Turn mower over and check: Blade for sharpness - Keep blade
sharp. Deck and discharge chute for clogging.
B. Wheel height adjustment may be set too low for grass
condition. Raise cutting height.
4. Mower is too hard to
push.
A. Raise cutting height to reduce deck drag on grass. Check each
wheel for free rotation.
5. Mower is abnormally
noisy and vibrates.
A. Release Switch Lever to turn mower off. Remove safety key.
Turn mower on side and check blade to ensure it has not been
bent or damaged. If blade is damaged, replace with a replacement
blade. If the underside of the deck is damaged return mower to an
Authorized service center.
B. If there is no visible damage to the blade and the mower still
vibrates: Release Switch Lever to turn mower off, remove safety
key and remove blade. Rotate blade 180 degrees and retighten.
If mower still vibrates, return the mower to an authorized service
center.
6. Mower not picking up
clippings with the Grass
Collection Bag.
A. Remove mulch plate when bagging.
B. Chute clogged. Release Switch Lever to turn mower off.
Remove safety key. Clear chute of grass clippings.
C.Too much cut grass. Raise cutting height of wheels to shorten
length of the cut.
D. Bag full. Empty bag more often.
7. When mulching there
are clippings visible.
A.Too much cut grass. Raise cutting height of wheels to shorten
length of the cut. Do not cut off more than 1/3 of total length.
B. Check blade for sharpness. Always keep blade sharp.

14
Electric lawn mower EN
ENVIRONMENTAL PROTECTION
Disposal
The machine, its accessories and packaging materials should be sorted for environmentally friendly
recycling.
The plastic components are labeled for categorized recycling.

15
Электрическая газонокосилка RU
ОБЩИЕ ПРАВИЛА
ТЕХНИКИ
БЕЗОПАСНОСТИ
ПРЕДУПРЕЖДЕНИЕ!
ВНИМАТЕЛЬНО
ОЗНАКОМЬТЕСЬ С
ИНСТРУКЦИЯМИ.
Невыполнение всех
нижеприведенных инструкций
и рекомендаций может
привести к поражению
электрическим током, пожару
и серьезным травмам.
ВНИМАТЕЛЬНО
ПРОЧИТАЙТЕ
ИНСТРУКЦИЮ, ЧТО
ПОЗВОЛИТ ОБЕСПЕЧИТЬ
БЕЗОПАСНУЮ РАБОТУ
КОСИЛКИ.
СОХРАНИТЕ ЭТИ
ИНСТРУКЦИИ!
- Данный аппарат не
предназначен для
использования людьми
(включая детей) с
недостаточными
физическими, психическими
или умственными
способностями,
необученными или
неосведомленными
лицами. В случае
использования аппарата
упомянутыми лицами
необходим надзор за ними
(или прямые указания по
применению) со стороны
лица, отвечающего за их
безопасность.
- Дети в таких случаях
должны находиться под
наблюдением во избежание
баловства или игр с данным
аппаратом.
- Если шнур питания
повреждён, он должен быть
заменён производителем,
его сервисным агентом
или специалистами
с аналогичной
квалификацией, чтобы
избежать возникновения
опасных ситуаций.
Дополнить
ДОПОЛНИТЕЛЬНЫЕ
ПРАВИЛА
БЕЗОПАСНОСТИ ДЛЯ
ГАЗОНОКОСИЛКИ
ОБУЧЕНИЕ
а) Внимательно прочитайте
инструкции. Ознакомьтесь
с регуляторами
и правильным
использованием
оборудования;
б) Никогда не позволяйте
детям или лицам, не
ознакомленными с этими
инструкциями, работать с
газонокосилкой. Местные
нормы могут ограничивать
возраст оператора;
в) Никогда не выполняйте
скашивание вблизи людей
и, в особенности, детей или
домашних животных;
г) Помните, что оператор
или пользователь
несет ответственность

16
Электрическая газонокосилка RU
за несчастные случаи
или опасность для
других людей или их
собственности.
ПОДГОТОВКА
а) При скашивании, всегда
носите надежную обувь
и длинные брюки. Не
работайте с оборудованием
босиком или в открытых
сандалиях;
б) Тщательно проверьте
место, где предполагается
использование
оборудования, и удалите
все объекты, которые могут
отбрасываться машиной;
в) Перед использованием
всегда проводите осмотр,
чтобы убедиться, что
лезвие, болты лезвия
и режущий узел не
изношены или повреждены.
Заменяйте изношенные
или поврежденные лезвия
и болты в комплектах для
сохранения балансировки;
d) При работе с косилкой,
имеющей несколько ножей,
соблюдайте осторожность,
так как вращение одного
ножа может привести к
вращению остальных
ножей.
ЭКСПЛУАТАЦИЯ
a) Косите только в дневное
время или при хорошем
искусственном освещении;
b) Избегайте работы с
оборудованием в мокрой
траве там, где возможно;
c) Всегда проверяйте свою
точку опоры на склонах;
d) Ходите, никогда не бегайте;
e) В случае колесных
роторных машин
скашивайте поперек лица
склонов, но никогда не
скашивайте вверх и вниз;
f) Проявляйте
исключительную
осторожность при смене
направления на склонах;
g) Не проводите скашивание
на слишком крутых склонах;
h) Будьте предельно
осторожны при
реверсировании
направления или
подтягивании газонокосилки
к себе;
i) Остановите лезвие(я),
если газонокосилку
необходимо наклонить
для транспортировки при
пересечении поверхностей,
отличных от травы, а
также при транспортировке
газонокосилки в и из зоны,
которую необходимо
окосить;
j) Никогда не управляйте
газонокосилкой с
неисправным защитным
кожухом или без
установленных устройств
безопасности, например
отражателей и/или
уловителей;
k) включайте двигательв
соответствии
синструкциями, держа

17
Электрическая газонокосилка RU
ногивдали от лезвий;
l) Не наклоняйте
газонокосилку при
включении мотора, за
исключением случаев,
когда она должна быть
наклонена для пуска. В
этом случае не наклоняйте
её больше, чем абсолютно
необходимо, и поднимайте
только ту часть, которая
удалена от оператора;
m) Не ставьте руки или ноги
вблизи вращающихся
деталей или под ними.
Всегда держитесь вдали от
выпускного отверстия;
n) Не поднимайте и не
переносите газонокосилку,
когда ее двигатель
работает;
o) не прикасайтесь к лезвиям,
пока не достанете штепсель
из розетки и лезвия
полностью не остановятся;
p) Заглушите двигатель и
достаньте штепсель из
розетки:
-каждый раз, когда вы
оставляете машину без
присмотра;
-перед очисткой засорения;
-перед проверкой, чисткой или
работой на машине;
– после удара о посторонний
объект; Iосмотрите
газонокосилку на предмет
повреждений и при
необходимости выполните
ремонт;
– если газонокосилка
начинает ненормально
вибрировать (немедленно
проверьте);
ОБСЛУЖИВАНИЕ И
ХРАНЕНИЕ
a) Следите за затяжкой всех
гаек, болтов и винтов
для того, чтобы быть
уверенным в том, что
устройство находится
в безопасном рабочем
состоянии.
b) Для уменьшения опасности
воспламенения, очищайте
аккумуляторный отсек от
травы, листьев или избытка
смазки;
c) Периодически проверяйте
улавливатель травы на
износ или повреждение.
d) Убедитесь в том, что
используются только
сменные режущие
приспособления
подходящего типа;
ВНИМАНИЕ:
- Не используйте
газонокосилку, если шнур
питания поврежден или
износился.
- Не подключайте
поврежденный шнур
к источнику питания и
не дотрагивайтесь до
поврежденного шнура, пока
он подключён к источнику
питания. Поврежденный
шнур может привести к
контакту с токоведущими
элементами.

18
Электрическая газонокосилка RU
- Не прикасаться к лезвиям,
пока машина всё ещё
подключена к источнику
питания и лезвия ещё не
полностью остановились.
- Держите удлинители
вдали от лезвий. Лезвия
могут повредить шнуры
и привести к контакту с
токоведущими элементами.
- Отключите питание (т.е.
вытащите штепсель из
розетки)
- когда оставляете машину
без присмотра,
- перед устранением засора,
- перед проверкой, чисткой
или проведением работ с
машиной,
- после удара о посторонний
предмет,
- когда машина начинает
ненормально вибрировать.
- Внимательно прочитайте
инструкцию по безопасной
эксплуатации машины;;
- Рекомендации:
- Подключайте машину
только к цепи питания,
защищённой устройством
дифференциальной
защиты (УДЗ), с током
расцепления не более 30
мА.
УСЛОВНЫЕ
ОБОЗНАЧЕНИЯ
Прочтите инструкцию
поэксплуатации перед
началомэксплуатации этой
машины
Держите посторонних людей
набезопасном расстоянии.
Остерегайтесь острых лезвий.
Клинки продолжают вращаться
после выключения двигателя-
Отсоедините штепсель от сети
питания перед проведением
технического обслуживания
или в том случае, если шнур
повреждён.
Держите гибкий шнур вдали от
лезвий.
1. РЫЧАГ ПЕРЕКЛЮЧЕНИЯ
2. ЗАЩЁЛКА
3. ПРЕДОХРАНИТЕЛЬНЫЙ КЛЮЧ
4. КАБЕЛЬНЫЙ ЗАЖИМ
5. ВЕРХНЯЯ РУКОЯТКА
6. НИЖНЯЯ РУКОЯТКА
7. КРЫШКА ДВИГАТЕЛЯ
8. РУЧКА РЕГУЛИРОВКИ ВЫСОТЫ
СКАШИВАНИЯ
9. РУКОЯТКА ДЛЯ ПЕРЕНОСКИ
10. РУЧКА РУКОЯТКИ, НИЖНЯЯ

19
Электрическая газонокосилка RU
11. ПРЕДОХРАНИТЕЛЬНЫЙ КЛАПАН
12. ТРАВОСБОРНИК
13. ИНДИКАТОР ТРАВОСБОРНИКА
14. РУЧКА ТРАВОСБОРНИКА
15. РУЧКА РУКОЯТКИ, ВЕРХНЯЯ
16. БОЛТ ЛЕЗВИЯ(СМ. РИС. K1)
17. ЛЕЗВИЕ(СМ. РИС. K1)
*Не все принадлежности,
иллюстрированные или описанные
включены в стандартную поставку.
ТЕХНИЧЕСКИЕ
ХАРАКТЕРИСТИКИ
Тип WG713E (7 – Обозначение
техники, типичной газонокосилки)
WG713E
Напряжение 220V-50HZ
Скорость без нагрузки 3800/мин
Ширина скашивания 34см
Высота кошения 25-75мм
Положения высоты
кошения 6
Диаметр переднего
колеса 140мм
Диаметр заднего колеса 160мм
Емкость травосборника 30л
Вес машины 10.5кг
ПРИНАДЛЕЖНОСТИ
WG713E
Травосборник 1
Кабельный зажим 2
Ручка рукоятки 4
Регулировочная шайба 4
Рекомендуется приобретать все принадлежности в
том же магазине, где был приобретен инструмент.
Обратитесь к вспомогательной упаковки для
получения более подробной информации. Помощь и
консультацию можно также получить у продавца.
ИНСТРУКЦИЯ
ПОЭКСПЛУАТАЦИИ
ПРИМЕЧАНИЕ Перед началом
работы сэтим аппаратом прочитайте
инструкцию по эксплуатации.
Предполагаемое использование
Этот продукт предназначен для покоса травы.
СБОРКА
ИЭКСПЛУАТАЦИЯ
Действие Рисунок
Сборка
Сборка рукоятки
ПРИМЕЧАНИЕ: Выберите
одно из двух отверстий в
нижней рукоятке для получения
желаемой высоты рукоятки.
См. Рис. A1,
A2, A3, A4,
A5
Сборка травосборника См. Рис. B1,
B2, B3, B4
Установка травосборника на
газонокосилку
ПРИМЕЧАНИЕ: Слегка
нажмите на травосборник,
чтобы убедиться в том, что он
полностью установлен.
См. Рис. C1,
C2
ЭКСПЛУАТАЦИЯ
Запуск и выключение
ЗАПУСК
Подключите штепсель к проводу
питания. Сначала задействуйте
предохранительный ключ, затем
нажмите рычаг переключения,
чтобы начать работу.
ПРИМЕЧАНИЕ:
В случае, если
соединение с источником питания
нестабильно, закрепите провод
питания на защёлку.
ВЫКЛЮЧЕНИЕ
Отпустите рычаг переключения
См. Рис. D

20
Электрическая газонокосилка RU
Регулировка высоты кошения
Предостережение!
Остановите работу, отпустите
рычаг переключения и дождитесь
остановки двигателя, прежде
чем регулировать высоту
кошения. Лезвия продолжают
вращаться после выключения
машины, вращающиеся лезвия
могут привести к травме. Не
прикасайтесь к вращающимся
лезвиям.
См. Рис. E
Индикатор наполнения
травосборника
Пустой: клапан колеблется (a)
Наполнен: клапан опускается
вниз (b)
См. Рис. F1
Извлечение / опорожнение
травосборника
Предостережение!
Необходимо убедиться в
том, что предохранительный
клапан закрывает выпускной
патрубок перед использованием
машины. Никогда не поднимайте
предохранительный клапан, когда
газонокосилка используется без
установленного травосборника.
См. Рис. F2
Установка мульчирующей
вставки См. Рис. G
Хранение
См. Рис. H1,
H2
MOWING TIPS
NOTE: ALWAYS INSPECT AREA WHERE
MOWER IS TO BE USED AND REMOVE
ALL STONES, STICKS, WIRE, METAL
AND OTHER DEBRIS WHICH MIGHT BE
THROWN BY THE ROTATING BLADE.
1. Косите вдоль склонов, не сверху вниз.
Будьтепредельно осторожны при
изменении направления
на склонах. Не косите чрезмерно крутые
склоны.Всегда держите равновесие.
2. Отпустите рычаг переключения,
чтобы выключить газонокосилку при
пересечении любой гравийной зоны
(лезвие может отбрасывать камни).
3. Установите косилку в высокое положение
кошенияпри работе на грубой почве или
при высоких
сорняках. Скашивание слишком
большогоколичества травы за один раз
может привести
к срабатыванию автоматического
выключателя,который останавливает
косилку.
4. Если травосборник используется в
период быстрого роста растений, трава
может засорить выпускное отверстие.
Отпустите рычаг переключения, чтобы
выключить газонокосилку и извлеките
предохранительный ключ. Снимите
травосборник и встряхните его, чтобы
трава переместилась в заднюю часть
емкости. Также удалите всю траву или
мусор, которые могли накрутиться
вокруг выпускного отверстия. Замените
травосборник.
5. Если косилка начинает ненормально
вибрировать, oтпустите рычаг
переключения, чтобы выключить
газонокосилку и извлеките
предохранительный ключ.и
извлеките предохранительный ключ.
Незамедлительно проверьте для
выяснения причины. Вибрация - это
предупреждение о неисправности. Не
работайте с косилкой, пока не будет
выполнена сервисная проверка.
6. ВСЕГДА ОТПУСКАЙТЕ
РЫЧАГ ПЕРЕКЛЮЧЕНИЯ,
ЧТОБЫ ВЫКЛЮЧИТЬ
ГАЗОНОКОСИЛКУ, И ИЗВЛЕКАЙТЕ
ПРЕДОХРАНИТЕЛЬНЫЙ КЛЮЧ,
КОГДА ВЫ ОСТАВЛЯЕТЕ КОСИЛКУ
БЕЗ ПРИСМОТРА ДАЖЕ НА
КОРОТКОЕ ВРЕМЯ.
ОБСЛУЖИВАНИЕ
ПРЕДУПРЕЖДЕНИЕ: Остановите
Other manuals for WG713E
1
Table of contents
Languages:
Other Worx Lawn Mower manuals

Worx
Worx LANDROID WG796E User manual

Worx
Worx Landroid WR142E User manual

Worx
Worx WG773E User manual

Worx
Worx Landroid M 500 Specification sheet

Worx
Worx WG778E User manual

Worx
Worx Landroid Specification sheet

Worx
Worx Landroid WR101SI User manual

Worx
Worx Landroid M User manual
Worx
Worx WG724E Installation manual

Worx
Worx Landroid S 300 Specification sheet