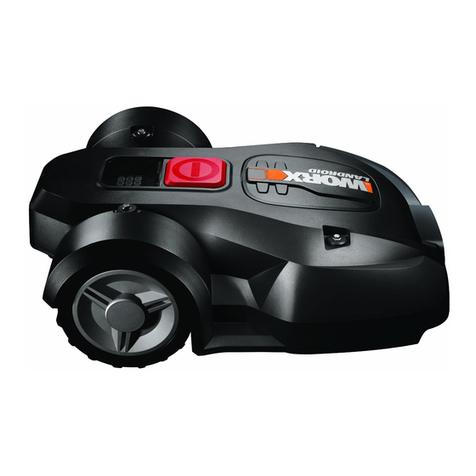
Worx LANDROID L WG795E User manual

INSTALLATION
GUIDE


Installation guide EN P04
Installationsanleitung D P18
Guide d'installation F P32
Guida d'installazione I P46
Guía de instalación ES P60
Installationsvejledning DK P74
Asennusopas FIN P88
Installasjonsguide NOR P102
Monteringshandbok SV P116

4
EN
How to install your Landroid
®
L
The installation of the Landroid
®
L is easy. Depending on the size of your garden, the entire process only takes
a short amount of time. If your are like us, you hate having to waste your precious free time mowing your lawn.
The Landroid
®
L will prove to be your best investment eliminating the need to mow your lawn ever again.
You can watch the installation demo video at www.worxlandroid.com.
The Landroid
®
L loves to mow
It is designed to mow often, maintaining a healthier and better looking lawn than ever before. Depending on the
size of your lawn, the Landroid
®
L may be programmed to operate at any time or frequency with no restrictions. It
is here to work for you.
Operating costs
Worried about your electricity bill? Let’s do the math: if you let your Landroid
®
L work 3 hours a day, 5 days a week,
25 weeks a year, your Landroid
®
L will cost you approximately £4 in electricity*.Yes, £4 a year. A fraction of what
you would spend in petrol for your noisy, polluting petrol mower.
* Source: www.energy.eu

5
EN
Preparation
In the box
From your shed
Distance gauge
Hex key
Scissors Hammer
Landroid®LCharging base
6 Base
retention
pegs
250
Boundary
Pegs
Boundary
wire reel 200m
Owner’s manual
Warranty
statement
Installation
guide
9 Spare blades
(3 kits)
Power cord
with AC/DC
transformer
Programming and
trouble shooting
guide

6
EN
Landroid®L's new home-your garden
Let's start by having a closer look at Landroid
®
L's new home—your lawn—highlighting the areas where it can safely
go and areas it’s best for Landroid
®
L to avoid.
When hitting any obstacle that’s rigid, stable and taller than
15cm—such as a wall or a fence—your Landroid®L will simply
stop and re-direct away from the obstacle.
Obstacles that can be hit
Stones that are heavy enough not to be moved by your
Landroid®L can be safely hit. However, if any stone has an
inclined surface that your Landroid®L can climb, you should either
remove it or exclude from the working area.
Stones
If your driveway is level with your lawn, without any protruding
surface, the Landroid®L can freely run over it. If you'd like the
Landroid®L to avoid it, then only a 10cm* space between the
Boundary Wire and the driveway is needed.
If it’s covered with gravel, you should not allow the Landroid®L
to travel over it, using the distance gauge in this case, keeping a
45cm* space between the boundary wire and the driveway.
*This is the recommended distance. Use the provided distance
gauge to ensure proper installation.
Driveways
You certainly don’t want your Landroid®L to mow your flowers, or
fall into the water. These areas should be avoided.
Flowerbeds, ponds, pools...

7
EN
If there are roots emerging from the ground, this area should be
avoided in order not to damage the roots.
Trees
In the case of large bumps or dips, please consider if the blades
could touch the ground; if this is the case, either make the
inclines smoother or exclude those areas from your Landroid®L’s
operation.
Depressions and bumps
Your Landroid®L has the ability to safely climb slopes up to 35%
(20°), so just avoid anything steeper than this.
Slopes
35% (20°)
The Upper Boundary Wire should NOT be placed on slopes
steeper than 35% (20°).The Upper Boundary Wire should have
a distance of at least 35cm between any obstacles. The Lower
Boundary Wire should NOT be placed on slopes steeper than
25% (15°).The Lower
Boundary Wire should have a distance of at least 45cm between
any obstacles when it is positioned on a slope that is 25%.
Placement of Boundary Wire on slopes
Upper boundary wire
upper boundary wire
Lower boundary
Wire

8
EN
Marking out Landroid®L’s
territory within your garden
Your Landroid
®
L needs to know where to mow. This is why you have to mark its working area with a boundary
wire that will form an invisible fence.This wire will also guide your Landroid
®
L to its charging base.
If your neighbor also uses a Landroid
®
L, then you must keep a space of at least 2metres between your Boundary
Wire and your neighbors.
Please be aware that your Landroid
®
L will not be able to receive
a signal from the BoundaryWire beyond the distance of 25m.
The charging base should be placed along a straight line—allow
2 meters at both the front and the back. If possible, place the
charging base in the shade—batteries are better recharged in a
cool place.
First of all, locate the best spot for the charging base, taking
into account where your nearest outdoor electricity socket is.
The charging base has a 15m power cord.
NOTE: Make sure the transformer and the electrical socket
are kept in a dry area at all times.
An island is an area that sits inside your lawn where you don't
want Landroid®L to go.The boundary wire starts from the
mowing boundary, goes straight to the island, around it and
back to the boundary as shown by the arrows on the picture.
Make sure it is on a flat area, clear of any obstacles.

9
EN
A forbidden area that's close to the mowing boundary should
be a part of the boundary itself, as shown in the picture.
If your lawn has two or more separate areas connected to each
other by means of a corridor, this should be at least 1 meters wide.
In the case of two islands that are close to each other, it would be
convenient to lay out the wire as illustrated above.
The Landroid®L can travel freely over the boundary wire in
between the islands and the mowing boundary.
If your lawns are not connected by a corridor that's wide enough,
then you'll have to pick your Landroid®L up and move it to the other
lawn. Landroid®L will mow this lawn no problem, but you'll have to
bring it back to the charging base when the battery runs out.

10
EN
Place the Charging Base in its designated spot, without fixing it
permanently. The “IN” arrow should be oriented so that it indicates
the inside of your lawn.
Feed the boundary wire through the tunnel underneath the charging
base.
Leaving about 1 meter in length of extra wire, start from the rear of
your charging base and begin pegging the wire along the boundary.
When you’ve finished laying the wire along the boundary back to the
charging base, leave another meter of extra wire and then cut it.
Pegging your boundary wire
Installation
We recommend that you first mow the lawn where the wire is to be laid using a normal lawn mower or a grass
trimmer.This ensures that the wire is laid as close to the ground as possible so the Landroid
®
L does not accidentally
cut the wire. The boundary wire is powered with a very low voltage so that it is totally safe to human beings and
pets.
1
2
3

11
EN
When laying the boundary wire,
use the distance gauge to keep a
45cm* space between the wire
and the boundary. However, in
the case of an obstacle that is
level with ground and safe for the
Landroid®L to run over, such as a
driveway or sidewalk, then only a
10cm* space is needed.
Each boundary peg should be
placed around 80cm apart.
Knock the boundary pegs tight to
the ground with the help of the
hammer, although avoid putting
too much pressure on the wire.
Keep the boundary wire straight
and tight between the pegs, there
should not be any slack wire.
*This is the recommended
distance. Use the provided
distance gauge to ensure proper
installation.
4
When making an island with the boundary wire, follow the path as
shown.The wire should run from the perimeter to outline the defined
island and then return back to the perimeter.The boundary wire in
between the island and perimeter should be laid close together
and held in place by the same boundary peg. During operation, the
Landroid®L will be able to freely pass over this part of the wire.
Ensure the Boundary Wire is perfectly straight in each corner.
6
5

12
EN
Connect the base to the boundary wire
Cut the two ends of the wire to a length that’s appropriate
convenient for reaching the clamps.
Strip the two ends of the wire.
When connecting to the charging base there will be an IN-wire
and an OUT-wire, as shown. Connect the IN-wire to the red
clamp of the charging base and the OUT-wire to the black clamp.
Then close the cover.
1
2
OUT
IN
OUT
IN
OUT
IN

13
EN
You can now permanently fix the charging base on the ground
by tightening the supplied Base Retention Pegs with the
supplied Hex key.
NOTE: Make sure the IN-wire is running straight through
the tunnel underneath the charging base.
3
Turn on and test the installation
Connect the power cord to the transformer and then to the AC
electrical socket, the LED on the charging base will turn on. If
the LED is off, please refer to the Trouble shooting guide.When
connecting, align the notch on the power cord connector (a)
with the groove on the transformer connector (b).
Make sure to only screw or unscrew the highlighted piece of
the connector.
If the green light does not come on, then check the power
connections.
In case the power cord is within the working area, you may bury
it as needed.
4
Place your Landroid®L inside the
working area, a few meters from
the back of the charging base.
1
This is the exciting part where you can turn your Landroid
®
L on for the first time.
ab

14
EN
Open the keypad window
by pressing the ACCESS
button on the top of your
Landroid®L.
Press and hold down the
Power ON/OFF key
until the Landroid®L turns on.
Press the key and close
the keypad window: your
Landroid®L will now find its
way to the charging base.
Watch the Landroid®L as it
returns to the charging base
and modify the positioning
of the boundary wire if
necessary. When the
Landroid®L successfully
returns to the charging base,
this means the installation has
been successfully completed!
Now your Landroid®L will start
to fully charge.
2
• If your Landroid®L is
outside its territory, it
will not move and the
display will indicate
”out of cutting area”
error. Just move it inside
its territory and repeat
step 2.
• If your Landroid®L is
inside its territory but
the display says “out
of cutting area”, and the
LED is on, it means you
clamped the boundary
wire ends incorrectly.
Just reverse them.
• Your Landroid®L should
always remain switched
on. If you ever need to
turn it off, then make sure
you place it within its
boundary area before you
switching it back on again.
• Should your Landroid®L
stop operating
unexpectedly, just press
the ACCESS button, open
its keypad window, press
its ON/OFF key to ON,
correct the problems,
press
0 button, close its keypad
window.
NOTE: If your Landroid®L is in the charging base during a time you have programmed it to mow, then simply press the
ACCESS button and close keypad window to send it back to mowing.
NOTE: Please refer to the Programming andTroubleshooting Guide for more information.
Warning

15
EN
Programming
Having finished the installation, it is now time to program the Landroid®L when you want it to go to work by using the keypad
display shown below. Please refer to the Programming and Troubleshooting Guide included in the packaging.
You could find more details about default work time of Landroid®L in following table:
Landroid®L WG795E - Auto mowing time schedule.
Area m2Auto mowing
runtime-hours
Monday
mowing
hours
Tuesday
mowing
hours
Wednesday
mowing
hours
Thursday
mowing
hours
Friday
mowing
hours
Saturday
mowing
hours
Sunday
mowing
hours
100 1.5 7:00-8:30 / / 7:00-8:30 / / /
200 5 7:00-8:00 7:00-8:00 7:00-8:00 7:00-8:00 7:00-8:00 / /
300 6 7:00-8:12 7:00-8:12 7:00-8:12 7:00-8:12 7:00-8:12 / /
400 7.5 7:00-8:30 7:00-8:30 7:00-8:30 7:00-8:30 7:00-8:30 / /
500 10 7:00-9:00 7:00-9:00 7:00-9:00 7:00-9:00 7:00-9:00 / /
600 11 7:00-9:12 7:00-9:12 7:00-9:12 7:00-9:12 7:00-9:12 / /
700 13 7:00-9:36 7:00-9:36 7:00-9:36 7:00-9:36 7:00-9:36 / /
800 15 7:00-10:00 7:00-10:00 7:00-10:00 7:00-10:00 7:00-10:00 / /
900 16.5 7:00-10:18 7:00-10:18 7:00-10:18 7:00-10:18 7:00-10:18 / /
1000 18 7:00-10:36 7:00-10:36 7:00-10:36 7:00-10:36 7:00-10:36 / /
1100 20 7:00-11:00 7:00-11:00 7:00-11:00 7:00-11:00 7:00-11:00 / /
1200 22.5 7:00-11:30 7:00-11:30 7:00-11:30 7:00-11:30 7:00-11:30 / /
1300 25 7:00-12:00 7:00-12:00 7:00-12:00 7:00-12:00 7:00-12:00 / /
1400 26.5 7:00-12:18 7:00-12:18 7:00-12:18 7:00-12:18 7:00-12:18 / /
1500 28 7:00-12:48 7:00-12:48 7:00-12:48 7:00-12:48 7:00-12:48 / /

16
EN
Ready to go?
The Landroid®L is designed for maintaining your grass at a perfect length during the season, but is not designed for deforesting a
jungle.
Before starting it for the first time,
1. You should mow your lawn to the desired height.
2. Make sure the operating area is clear from objects such as toys and branches...
3. Adjust the cutting height to its maximum level for the first mow and then adjust to your preferred lawn grass height.
Next Spring, let your Landroid®L start mowing early, when the grass is still short, so that you can avoid a preliminary grass cut.
20
25
30
35
40
45
50
55
60

17
EN
Keep it sharp
Always wear gloves when adjusting the blades.
Each blade of your Landroid®L has 4 cutting edges. Depending on the frequency the Landroid®L
mows your lawn, the cutting blades will need to be flipped/rotated periodically for a new cutting edge.
If your Landroid®L is programmed to mow the lawn every day then the cutting blades will need to
be rotated monthly for the best mowing results. Each cutting blade will last up to 4 months when
it is programmed to mow every day. When the cutting blades are dull and worn out, they should be
replaced with the spare blades provided with your Landroid®L. Spare blades are also available at your
nearest WORX retailer.
Maintenance
Your Landroid®L is engineered and built to stay outdoor regardless of adverse conditions. Just
periodically clean its deck from grass clipping build ups and your Landroid®L will mow for you trouble-
free, year after year, season after season. Don’t wash the machine with high pressure squirt gun.This
may cause damage of the battery or the machine.
Write your PIN code here
Winter storage
Even though it is tough, we would recommend that you store your Landroid®L in your shed or garage
during the Winter. Before storing it, give your Landroid®L a full recharge that will preserve its battery
from damage.You can then disconnect the plug of the charging base. A good tip to prolong the life of
the battery is to periodically re-charge it during the Winter. A full charge every 3 months will be fine.
We'd also suggest that you cover the base with a nylon sheet in Winter time.
Safety
Your Landroid®L is safe to human beings and pets. First of all, there’s a large clearance between the
outer border of the machine and the blade. Moreover, the tilt sensors will instantly stop the blades if
the unit is lifted from the ground.
Security
Your Landroid®L is protected by a PIN code.This PIN code prevents unauthorised people from being
able to use it. Once it’s taken outside its territory, it will not be possible to re-start it by anyone who
does not know the PIN code.This also means that you will not able to start your Landroid®L if you
forget your PIN code! We strongly recommend that you write your PIN code here for future reference.
Even better, register your Landroid®L online at www.worxlandroid.com and record your PIN code
there.You'll be able to access your PIN code online any time.
1
3
2
4

18
D
So installieren Sie Ihren Landroid
®
L
Die Installation des Landroid
®
L ist ganz einfach. Je nach Größe Ihres Gartens nimmt der ganze Vorgang nur kurze
Zeit in Anspruch. Wahrscheinlich hassen Sie es so wie wir, Ihre kostbare Freizeit damit zu vergeuden, den Rasen zu
mähen. Der Landroid
®
L wird garantiert Ihre beste Investition sein, da Sie nun nie mehr den Rasen selbst mähen
müssen.
Sie können das Demo-Video zur Installation unter www.worxlandroid.com ansehen.
Der Landroid
®
L liebt das Mähen
Er ist zum häufigen Mähen bestimmt – er hält Ihren Rasen gesund und dieser wird gepflegter aussehen als je
zuvor. Je nach Größe des Rasens kann der Landroid
®
L so programmiert werden, dass er zu jeder beliebigen Zeit
und mit jeder beliebigen Frequenz uneingeschränkt arbeitet. Er ist dazu da, für Sie zu arbeiten.
Betriebskosten
Sie sorgen sich wegen der Stromrechnung? Rechnen wir das doch einmal durch: Wenn Sie Ihren Landroid
®
L 5
Stunden proTag, 5Tage pro Woche, 25 Wochen pro Jahr arbeiten lassen, kostet Sie das etwa 8 euro an Strom*.
Ja, 8 euro pro Jahr. Ein Bruchteil dessen, was Sie an Benzin für Ihren lauten, schmutzigen Motormäher ausgeben
müssten.
* Quelle: www.energy.eu

19
D
Vorbereitung
Aus Ihrem Schuppen
Begrenzungskabel-
Abstandlehre
Inbusschlüssel
Schere Hammer
Landroid®LLadebasis
6 Basis-
Haltenägel
250
Begrenzungsnägel
Begrenzungskabelrolle
200m
Bedienungsanleitung
Garantieerklärung
Installationsanleitung
9
Ersatzmesser
(3 Sätze)
Netzkabel mit
Netzteil
Programmierungs- und
Problemlösungsanleitung
Im Lieferumfang

20
D
Landroid®L`s Neues Zuhause–Ihr Garten
Lassen Sie uns zunächst einen Blick auf das neue Zuhause Ihres
Landroid
®
L werfen: Ihren Garten. Betrachten wir uns
insbesondere die Stellen, die der Landroid
®
L problemlos
befahren kann – und welche er besser meiden sollte.
Bei festen, stabilen Hindernissen, die höher als 15cm sind (wie
Mauern oder Zäune) hält Ihr Landroid®L einfach an und fährt in
eine andere Richtung.
Hindernisse, die zu Kollisionen einladen
Steine, die so schwer sind, dass sie nicht vom Landroid®L
umgeworfen oder verschoben werden können, sind kein Problem.
Falls Steine aber wie eine Rampe wirken und den Landroid®L zum
Klettern verleiten könnten, sollten diese entweder entfernt oder aus
dem Arbeitsbereich ausgeschlossen werden.
Steine
Wenn Ihre Zufahrt auf einer Ebene mit dem Rasen liegt, also
nicht darüber hinaus ragt, kann sie vom Landroid®L problemlos
überfahren werden. Wenn Sie wollen, dass der Landroid®L Ihre
Einfahrt vermeidet, benötigen Sie nur einen Zwischenraum von
10cm* zwischen dem Begrenzungsdraht und der Einfahrt.
Mit Kies bedeckte Zufahrten sollten nicht vom Landroid®L
überfahren werden. wobei ein Zwischenraum von 45cm* zwischen
dem Begrenzungsdraht und der Einfahrt eingehalten werden soll.
* Dies ist ein empfohlener Abstand, Sorgen Sie mit der
mitgelieferten Abstandlehre für die richtigen Entfernungen.
Zufahrten und Fahrwege
Sie möchten ganz bestimmt nicht, dass Ihr Landroid®Ldie
Blumen mäht oder ein Vollbad nimmt. Daher sollten solche
Stellen gemieden werden.
Blumenbeete, Teiche, Pools...
Table of contents
Languages:
Other Worx Lawn Mower manuals

Worx
Worx Landroid User manual

Worx
Worx WG783 User manual

Worx
Worx Landroid Series Specification sheet

Worx
Worx WG789E User manual

Worx
Worx Landroid M User manual

Worx
Worx LANDROID M WG754E User manual

Worx
Worx WA0862 User manual

Worx
Worx WG719 User manual

Worx
Worx WG751E User manual

Worx
Worx WG776E.9 Installation manual

Worx
Worx WG743E Installation manual

Worx
Worx Landroid User manual

Worx
Worx Landroid WR143 Specification sheet

Worx
Worx S Basic LANDROID User manual

Worx
Worx Landroid WR130E User manual

Worx
Worx WG770E User manual

Worx
Worx Landroid WR139E User manual

Worx
Worx WG775E User manual

Worx
Worx WG789 User manual

Worx
Worx wg706e User manual