Rev 2.0/4-20 DC3 DVS, Powered Motion: #361087
M02 “Motion setting
saved” single chirp (none)
Motion setting has been saved to memory and
will be used to control the motion from this
point forward. No corrective action is necessary.
N/A
N00 “Automatic
attach” (none) (none)
System activated “attach” mode as precaution
because significant vacuum was detected, even
though no one initiated “attach” function. No
corrective action is necessary.
N/A
N01 “Automatic
attach” (none) (none)
System activated “attach” mode as precaution
because load did not release completely. No
corrective action is necessary.
N/A
N02 “Automatic
attach” (none) (none)
System activated “attach” mode as precaution
when lifter was powered up, because power
was previously lost while load was attached. No
corrective action is necessary.
N/A
N03 “Unable to turn
module power off”
1 chirp
every 2
seconds
(none)
Modular circuit board failed to power down.
Remove 9V battery. Disconnect connector
between 12V battery and vacuum generating
system. Charge battery completely (see
“MAINTENANCE: 12-VOLT BATTERY RECHARGE” in
lifter's OPERATING INSTRUCTIONS). Then
reconnect battery and try to power down again.
If code persists, disconnect connector. Service is
required.
Check for fault(s) in
cable connecting to
modular circuit board.
Disconnect 12V battery
and replace cable or
circuit board as needed.
N04
“Failed to turn
controls power
off”
1 chirp
every 2
seconds
(none)
Control unit failed to power down. Remove 9V
battery. Disconnect connector between 12V
battery and vacuum generating system. Charge
battery completely (see “MAINTENANCE: 12-
VOLT BATTERY RECHARGE” in lifter's OPERATING
INSTRUCTIONS). Then reconnect battery and try
to power down again. If code persists,
disconnect connector. Service is required.
Disconnect 12V battery
and replace control unit
as needed.
N05 “Unable to turn
module power on”
1 chirp
every 2
seconds
(none)
Modular circuit board failed to power up.
Charge 12V battery (see “MAINTENANCE: 12-
VOLT BATTERY RECHARGE” in lifter's OPERATING
INSTRUCTIONS). Then power lifter up again. If
code persists, service is required.
Disconnect 12V battery
and replace modular
circuit board.
N06 “Power-down
reminder” 2 chirps on briefly Power down to prevent 12V battery discharge
when lifter is not in use. N/A
N07 “Auto power-down
disabled” (none) (none)
Automatic power-down is prevented. Power
down lifter and power up again. If code persists,
service is required.
Check for other
Diagnostic Codes and
perform service as
directed.
N08 “Powering down in
# seconds”
1 chirp per
minute (none)
Lifter will automatically power down in number
of seconds shown. Press any button to cancel
action.
N/A
N10 “App-support
hardware fault” (none) (none)
Fault is detected in hardware that enables
communication with mobile app. Power down
lifter and power up again. If code persists,
service is required.
Disconnect 12V battery
and replace control unit
to resolve.
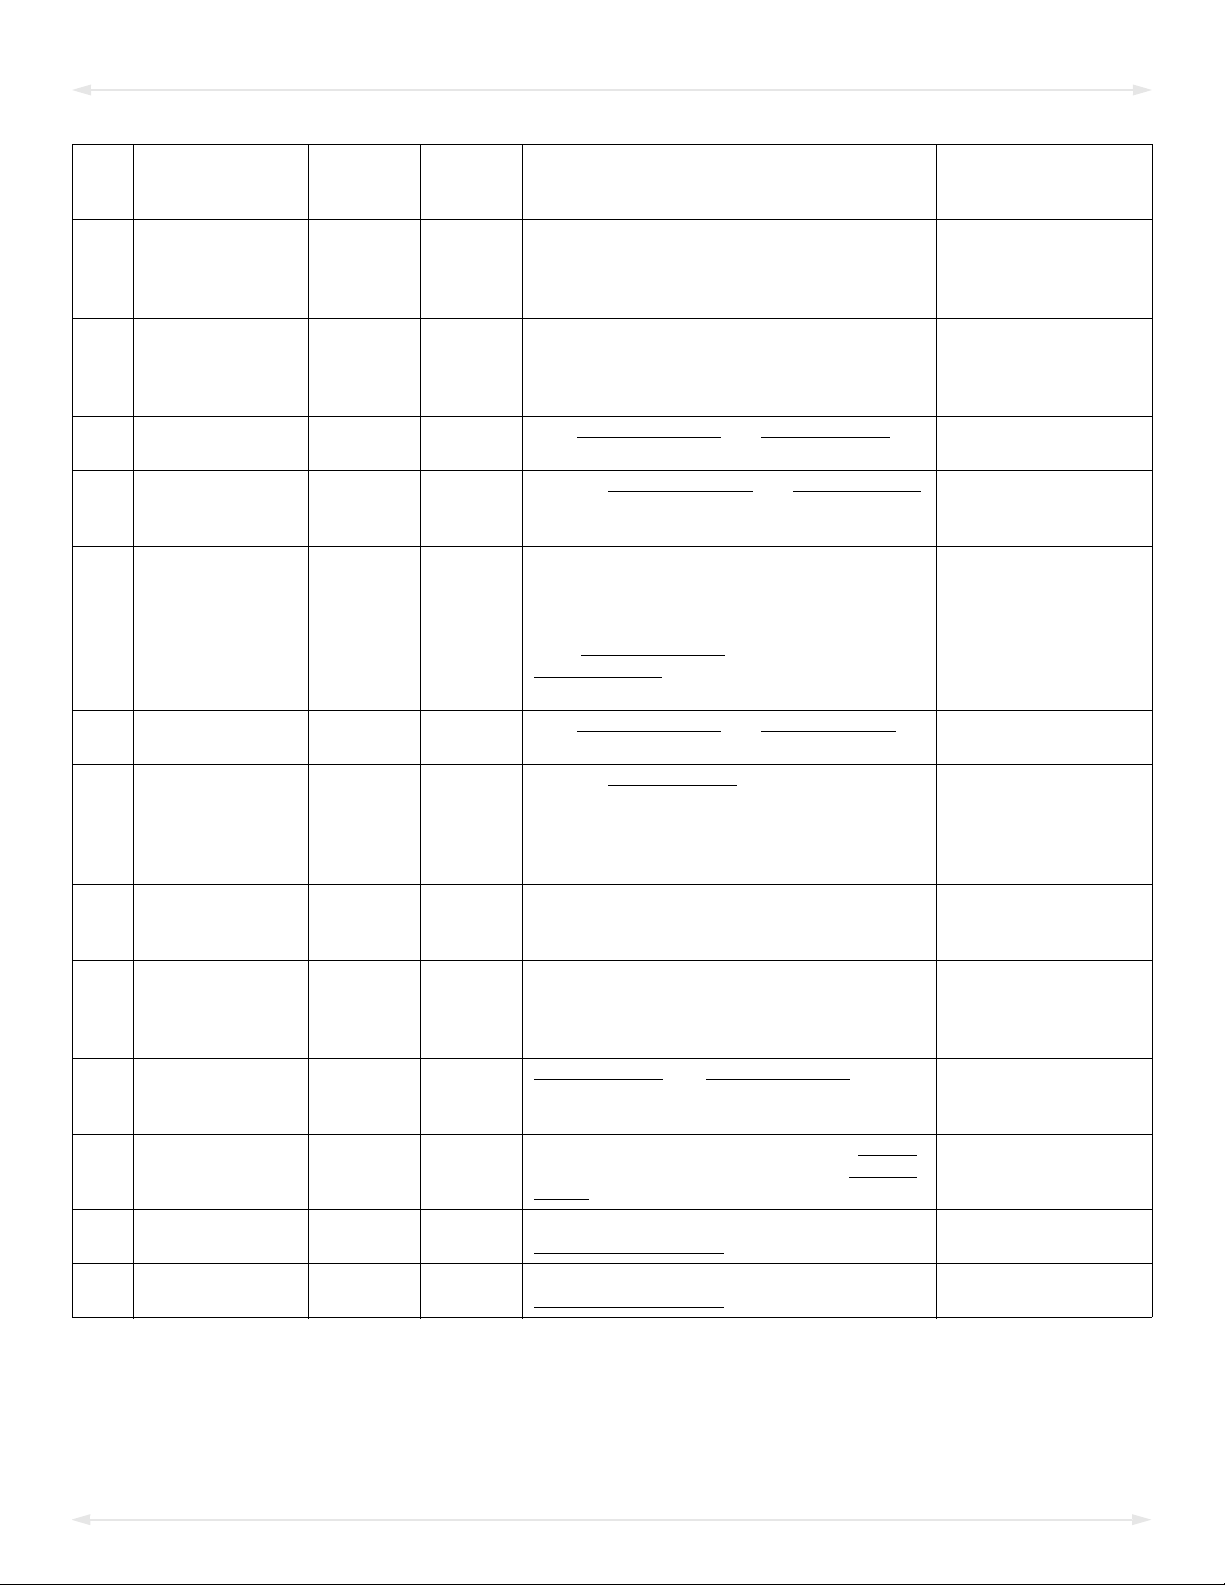
Code On-Screen
Message
Buzzer
Pattern
Strobe
Light
Activity
Operator Explanations/Directions Service Personnel
Directions
INTELLI-GRIP®DIAGNOSTIC CODES