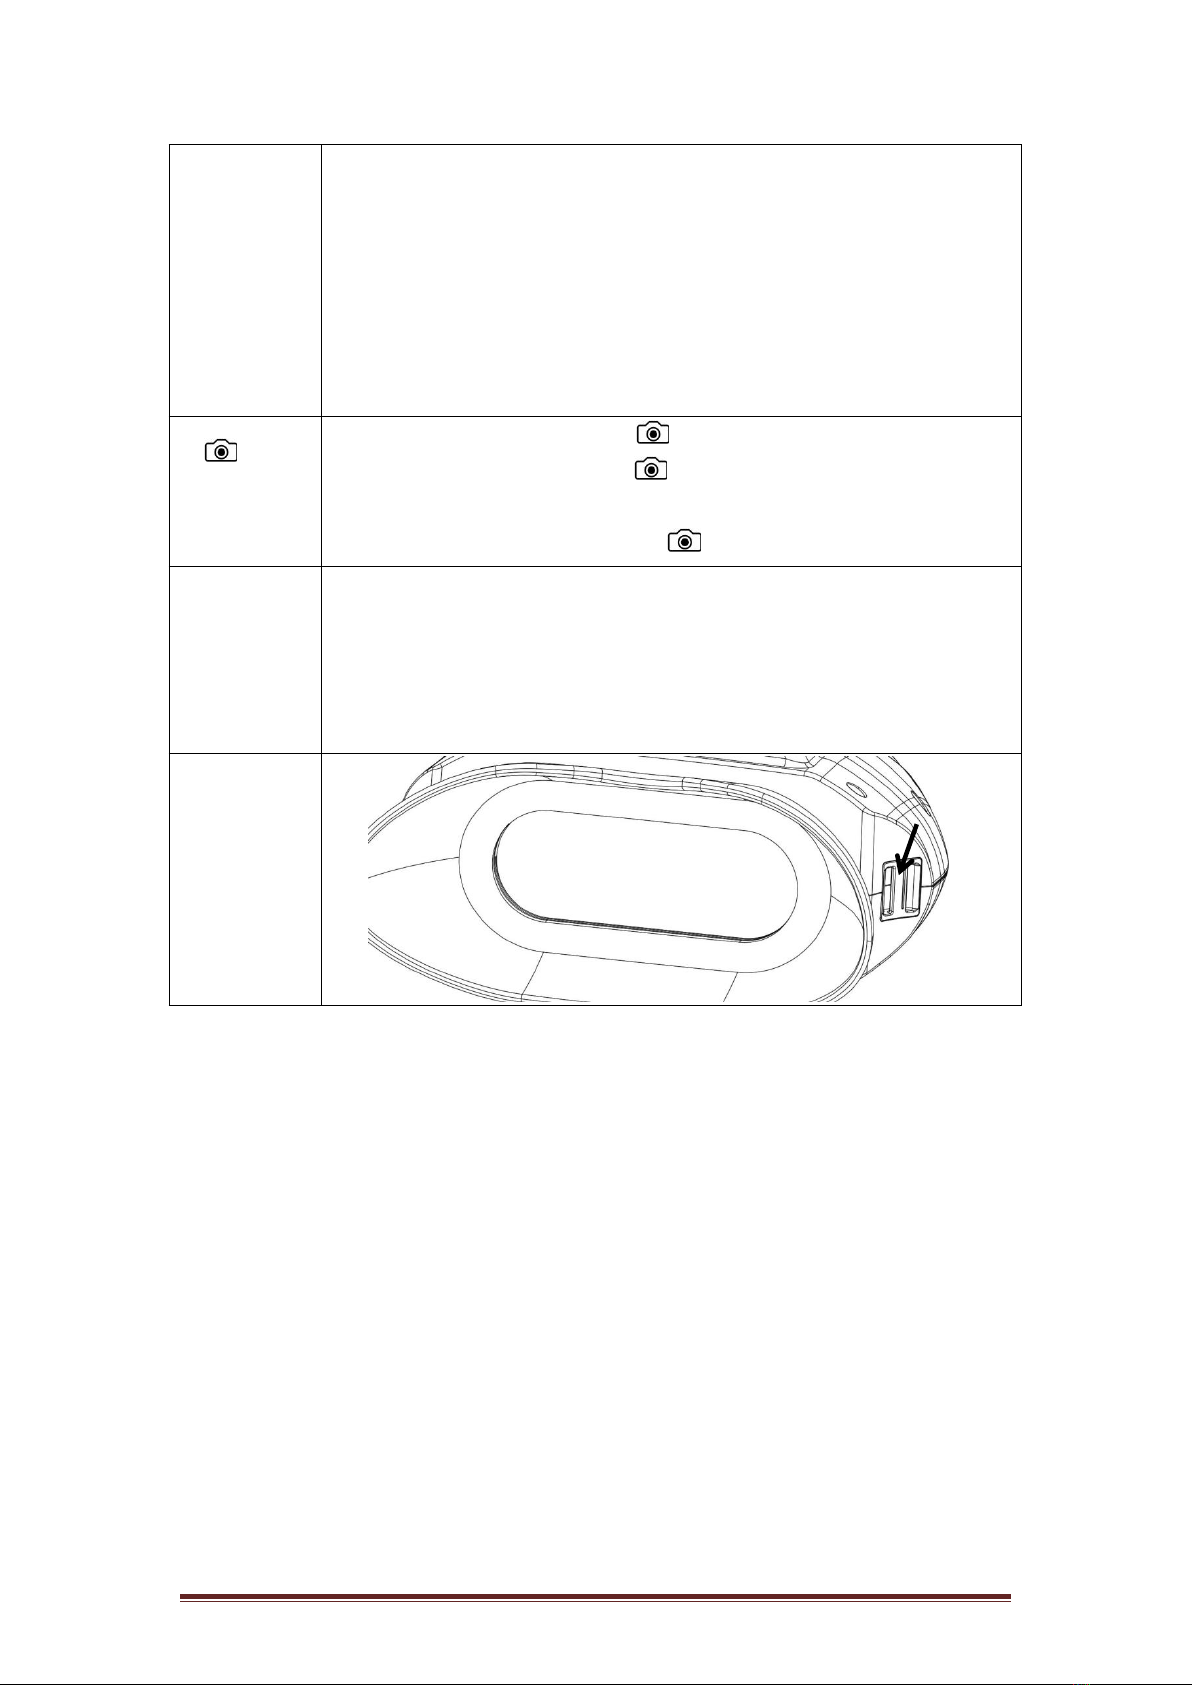
X-Vision XANB50 User manual

HANDS FREE DELUXE NIGHT
VISION BINOCULAR XANB50
USER MANUAL
X-Vision Optics | 5140 Moundview Dr. | Red Wing, MN 55066
Edition, 2020-8-24

Table of Contents
1. Package Contents
2. About the Binocular
3. Quick Start
● Charging the Binocular
● Insert a Micro SD card (for capturing photos and videos)
● Powering the Night Vision Binocular
● Capturing Photos or Videos
● Using the Digital Zoom
● Playback of Captured Photo or Video
4. Display Information
5. Head Piece Assembly
6. Menu Settings
7. Trouble Shooting
8. Appendix: Specification
1
Third Edition, August 2020. Published by X-Vision Optics, Red Wing,
Minnesota © 2020 X-Vision Optics. All rights reserved.
X-Vision Optics | 5140 Moundview Dr. | Red Wing, MN 55066

2020-8-24 Version
2
1. Package Contents
Night Vision Binocular
Neck Strap
Micro USB Cable
Head Piece Accessories

2020-8-24 Version
3
2. About the Binocular
①Power
Long press for power on and off
Short press for 3 levels of screen brightness
②Mode
● There are 4 modes: Photo / Video / Playback /
Menu (in a loop).
● When the power is on, the default mode is Photo.
● Press Mode to change to the next mode.
③Zoom
● Under Photo and Video Mode, Press zoom to zoom in at
multiple levels: 3X, 4.5X and 6X. Once reaching 6X, keep
pressing zoom to go back to 3X.
● Under Playback mode: Press Zoom to playback to the next
file.
● Under Menu mode: Press Zoom to go up.
①
②
③
④
⑤
⑥

2020-8-24 Version
4
④IR
● Under Photo and Video Mode: Press IR for 4 levels of
brightness(IR Off-> IR1->IR2->IR3->IR Off...)
First time power on, IR is set at IR2. Make sure IR is on for
night use.
● Under Playback mode: Press IR to playback to the previous
file.
● Under Menu mode: Press IR to go down.
⑤
● Under Photo mode: Press to take photos.
● Under Video mode: Press to start video recording, and
press one more time to stop recording.
● Under Playback mode: Press to enter selected item.
⑥Micro SD
Card and
USB Slot
● For SD card insert (make sure the power is off)
● USB slot for battery charging.
⑦View area
⑧Strap
Hook
⑦
⑧

2020-8-24 Version
5
⑨Focus
Wheel
HOW TO FOCUS
Turn Focus Wheel ⑨
⑨

2020-8-24 Version
6
3. Quick Start
●Charging the Night Vision Binocular
(1) Open the USB cover.
(2) Plug in the USB cable to charge. It is suggested to use 5V 1A
plug to charge. The charging time is approximately 3 hours using 5V 1A
Note: Do not turn on the power while charging.
●Insert a Micro SD card for photo and video taking (not included)
(1) Insert the card in the direction as below. Push the card into
the slot to lock it.
(2) To remove the card, push it in to release. When the card is
partially ejected, pull it out.

2020-8-24 Version
7
Note:
When using a card with previous files saved, it is recommended
to save the files to your computer first, and format the card
before use. To format the card, press Mode several times to
reach menu, and select “Format SD”.
If the “Memory Full” warning message appears on the LCD
screen, the SD card is full. Please transfer all the files to your
computer and delete the files on the card. Then the card can be
used again.
Turn on the Binocular:
(1) Long press the Power button to turn on the binocular. Once
the power is on, look into the LCD screen inside for preview.
(2) Adjust the focus by turning the focus wheel at the front
bottom. See below arrow for “focus wheel”
(3) For daytime use, make sure the IR is off. For night use, turn
on the IR by pressing the IR button. Increase the brightness
by pressing the button repeatedly. It has 4 levels of
brightness (0ff->1->2->3->0ff…).
(4) Long press the Power button to shut down the binocular.
(5) If the screen brightness needs to be adjusted, short press
the Power button, or you can go to the “Menu Settings” to
adjust.
(6) The binocular will save the setting from last use.
(7) This binocular has an auto shut off feature; after 5 minutes
the binocular will power off to conserve battery power. To
change this setting, you can go to the “Menu Settings” to
turn it off, or change it to 10/15/30mins.

2020-8-24 Version
8
Take a picture
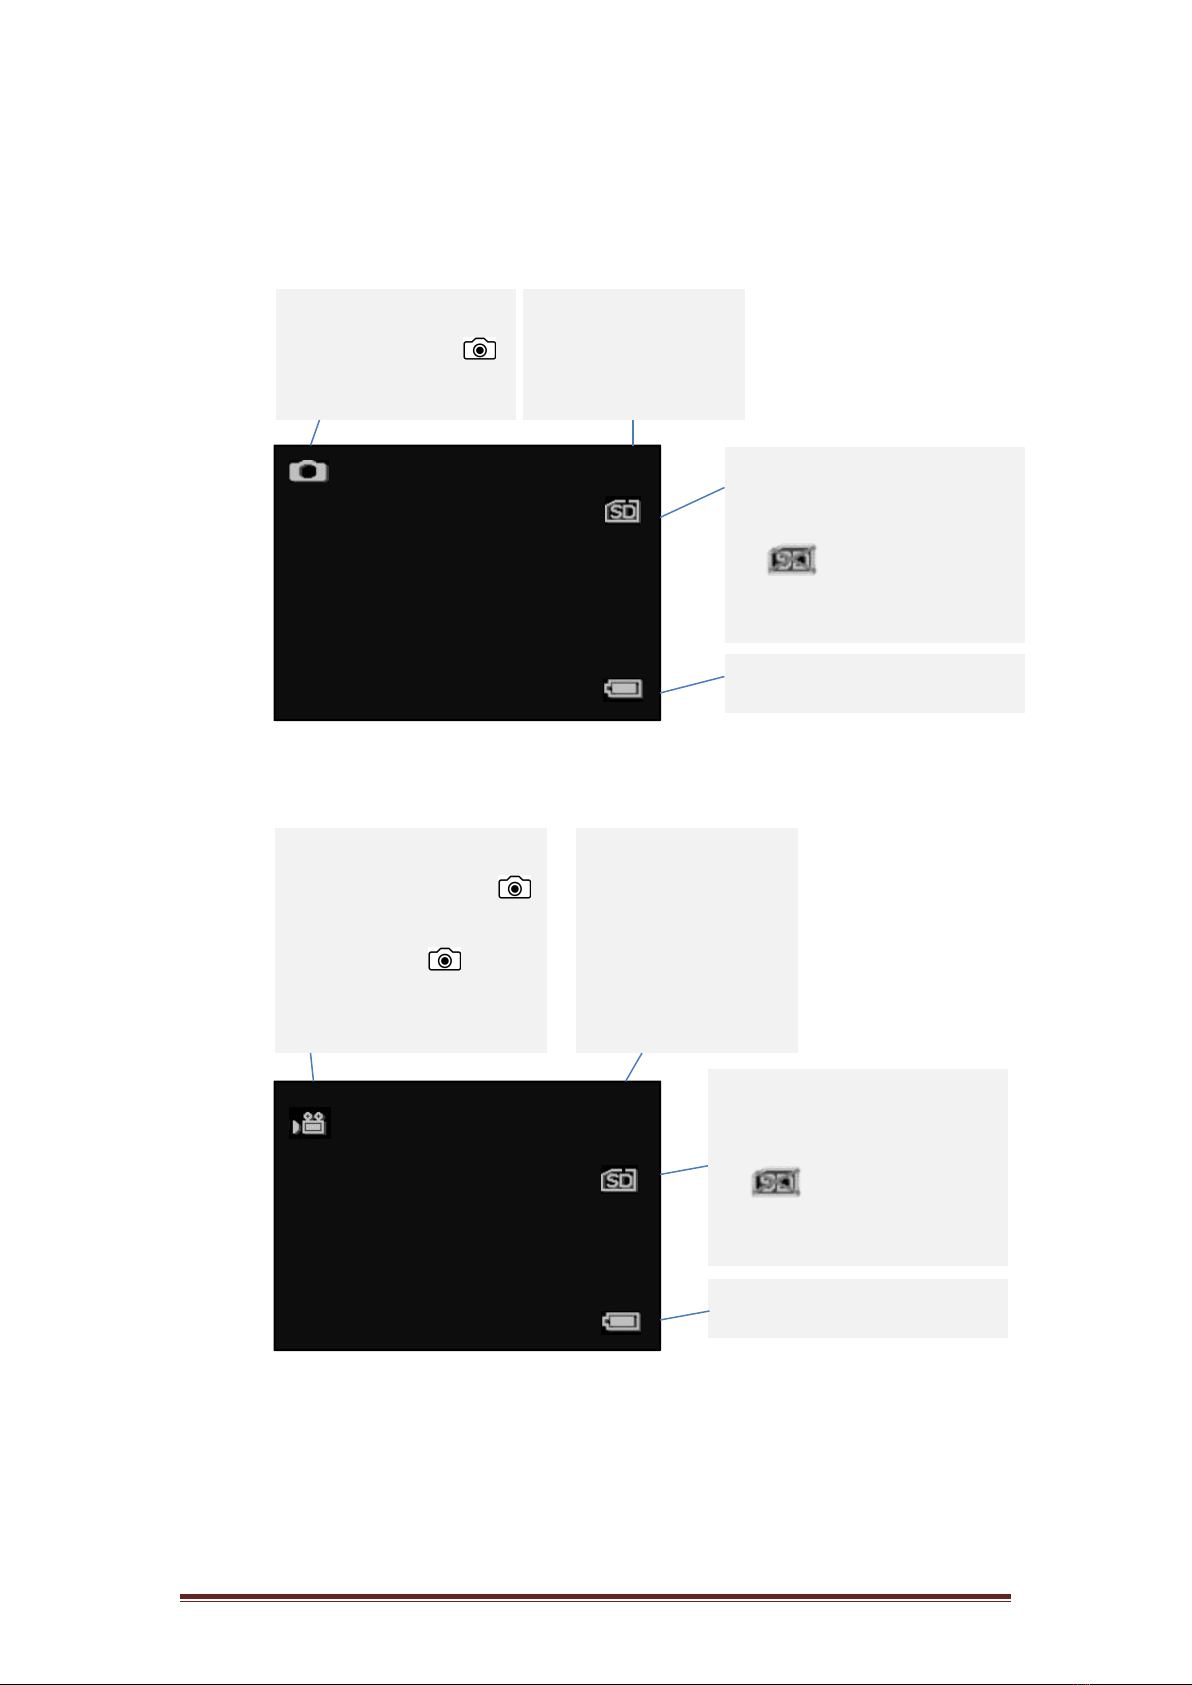
(1) When the power is on, the binocular is automatically under
the picture mode.
(2) Check the left bottom corner of the screen for the icon.
If the icon is not showing, press Mode multiple times
until the icon shows up.
(3) Adjust the focus by turning the focus wheel. (see “Turn on
the Binocular” section for details)
(4) If at night, adjust the brightness by pressing IR. (see “Turn
on the Binocular” section for details)
(5) Press to take pictures.
Take a video
(1) Turn on the Binocular.
(2) Press Mode to enter video-recording mode. Check the left
bottom corner of the screen for the icon. If the
icon is not showing, press Mode until the icon shows up.
(3) Adjust the focus by turning the focus wheel. (see “Turn on
the Binocular” section for details)
(4) If at night, adjust the brightness by pressing IR. (see “Turn
on the Binocular” section for details)
(5) Press to start video recording, and press it again to stop
recording.
Use Digital Zoom
Press Zoom to zoom in at multiple levels: 3X, 4.5X and 6X.
Once reaching 6X, keep pressing Zoom to go back to 3X.
Playback
(1) Press Mode until icon shows on the top left corner of
the screen.
(2) The LCD Screen will show the last file saved. If it was a
photo, the photo will show on the screen, with “JPG”
wording on the left bottom corner. If it was a video, wording
“AVI” will show on the left bottom corner.
(3) Press to play, delete, delete all, or exit.
(4) Press IR to go to the previous file, and press Zoom to go to
the next file.

2020-8-24 Version
9
4. Display Information
Photo Mode
Video Mode
00038
LCD Screen
Number of files
(including photos
and videos) taken
SD Card installed and ready
for photos.
If is showing, power
off and then insert the SD
card.
Battery Status
Photo Mode: Ready to
take picture. Press
to take pictures.
00:45:00
LCD Screen
Video Mode: Ready to take
videos. When pressing
to record, the time starts
running. Press again to
stop recording.
Minutes of videos
taken
Battery Status
SD Card installed and ready
for photos.
If is showing, power
off and then insert the SD
card.

2020-8-24 Version
10
Playback Mode
This means current
file is the 38th among
38 taken (including
photos and videos).
Battery Status
Battery Status
38/38
LCD Screen
This means the file shown
is a video. Press to
view. To go to the previous
file, press IR.
37/38
LCD Screen
This means current
file is the 37th among
38 taken (including
photos and videos).
This means the file shown
is a photo. To go to the
previous file, press IR.
Playback
Mode
Playback
Mode

2020-8-24 Version
11
5. Head Piece Assembly
There are 4pcs accessories of
head pieces.
Slide (A) into the top of the
binocular.
Screw (B) into the slot.
Combine (A) to (D).
Screw (C) into the slot.

2020-8-24 Version
12
6. Menu Settings
Menu mode
This is to set up parameters for the binocular if you wish to change default
settings. Press Mode multiple times until the Menu shows up. Press IR to
go down the menu, or Zoom to go up the menu. Press to enter. Once
the desired setting is selected, press to save it. Press Mode to exit back
to the photo mode.
Menu
Format SD
To delete all the files in SD card
Power Save
To set up auto power off
Date
Time
To set up the date
To set up the time
Flicker
50Hz (Default setting for EU)
60Hz (Default setting for U.S. and Japan)
LCD Backlight
To select the brightness level of the LCD screen
Date/Time Tag
To show date and time on the photos
Version
Version of the Firmware for reference only
Format SD
Yes
To delete all the files in SD card
No
Not to delete all the files in SD card
Power Save
Off
Yes (to cancel the auto power off setting)
10min
Auto power off in 10 mins without actions
15min
Auto power off in 15 mins without actions
30min
Auto power off in 30 mins without actions
Date
YY/ MM/ DD
Press to enter
Press Zoom and IR to go left and right, up and down
Press to saved settings

2020-8-24 Version
13
Time
hr/ min/ sec
Press to enter
Press Zoom and IR to go left and right, up and down
Press to saved settings
Flicker
50Hz
Default setting for EU
60Hz
Default setting for U.S. and Japan
LCD Backlight
Default setting is 1
Indicating backlight levels (1-3). The higher the
setting the brighter the display.
Date/ Time Tag
Off
Default setting is off
On
Version
Version of the Firmware for reference only

2020-8-24 Version
14
7. Trouble Shooting
Poor Image:
If you wear glasses, please keep them on while using the binocular.
During daylight hours, make sure the IR is off. For use during
nighttime hours, make sure the IR is on.
Adjust the focus by slowly turning the Focus Wheel at the front
bottom of the binocular. Make sure it is focused.
Why is “No SD Card” message showing on the screen while the
SD card has been inserted?
Please turn off the power, insert the card, and check again. The micro
SD card needs to be inserted when the power is off.
If the issue persists, please check the micro SD card compatibility. In
some cases, the micro SD card failed to be read because it was broke;
try inserting another Micro SD card

2020-8-24 Version
15
8. Appendix: Specifications
Viewfinder
EVF mode
Aspect ratio
4:3
Lens
Push button day / night transition
Operation
Preview
Visual distance
200yd / 183m at night
400yd / 366m during the day
Object lens Focus
Manually adjust
Magnification
3x to 6x
Visual angle
10° degrees
Luminance
IR LED / total 2W
Power Supply
Rechargeable Battery, 3000mAh
Photo Taking
Yes
Video Taking
Yes
Photo and Video
VGA
Display Resolution
320 x 240
Battery Life
Up to 8 hours for Day Use, 5 hours for Night Use
Power consumption
2.5W with IR LED fully on
Unit Size
14.0
cm
x 16.5cm x 6.6cm (approx.)
5.51” x 6.3” x 2.6” (approx.)
Net Weight
0.74lbs / 0.34kg
Packaging Dimensions
8.0” x 9.0” x 3.2”
20cm x 23cm x 8cm
Color
Black
Accessories
Head Piece (Detachable), Neck Strap, USB Cable
Specifications are subject to changes without prior notice.
Patented in EU, U.S.A., Taiwan and China
US PATENT NO. US 10,466,467 B2
FOR CUSTOMER SERVICE CONTACT US AT:
Email: [email protected]
Phone: 833-993-2383
Table of contents
Other X-Vision Binoculars manuals