7
Plasma cutters work by passing an electric arc through a gas that is passing through a constricted opening. The gas can be air, nitro-
gen, argon, oxygen. etc. The electric arc elevates the temperature of the gas to the point that it enters a 4th state of matter. We all are
familiar with the rst three: i.e., Solid, liquid, and gas. Scientists call this additional state plasma. As the metal being cut is part of the
circuit, the electrical conductivity of the plasma causes the arc to transfer to the work. The restricted opening (nozzle) the gas passes
through causes it to squeeze by at a high speed, like air passing through a venturi in a carburettor. This high speed gas cuts through
the molten metal.
Plasma cutting was invented as the result of trying to develop a better welding process. Many improvements then led to making this
technology what it is today. Plasma cutters provide the best combination of accuracy, speed, and aord ability for producing a variety of
at metal shapes. They can cut much ner, and faster than oxy-acetylene torches.
How a plasma cutter works:
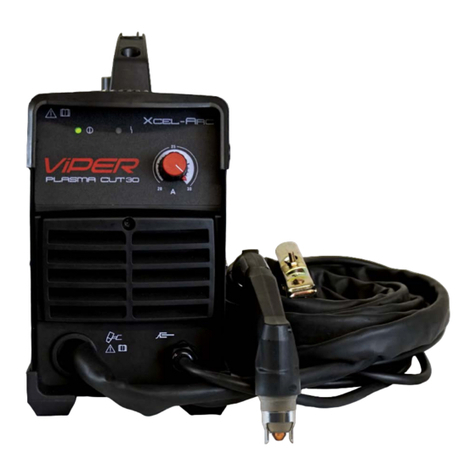
Basic plasma cutters use electricity to superheat air into plasma (the 4th state of matter), which is then blown through the metal to be
cut. Plasma cutters require a compressed air supply and AC power to operate.
Operation:
1. When the trigger is squeezed, DC current ows through the torch lead into the nozzle.
2. Next, compressed air ows through the torch head, through the air diuser that spirals the air ow around the
electrode and through the hole of the cutting nozzle.
3. A xed gap is established between the electrode and the nozzle. (The power supply increases voltage in order to
maintain a constant current through the joint.) Electrons arc across the gap, ionizing and super heating the air
creating a plasma stream.
4. Finally, the regulated DC current is switched so that it no longer ows to the nozzle but instead ows from the
electrode to the work piece. Current and airow continue until cutting is stopped.
Notes:
The nozzle and electrode require periodic replacement. The electrode has an insert of tough high conductive material such as hafnium
and cerium. This insert erodes with use, also the nozzle orice will erode with use. Quality of the air used is paramount to longer life of
electrodes and nozzles, in short clean dry air gives longer parts life, the cleaner and dryer the better. We recommend use of a Plasma
Air Filter.
What kinds of materials can the plasma cut?
Virtually any metal can be plasma cut including steel, stainless steel, aluminium, brass, copper, etc. Any thickness from 30 gauge
through 30mm can be cut, depending on the power of the plasma cutter used.
How Does Plasma Cutting Compare to Oxy-fuel (gas) cutting?
Plasma cutting can be performed on any type of conductive metal - mild steel, aluminium and stainless are some
examples. With mild steel, operators will experience faster, thicker cuts than with alloys. Oxy-fuel cuts by burning, or
oxidizing the metal it is severing. It is therefore limited to steel and other ferrous metals which support the oxidizing
process. Metals like aluminium and stainless steel form an oxide that inhibits further oxidization, making conventional
oxy-fuel cutting impossible. Plasma cutting however does not rely on oxidation to work and thus it can cut aluminium, stainless and
any other conductive material. While dierent gasses can be used for plasma cutting, most people today use compressed air for the
plasma gas. In most shops, compressed air is readily available, and thus plasma does not require fuel gas and compressed oxygen for
operation. Plasma cutting is typically easier for the novice to master, and on thinner materials, plasma cutting is much faster than oxy-
fuel cutting. However, for heavy sections of steel (25mm and greater), oxy-fuel is still preferred since oxy-fuel is typically faster and, for
heavier plate applications high powered plasma machines are required for plasma cutting applications.
What are the limitations to Plasma Cutting? Where is Oxyfuel preferred?
The plasma cutting machines are typically more expensive than oxy/acetylene. Also, oxy/acetylene does not require
access to electrical power or compressed air which may make it a more convenient method for some users. Oxyfuel can generally cut
thicker sections (>25mm) of steel more quickly than plasma.
Electrode
Air Diffuser
Nozzle
Plasma Stream
Electrode Insert
Shield Cup
AIR PLASMA CUTTING TECHNOLOGY

