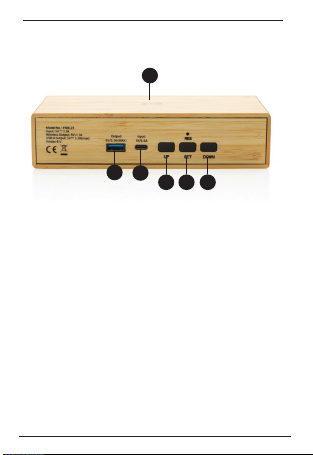
CLOCK SETUP:
Connect the included cable to the alarm clock and then connect it to a wall
adapter.
The clock display will turn on when the clock is connected to power.
1. Default time display 12-Hour, press and hold the [ DOWN ] button to toggle
between the 12-hour and the 24-hour clock.
2. In time mode, short press [ UP ] button to switch display mode, dP-1, dP-2,
dP-3 .
3. In time mode, press [ UP ] button 2 seconds enter power saving setting
mode, display”--Sd” means power saving mode in o status ; short press [
DOWN ] button ,display”“onSd” means power saving mode on. In power saving
mode, the LED display will turn o after 10 seconds, press any button or tap on
top of the alarm clock to turn on the LED display. Short press [ DOWN ] button
again to turn o the power saving mode, press [ SET ] or [ UP ] will return to
its default display mode.
4. In time mode, short press [DOWN] button to adjust LED display brightness,
low brightness,medium brightness,high brightness.
SETTING THE TIME
1. Press the [ SET ]button until the time is displayed.
2. Press+hold the [ SET ]button to set the time. The time hours will begin
flashing. Press the [ UP ] and [ DOWN ] buttons to adjust. The dot in the upper
left corner of the display will appear when the hour is in PM.
3. Press [ SET ]to save the hour setting. The minute digits will begin flashing.
Press the [ UP ] and [ DOWN ] buttons to adjust,and press [ SET ] to save.The
clock will return to its default display mode.
ALARM TIME FUNCTION
1. In time mode, short press [ SET ]button enter alarm mode, display “-- --”
means alarm in o status.
2. Press [ UP ] or [ DOWN] to turn on the alarm function, 12-Hours default,the
dot in the lower left corner will display when the alarm is turned on.