Xiaomi RMMNT30HFCW User manual

Curved Gaming Monitor 30'' User Manual . 1
Руководство пользователя Изогнутого игрового монитора
Xiaomi Curved Gaming Monitor 30" . 14
Manual de usuario de Xiaomi Curved Gaming Monitor 30" . 27
Вигнутий ігровий монітор Xiaomi Curved Gaming Monitor 30"
Посібник користувача . 40
Manuale utente Xiaomi Curved Gaming Monitor 30" . 53
Manuel d'utilisation de Xiaomi Curved Gaming Monitor 30" . 66
Xiaomi gebogener Gaming-Monitor 30 Zolln Benutzerhandbuch . 79
Xiaomi Kavisli Oyun Monitörü 30" Kullanım Kılavuzu . 92
Zakrzywiony monitor do gier Xiaomi 30'' Instrukcja obsługi .105
Xiaomi Curved Gaming Monitor 30" Gebruikershandleiding .118
Panduan Pengguna Xiaomi Curved Gaming Monitor 30" . 131

Contents
Product Overview
Monitor Overview
Package Contents
How to Install
Installing the Base
Cable Management
Wall Mount Installation
Instructions
Connections
Indicator Status
Menu Description
Precautions
Troubleshooting
Specifications
2
2
2
3
3
4
5
6
6
7
7
7
8
10
11
12
13
Regulatory Compliance Information

Power Adapter DP Cable
Monitor
Stand
Base
Studs × 4
8BSSBOUZ/PUJDF
Power Button & Indicator
Function Button
DisplayPort (DP) cable
User Manual

Quick Release
Caution: To reduce the risk of the monitor from
accidentally falling down, please make sure the
stand is firmly installed in place.
4. Install the stand onto the mounting point until
it clicks into place. Try to shake the stand to
make sure it is securely installed.
Note: Press the quick release button to remove
the stand.
Do not remove the
monitor from the
protective foam during assembly.
1. Unpack the box, then remove the monitor
with its protective foam together from the box
and place them on a flat stable surface.
2. Install the stand onto the base and fasten it
with the thumb screw from the bottom of the
base.
How to Install

Remove the cable-management cover, then pass the power cord and the cable through the opening in the
stand to connect them to the monitor. Install the cable-management cover back onto the monitor.
Cable Management
5. Use both hands to carefully take out the fully assembled monitor and place it on a flat stable surface.
CAUTION: To avoid damaging the screen, be careful not to press on the LCD screen when standing
it up.
Do not press the screen.
Cable-management Cover

3. Refer to the instructions of the wall mount to mount the monitor. Do not press on the screen during the
mounting process so as to avoid damaging the screen.
Wall Mount Installation
1. Press the quick release button to remove the stand.
CAUTION: To reduce the risk of falling down, please properly install the wall mount and take safety
protection on the monitor to avoid any injury or damage. Do not place anything on top of the wall
mount or hang anything from it. The recommended height of the wall mount shall not exceed two
meters.
Wall
Wall
Wall Mount
(sold separately)
Monitor Arm Wall Mount
(sold separately)
2. Insert the four studs into the back of the monitor in the positions indicated, then refer to the
instructions of the wall mount (sold separately) to install it to the studs.
Note: The compatible wall mount must have the VESA pattern mounting holes of 75 × 75 mm apart from
each other vertically and horizontally.
Quick Release Button

%1$BCMF
)%.*$BCMF
DC IN HDMI 1 HDMI 2 DP
(HDMI 1.4) (HDMI 2.1) (DP1.2)
Connecting the DP cable. The DP cable is only used for transferring data or signals via the DP port.
a. Make sure the monitor and the computer are both turned off.
b. Connect one end of the DP cable to the computer's DP port, and the other end to the monitor's DP port.
Note: The maximum resolution of the DP port (DP 1.2) is 2560 × 1080, and the maximum refresh rate is 200 Hz.
Connecting the HDMI cable. The HDMI cable is only used for transferring data or signals via the HDMI port.
It is sold separately.
a. Make sure the monitor and the computer are both turned off.
b. Connect one end of the HDMI cable to the computer's HDMI port, and the other end to the monitor's
HDMI port.
Note: Due to the detailed classification of the HDMI certification standard, HDMI 2.1 is divided into TMDS
protocol (its bandwidth is equivalent to HDMI 2.0's) and FRL protocol. The monitor's HDMI 2.1 port
supports the TMDS protocol. The maximum resolution of the HDMI 2.1 port is 2560 x 1080, and the
maximum refresh rate is 180 Hz. The maximum resolution of the HDMI 1.4 port is 2560 × 1080, and
the maximum refresh rate is 75 Hz. The FreeSync Premium function cannot be enabled when this
port is used.
Plug both the power cords of the computer and the monitor into a power outlet.
Earphone
DC Power Cord
Connect a headset or any 3.5 mm compatible external audio device to the monitor's audio output port.
Note: The audio port is only for transmitting the audio data
Note: If the power adapter cord or DP cable is damaged, it must be replaced with a genuine
one purchased from the manufacturer or after-sales service department

Press Turn On/Off
On
In sleep mode
On
Dimmed Off
Breath
Indicator Status
1
2
Down/Right
Exit/Go back
//
3
4
Operation
Result
When menu is not
displayed on the monitor
When shortcut menu is
displayed on the monitor
When main menu is
displayed on the monitor
Press
Press
Press
Press
Open shorcut menu
Open shorcut menu
Open shorcut menu
Open shorcut menu
Open main menu OK
Press and hold
for 5 seconds Disable menu
Shortcut key 1
Shortcut key 2
Close shorcut menu
Note: Once the menu is disabled, the monitor is no longer responds to user actions. A message will pop up
to inform you that the on-screen display (OSD) has been locked up. Press and hold any button for 5
seconds to enable the menu and unlock the OSD.

Menu Description
Shortcut Key Description
Main menu Shortcut
key 1
Shortcut
key 2
Exit
Main Menu Icon and Description
4UBOEBSENPEF
Bri/Con
Display
PQ
Game realated
Smart modes
Brightness
Contrast
DCR
Black level
0–100 60
75
Display
Color
temperature
Standard/Warm/Cool/
Custom
Hue
Saturation
Gamma
Adjust the monitor's sharpness
Aspect ratio
PQ Response time
Sharpness
0–100
Off
500–100
0–100
0–100 50
50
1.8/2.0/2.2/2.4/2.6 2.2
Full/1:1/Auto
Ultrafast/Superfast/
Fast/Normal Normal
0–100 50
Adjust the monitor's response time
Game
realated
FreeSync Premium On/Off Off
On/Off Off
Enable or disable FreeSync
Premium function
To reduce high brush picture ghosting
Displays the aiming sight
Refresh rate
IMBC
Aiming sight
On/Off Off
Off/Style 1–Style 6 Off
Displays the current refresh rate
Standard
Full
Main menu Submenu Description Option Default
Bri/Con
Brightness
Contrast
DCR
Black level
Adjust the monitor's brightness
Adjust the monitor's contrast
Adjust the monitor's dynamic
contrast
Adjust the monitor's black level
On/Off
Adjust the monitor's color
temperature
Adjust the monitor's hue
Adjust the monitor's saturation
Adjust the monitor's gamma
Adjust the monitor's aspect ratio
When the menu is not displayed, press any function
button to enter the shortcut menu.
Press the corresponding function button below each item of
the shortcut menu to enter the corresponding option.
You can set the shortcut function via Main menu > Seings >
Shortcut key > Shortcut key 1 / Shortcut key 2. By default,
the shortcut Key 1 is Input source settings and the shortcut
Key 2 is Smart mode settings.

(FPS/RPG/RTS/MOBA/SPT)
/
/
/
/
Bottom
left
Medium
/
Volume
Information
Reset
English
//
///
Adjust the monitor's volume
Model number
Current resolution
Input source
HDMI Logo
Low blue light content
0–100 50
10 s5 s/10 s/15 s/20 sOn-screen display (OSD) time
Main Menu Submenu Description Option Default
Smart
modes
Standard
ECO
Game
Movie
Low blue light
Set to standard mode
Set to eco mode
Set to game mode
Set to movie mode
Set to low blue light mode
Only one mode can be
selected at a time Standard
Language
PBP
Single window Only display the main window Input source
Win 1 input
Win 2 input
Win 1 input
Win 2 input
Win 2 size
Win 2 position
PIP
Select the menu language
Picture-by-Picture. Display two
video inputs side by side
Picture-in-Picture. Display the
main window and a subwindow
Shortcut
key
Shortcut
key 1
Shortcut
key 2
Set function for shortcut key 1
Set function for shortcut key 2
Input
Smart
modes
FreeSync Premium/Brightness/
Contrast/Color temperature/
Smart modes/Input/Volume
FreeSync Premium/Brightness/
Contrast/Color temperature/
Smart modes/Input/Volume
Setting
Window
setting
English/Español/РУССКИЙ/Francais/Italiano/
Deutsch/Polski/ /Français canadien/
Español de Latinoamérica/繁體中文 (香港)/
繁體中文 (台灣)/日本語/한국어
ﻲﺑﺮﻋ

&ZF)FBMUI
To avoid eyestrain, or neck, arm, elbow, and shoulder pain caused by using the computer for a long time,
please follow the suggestions listed below:
Keep the monitor at a distance of 20–28 inches (approx. 50–70 cm) from your eyes.
Take your eyes off the monitor and look at something a certain distance away for at least 20 seconds.
Stretch your body to help relieve tension on the neck, arms, back, and shoulders.
Blink more often to relieve eye fatigue when staring at the monitor
Give your eyes a 20-minute break after using the monitor for two hours
Low Blue Light Description
In recent years, eye damage caused by blue light has attracted more and more attention. In general, the
wavelength of blue light is 400–480 nm, and the wavelength of harmful blue light is 415–455 nm. This
monitor has a function to help reduce your exposure to the blue light emission. You can enable the low
blue light mode via the settings menu.
Precautions
If you do not plan to use the monitor for a long period of time, unplug it from the electrical outlet so as to
prevent possible damage from power surges or lightning strikes.
Do not overload electrical outlets, as this may cause a fire or an electric shock.
Do not use this monitor in damp or humid environments such as bathrooms, kitchens, basements, or
near swimming pools.
Make sure the monitor is placed on a stable surface. If the monitor falls down or is knocked over, it
may cause personal injury or damage to the monitor.
Store and use the monitor in a cool, dry, and ventilated place. Keep the monitor away from radiation
and heat sources.
Do not cover or block the heat dissipation vents on the back of the monitor. Do not place the monitor
on a bed, sofa, blanket, etc.
The monitor's operating voltage range is indicated on a label on the back of the monitor. If you are unsure
what voltage your power supply is, please contact the monitor's distributor or local power company.
Do not excessively pull, twist, or bend the power cord.
Do not attempt to disassemble or repair the monitor by yourself to avoid the risk of an electric shock.
If the monitor is not functioning properly, please contact the after-sales service department for help

The indicator is blinking,
no image on the screen
Unable to open the menu,
and the monitor displays
the OSD is locked up
The menu is
disabled
Make sure the DP cable is plugged in properly.
Make sure the power adapter is plugged in properly.
The monitor displays that
the current resolution is
not supported
the menu and unlock the OSD.
External AC Adapter Specifications
Model Identifier AD~0481200400EU-1
Input Voltage 100~240 V AC
Input AC Frequency 50/60 Hz
Output Voltage 12 V DC
Output Current 0–4.0A
Output Power 48 W
Average Active Efficiency ≥ 87.76%
Efficiency at Low Load (10%) ≥ 77.76%
No-load Power Consumption ≤ 0.1 W
Manufacturer Shenzhen AMC Technology Co., Ltd.

30”
749.3 mm
0.2697 × 0.2697 mm
300 cd/m
2
(TYP)
3000:1 (TYP)
16.7 Million
21:9
200 Hz
4ms (GTG)
2560 × 1080
2560 × 1080
706.7 (L) × 201.9 (W) × 438.5 (H) mm
48 W Max.
4.88 kg
75 ×75mm
20%–80% RH
86–106 kPa
12 V 4.0 A
RMMNT30HFCW
Power Input
Screen Displays
0°C to 40°C
VESA Pattern
Tilt -5° to +21°
1000000:1
The power of the power adapter is not included.
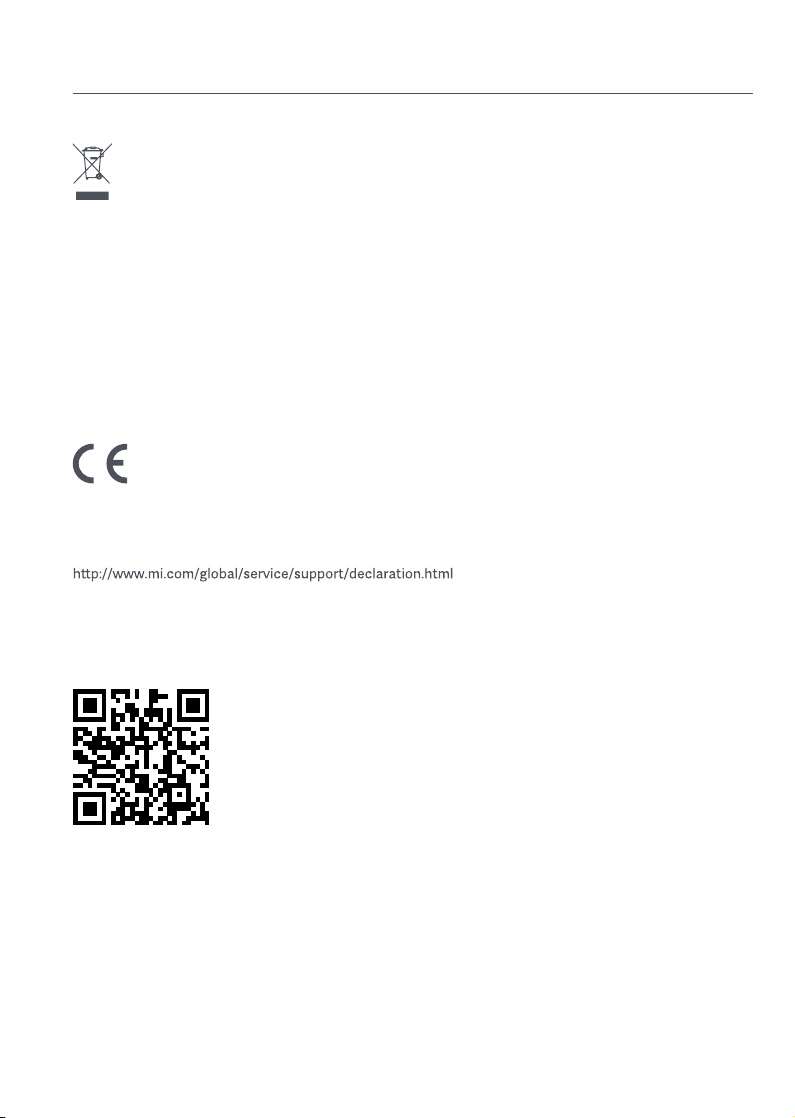
All products bearing this symbol are waste electrical and electronic equipment (WEEE as in directive
2012/19/EU) which should not be mixed with unsorted household waste. Instead, you should protect
human health and the environment by handing over your waste equipment to a designated collection
point for the recycling of waste electrical and electronic equipment, appointed by the government or
local authorities. Correct disposal and recycling will help prevent potential negative consequences to
the environment and human health. Please contact the installer or local authorities for more information
about the location as well as terms and conditions of such collection points.
Regulatory Compliance Information
WEEE Disposal and Recycling Information
We, Xiaomi Communications Co., Ltd., hereby, declare that this equipment is in compliance with the
applicable Directives and European Norms, and amendments. The full text of the EU declaration of
conformity is available at the following internet address:
For Product Information Sheet, please scan the QR code below.
EU Declaration of Conformity

Содержание
Описание изделия
Описание монитора
Комплект поставки
Установка
Установка подставки электропитания
Подключение кабелей
Установка настенного крепления
Инструкции
Подключения
Описание кнопок
Кнопка питания
Состояние индикатора
Описание меню
Меры предосторожности
Устранение неполадок
Технические характеристики
15
15
15
16
16
17
18
19
19
20
20
20
21
23
24
25
26
Информация о соответствии требованиям

Описание изделия
Адаптер питания
Монитор
Стойка
Подставка
электропитания
Болты × 4 шт.
Кнопка питания и индикатор
питания
Функциональная кнопка
Руководство
пользователя
Перед использованием внимательно
прочтите это руководство. Сохраните его —
оно может понадобиться вам в дальнейшем.
Описание монитора
Комплект поставки
Монитор Подставка
электропитания
Стойка
Гарантийное
уведомление
Кабель DisplayPort (DP)

Установка
Установка подставки электропитания
Кнопка быстрого
демонтажа
Не нажимать.
Не вынимайте
монитор из защитного
пеноматериала во время
сборки.
1. Распакуйте коробку, затем извлеките
монитор вместе с защитным
пеноматериалом из коробки и поместите их
на ровную устойчивую поверхность.
2. Установите стойку на подставку
электропитания и закрепите с нижней
стороны с помощью прижимного винта.
3. Снимите верхний слой пенопласта и пакет,
чтобы получить доступ к точке крепления с
обратной стороны монитора.
4. Установите стойку на точку крепления и
вставляйте до тех пор, пока она не защелкнется
в нужной позиции. Потрусите стойку, чтобы
убедиться, что она надежно закреплена.
Примечание:Нажмите кнопку быстрого
отсоединения, чтобы снять подставку.
Внимание: Чтобы снизить риск случайного
падения монитора, убедитесь, что стойка
установлена надежно в нужном положении.

Подключение кабелей
Крышка кабельного отсека
5. Обеими руками аккуратно извлеките полностью собранный монитор и установите его на ровной
устойчивой поверхности.
ВНИМАНИЕ: Во избежание повреждений, будьте осторожны, чтобы не нажать на ЖК-экран во
время установки монитора.
Не нажимайте на экран.
Откройте крышку кабельного отсека, затем пропустите шнур питания и кабель через отверстие в
стойке, чтобы подключить их к монитору. Закройте крышку кабельного отсека в мониторе.

Установка настенного крепления
1. Нажмите кнопку быстрого отсоединения, чтобы снять подставку.
Стена
Стена
Настенное крепление
(продается отдельно)
Кронштейн для настенного
крепления монитора
(продается отдельно)
Кнопка быстрого демонтажа
2. Вставьте четыре болта в заднюю часть монитора в указанных местах, затем следуйте инструкциям
настенного крепления (продается отдельно), чтобы установить его на болты.
Примечание: Совместимое настенное крепление, согласно стандарту VESA 75 × 75, должно иметь
монтажные отверстия, отдаленные друг от друга по вертикали и горизонтали на 75 мм.
3. Следуйте инструкциям по настенному креплению, чтобы прикрепить монитор. Во избежание
повреждений, не нажимайте на ЖК-экран во время крепления монитора к стене.
ВНИМАНИЕ: Чтобы снизить риск падения, установите настенное крепление должным образом и
защитите монитор во избежание травм или повреждений. Ничего не кладите и не вешайте на
настенное крепление. Рекомендуемая высота настенного крепления не должна превышать двух
метров.

Кабель DP
Кабель HDMI
Вход для подключения
внешнего блока питания HDMI 1 HDMI 2 DP
(HDMI 1.4) (HDMI 2.1) (DP 1.2)
А. Выключите монитор и компьютер.
А. Выключите монитор и компьютер.
Наушник
Шнур питания
постоянного тока
Инструкции
Подключения
○Подключение кабеля DP. Кабель DP используется только для передачи данных или сигналов через порт DP.
Б. Подключите один конец кабеля DP к выходному порту DP компьютера, а другой конец — к порту DP
монитора.
Примечание: Максимальное разрешение порта DP (DP 1.2) — 2560 × 1080, а максимальная частота
обновления — 200 Гц.
Примечание: Аудиопорт предназначен только для передачи звуковых данных.
Б. Подключите один конец кабеля HDMI к выходному порту HDMI компьютера, а другой конец — к порту
HDMI монитора.
Примечание: Из-за подробной классификации стандарта сертификации HDMI, HDMI 2.1 делится на
протокол TMDS (его пропускная способность эквивалентна HDMI 2.0) и протокол FRL. Порт
HDMI 2.1 монитора поддерживает протокол TMDS. Максимальное разрешение порта HDMI
2.1 составляет 2560 × 1080, а максимальная частота обновления — 180 Гц. Максимальное
разрешение порта HDMI 1.4 составляет 2560 × 1080, а максимальная частота обновления —
75 Гц. Функция FreeSync Premium не может быть включена при использовании этого порта.
○Подключение кабеля HDMI. Кабель HDMI используется только для передачи данных или сигналов через
порт HDMI. Продается отдельно.
○Подключите гарнитуру или любое внешнее аудиоустройство, совместимое с разъемом 3,5 мм, к
выходному аудиопорту монитора.
○Подключите шнуры питания компьютера и монитора к розетке.
Примечание: Если шнур адаптера питания или кабель DP поврежден, его необходимо заменить только
оригинальным изделием, приобретенным у производителя или в сервисе послепродажного
обслуживания.
This manual suits for next models
1
Table of contents
Languages:
Other Xiaomi Monitor manuals


