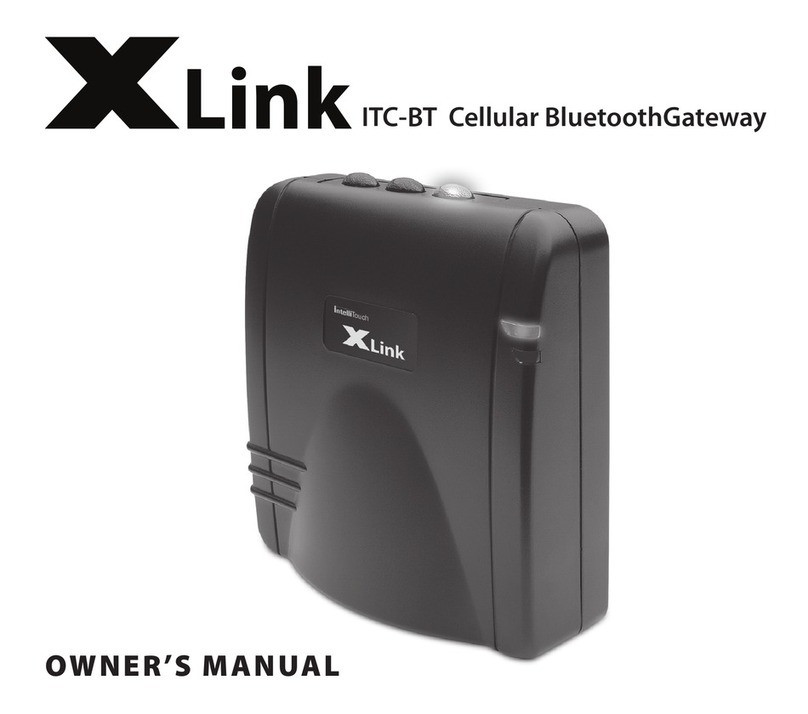
Xlink ITC-BTTN User manual

In
ITC-BTTN
Bluetooth Cellular Gateway
QUICKSTART
GUIDE

E:--
Connect
support
stand
to
XLink
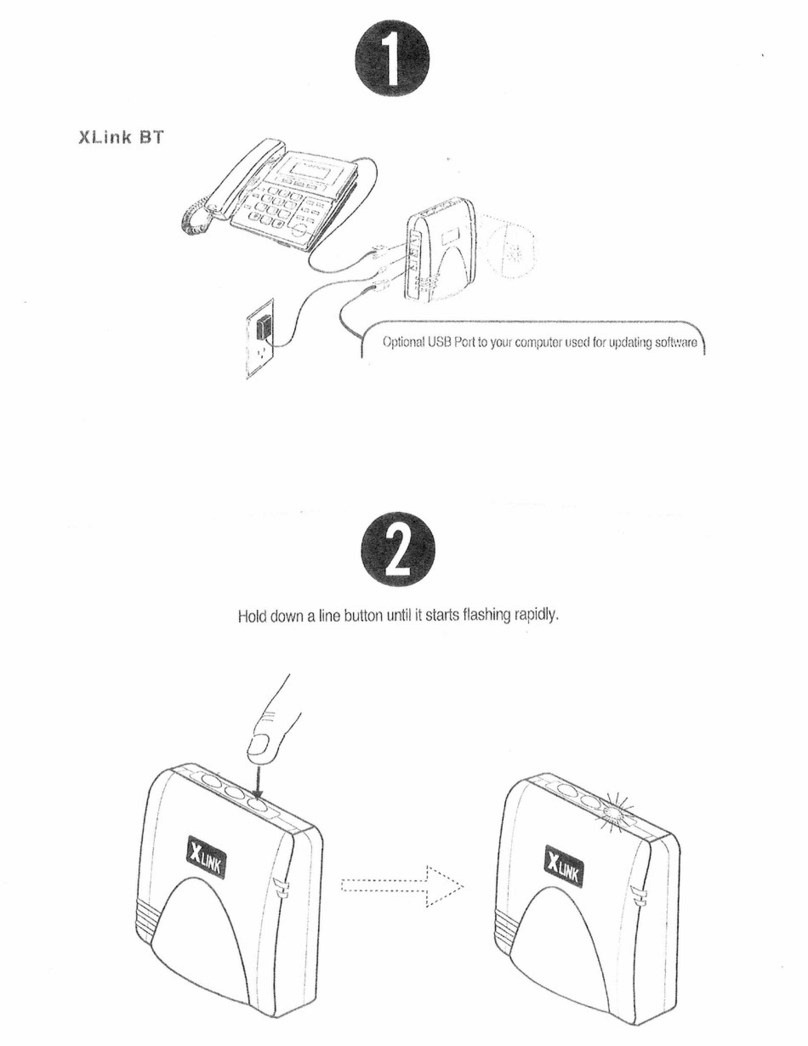
Plug telephone cord from main home
telephone
into
XLink
Plug telephone service line from wall
outlet
into
XLink
Plug power adapter from wall
outlet
into
XLink
TELEPHONE
SERVICE
LINE·
•
POWER
SUPPLY
•
HANDS-FREE
HANDS-FREE
HANDS-FREE
•••
I I I
I I I
I I I
.------------------------
,
TELEPHONE

STEP
2Ready for Pairing i
STEP
3Pair Cellular Phone
to
XLink
YOU
CONNECTEDI
Press
OK
~
Enter password "1234"
into
your cellular
phone.
Blue
light
stops blinking and remains
on
when cellular and selected XLink line are
---li':::~::~~=:--~~~
paired successfully
Typical Pairing
-Select"Hands
Free"
-Select"Look
For
Devices"
-Select"XLink Gateway"
-Select
"Yes"
and pair
with
XLink
-Enter password "1234"
-
Press
"OK"
~
Enable your
Bluetooth
function
on
your
cellular
phone
(refer
to
your cellular
phone's manual
if
necessary) steps
may
differ
per
model
Select line [oj, [00], or
[oooJ
on XLink
Press
and
hold
down
button
for
selected
line
until
blue
button
light
blinks
quickly

OUTLETS
'.
. .
.,:.I!
LINE
#1
L1NE#2
1
LINE
#3
...,
1
POWER
+0
INDICATOR
~~,.....-~
TELEPHONE
CORD
---
CONNECTION
(to
main home phone)
TELEPHONE
SERVICE
LINE
CONNECTION
(to wall outlet)
POWER
ADAPTER
---I
CONNECTION
USB
CONNECTION
-Bluetooth enabled cellular phone required
-XLink can be placed
upright
with stand or lay flat
-Pair up
to
3cellular phones
to
your XLink
Each
line
[oJ.
[ooJ,
or
[000] pairs to one cellular phone
-Once paired, your cellular phone and your XLink will
automatically connect
via
Bluetooth when in range
-
To
disconnect your cellular phone from XLink simply
press the appropriate blue line
button
-
To
re-connect your cellular phone
to
XLink on the same
line, simply press the same
button
and the
light
will
return
to
steady blue
-XLink
ITC-BTTN
is
designed
to
work
with
your standard
home phone and telephone service

Link
ITC-BTTN
Grace Digitallne.
San
Diego
CA,
92127
For
customer service contact
your
point
of
sale
or
visit:
www.xlinkgateway.com
Or call
us
at:
(866)
446-0961 or (858)
201
-4113
Made in China
Copyright
10
Grace Digitallne.
XLink
is
aregistered
Trademark
of
Grace Digitallne.
All rights reserved.
QS
IS
XliNK
ITC-BTTN

Link
ITC-BTTN
Cellular B/uetooth Gateway
OWNER'S MANUAL

2
TABLE
OF
CONTENTS
Introduction 3
Package
Contents 3
XLink
Connections
Diagram 4
Setup 5
Pairing
your
Bluetooth
Cell
Phone
to
the XLink 6
Automatic
Bluetooth
Connection 7
Manual
Bluetooth
Connection 8
Testing
the
Setup
8
Light
Indicators
9
Using
the
XLink
10
Placing
aCall 10
Selecting
aLine
11
Receiving
aCall :
11
Force
Call
Connection
12
Speed
Dialing
12
Voice
Mail
13
Caller
10
14
Call
Waiting 14
Voice
Dialing
14
Computer Connectivity
15
Troubleshooting
15
Warranty 18
Safety
and
Regulations 19
FCC
Notices
21
Calling
911
21
Wall
Mount Information 22

INTRODUCTION
Congratulations on your purchase
of
the XLink
ITC-BTTN
Cellular Bluetooth Gateway.
In addition
to
your regular telephone line you will
now
be able
to
access
up
to
3
Bluetooth enabled cell phones from any standard telephone connected
to
the XLink.
XLink
ITC-BTTN
is
designed
to
work
with
or
without
telephone service (land line).
e
WARNING:
•
If
the
RED
Error
light
starts flashing then
the
lines connected
to
the XLink
have
not
been connected properly.
In
this
case
immediately check
that
connections from
the
telephone
to
the XLink
and/or
from
the
telephone
service line are correctly installed.When connections are correct
the
red
light
does
not
flash and
the
green
light
remains on.
PACKAGE
CONTENTS
Each
XLink
ITC-BT
gift
box includes the following.
•XLink
ITC-BT
Unit
•9-Volt
DC
Power Adapter
•Vertical Stand
•Quick Start Guide
•Owner's Manual
•Telephone Cord 3

4
XLINK
CONNECTIONS
DIAGRAM
r--------
CELL
PHONE
#3
Button &Status Light
r-------
CELL
PHONE
#2
Button &Status Light
-----
CELL
PHONE
#1
Button &Status Light
--POWER
INDICATOR
--ERROR
LIGHT
TELEPHONE
CORD
CONNECTION
•
TELEPHONE
SERVICE
LINE
CONNECTION
•
POWER
ADAPTER
CONNECTION
•
USB
CONNECTION
•

SETUP
1.
Connect stand
to
your XLink
as
included in your
gift
box.
2.
Plug astandard corded
or
cordless telephone
into
the XLink using aregular telephone cord.
3. Plug the telephone service line
into
the XLink
using the cord from the wall.
4. Plug the supplied power adapter
into
the XLink
and the otherend
into
awall poweroutlet.
5.
To
pair your Bluetooth cell phone refer
to
"Pair
your Bluetooth cell phone
to
the XLink:'
HOME
PHONE
•
TO
WALL
I
••
•
Q
HINTS:
WALL
OUTLET
•
Place
your cell phone where you have the best reception in your home
or
office.
•
For
best audio quality keep
your
cell phone
within
10
feet
of
the XLink unit.
•Using amulti handset cordless phone gives you multiple extensions.
•Certain cordless phones
that
operate in the
2.4
GHz
frequency range may
interfere with
the
cell phone reception. Keep
as
much distance
as
possible
between the XLink and these types
of
cordless phones.
•Some wireless networks, such
as
802.11
and Wi-Fi, may interfere
with
Bluetooth radio signals. Keep
as
much distance
as
possible between this type
of
equipment, the XLink and your cell phones. 5

LINE
#3
~L1NE#2
11'11'
LINE
#1
PAIRING
YOUR
BLUETOOTH
ENABLED
CELL
PHONE
TO
THE
XlINK
Each
XLink ITC-BTIN can be paired
to
three different cell
phones, one for each line.
To
pair aBluetooth cell phone
to
aline perform
the
following
steps:
1.
Press
and hold one
of
the
three line buttons on the
XLink ITC-BTIN
until
it
flashes rapidly (keep
button
pressed for approximately4seconds).
2.
Put your cell phone
into
the
mode where
it
searches for
Bluetooth devices (similar
to
searching for aBluetooth car kit).This may be found in
your cell phone's menu under'Tools;'Setup;'Bluetooth'
and/or'
Connections'menu.
If
given
the
choice, search for'Handsfree'devices and select"Look for Devices". Your
cell phone should
then
scan/search for Bluetooth devices
3.
When theXLink
is
found XLink will be displayed on your
cell
phone's
LCD.
Accept this
device.
In
order
to
accept, your cell phone may
ask
you to do
so
by pressing any number
of
selections including;'select;'bond;'pair:
'yes:
'ok:
etc.
4.
Enter the
pass
code: 12 34
5.
Once
the
pairing
is
complete,
the
selected line's blue
light
button
on the XLink will
stop flashing quickly and remain solid.
Once paired, the XLink will remember
the
cell phone. Automatic connecting occurs
wheneverthe cell
phone
is
within
range (approx. 30ft.)
of
your XLink.
6

•
•
Q
~IN::ach
linecan
only
be
paired
to
ONE
cell
phone
at atime.
Aline can be paired
to
adifferent cell phone atany
time
by
repeating
the
pairing procedure.
(as
soon
as
pairing
is
started for aline) Previous pairing
information
is
lost.
• A paired line can be"unpaired"and prepared for re-pairing
by
holding
down
the
line
button
until
the
button
flashes rapidly.
•The pairing process can be aborted at any
time
by
pressing
the
line
button.
The previous paired cell phone will be disconnected.
AUTOMATIC
BLUETOOTH
CONNECTION
Once aline
is
paired
to
acell phone
it
will automatically
try
to
connect.When thecell
phone goes
out
of
range, the line lightwill flash slowly
to
indicate
it
is
not
connected and
is
searching for the cell phone.When thecell phone comes into range
of
the XLink
it
will
automaticallyconnect
to
the XLink and the line lightwill
turn
solid blue
to
indicate
the
connection.
If
you are on acall and walk
into
range, the XLink ITe
-BTTN
and cell
phone
will
automatically connect.
You
will be able
to
continue your call
without
interruption.
Ifaline light
is
not
flashing and you wish
to
place the line into automaticconnection mode,
simply
press
the line
button
once.
7

8
MANUAL BLUETOOTH CONNECTION
You
may
not
want
live calls
to
be transferred automatically
or
you may want
to
force
the
cell phone
to
disconnectfrom the XLink.
When aline
is
connected (blue
light
remains on) pressing
the
line
button
will disconnect
that
line and
the
lightwill turn
off
once disconnected. Audio will be transferred
to
the
cell
phoneand you can continueyourcall on
the
cell phone.
When aline
is
not
connected and
not
searching (blue
light
remains off) pressing
the
line
button
will
put
the line
into
searching
mode
(blue
light
flashes slowly).
If
the
cell phone
has been previously paired and
is
within
range
the
cell phonewill connect
with
the
XLink
and
the
blue
light
will remain solid.
o
NOTE:
•Some
cell
phones will promptyou when you come within range
of
the
XLink.
You
can
then decide
if
you want
to
transferthe
call
to
theXLink.
TESTING
THE
SETUP
After
connecting
one
or
more telephones
to
the
XLink,
the
setup test feature can be
used
to
ensure
proper
connections.
Ensure
the
green
light
is
on and
the
red
light
is
not
flashing.
2Simultaneously press and hold
the
line 1and line 2
buttons
for approximately
two
seconds: all telephones connected
to
the
XLink should start ringing.
QHINT:
•
If
an extension telephone does
not
ring, check
that
it
is
powered and
that
all
cables are properly connected.

o
NOTE:
Some olderanalog telephones may
not
ring properly when connected
to
the
XLink
ITC-BTTN.
Avoid these types
of
phones.
GREEN
RED
LIGHT
INDICATORS
¥Jt'BLUE
..
GREEN
Solid
Indicates the
unit
is
powered
up
and running
normally.
GREEN
Flashing
Indicates there
is
an incoming call on the
telephone service line (land line)
RED
Flashing
Indicates
the
XLink connections have
not
been
connected properly. Immediately re-check line
connections until
the
RED
light
turns
off
and
the
green light remains on.
BLUE
Solid
Indicates the selected line
is
connected
to
cell phone
BLUE
Fast Flash
Indicates the selected line
is
in pairing mode.
Use
your cell
phone
to
search and pair
to
the
XLink.
BLUE
Uneven Flash
Indicates
the
selected line
is
connected
to
cell phone and there
is
an incoming call on
this line. 9

10
BLUE
Slow
Flash
Indicates
the
selected line
is
paired
but
the
cell
phone
is
currently
out
of
range
and/or
temporarily
not
connected. XLink
is
actively searching
for
this cell phone.
BLUE
Off
Indicates
the
selected line
is
not
paired
or
not
searching
for
acell
phone
(Manual
Connection Mode).
USING
THE
XLINK
To
use
the
XLink
connect
your
normal
corded
or
cordless
telephone
into
the
connector
on
the
XLink
with
astandard
telephone
cable. This
phone
is
now
your
extension .
telephone.
To
use
your
telephone
service line,
connect
the
telephone
service line
to
the
designated
connection
on
the
XLink (see page 4
for
Connection Diagram).
PLACING
A
CALL
XLink
ITC
-BTTN
is
designed
to
work
with yourstandard phoneand yourtelephone service
orindependently
of
yourtelephone service.
If
you have connected yourtelephoneservice
line
to
theXLinkyou will dial
out
directly bysimply picking
up
thephoneand dialing.
If
you
wish
to
dial
out
on yourcell phonesimply select
the
appropriate line,"one""two"or"three"
by
pressing
OJI
FLASH
I
[lJ1
FLASH
Iori1)IFLASH
~ccordingly
and dial thedesired number.
To
place acall on anytelephone connected
to
the XLink, simply pick
up
the handset
and dial the number.When dialing
out
using acellphoneconnected
to
theXLink,
an
optional
[!Jdigit
maybe dialed at
the
end
of
the number
to
activate dialing immediately,
the
same
as

the
Send
buttonon the
cell
phone. Dialing a
[!]
is
not
required.The dialing process will start
following ashortdelayafterthelast digit
is
dialed.
After
picking
up
a
telephone
connected
to
the
XLink, you should hear asteady dial
tone,
if
you hear an error
tone
(series
of
rapid beeps), there are
no
lines available for an
outgoing
call. In this
case,
check
to
ensure
that
you have
at
least
one
cell
phone
paired
and connected
to
the
XLink. Also check
that
the
telephone
service line
is
connected
properl.y
to
the
XLink.
SELECTING LINE
If connected
to
the telephone service line (land line) the XLink will dial out from
the regular phone using the land line. You can choose
to
dial out using acell
phone
by
selecting the appropriate line that is paired
to
the cell phone you wish
to
dial
out
on.
Aspecific line can be specified on aper call basis
by
first dialing the desired line
number and then pressing the IFLASHIkey on your telephone.
Example:
To
specify line 3for an outgoing call, dial [illIFLASHI, then dial the
intended phone number.
Ifthe XLink is not connected
to
the telephone service line (land line), the XLink
uses the lowest line number with aconnected (paired) cell phone
for
outgoing
calls. For example, if cell phones for lines 2and 3are connected, all outgoing
calls will be made on line 2.
Anytime arapid series
of
beeps
is
heard instead
of
normal dial tone, that
specific line (or any line) is not available for outgoing calls. This is because the
XLink has
not
been paired with acell phone
or
the cell phone is
out
of
range. 11

12
RECE
VING
ACALL
When acell phone that has been paired and
is
currently connected with the
XLink rings,
all
telephones plugged into the XLink will also ring.
Each line has its own distinctive ring pattern, allowing you to immediately know
which cell phone the current call
is
coming
in
on.
You
can also tell which line
is
ringing by looking at the line buttons on top of the
XLink. The blue light for aringing line will flash with aunique cadence.
FORCE CALL
CONNECTION
Sometimes dial tone will be heard when
an
extension telephone
is
picked up to
continue
an
active call that was transferred from your cell phone to the XLink.
When this happens dialing
0[!]
can be used to connect the call.
SPEED DALING
Some cell phones support speed dialing. The XLink allows you to access speed
dials 2through 9from extension telephones. Use the following steps:
1.
Pick up
an
extension telephone. Listen for dial tone.
2.
OPTIONAL: Select Line:
[]]IFLASHlor
[]IFLASHlor
@]IFLASHI
3.
Dial speed dial digit, [g] to ffi]
4.
Dial
[!]
Example:
To
activate speed dial 3on athe cell phone paired
to
line one, press
[II
IFLASHIfollowed
by@][!]

o
NOTE:
This feature may
not
be supported by all cell phones.
The speed dial numbers for each line
are
determined by
the
individual cell
phones.
VOICE
MAIL
You
can access your cell phone voice mail from extension telephone. Before
this feature will work you may have
to
program your voice mail number into the
XLink.
1.
Pick up an extension telephone. Listen for dial tone.
2. OPTIONAL: Select Line: U]lFLASHIor[g]IFLASHIor@]!FLASH I
3. Dial
DJOO
If attempting
to
listen
to
your voice mail results in
an
error tone or
in
the wrong
number being dialed, adifferent voice mail number can be programmed for each
line. Use the following steps to program the voice mail number:
1. Pick up an extension telephone. Listen for dial tone.
2. Dial tJ[:][Ql[][Q]
3. Press the key indicating the line numberyou want to program: Either line IJ]
[g]
orC[)
4.
Dial the desired voice mail number.
5.
Press the IFLASHI
key.
6.
Hang up the extension set. 13

14
CALLER
10
Caller
ID
will display the incoming call information
on
the
LCD
of
your extension
sets.
For
this feature
to
work,
both
the cell phone and your extension telephones must
support caller
10.
ONaTE:
•This feature may
not
be supported by all cell phones.
•Mostcell phones only provide the caller
number
and
not
the
name.
CALL
WAITING
The
XLink will generate acall waiting tone
to
alert you
to
another incoming call on any
of
the 3lines. When you hear a
call
waiting tone,
press
the
FLASH
(or
CALL
WAITING
or
LINK
etc.)
button
on the extension telephone.This will connect
the
second caller.
Pressing
the
FLASH
key will then toggle
through
all active calls.
ONaTE:
•This feature may
not
be supported byall cell phones.
VOICE
DIALING
If
your cell phone supports voice dialing then the XLink may be able
to
access
this
feature.The following steps may allow you
to
voice dial from extension telephones:
Pick
up
an extension telephone. Listen for dial tone.
2OPTIONAL: Select Line:OJI
FLASH
Io
r
[]l
FLASH
lor[I]1
FLASH
I

3.
Dial [I)[!]
4.
Say
name
or
follow
voice
prompts
from cell phone.
NOTE:
Notall cell phones
support
this feature and
not
all cell phones enable
the
XLink
to
access
this feature.
COMPUTER
CONNECTIVITY
The XLink
has
a
USB
port
that
allows
the
XLink
to
communicate
with
a
computer
running the
proper
software (not supplied).
Please
see
the
XLink website (www.
xlinkgateway.com)
to
upgrade firmware and configure your XLink.
TROUBLESHOOTING
Red
light
is
flashing
Indicates the line connections made
to
the XLink have
not
been done properly. Re-check
line connections
(see
page 4Connections Diagram). Connections
are
correct when the
red light
is
not
flashing and the green lightremains on.
Cell
phone
does
not
pair
to
XLink
Hold
down
one
of
the
line
buttons
until
the
blue
light
flashes rapidly.The
line
is
now
ready
to
be paired
(see
section"Pairing your Bluetooth Cell phone
to
the XLink").
15
Other manuals for ITC-BTTN
1
Table of contents
Other Xlink Gateway manuals