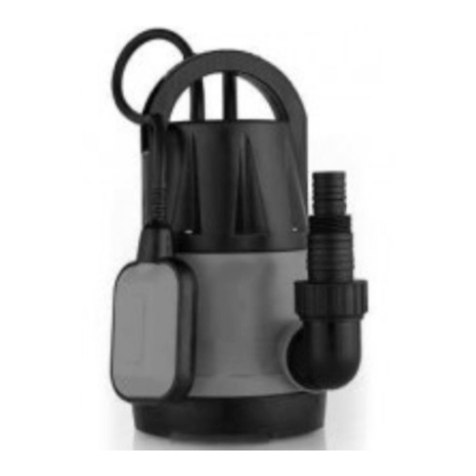
XPOtool 51537 User manual

Operation Manual
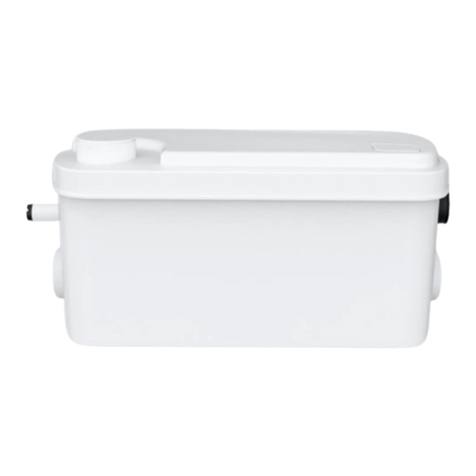
Waste Water Pump
51537–51541
Similar to image, may vary depending on model
Read and follow the operating instructions and safety information before use.
Technical changes reserved!
Due to further developments, illustrations, functioning steps, and technical data can differ slightly.

https://www.XPOtool.com Item 51537–51541 Page 2
The Tool Experts
08 2022-1
The information contained in this document may alter at any time without previous notice. It is prohibited
to copy or spread any parts of this document in any way without prior written allowance. All rights re-
served.
The WilTec Wildanger Technik GmbH cannot be held accountable for any possible mistakes in this
operating manual, nor in the diagrams and figures shown.
Even though, the WilTec Wildanger Technik GmbH has undergone biggest possible efforts to ensure
that the operating manual is complete, faultless, and up to date, mistakes cannot be entirely avoided.
If you should find a mistake or wish to make a suggestion for improvement, we look forward to hearing
from you.
Send an e-mail to:
or use our contact form:
https://www.wiltec.de/contacts/
The most recent version of this manual in various languages can be found in our online shop via:
https://www.wiltec.de/docsearch
Our postal address is:
WilTec Wildanger Technik GmbH
Königsbenden 12
52249 Eschweiler
Germany
To return orders for exchange, repair, or other purposes, please use the following address. Attention!
To allow for a smooth execution of your complaint or return, it is important to contact our customer
service team before returning the goods.
Returns Department
WilTec Wildanger Technik GmbH
Königsbenden 28
52249 Eschweiler
E-mail: service@wiltec.info
Tel: +49 2403 55592–0
Fax: +49 2403 55592–15

https://www.XPOtool.com Item 51537–51541 Page 3
The Tool Experts
08 2022-1
Introduction
Thank you very much for purchasing this quality product. To minimise the risk of injury, we ask you to
comply with basic safety precautions, when using this product. Please read this operating manual thor-
oughly and ensure you have understood them. Keep this operating manual for future reference.
Please note before starting:
The pump can be attached to any protective contact socket, which has been installed properly. The
socket needs a supply voltage of 230 V and a fuse of at least 6 A.
Warning! If the pump is meant to be used near swimming pools or garden ponds and in their
protective area, it needs to be equipped with an earth fault circuit breaker with a normal tripping current
of max. 30 mA. The pump must not be operated if there are people within the pool or pond. Please
contact an electrician.
Safety notes for the pump
General safety notes
•Know the application of the pump and ensure to be familiar with the limitations and potential
dangers.
•Make sure that the electricity source corresponds to the requirements of the device.
•Disconnect the pump from the electricity supply before carrying out any maintenance work.
•Release the pressure from the system before maintaining a part.
•Release the liquid from the system before maintaining the pump.
•Secure the pressure line before starting the pump. An unsecured pressure line can retaliate and
thus lead to injuries and/or damages.
•Check the hose for wear and damage before every use. Ensure that all connections are se-
cured.
•Occasionally check the pump and the system components. Keep the pump and the system free
of residues and foreign bodies. If necessary, carry out a routine maintenance.
•Keep a remedy for pressure relief near pumps, the pressure lines of which can be closed off or
clogged.
Personal safety
•Always wear protective glasses when working with the pump.
•Keep your working area clean, tidy, and well illuminated. Store tools and equipment when the
pump is not in use.
•Keep bystanders away from your working area.
•Make sure to make the working area safe for children by using padlocks and main switches and
by removing ignition keys.
•When connecting an electrically powered pump, all electrical and safety instructions need to be
regarded.
•The pump motor is equipped with an automatic resetting thermal protection and can unexpect-
edly re-start.
•Danger of electric shock: This device is designed to only be operated with 230 V. To reduce the
risk of electric shock, ensure that the pump is connected to a safety plug properly installed.
•The entire wiring should be done by a qualified technician.
•Protect the power cable from sharp objects, hot surfaces, oil, and chemicals. Avoid bending the
cable. Damaged or worn cables need to be replaced immediately.
•Use cables with a sufficient size to minimise a voltage drop to the motor.
•Do not touch a running motor. Modern motors can reach very high temperatures when running.
https://www.XPOtool.com Item 51537–51541 Page 4
The Tool Experts
08 2022-1
Additional safety precautions
Have the following checked by an expert before using the pump (important for your own safety,
too):
•Ground connection
•Neutral conductor
•Fault-current circuit breaker needs to comply with the safety regulations and needs to work
faultless.
•The electrical connections need to be protected from humidity.
•When a danger of flooding occurs, the electrical connections need to be placed in a high area.
•The circulation of aggressive liquids as well as the circulation of abrasive substances is to be
avoided.
•The motorised waste water pump needs to be protected from frost.
•The pump needs to be protected from dry-running. The pump should be kept away from chil-
dren.
Resistance
•The waste water pump is suited for a circulation of water with a maximal temperature of 35 ℃.
•The pump might not be suited for other liquids, especially motor oils, cleaning detergents, and
other chemical products.
Assembly
The waste water pump is installed the following way:
•in stationary position with a fixed pipeline or
•in stationary position with a flexible pipe.
Please note!
•The pump should never be installed hanging self-supporting of the pressure line or the electricity
cable. The waste water pump needs to be hung up by the designated handle or placed on the
floor of the shaft. To ensure the impeccable functioning of the pump, the shaft floor needs to be
kept free of mud and dirt of any kind.
•When the water level has sunk too low, the mud in the shaft dries fast and stops the pump from
starting. It is necessary to regularly check the pump (by performing tests before operation).
•The float switch is adjusted to allow the pump to start immediately.
Note! The pump shaft should have a minimum size of 40×40×50 cm, so that the floater can move freely.
Power supply
The pump is equipped with a proper protective contact plug. The pump is meant to be connected to a
220/230 V~50 Hz safety socket. Ensure that the socket is sufficiently secured (at least 6 A) and is in an
excellent condition. Place the electricity plug into the socket and the pump is ready for use.
Important note! If the main cable or the socket has been damaged due to external influences, repairs
on the cable are prohibited. Repair-work may only be carried out by a qualified technician.

https://www.XPOtool.com Item 51537–51541 Page 5
The Tool Experts
08 2022-1
Areas of application
This pump is mainly used as a cellar pump. When placing this into a shaft, the pump provides protection
from flooding. Additionally, the pump can be used, where water needs to be transported from one area
to another, e.g., at home, in agriculture, in gardening, for sanitary work and so forth.
Work settings
After thoroughly reading the operating manual and understanding it, the pump can be put into operation.
Please note the following things in advance:
•The pump is on the floor of the shaft.
•Ensure that the pressure line is attached properly.
•Check if the electrical connection has 230 V and 50 Hz. All fibre particles possibly collected in
the pump casing should be removed with a water stream.
•Check if the socket is in a good condition.
•Make sure that water and humidity never reach the main components.
•Avoid any running dry of the pump.
Maintenance instructions
•This waste water pump is an approved, maintenance-free, high-quality product subject to a strict
final inspection.
•We recommend a regular inspection and maintenance to ensure a longer lifespan of the device
and an interruption-free operation.
Important notes!
•Before every maintenance work, pull out the plug.
•In case the pump should be transported frequently, it needs to be cleaned with clear water after
every use.
•When installing the pump stationary, the function of the floater should be checked every
3months.
•All fibre particles possibly collected in the pump casing should be removed with a water stream.
•Every 3 months, the shaft bottom should be freed from mud.
•Remove the residues on the float switch with clear water.
Cleaning the drive wheel
If there are excessive residues collected in the pump casing, the bottom part of the pump needs to be
demounted the following:
1. Loosen the 4 screws on the bottom of the inlet cage.
2. Remove the suction cage from the pump casing.
3. Clean the drive wheel with clear water.
Important! The pump must not be placed on the drive wheel.
4. Build the pump back together in the reversed order.

https://www.XPOtool.com Item 51537–51541 Page 6
The Tool Experts
08 2022-1
Adjusting the on/off position of the operating point
The on/off switching point and the shut-off point of the floating switch can be adjusted via the floating
switch and its snap holder. Before putting the pump into operation, check the following:
1. The float switch needs to be installed so that the filling level of the shut-off point and the filling
level of the switch-on point can be activated with little effort.
To check this, place the pump into a container filled with water. Carefully lift the float switch by
hand and lower it again. Then check if the pump switches on and off.
2. Ensure that the distance between the float switch head and the snap holder is not too small. A
proper operation cannot be guaranteed if the gap is too small.
3. When adjusting the float switch, ensure that it does not touch the basis before switching the
pump off. Attention! Danger of dry-running.
To modify the pump and allow a lower suction point,
first remove the two screws of the back float switch
cover.
The cover can then be pushed away downward. We
recommend tilting the pump sideways to more easily
remove the cover.

https://www.XPOtool.com Item 51537–51541 Page 7
The Tool Experts
08 2022-1
There are two different mounting possibilities of both
float switches. Fig. 1 shows the factory setting of the
float switch and bracket mounting. Here the upper
float switch can only move.
With this way of mounting the switch-on point is at
120 mm/140 mm water level depending on the pump
variation. See the following table:
Item number
Switch-on point (㎜)
51537
120
51538
51539
51540
140
51541
To reassemble the pump to version 2, both screws
need to be loosened and the brackets to be turned.
This allows both float switches to move and the
switch-on point to sink.
Tighten the screws up again carefully.
With this assembly, the switch-on point is at 40 mm
water level/60 mm depending on the pump adjust-
ment. See the following table.
Item number
Switch-on point (㎜)
51537
40
51538
51539
51540
60
51541

https://www.XPOtool.com Item 51537–51541 Page 8
The Tool Experts
08 2022-1
Troubleshooting
Problem
Reason
Solution
Pump does not start
No power supply
Check power supply.
Float switch does not switch
Place float switch in a higher po-
sition.
No flow
Inlet filter clogged
Clean inlet filter with water
stream.
Compressed air hose bent
Adjust hose.
Pump does not switch off
Float switch cannot sink
Place pump properly on the shaft
floor.
Insufficient flow
Inlet filter clogged
Clean inlet filter.
Reduced pumping performance
due to dirty water or grinding wa-
ter
Clean pump and replace worn
parts.
The pump switches itself off after
short running period
Thermal switch stops pump due
to waste water.
Pull power plug, clean pump and
shaft.
Water too hot, thermal switch
stops pump
Ensure that the maximal water
temperature does not exceed
35 ℃.

https://www.XPOtool.com Item 51537–51541 Page 9
The Tool Experts
08 2022-1
Technical data
51537
51538
51539
51540
51541
Voltage (V)
230
Frequency (㎐)
50
Power consumption (W)
250
400
750
400
750
Max. delivery rate (ℓ⁄h)
6000
7000
12500
8000
13000
Max. delivery head (m)
5.5
7.5
8.5
5
7.5
Max. immersion depth (m)
5
8
5
8
Max. water temperature (℃)
35
Hose connections (㎝)
2.54 (1″), 3.17 (1¼″), 3.81 (1½″)
Max. ⌀ of foreign bodies (㎜)
5
35

https://www.XPOtool.com Item 51537–51541 Page 10
The Tool Experts
08 2022-1
Disposal regulations
EU guidelines regarding the disposal of scrap electric appliances (WEEE, 2012/19/EU) were imple-
mented in the law related to electrical and electronic equipment and appliances.
All WilTec electric devices that fall under the WEEE regulations are labelled with the crossed-out
wheeled waste bin logo. This logo indicates that this electric equipment must not be disposed with do-
mestic waste.
The company WilTec Technik GmbH has been registered in the German registry EAR under the WEEE-
registration number DE45283704.
Disposal of used electrical and electronic appliances
(intended for use in the countries of the European Un-
ion and other European countries with a separate col-
lection system for these appliances).
The logo on the item or on its packaging points out that
this item must not be treated as normal household
waste but must be disposed of at a recycling collection
point for electronic and electrical waste equipment. By
contributing to the correct disposal of this item you help
protect the environment and the health of fellow human
beings. The environment and the health of living beings
are threatened by inappropriate disposal.
Material recycling helps reduce the consumption of raw materials.
Additional information on recycling this item can be provided by your local community, municipal waste
disposal facilities or the shop where this item was purchased.
Address:
WilTec Wildanger Technik GmbH
Königsbenden 12/ 28
D-52249 Eschweiler
Important note:
The reprint or reproduction, even of excerpts, and any commercial use, even in part of this instruction
manual requires the written permission of the WilTec Wildanger Technik GmbH.
This manual suits for next models
4
Table of contents
Other XPOtool Water Pump manuals

XPOtool
XPOtool 15 l User manual

XPOtool
XPOtool 61962 User manual

XPOtool
XPOtool 61963 User manual

XPOtool
XPOtool 52900 User manual

XPOtool
XPOtool CGP User manual

XPOtool
XPOtool 62543 User manual

XPOtool
XPOtool 63004 User manual

XPOtool
XPOtool 63898 User manual

XPOtool
XPOtool 62820 User manual

XPOtool
XPOtool 51545 User manual