manuals.online logo
Brands
  1. Home
  2. •
  3. Brands
  4. •
  5. BLACKMER
  6. •
  7. Water Pump
  8. •
  9. BLACKMER SGLD3 User manual

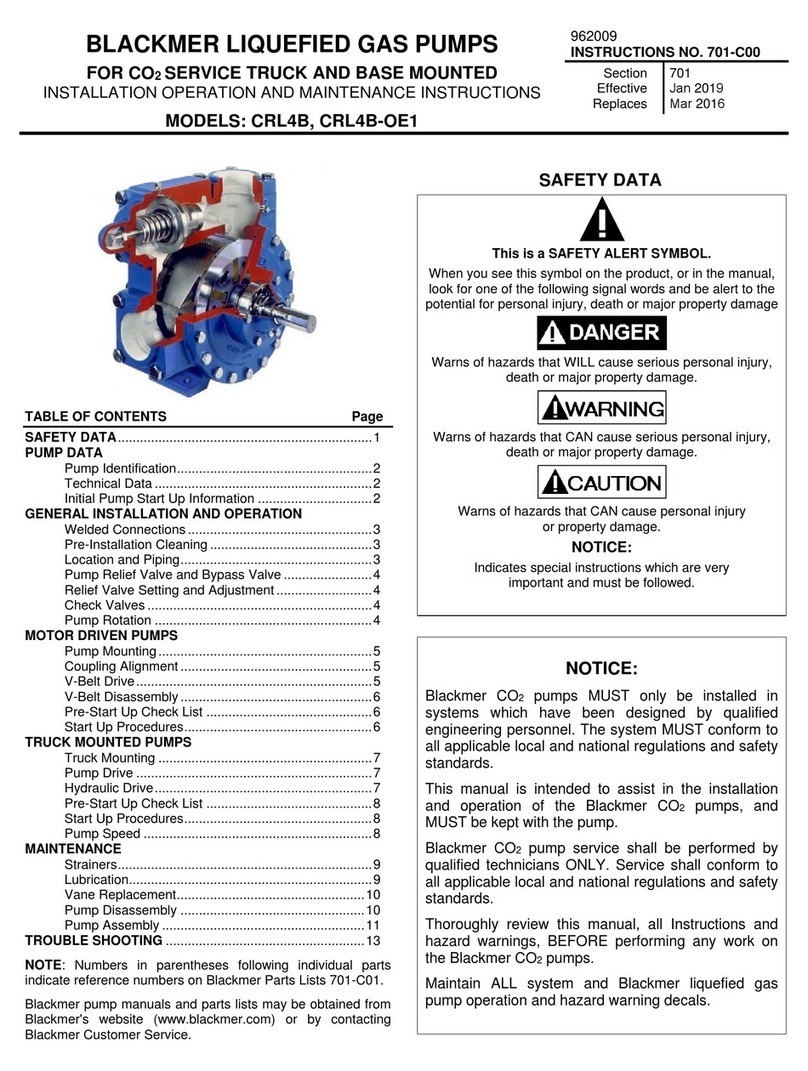
BLACKMER SGLD3 User manual

BLACKMER MECHANICAL SEAL INSTALLATION
DUAL SEAL – PLAN 52 AND PLAN 53
960655
Page 1of 6
FORM
605
CARTRIDGE MECHANICAL SEAL INSTRUCTIONS
MODELS: SGLD(W)3, SGLD(W)4 Effective MAR 2019
Replaces SEPT 2018
1809 Century Avenue, Grand Rapids, Michigan 49503-1530, U.S.A.
Telephone: (616) 241-1611 / Fax: (616) 241-3752 Form 605
E-Mail: [email protected] / Internet: www.blackmer.com Page 1 of 6
This is a SAFETY ALERT SYMBOL.
When you see this symbol on the product, or in the
manual, look for one of the following signal words and be
alert to the potential for personal injury, death or major
property damage
Warns of hazards that WILL cause serious personal injury,
death or major property damage.
Warns of hazards that CAN cause serious personal injury,
death or major property damage.
Warns of hazards that CAN cause personal injury
or property damage.
NOTICE:
Indicates special instructions which are very
important and must be followed.
NOTICE:
Blackmer pumps MUST only be installed in systems,
which have been designed by qualified engineering
personnel. The system MUST conform to all
applicable local and national regulations and safety
standards.
These instructions are intended to assist in the
installation of Blackmer cartridge mechanical seals,
and MUST be kept with the pump.
Blackmer pump service shall be performed by
qualified technicians ONLY. Service shall conform to
all applicable local and national regulations and
safety standards.
Thoroughly review the pump manual, all instructions
and hazard warnings, BEFORE performing any work
on the Blackmer pump.
Maintain ALL system and Blackmer pump operation
and hazard warning decals.
DISCONNECTING FLUID OR PRESSURE
CONTAINMENT COMPONENTS DURING
PUMP OPERATION CAN CAUSE
SERIOUS PERSONAL INJURY, DEATH
OR MAJOR PROPERTY DAMAGE
Hazardous pressure
can cause personal
injury or property
damage
FAILURE TO DISCONNECT AND
LOCKOUT ELECTRICAL POWER
BEFORE ATTEMPTING MAINTENANCE
CAN CAUSE SHOCK, BURNS OR
DEATH
Hazardous voltage.
Can shock, burn or
cause death.
FAILURE TO DISCONNECT AND
LOCKOUT ELECTRICAL POWER OR
ENGINE DRIVE BEFORE ATTEMPTING
MAINTENANCE CAN CAUSE SEVERE
PERSONAL INJURY OR DEATH
Hazardous
machinery can
cause serious
p
ersonal in
j
ur
y
.
FAILURE TO RELIEVE SYSTEM
PRESSURE PRIOR TO PERFORMING
PUMP SERVICE OR MAINTENANCE
CAN CAUSE SERIOUS PERSONAL
INJURY OR PROPERTY DAMAGE.
Hazardous pressure
can cause serious
personal injury or
property damage
FAILURE TO SET THE VEHICLE
EMERGENCY BRAKE AND CHOCK
WHEELS BEFORE PERFORMING
SERVICE CAN CAUSE SEVERE
PERSONAL INJURY OR PROPERTY
DAMAGE.
Hazardous pressure
can cause personal
injury or property
damage
IF PUMPING HAZARDOUS OR TOXIC
FLUIDS, SYSTEM MUST BE FLUSHED,
PRIOR TO PERFORMING SERVICE OR
MAINTENANCE
Hazardous or toxic
fluids can cause
serious injury.
1809 Century Avenue, Grand Rapids, Michigan 49503-1530, U.S.A.
Telephone: (616) 241-1611 / Fax: (616) 241-3752 Form 605
E-Mail: [email protected] / Internet: www.blackmer.com Page 2 of 6
FAILURE TO RELIEVE SEAL SUPPORT
SYSTEM PRESSURE, PRIOR TO
PERFORMING MAINTENANCE, CAN
RESULT IN SERIOUS PERSONAL
INJURY OR PROPERTY DAMAGE.
Hazardous pressure
can cause serious
personal injury or
property damage
IF PUMPING HAZARDOUS OR TOXIC
FLUIDS, SEAL SUPPORT SYSTEM
OIL MAY CONTAIN HAZARDOUS OR
TOXIC FLUIDS. CARE MUST BE
TAKEN TO PROPERLY CONTAIN AND
DISPOSE OF FLUIDS OR VAPORS
CONTAINED IN SEAL SUPPORT
SYSTEM.
Hazardous or toxic
fluids can cause
serious injury.
NOTICE:
THE APPROPRIATE BLACKMER PUMP MANUAL AND
PARTS LIST MAY BE OBTAINED FROM THE
BLACKMER WEBSITE (WWW.BLACKMER.COM) OR BY
CONTACTING BLACKMER CUSTOMER SERVICE.
PUMP INSTRUCTION SHEETS AND PARTS LISTS
Pump
Model
Pump
Instruction
Sheet
Pump Parts
Lists
SGL(W)D3 801-B00 801-B01
SGL(W)D4 801-B00 801-B02
NOTICE:
MAINTENANCE AND TROUBLE SHOOTING MUST BE
DONE BY AN INDIVIDUAL EXPERIENCED WITH PUMP
MAINTENANCE AND THE TYPE OF SYSTEM INVOLVED.
NOTICE:
THE FOLLOWING INSTRUCTIONS INCLUDE ONLY THE
STEPS NECESSARY TO REMOVE AND REPLACE THE
BLACKMER CARTRIDGE MECHANICAL SEAL. BEFORE
PROCEEDING, READ AND FOLLOW ALL MECHANICAL
SEAL RELATED INSTRUCTIONS AND HAZARD
WARNINGS PROVIDED IN THE APPROPRIATE PUMP
"INSTALLATION, OPERATION AND MAINTENANCE”
MANUAL.
PLAN 52/53 CARTRIDGE MECHANICAL SEAL
REMOVAL PROCEDURE
1. Drain all seal oil by removing the bottom drain plug.
Warning: The oil may contain pumping fluid
and/or vapor. Take proper precautions.
2. Remove cartridge capscrews (22) from head ring (20)
3. Thread 2 capscrews into opposite, blind threaded
holes as shown in Figure 1. Attempt to gently
removed seal cartridge from head ring (20) and
rotor/shaft (13) using capscrews as handles.
Figure 1 – Removal Capscrew Location – Plan 53
4. If cartridge cannot be removed by pulling, insert 3
capscrews (22) into cartridge threaded jacking holes
and slowly tighten until cartridge is lifted off of shaft.
PLAN 53 CARTRIDGE MECHANICAL SEAL
DISSASSEMBLY PROCEDURE
1. Remove snap ring from shaft drive collar(153N) as
shown in Figure 2.
Figure 2 – Snap Ring Removal (Plan 53)
2. Separate the rotating face (153A) from the stationary
cartridge (153R) by gently pressing on the inner drive
collar (153N).
3. Remove outer carbon (153B) and inner carbon
(153J). If required gently pry with a pry bar to
remove.
4. Remove dynamic o-rings (153C and 153H), backer
rings (153G and 153D), and springs (153F).
5. Clean cartridge (153R) ensuring all surfaces are free
of contaminates. Pay special attention to o-ring
grooves.
PLAN 52 COMPONENT MECHANICAL SEAL
DISSASSEMBLY PROCEDURE
1. Remove head ring (20) by removing all capscrews
(21) and separating from casing (12).
2. Loosen rotating face capscrews (153K) and remove.
See Figure 3.
Cartridge
Removal Holes
Threaded
Jacking Holes (3)
Snap Ring
1809 Century Avenue, Grand Rapids, Michigan 49503-1530, U.S.A.
Telephone: (616) 241-1611 / Fax: (616) 241-3752 Form 605
E-Mail: [email protected] / Internet: www.blackmer.com Page 3 of 6
Figure 3 – Rotating Face Capscrew Removal (Plan 52)
3. Gently pry rotating face (153A) away from rotor/shaft
(13)
4. Remove outer carbon (153B) and inner carbon
(153J). If required gently pry with a pry bar to
remove.
5. Remove dynamic o-rings (153C and 153H), backer
rings (153G and 153D), and springs (153F).
6. Clean cartridge (153R) and rotor/shaft (13) ensuring
all surfaces are free of contaminates. Pay special
attention to o-ring grooves.
PLAN 53 CARTRIDGE MECHANICAL SEAL
ASSEMBLY PROCEDURE
1. Insert springs (153F) into all blind spring holes in
cartridge (153R). See Figure 4.
Figure 4 – Spring Installation (Plan 53)
2. Install backer rings (153D and 153G) into cartridge
(153R). Bottom of backer ring should rest on springs.
See Figure 5.
3. Apply a small amount of grease to o-rings (153C and
153H). Install o-rings into cartridge (153R). See
Figure 5.
4. Align 3 tang features of carbons (153J and 153B) with
3 tang features of cartridge (153R). Gently press
carbon into cartridge assembly taking care to not
damage raised sealing face. See Figure 5.
Figure 5 – Carbon Assembly (Plan 53)
5. Clean carbon (153B and 153J) raised faces and
rotating seal sub-assembly face (153A). Use a lint-
free rag and a suitable solvent such as methanol.
6. Insert rotating seal sub-assembly (153A) into
cartridge sub-assembly. Turn assembly over and
install snap ring. See Figure 2.
7. Install o-ring153P and apply a small amount of grease
to hold it in place.
PLAN 52 CARTRIDGE MECHANICAL SEAL
ASSEMBLY PROCEDURE
1. Insert springs (153F) into all blind spring holes in
cartridge (153R). See Figure 6.
Figure 6 – Spring Installation (Plan 52)
2. Install backer rings (153D and 153G) into cartridge
(153R). Bottom of backer ring should rest on springs.
See Figure 7.
3. Apply a small amount of grease to o-rings (153C and
153H). Install o-rings into cartridge (153R). See
Figure 7.
4. Align 3 tang features of carbons (153J and 153B) with
3 tang features of cartridge (153R). Gently press
carbon into cartridge assembly taking care to not
damage raised sealing face. See Figure 7.
1809 Century Avenue, Grand Rapids, Michigan 49503-1530, U.S.A.
Telephone: (616) 241-1611 / Fax: (616) 241-3752 Form 605
E-Mail: [email protected] / Internet: www.blackmer.com Page 4 of 6
Figure 7 – Carbon Assembly (Plan 52)
5. Install o-ring (153P) and apply a small amount of
grease to hold it in place.
6. Lightly grease ID o-ring of rotating seal. Install rotating
face (153A) onto rotor/shaft (13) making sure to align
hole near OD with seal alignment pin. Take care to
not damage rotating seal face ID o-ring on rotor/shaft
threads. See Figure 8.
Figure 8 – Rotating Seal Face Installation (Plan 52)
7. Install sealing capscrews (153K) into rotating seal
face and torque to 20-25 in-lbf.
8. Clean carbon (153B and 153J) raised faces and
rotating seal sub-assembly face (153A). Use a lint-
free rag and a suitable solvent such as methanol.
1809 Century Avenue, Grand Rapids, Michigan 49503-1530, U.S.A.
Telephone: (616) 241-1611 / Fax: (616) 241-3752 Form 605
E-Mail: [email protected] / Internet: www.blackmer.com Page 5 of 6
BLACKMER PARTS LIST – PLAN 53 REBUILD
SEAL MODELS: SGL(W)D3, SGL(W)D4
Ref.
No. Description
Parts
per
Seal
Part No.
153A Rotating Seal Sub-Assembly11 332282
153B Carbon, Outer11 332087
153C O-ring, FKM11 702357
153D Backer Ring, Outer 1 332089
153F Spring121 332199
153G Backer Ring, Inner 1 332088
153H O-ring, FKM11 711929
153J Carbon, Inner11 332086
153P O-ring, FKM11 702059
153Q Plug 3 908192
153R Cartridge, Seal Insert 1 332081
153T Snap Ring11 903590
1 Included in Rebuild Kit 899053
1809 Century Avenue, Grand Rapids, Michigan 49503-1530, U.S.A.
Telephone: (616) 241-1611 / Fax: (616) 241-3752 Form 605
E-Mail: [email protected] / Internet: www.blackmer.com Page 6 of 6
BLACKMER PARTS LIST – PLAN 52 REBUILD
SEAL MODELS: SGL(W)D3, SGL(W)D4
Ref.
No. Description
Parts
per
Seal
Part No.
153A Rotating Seal11 332093
153B Carbon, Outer11 332187
153C O-ring, FKM11 701991
153D Backer Ring, Outer 1 332085
153E O-ring, FKM11 701962
153F Spring127 332199
153G Backer Ring, Inner 1 332088
153H O-ring, FKM11 711929
153J Carbon, Inner11 332086
153K Sealing Capscrew16 920140
153P O-ring, FKM11 702059
153Q Plug 3 908192
153R Cartridge, Seal Insert 1 332181
1 Included in Rebuild Kit 899052

This manual suits for next models

3

Other BLACKMER Water Pump manuals

BLACKMER AX65 Owner's manual

BLACKMER

BLACKMER AX65 Owner's manual

BLACKMER V Series Manual

BLACKMER

BLACKMER V Series Manual

BLACKMER SSP-X Series User manual

BLACKMER

BLACKMER SSP-X Series User manual

BLACKMER EBSRAY RC20 Manual

BLACKMER

BLACKMER EBSRAY RC20 Manual

BLACKMER LGL156C Manual

BLACKMER

BLACKMER LGL156C Manual

BLACKMER TLGLF3HD Manual

BLACKMER

BLACKMER TLGLF3HD Manual

BLACKMER TXH3C User manual

BLACKMER

BLACKMER TXH3C User manual

BLACKMER SX1220A Manual

BLACKMER

BLACKMER SX1220A Manual

BLACKMER LGRL1.25 Manual

BLACKMER

BLACKMER LGRL1.25 Manual

BLACKMER TXV2.5B Manual

BLACKMER

BLACKMER TXV2.5B Manual

BLACKMER TRANSMAX TX206A Manual

BLACKMER

BLACKMER TRANSMAX TX206A Manual

BLACKMER LGLD2E Manual

BLACKMER

BLACKMER LGLD2E Manual

BLACKMER CRL2 User manual

BLACKMER

BLACKMER CRL2 User manual

BLACKMER CRL4A Manual

BLACKMER

BLACKMER CRL4A Manual

BLACKMER MAGNES Series Manual

BLACKMER

BLACKMER MAGNES Series Manual

BLACKMER TLGLF3C Manual

BLACKMER

BLACKMER TLGLF3C Manual

BLACKMER ATX300A Manual

BLACKMER

BLACKMER ATX300A Manual

BLACKMER TX Manual

BLACKMER

BLACKMER TX Manual

BLACKMER SGLD4A User manual

BLACKMER

BLACKMER SGLD4A User manual

BLACKMER GDP 102 Manual

BLACKMER

BLACKMER GDP 102 Manual

BLACKMER SMVP15C User manual

BLACKMER

BLACKMER SMVP15C User manual

BLACKMER TLGLF4B Manual

BLACKMER

BLACKMER TLGLF4B Manual

BLACKMER LGL154A Manual

BLACKMER

BLACKMER LGL154A Manual

BLACKMER TX User manual

BLACKMER

BLACKMER TX User manual

Popular Water Pump manuals by other brands

ALBIN PUMP ALHP Series Manual of maintenance

ALBIN PUMP

ALBIN PUMP ALHP Series Manual of maintenance

Lutz-Jesco PERIDOS Series operating instructions

Lutz-Jesco

Lutz-Jesco PERIDOS Series operating instructions

Sears Craftsman 390.303302 owner's manual

Sears

Sears Craftsman 390.303302 owner's manual

Weberman GPA 25-6 180 Installation and operation manual

Weberman

Weberman GPA 25-6 180 Installation and operation manual

Idrochemical NCB Series Installation, use and maintenance manual

Idrochemical

Idrochemical NCB Series Installation, use and maintenance manual

Berner 148966 Operating	 instruction

Berner

Berner 148966 Operating instruction

SAMES KREMLIN REXSON 2B124 user manual

SAMES KREMLIN

SAMES KREMLIN REXSON 2B124 user manual

AQUASYSTEM APDS Series Use and maintenance manual

AQUASYSTEM

AQUASYSTEM APDS Series Use and maintenance manual

Grundfos Unilift KP 150 Installation and operating instructions

Grundfos

Grundfos Unilift KP 150 Installation and operating instructions

Zoeller AQUANOT 585 manual

Zoeller

Zoeller AQUANOT 585 manual

AMT 489G-95 Specifications information and repair parts manual

AMT

AMT 489G-95 Specifications information and repair parts manual

STA-RITE HC-01 owner's manual

STA-RITE

STA-RITE HC-01 owner's manual

Atlantic Typhoon TA-2200 operating manual

Atlantic

Atlantic Typhoon TA-2200 operating manual

Wilden PS 4 Stallion Metal Engineering, operation & maintenance

Wilden

Wilden PS 4 Stallion Metal Engineering, operation & maintenance

Agilent Technologies Infinity II SFC Binary 1260 user manual

Agilent Technologies

Agilent Technologies Infinity II SFC Binary 1260 user manual

K2 Pumps UTM02501K manual

K2 Pumps

K2 Pumps UTM02501K manual

SFA Watermatic VD120 installation manual

SFA

SFA Watermatic VD120 installation manual

KNF NF 300 Operating and installation instructions

KNF

KNF NF 300 Operating and installation instructions

manuals.online logo
manuals.online logoBrands
  • About & Mission
  • Contact us
  • Privacy Policy
  • Terms and Conditions

Copyright 2025 Manuals.Online. All Rights Reserved.