XS Power Batteries Performance IntelliSUPPLY PSC15 User manual

USER GUIDE
Microprocessor Controlled Multi-Stage 12V/14V/16V
Automatic Power Supply and Battery Charger
P/N PSC15 / PSC30 / PSC60 / PSC90
Sleek On-Board Design / Remote LCD Display
Three Mode Operation / 120V & 230V AC Input

XS Power IntelliSUPPLY User Guide
About XS Power
XS Power designs and manufactures custom charging solutions for audio, racing,
marine, off road, and many other applications. These products include high
performance batteries, chargers, and related accessories.
Trademarks
Trademarks, registered trademarks, and product names are the property of their respective
owners and are used herein for identification purposes only.
Notice of Copyright
IntelliSUPPLY User Guide © January 2019 by XS Power. All rights reserved.
Disclaimer
UNLESS SPECIFICALLY AGREED TO IN WRITING, XS POWER:
(a) MAKES NO WARRANTY AS TO THE ACCURACY, SUFFICIENCY OR SUITABILITY OF
ANY TECHNICAL OR OTHER INFORMATION PROVIDED IN ITS MANUALS OR OTHER
DOCUMENTATION.
(b) ASSUMES NO RESPONSIBILITY OR LIABILITY FOR LOSS OR DAMAGE, WHETHER
DIRECT, INDIRECT, CONSEQUENTIAL OR INCIDENTAL, WHICH MIGHT ARISE OUT OF THE
USE OF SUCH INFORMATION. THE USE OF ANY SUCH INFORMATION WILL BE ENTIRELY
AT THE USER’S RISK.
The following conventions are used in this guide.
WARNING
Warnings identify conditions that could result in personal injury or loss of life.
CAUTION
Cautions identify conditions or practices that could result in damage to the charger
or battery.
*Important*: These notes describe an important item that you must pay
attention to.

XS Power IntelliSUPPLY User Guide
Chapter 1, Introduction.............................................................. p. 1-6
Quick Start Guide
Chapter 1 contains information on safety guidelines, and the features,
switches, and indicators on the front panel of the IntelliSUPPLY.
Chapter 2, Operation ........................................................................ p. 7-11
Chapter 2 explains how to operate the IntelliSUPPLY correctly to charge a
performance battery and use the power supply feature.
Chapter 3, Troubleshooting..........................................................p. 12
Chapter 3 will help you identify and correct the common problems than can
occur with the IntelliSUPPLY.
Appendix A, Specifications ..........................................................p. 13
Appendix A lists the specifications for the IntelliSUPPLY.
Appendix B, Battery Charging......................................................p. 14
Appendix B describes battery charging in more detail.
FAQs.......................................................................................p. 15-16
Warranty......................................................................................p. 17
Contact Information......................................................................p. 18
Contents

1
1) Do not expose the IntelliSUPPLY to rain, snow, spray, or bilge water. To reduce risk of fire
hazard, do not cover or obstruct the ventilation openings. Do not install the charger in a
zero-clearance compartment. Overheating may result.
2) The IntelliSUPPLY is designed to be permanently connected to your AC and DC electrical systems.
3) The IntelliSUPPLY is designed to charge 12V, 14V and 16V lead-acid batteries of all types.
Do not attempt to use with batteries of other voltages
4) Never use chargers at a location where there is danger of gas or dust explosions.
5) Use only attachments recommended or sold by the manufacturer. Doing otherwise may result in
a risk of fire, electric shock, or injury to persons.
6) Do not disassemble the IntelliSUPPLY. Attempting to service the unit yourself may result in a risk of
electrical shock or fire. Internal capacitors remain charged after all power is disconnected.
7) Do not open the IntelliSUPPLY. There are no user serviceable parts inside the unit. For service see
the Returns policy in the back of this guide.
8) The charger must be provided with an equipment-grounding conductor connected to the AC input
ground.
9) To reduce the risk of electrical shock, disconnect both AC and DC power from the charger before
attempting any maintenance or cleaning or working on any circuits connected to the charger. Turning
off controls will not reduce this risk.
10) Do not operate the charger if it has received a sharp blow, been dropped, or otherwise damaged
in any way.
11) Be sure AC and DC cords are not pinched or otherwise damaged by hoods, doors, or other
moving engine components.
12) Never attempt to charge a frozen battery.
13) Fuse Holder: Contains a 10A fuse in case of overload.
14) AC Cord: Grounded 3-pin 110V cord for use with grounded outlets only.
Important Safety Instructions XS Power IntelliSUPPLY User Guide
Chapter 1
General Safety Precautions
WARNING: Before installing and using the charger, read all instructions and cautionary markings on
the charger, the batteries, and all appropriate sections of this guide.

Features of the XS Power
IntelliSUPPLY
XS Power IntelliSUPPLY User Guide
Chapter 1
2
The IntelliSUPPLY is an advanced power supply unit and battery charger designed specifically for high
performance lead-acid batteries. This power supply/charger uses MOSFET rectifier technology with an advanced
microprocessor control board to create a battery charger and power supply that can rapidly and safely recharge
12V, 14V and 16V flooded, maintenance free, deep cycle, gel-cell, and AGM (Absorbed Glass Mat) batteries
in several sizes. The wireless remote and digital display makes the IntelliSUPPLY very easy to use.
Multi-Stage Charging
At the heart of the technology in the XS Power IntelliSUPPLY are the three distinct charging stages and DC
power output. During the first stage, called “Bulk” charging, the charger will regulate the current the voltage is
allowed to float. During this stage, 80% of the battery’s capacity is restored. When the battery’s cell voltage
comes up to the correct level, the second stage called “Absorption” charging is engaged. During this stage
the voltage is fixed according to the battery type and voltage switches on the front panel and the current is
allowed to float. The battery is brought to 100% during this stage and the cells are equalized. The third stage
is float charging. During this stage the voltage and current are reduced to a level that will maintain the battery
indefinitely. Several microprocessors are used to tightly control the entire process. This is the same technique
that battery manufacturers recommend and use in the production of new batteries and it is the fastest and
safest technique for battery charging.
Compatible With All Lead-Acid Type Batteries
Lead-acid batteries have different charging requirements based on their specific design. Flooded and
maintenance free batteries require a higher voltage per cell than do sealed valve regulated types such as AGM
and gel-cell batteries. Overcharging will reduce the life of any battery as sealed valve regulated batteries are
especially sensitive to high charging voltages and overcharging. Some sealed valve regulated batteries are
more sensitive to overcharging than others. If in doubt as to which battery setting to use for your application,
contact the manufacturer of the battery being charged. Overcharging an AGM or gel-cell battery will cause
permanent damage.
Power Supply Mode
Along with charging batteries, the XS Power PSC Chargers can operate as Power Supplies. When this mode is selected,
the Charger will maintain a constant output voltage and current. Power Supply mode is to be used for audio display boards
and can be used as test bench power supplies. Power Supply Mode should not be used to charge AGM Batteries.
Desulfation Mode
At the end of a battery’s life, or in the event that a battery has sat uncharged for an elongated amount of time, It
can become sulfated. This would reduce the capacity and performance of the battery. The PSC Chargers have the
ability to recondition a battery that has sulfated. Through a complex charging cycle and microprocessor controlled
pulsed output, the PSC charger can break down the sulfated crystals inside the battery which cause the lack in
performance. Using this mode on older batteries once every few months is advisable to prolong battery life.
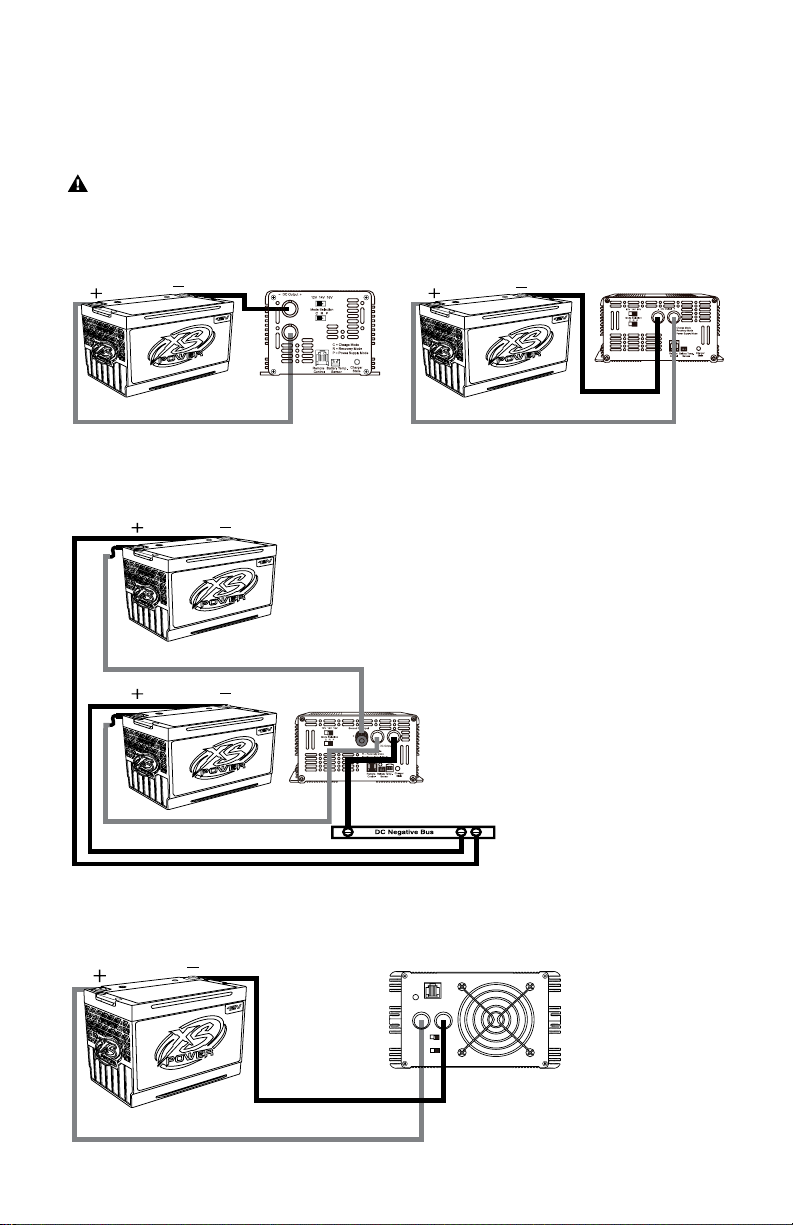
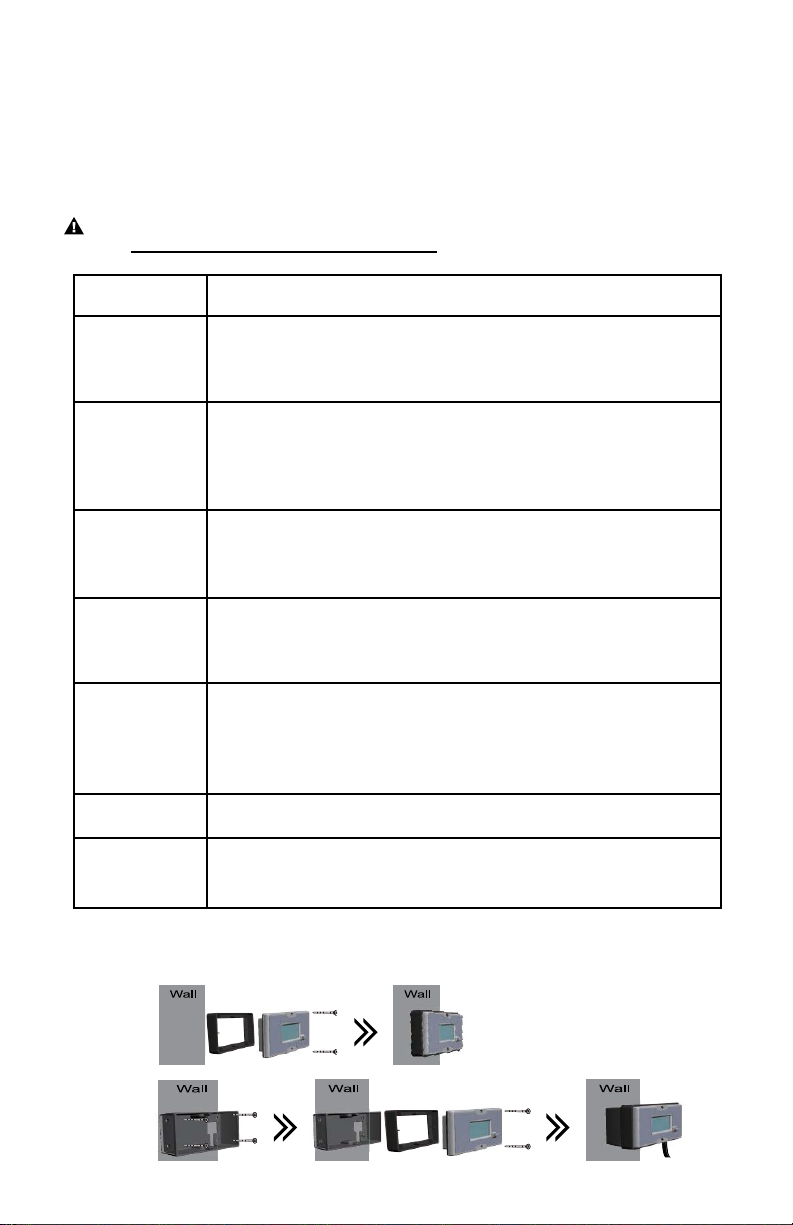
Remote Control/ Display
A remotely mounted display will show the status of the charging functions of the PSC models. This feature will
allow the user to control power on/off. The remote will display important charger and battery information such as
voltage, charge rate, mode, fault, and status of the battery being charged.
Voltage Monitoring
The battery’s terminal voltage is measured every five minutes by the on-board microprocessors and this information is
analyzed in addition to the elapsed time to dynamically control the Battery Charger for optimum charging performance.
Automatic Computer Analysis/Auto Shutdown
The microprocessors will analyze the battery when connected. If the battery’s voltage is below 4V or the battery will
not come up to the correct voltage in a ten-hour period the charger will automatically shut off.
UL Approved Battery Cables
Six feet of durable battery cables are provided that are resistant to cuts and abrasion. The copper plated battery clamps are
compact and custom designed easy connections. All clamp connections are soldered for maximum current flow.
Internal Cooling Fan
A cooling fan automatically operates during charging to keep the transformer and other internal components at
a constant safe temperature.

3
Front and Rear Panel
Switches and Indicators
XS Power IntelliSUPPLY User Guide
Chapter 1
WARNING: Don’t reverse the (+) and (--) of the battery! Or internal damage will result!
PSC15 / PSC30 Product Introduction
WARNING: Before installing and using the PSC unit, read all instructions and cautionary markings
on the unit, the batteries, and all appropriate sections of this guide.
1- DC Output(+Red / - Black) 2- Main On/Off Switch 3- Unit Cooling Fan 4- AC Input 5- Mode/Voltage Selection
6- Charging Status 7- Battery Temperature Sensor(note1) 8- Remote Power Switch(note2) 9- LCD Remote Control
PSC60 / PSC90 Product Introduction
Note 1: Battery Temp. Sensor: To detect the battery temp. While charging, please connect the wire sensor to
the battery Negative (-) terminal.
Note 2: The remote power switch of the remote control just cuts out the output. If you want to turn off the
charger completely, please switch off main switch of charger body.
1- DC Output(+Red-Primary[1st] / Secondary[2nd]) 2- DC Output(- Black) 3- Main On/Off Switch 4- Unit
Cooling Fan 5- AC Input 6- Mode/Voltage Selection 7- Charging Status 8- Battery Temperature Sensor(note1)
9- Remote Power Switch(note2) 10- LCD Remote Control
AC INPUT
Warning:
Pleasecheck AC Input
Volt before turning on the
charger.
Main Switch
ON
OFF

XS Power IntelliSUPPLY User Guide
Chapter 1
Installation Diagram
IMPORTANT: Before charging, read the instructions. Disconnect the PSC unit before making or
breaking the connections to the battery.
4
Negative(black)
Positive(red)
PSC15
PSC60
Negative(black)
The PSC60 can be used as a dual bank charger,
meaning it has a secondary output that allows inde-
pendent charging of two isolated batteries or battery
banks. When using this feature, the charger will
automatically sense how much current to deliver to
each battery or battery bank and will provide different
levels of current as needed to each until both are fully
charged. This feature is designed for use on com-
mon voltage batteries only, so connecting a 12V and
a 16V battery to one charger will result in improper
charging of one of the batteries and may cause
irreversible damage.
Negative(black)
Positive(red)
Positive(red)
Negative(black)
PSC30
Positive(red)
Negative(black)
PSC90
Charger
State
16V 14V 12V
P R C
Mode Selection
DC Output
+
-
Remote Control
C = Charge ModeR = Recovery ModeP = Power Supply Mode
Negative(black)
Positive(red)

5
XS Power IntelliSUPPLY User Guide
Chapter 1
Installation Location:
Physical Requirements
Requirements For Installation
IMPORTANT: This product is best mounted in a Horizontal position. If the unit is mounted in a vertical
position, the cooling fan must be at the bottom of the unit.
Avoid excessive cable lengths and use the recommended wire lengths and
sizes. Undersized or overly long cables may affect charging accuracy.
Avoid the use of extended wire lengths if possible.
Allow at least 4 inches (10 cm) of clearance around all sides of the
charger for air flow. Ensure that the ventilation openings on the unit are
not obstructed. If mounting in a compartment, ventilate the compartment
with louvres or cut-outs to prevent overheating.
Working in the vicinity of lead-acid batteries is dangerous. Batteries generate
explosive gases during normal operation. It is safest not to install electrical
equipment in these areas.
The unit is intended for use in a dry location. Do not allow water or other
fluids to drip or splash on the charger. Do not mount the charger in an
area subject to rain, spray or splashing bilge water.
For best performance, the ambient air temperature should be between
5°F (-15°C) and 113°F (45°C)- the cooler the better. At higher ambient
temperatures, the output current will be automatically reduced to protect
the charger from high internal temperatures.
Do not expose the charger to metal filings or any other form of conduc-
tive contamination. The presence of conductive contamination can cause
damage and void your warranty.
DESCRIPTIONCONDITION
Clean
Cool
Dry
Safe
Ventilated
Close to AC
Junction Box
Close to Batteries
LCD Display Mounting Bracket
OR
Option 1:
Option 2:

6
)DXOW
212))
0RGH
)DXOW
212))
0RGH
)DXOW
212))
0RGH
power supply DC output voltage
output current ON/OFF switch
)DXOW
212))
0RGH
battery voltage
charging currentcharging mode
ON/OFF switch
battery capacit
y
)DXOW
212))
0RGH
fault indicator (red lighting)
)DXOW
212))
0RGH
fault indicator (red lighting)
)DXOW
212))
0RGH
fault indicator
mode
IntelliSUPPLY LCD Remote XS Power IntelliSUPPLY User Guide
Chapter 1
LCD Remote Display

XS Power IntelliCHARGER User Guide
Chapter 2
Charging Lead-Acid Batteries
WARNING: Before you start to charge batteries read the “Important Safety Instructions” on page (1)
and take all safety precautions when working with batteries.
The IntelliSUPPLY has been designed to provide fully automatic recharge of 12V, 14V and 16V AGM and gel-cell
batteries.
To charge your 12V, 14V or 16V battery:
1) If possible, disconnect all loads from the battery, by removing battery cables, opening a
disconnect switch, or switching loads off.
CAUTION!
Although this is best, in a racing environment this may not be possible. Supplemental
loads such as an electric water pump or cooling fans may be operated while charging
during stage one. Please note though that supplimental loads will reduce the amount of
amperage available to the battery. The charger detects that a battery is fully charged when
its charging current drops below a preset limit in a specific elapsed time. The presence of
electrical loads on the battery will interfere with this process. Therefore when the charger
is in stage two-absorption charging it is necessary for the battery to be isolated from loads.
The IntelliCHARGER is in stage-two when the charge rate is declining.
2) Select the correct battery voltage.
3) Connect the red positive (+) clip of the charger cables to the positive (+) terminal of the
vehicle battery.
4) Connect the black negative (–) clip of the charger cables to a solid chassis ground. If this is
not possible, connect it to the negative (–) battery terminal.
5) Flip the power switch on the front panel to ON.
The microprocessors will analyze the battery and then after a short delay, the charging status
LED indicator will turn red beginning the three-stage charging sequence.
CAUTION: Do not change the voltage type during charging. Use the correct battery type at all times.
During stage one-bulk charging, the amperage will begin at 0A and finish at either 15A, 30A, 60A,
or 90A depending on which PSC model is being used. During stage two-absorption charging, the
amperage will start to fall to zero as the battery comes up to 100%. When the charging process
is complete, the charging staus LED indicator will turn green. The cooling fan inside the charger
wll come on for several seconds when the unit is initially powered up and connected to your
battery. The fan will turn on automatically when the unit reaches 6 to 7 amps and will remain on
until the unit falls below 6 to 7 amps.
*Note that the charger will automatically restart the charging sequence if the charge current rises
above a factory preset threshold.
6) When complete, flip the power switch to OFF.
7) Remove the black negative (–) clip and the red positive (+) clip from the vehicle’s battery terminals.
Operation
7

8
MODEL
Voltage Range
Frequency Range
Efficiency
Power Factor
Input Socket
Bulk Stage
Absorption Stage
Float Stage(2A Max)
Max Current
Continuous Current
Over Temperature
Overload
Output Short Circuit
Microprocessor Check
Working Temperature
Working Humidity
Storage Temperature
Storage Humidity
Temp Coefficient
Dimension (LxWxH)
Remote Control
Weight
INPUT
OUTPUT
PROTECTION
ENVIRONMENT
SIZE
SAE METRIC
50~60Hz
>=85%
0.5 at full load (±5%)
IEC plug
20 ~ 90% RH Non-Condensing
10 ~ 95% RH
5° ~ 113°F / -15° ~ 45°C
-22° ~ 149°F / -30° ~ 65°C
7.68 x 4.96 x 3.25 in
4.63lbs 2.1kgs
15A
15A
12V
14.4V
13.56V
14V
16.8V
15.82V
16V 12V 14V 16V 12V 14V 16V
19.2V
18.08V
14.4V
13.56V
16.8V
15.82V
19.2V
18.08V
14.4V
14.4V 16.8V
14.4V 16.8V 19.2V
16.8V 19.2V
19.2V
14.4V 16.8V 19.2V
Note: Specifications subject to change without notice.
**The above spec.
±0 .5V for 12V spec.; Amp.±10% is acceptable.
PSC15
120VAC (90~130VAC)
YES
Charge Mode Recovery ModePower Supply Mode
Voltage Selection
Mode Selection
///
FEATURES
YES
YES
YES
±0.09%° (32° ~ 122°F) / ±0.05%° (0° ~ 50°C)
195 x 126 x 82.5 mm
131° ± 9°F / 55° ± 5°C
PSC15 Specifications XS Power IntelliSUPPLY User Guide
Chapter 2

MODEL
Voltage Range
Frequency Range
Efficiency
Power Factor
Input Socket
Bulk Stage
Absorption Stage
Float Stage(2A Max)
Max Current
Continuous Current
Over Temperature (F)
Overload
Output Short Circuit
Microprocessor Check
Working Humidity
Storage Humidity
Dimension (LxWxH)
Remote Control
Weight
INPUT
OUTPUT
PROTECTION
ENVIRONMENT
SIZE
SAE METRIC
50 ~ 60Hz
>=85%
1.0 at full load (±5%)
IEC plug
21 ~ 90% RH Non-Condensing
10 ~ 95% RH
9.25 x 7.05 x 3.54 in
6.61lbs 3kgs
30A
30A
12V
14.4V
13.56V
14V
16.8V
15.82V
16V 12V 14V 16V 12V 14V 16V
19.2V
18.08V
14.4V
13.56V
16.8V
15.82V
19.2V
18.08V
14.4V
14.4V 16.8V
14.4V 16.8V 19.2V
16.8V 19.2V
19.2V
14.4V 16.8V 19.2V
Note: Specifications subject to change without notice.
**The above spec.
±0 .5V for 12V spec.; Amp.±10% is acceptable.
PSC30
YES
Charge Mode Recovery ModePower Supply Mode
Voltage Selection
Mode Selection
///
FEATURES
YES
YES
YES
235 x 179 x 90 mm
Working Temperature
Storage Temperature
Temp Coefficient
5° ~ 113°F / -15° ~ 45°C
-22° ~ 149°F / -30° ~ 65°C
±0.09%° (32° ~ 122°F) / ±0.05%° (0° ~ 50°C)
131° ± 9°F / 55° ± 5°C
100~240VAC
PSC30 Specifications XS Power IntelliSUPPLY User Guide
Chapter 2
9

10
MODEL
Voltage Range
Frequency Range
Efficiency
Power Factor
Input Socket
Bulk Stage
Absorption Stage
Float Stage(2A Max)
Max Current
Continuous Current
Over Temperature
Overload
Output Short Circuit
Microprocessor Check
Working Humidity
Storage Humidity
Dimension (LxWxH)
Remote Control
Weight
INPUT
OUTPUT
PROTECTION
ENVIRONMENT
SIZE SAE METRIC
50 ~ 60Hz
>=85%
1.0 at full load (±5%)
IEC plug
22 ~ 90% RH Non-Condensing
10 ~ 95% RH
131° ± 9°F / 55° ± 5°C
12.9 x 7.07 x 3.54 in
8.82lbs 4kgs
60A(12V) / 50A(14V) / 50A(16V)
12V
14.4V
13.56V
14V
16.8V
15.82V
16V 12V 14V 16V 12V 14V 16V
19.2V
18.08V
14.4V
13.56V
16.8V
15.82V
19.2V
18.08V
14.4V
14.4V 16.8V
14.4V 16.8V 19.2V
16.8V 19.2V
19.2V
14.4V 16.8V 19.2V
Note: Specifications subject to change without notice.
**The above spec.±0 .5V for 12V spec.; Amp.±10% is acceptable.
PSC60
YES
Charge Mode Recovery ModePower Supply Mode
Voltage Selection
Mode Selection
///
FEATURES
YES
YES
YES
328 x 179 x 90 mm
Working Temperature
Storage Temperature
Temp Coefficient
5° ~ 113°F / -15° ~ 45°C
-22° ~ 149°F / -30° ~ 65°C
±0.09%° (32° ~ 122°F) / ±0.05%° (0° ~ 50°C)
100~240VAC
PSC60 Specifications XS Power IntelliSUPPLY User Guide
Chapter 2

11
MODEL
Voltage Range
Frequency Range
Efficiency
Power Factor
Input Socket
Bulk Stage
Absorption Stage
Float Stage(2A Max)
Max Current
Continuous Current
Over Temperature
Overload
Output Short Circuit
Microprocessor Check
Working Humidity
Storage Humidity
Dimension (LxWxH)
Remote Control
Weight
INPUT
OUTPUT
PROTECTION
ENVIRONMENT
SIZE SAE METRIC
50 ~ 60Hz
>=85%
1.0 at full load (±5%)
IEC plug
22 ~ 90% RH Non-Condensing
10 ~ 95% RH
131° ± 9°F / 55° ± 5°C
14.75 x 7 x 4.125 in
15.3lbs 6.94kgs
90A
90A
12V
14.4V
13.56V
14V
16.8V
15.82V
16V 12V 14V 16V 12V 14V 16V
19.2V
18.08V
14.4V
13.56V
16.8V
15.82V
19.2V
18.08V
14.4V
14.4V 16.8V
14.4V 16.8V 19.2V
16.8V 19.2V
19.2V
14.4V 16.8V 19.2V
Note: Specifications subject to change without notice.
**The above spec.±0 .5V for 12V spec.; Amp.±10% is acceptable.
PSC90
YES
Charge Mode Recovery Mode Power Supply Mode
Voltage Selection
Mode Selection
///
FEATURES
YES
YES
YES
375 x 178 x 105 mm
Working Temperature
Storage Temperature
Temp Coefficient
5° ~ 113°F / -15° ~ 45°C
-22° ~ 149°F / -30° ~ 65°C
±0.09%° (32° ~ 122°F) / ±0.05%° (0° ~ 50°C)
100~240VAC
PSC90 Specifications XS Power IntelliSUPPLY User Guide
Chapter 2

Precautions Working With
Lead-Acid Batteries
Follow all instructions published by the battery manufacturer and the manufacturer of the equipment in
which the battery is installed.
1) Make sure the area around the battery is well ventilated.
2) Never smoke or allow a spark or flame near the battery(ies).
3) Use caution to reduce the risk of dropping a metal tool on the battery.
It could spark or short circuit the battery or other electrical parts and
thereby cause an explosion.
4) Remove all metal items, like rings, bracelets, and watches when working
with lead-acid batteries. Lead-acid batteries produce a short circuit
current high enough to cause a severe burn.
5) Have plenty of fresh water and soap nearby in case battery acid contacts
skin, clothing, or eyes.
6) Wear complete eye protection and clothing protection. Avoid touching
eyes while working near batteries.
7) If battery acid contacts skin or clothing, wash immediately with soap and
water. If acid enters your eye, immediately flood it with running cold
water for at least twenty minutes and get medical attention immediately.
8) If you need to remove a battery, always remove the ground terminal
from the battery first. Make sure all accessories are off to minimize the
potential of a spark.
9) Someone should be in the range of your voice or close enough to come
to your aid when working with a lead-acid battery.
10) Do not attempt to remove the vent covers on sealed lead-acid batteries
such as the XS Power 16V AGM battery. Sealed batteries operate on a
slight positive cell pressure. Venting this pressure will ruin the battery.
XS Power IntelliSUPPLY User Guide
Chapter 2
12

XS Power IntelliSUPPLY User Guide
Chapter 3
Chapter 3 will help you identify and remedy the common problems than can occur with the IntelliSUPPLY.
Please read this chapter before calling Customer Service. If you cannot solve the problem with the
IntelliSUPPLY, record the information asked for on “Information About Your System” on the back page
and then call Customer Service.
WARNING: Electric shock hazard
Do not disassemble the IntelliSUPPLY. The IntelliSUPPLY does not contain any internal user-serviceable
parts and attempting to service the unit yourself could result in electrical shock or burn.
• Power light does not come on when the power switch is flipped ON:
- Check fuse.
- Check cord and input power.
• Voltage LED will not illuminate for 12V, 14V or 16V:
- The battery is not connected.
- The battery is below 2.0V.
• Charge rate does not come up to the selected charge rate initially:
- The battery charger has already moved into stage two charging.
- Input voltage is below 120VAC.
- The battery may be defective and resisting the charge current.
• “Fault” indicator is illuminated:
- This illuminates when the charger over heats or encounters high battery voltage situations.
*To reset the fault caused by over heating, allow the inverter to cool and reduce the load reduce the load if continuous
operation is required.
*To reset a high battery voltage fault, please check the battery voltage specifications again.
Troubleshooting
13

Important: PSC15(15A), PSC30(30A), PSC60(60A), PS90(90A) Output – Three
amperage output models to choose from and isolated outputs for powering any size load.
Specifications are subject to change without notice.
Physical Specifications
- Dimensions ....................... PSC15 - 7.68” L x 7.05” W x 3.25” H
PSC30 - 9.25” L x 5.6” W x 3.54” H
PSC60 - 12.9” L x 7.07” W x 3.54” H
PSC90 - 14.75” L x 7” W x 4.125” H
- Weight ............................... PSC15 - 4.63 lbs (2.1 kg)
PSC30 - 6.61 lbs (3 kg)
PSC60 - 8.82 lbs (4 kg)
PSC90 - 15.3 lbs (6.94 kg)
- AC Input Connections ........ 5.9’ (1.8 m) AWG 18
- DC Output Connections ...... 3.23’ (1 m) AWG 8
Electrical Specifications
12V 14V 16V
- Absorption Voltage ............. 14.40 VDC ... 16.80 VDC ... 19.20 VDC
- Float Voltage at no Load ..... 13.56 VDC ... 15.82 VDC ... 18.08 VDC
- Maximum Output Voltage ... 14.40 VDC ... 16.80 VDC ... 19.20 VDC
- Power Supply Voltage ........ 14.40 VDC ... 16.80 VDC ... 19.20 VDC
AC Input Specifications
- AC Input Voltage .................PSC15 - 120VAC (100~130VAC)
PSC30 - 100~240VAC
PSC60 - 100~240VAC
PSC90 - 100~240VAC
- AC Input Current ................ PSC15 - 6.3A RMS fuse protected
PSC30 - 10A RMS fuse protected
PSC60 - 12A RMS fuse protected
PSC90 - 25A RMS fuse protected
Appendix A
Specifications
XS Power IntelliSUPPLY User Guide
Appendix A
14

Appendix B
Battery Charging
XS Power IntelliSUPPLY User Guide
Appendix B
Appendix B describes battery charging in more detail.
The IntelliSUPPLY charges batteries in a sequence known as multi-stage charging. The charging
voltage delivered to the battery depends on the battery’s depth of discharge.
The three automatic stages are:
• Stage One - Bulk
• Stage Two - Absorption/Equalization
• Stage Three - Float
Bulk Charge
In the first stage, known as “bulk” charging, the IntelliSUPPLY delivers its full-rated output
current. This constant current is delivered to the batteries until the battery voltage approaches
its absorption voltage, either 2.5V per cell or 2.375V per cell depending on battery type selected.
The bulk charge stage restores about 75% of the battery’s charge and this stage completes very
quickly unless the battery is deeply discharged. During this stage the charge rate current on the
ammeter should close to the charge rate selected on the front panel switch.
Absorption/Equalize Charge
During the second stage, known as “absorption” charging, the charging voltage is held constant
near the gassing voltage, and the charging current is allowed to diminish as the battery comes
up to 100% charge. Complex algorithms considering the time, voltage level, and charging current
determine when the charger exits this mode and goes to stage three, float charging. The length
of time of this mode depends on the battery and is not fixed.
Float Charge
The third stage, called “Float” charging is a maintenance mode in which the output voltage of
the charger is reduced to a lower level, typically about 2.26 V per cell to maintain the battery’s
charge without losing electrolyte through gassing. In the float mode, the charger will initiate a
new charge cycle if:
• AC power is disconnected and reconnected
• The current demand on the IntelliSUPPLY exceeds the battery recharge current setting.
15

Figure B-1 Three-stage charging profile
FAQ’s
Can I change the clamps on the charger with quick disconnects?
Yes. We recommend soldering all electrical connections where possible.
Can I run my electric water pump and cooling fan while charging?
Yes, with a word of caution, but there are two issues. First, the charger will only provide 15A
max(PSC15), 30A max(PSC30), or 60A max(PSC60), or 90A(PSC90) charge current. Any amperage
being consumed by extra electrical loads (ie. electric water pumps, etc.) will take away from the
amperage available for battery charging and the battery charge time will be increased. In addition,
the battery charger monitors the battery voltage and time to determine when the battery is at 100%
charge. Extra electrical loads on the system will give the charger false information and therefore will
prevent the charger from properly completing stage two.
Second, some electrical items can be damaged by high voltages. Data loggers, computers, and
other items may lose data or be seriously damaged if subjected to the 19.0~20.0VDC of charging
voltage. We do not recommend retrieving this information while charging. If in doubt about a
particular component, consult with its manufacturer concerning its maximum input voltage.
CAUTION: Data loggers, computers of all sorts, and light bulbs may be damaged by the 19.0~20.0VDC
of input voltage during charging. Do not operate these items while charging. We recommend disconnecting
the battery from the system while charging.
FAQ’s XS Power IntelliSUPPLY User Guide
FAQ
16

FAQ’s XS Power IntelliSUPPLY User Guide
FAQ
Can I run this charger from a portable generator?
Yes with a word of caution. Since the output of the battery charger is directly proportional with
the input voltage, we recommend portable generators with automatic voltage regulation. The
IntelliSUPPLY is calibrated at the factory assuming 120VAC, 60Hz. Deviations from this voltage
will cause deviations in the output voltage and overall performance.
How many batteries can I recharge at one time with the IntelliSUPPLY?
This depends on the size of the batteries. All batteries in the bank must be of the same type and
size. In addition, the IntelliSUPPLY is expecting the battery bank to be at full charge in ten hours or
less. Therefore the size of the batteries and their depth of discharge will play a role in the answer
here. Given they were all XS Power 16V AGM batteries with a size of 45Ah at 100% discharged,
you can charge up to four in parallel in ten hours.
Calculating External Battery Charging Time
Charging time will depend on the amp-hour capacity of your battery and on how deeply it is
discharged. The following equation calculates an approximate charging time:
Charging Time = CAP x DOD
CC x 80% where:
Charging Time = Battery recharge time in hours
CAP = Battery capacity in amp-hours
DOD = Battery depth of discharge in percent.
A fully discharged battery has 100% DOD.
CC = Charge current. The rated current output of the
charger in amps.
80% = Typical charging efficiency for lead-acid batteries.
Example:
An XS Power 16V AGM battery rated at 100 amp-hours is 40% discharged, that is, it has a
DOD = 40%. Charging time with an IntelliSUPPLY 15A unit is calculated as follows:
Charging time = 100Ah x 40% = 3.3 hours
15A x 80%
17
This manual suits for next models
3
Table of contents
Popular Power Supply manuals by other brands

Meanwell
Meanwell NMP650 instruction manual

B+K precision
B+K precision 1693 instruction manual

Vox Power
Vox Power NEVO+1200S User & installation manual

I-Tech
I-Tech IT6400 Series user manual

Vanair
Vanair AIR N ARC RELIANT 250 Series Operations manual & parts list

ViewZ
ViewZ VZ-DC24-320 Install mounting instructions